25 Half Wall Paneling Ideas That Will Transform Your Home Into a Design Masterpiece
I’ve been totally obsessed with half wall paneling lately (my husband thinks I’ve lost it!). There’s something magical about how the right paneling can completely transform a space from “meh” to “wow, did you hire a designer?” After trying out different styles in our own house and helping a few friends with their projects – plus making more mistakes than I care to admit – I wanted to share what I’ve learned.
Whether you’re working with a shoestring budget or ready to splurge on something fancy, dealing with a nightmare bathroom renovation or trying to make your dining room look less like a cafeteria, I’ve got you covered. These 25 ideas range from traditional stuff your grandmother would approve of to weird geometric designs that’ll make your neighbors do a double-take.
Look, I’m not a professional contractor – just someone who’s made a lot of mistakes and learned from them. But sometimes that’s exactly what you need to hear from, right?
Table of Contents
-
Essential Considerations Before Choosing Your Paneling Style
-
Traditional and Classic Paneling Solutions (Ideas 1-5)
-
Modern and Contemporary Paneling Options (Ideas 6-10)
-
Textured and Natural Material Approaches (Ideas 11-15)
-
Budget-Friendly Paneling Solutions (Ideas 16-20)
-
Room-Specific Paneling Applications (Ideas 21-23)
-
Creative and Unique Paneling Options (Ideas 24-25)
-
How Jiffy Junk Simplifies Your Paneling Project Cleanup
-
Final Thoughts
TL;DR
-
Half wall paneling ranges from $50 DIY disasters to $500+ professional masterpieces
-
Traditional styles like raised panels work great in fancy spaces, while modern geometric stuff suits contemporary homes
-
Material choice really matters – vinyl rocks in bathrooms, real wood adds character everywhere else
-
Some projects are “easy weekend jobs” (spoiler: they’re not), others need actual professionals
-
Room function trumps pretty looks – kitchens need wipeable surfaces, bathrooms need moisture resistance
-
Getting the height right (usually 32-36 inches) can make or break the whole look
-
Budget options like MDF can look expensive if you do them right
-
Professional cleanup services handle the mess so you can focus on not messing up the installation
Essential Considerations Before Choosing Your Paneling Style
Before you get all excited and start ripping stuff off the walls, let me save you from some expensive mistakes I’ve made. Trust me, taking time to think through these six things will prevent you from ending up with beautiful paneling that looks completely wrong in your space.
Making Sure It Doesn’t Look Weird With Your Existing Stuff
Your paneling needs to play nice with what you already have. I learned this the hard way when I fell in love with some ultra-modern geometric panels and installed them in our 1920s house. They were gorgeous on their own, but they made our living room look like a spaceship had crashed into a vintage furniture store.
Take a step back and really look at your house’s style, your furniture, and your overall vibe. The goal is to make everything look like it belongs together, not like you got drunk at Home Depot.
What Your Room Actually Needs to Handle
Different rooms beat up your walls in different ways, and this is where I see people mess up the most. I installed beautiful beadboard in our guest bathroom without thinking about moisture, and six months later it looked like it was melting. Not cute.
Bathrooms need stuff that won’t warp when your teenager takes hour-long showers. Kitchens need surfaces that won’t stain when you inevitably splatter pasta sauce everywhere. High-traffic hallways need materials that won’t show every scuff from your kids’ backpacks.
Be Honest About How Handy You Actually Are
Here’s where you need to have a come-to-Jesus moment with yourself. Some paneling projects are genuinely easy – peel-and-stick panels that anyone can handle. Others require precision measuring, fancy tools, and the kind of patience that I definitely don’t have.
There’s no shame in starting with easier projects and working your way up. I’ve seen too many ambitious weekend warriors end up with wonky panels because they bit off more than they could chew.
|
How handy are you? |
What you can tackle |
What you’ll need (and probably already have) |
How long it’ll really take |
|---|---|---|---|
|
I can barely hang pictures |
Peel-and-stick panels, Simple boards |
Basic measuring stuff, maybe some adhesive |
1-2 days (if you don’t overthink it) |
|
I’ve built some IKEA furniture without crying |
Beadboard, Board and batten, Picture frame stuff |
Saw, drill, level, nail gun (borrow one) |
2-4 days (plus trips to the store for forgotten supplies) |
|
I actually know what a router is |
Raised panels, Live edge wood, Custom designs |
Professional tools, router, patience of a saint |
1-2 weeks (and possibly some therapy) |
Budget Reality Check
Material costs are all over the place, and I’ve learned that thinking beyond the sticker price is crucial. Sure, that cheap stuff looks good initially, but if you’re replacing it in three years, it wasn’t really cheap, was it?
I know the blog says “budget-friendly,” but even the cheap options can add up fast when you factor in tools, paint, primer, sandpaper, and the inevitable extra trip to Home Depot because you measured wrong (we’ve all been there).
How Much Maintenance Do You Actually Want to Deal With?
Some materials are like having a high-maintenance friend – they look great but need constant attention. Others are more like that reliable buddy who always looks put-together without trying.
If you’re someone who can barely remember to water plants, don’t choose materials that need regular sealing, special cleaning products, or frequent touch-ups. Be realistic about your future self’s motivation levels.
Getting the Height Right (Because It Really Matters)
This is one of those things that seems minor but can make your room look amazing or awkward. Traditional paneling usually goes 32-36 inches high, but you can adjust based on your ceiling height and what looks right.
In rooms with 8-foot ceilings, I stick closer to 32 inches so it doesn’t look like the walls are wearing high-water pants. With taller ceilings, you can go higher without making the room feel chopped in half.
Pro tip: Use painter’s tape to mark different heights before you commit. Trust me on this one – it’s way easier to move tape than finished paneling.
Traditional and Classic Paneling Solutions
These are the tried-and-true options that have been making homes look fancy for decades. I’ve installed all of these at some point, and while they require different levels of commitment (both time and money), they all deliver that timeless elegance that never goes out of style.
Think of these as the little black dress of wall treatments – classic, versatile, and always appropriate for formal occasions.
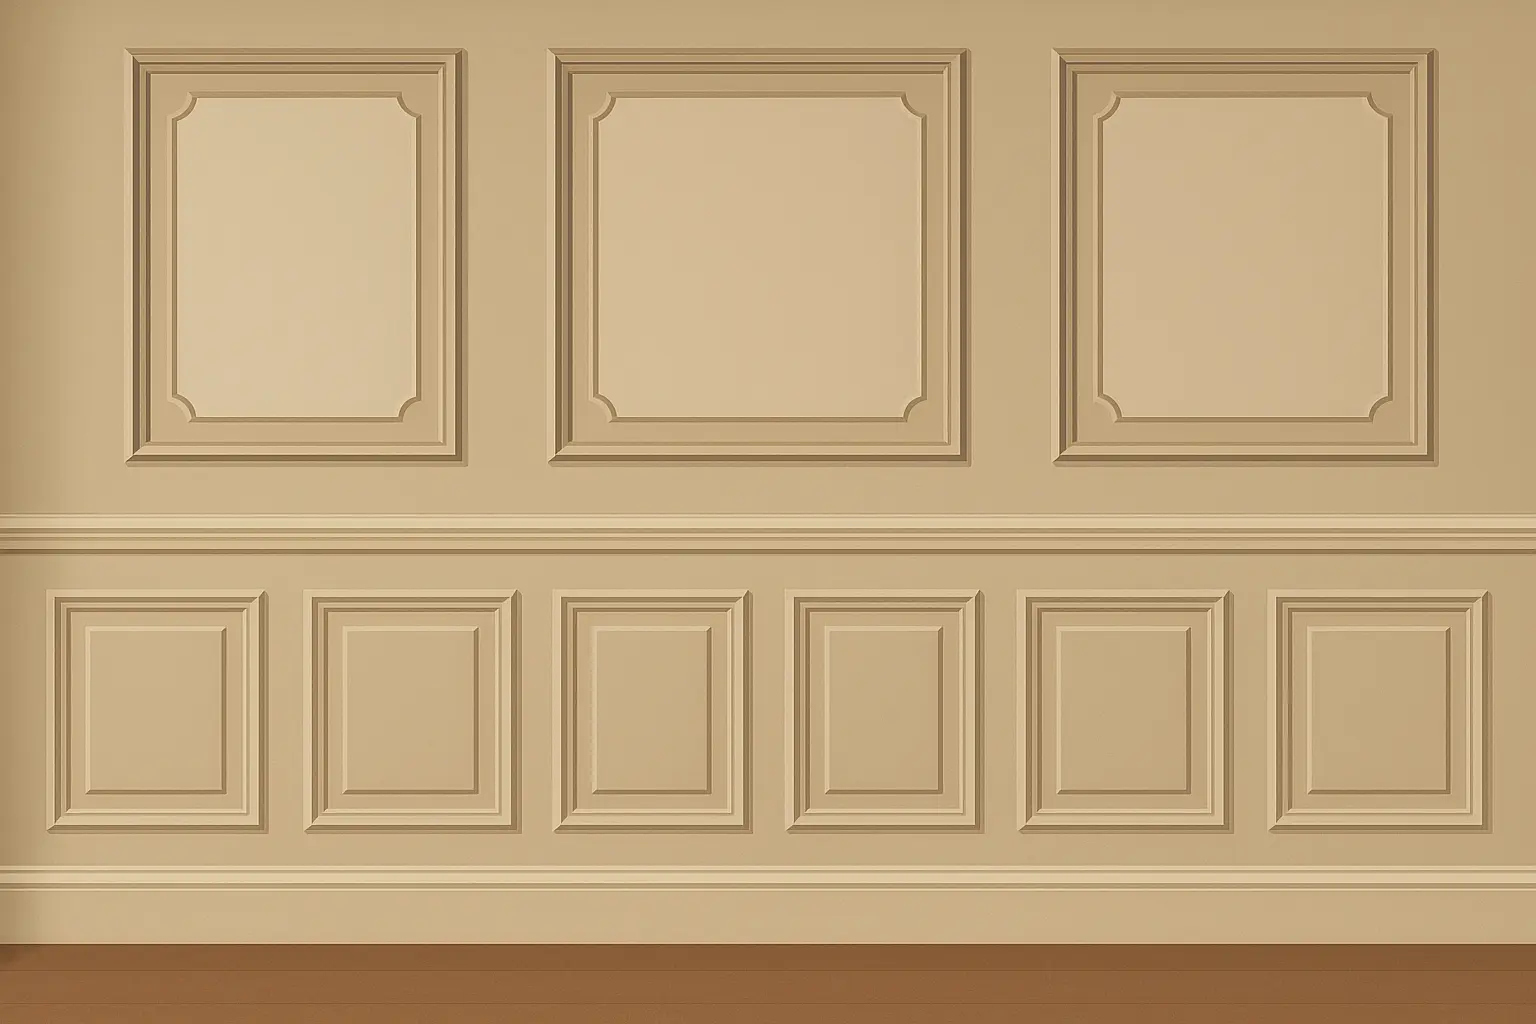
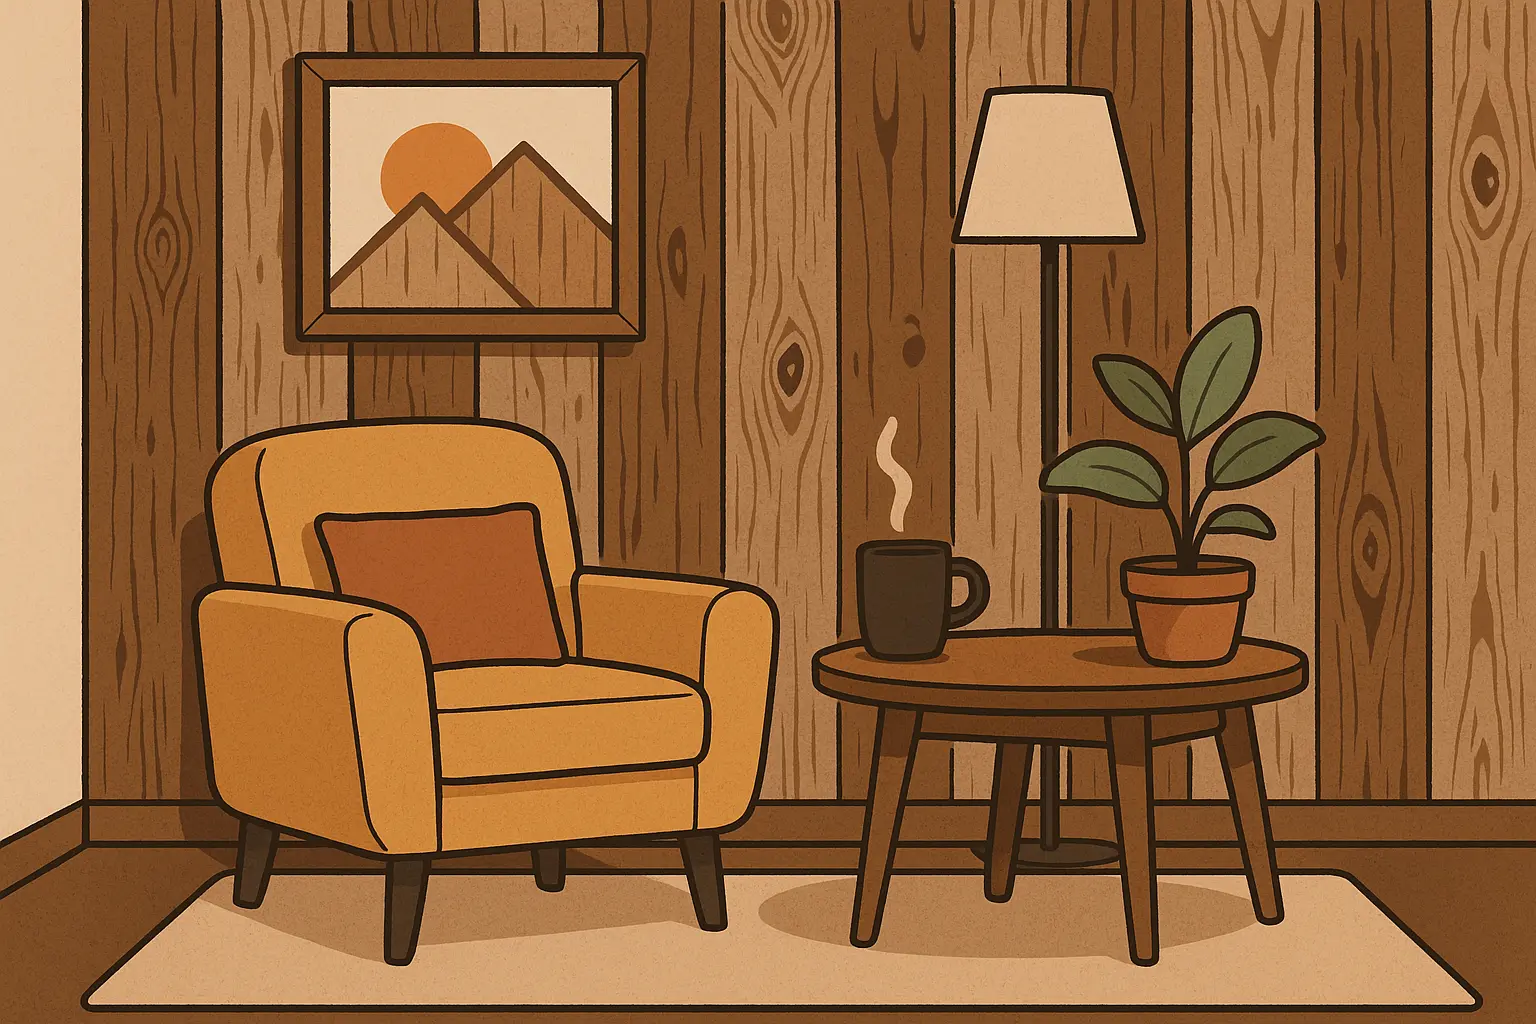
1. Raised Panel Wainscoting
This is the fancy stuff – panels that stick out from the wall with frames around them, creating cool shadows and that expensive look you see in high-end homes. It’s definitely the most “look at me, I have money” option, but it requires serious commitment.
Where it works best: Formal dining rooms, fancy entryways, libraries – basically anywhere you want to feel like you live in a mansion instead of a regular house.
How hard is it to install: Pretty darn hard. You need precise measuring, fancy tools, and the kind of patience that comes from years of woodworking. I recommend hiring someone unless you’re already comfortable with detailed carpentry work.
What it’ll cost you: This is definitely a splurge option. The materials alone are pricey, and if you hire someone (which you probably should), it gets expensive fast. But the results are stunning if you’ve got the budget.
Keeping it nice: You’ll need to dust those grooves regularly (they’re dust magnets) and repaint occasionally. It’s not crazy high-maintenance, but it’s not wipe-and-forget either.
Best rooms: Stick to dry areas where looking fancy is more important than being practical. Skip the bathroom unless you enjoy watching expensive paneling warp.
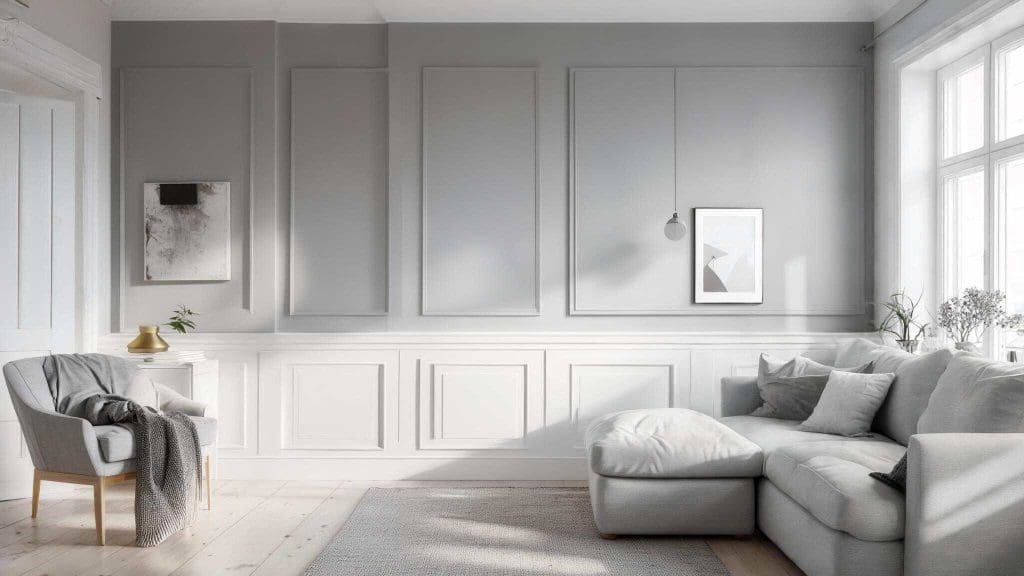
2. Flat Panel (Shaker-Style) Wainscoting
This is like the cool, laid-back cousin of raised panels. Clean lines, simple rectangles, no fussy details – it’s sophisticated without being stuffy. I love this style because it works with almost everything and doesn’t compete with your furniture for attention.
Where it works best: Honestly, almost anywhere. Farmhouse kitchens, modern living rooms, traditional bedrooms – it’s like the Swiss Army knife of paneling.
How hard is it to install: Moderately challenging. Easier than raised panels but you still need to cut things precisely and make sure everything lines up. Definitely doable for someone with decent DIY skills.
What it’ll cost you: Right in the middle – not cheap, but not crazy expensive either. Good bang for your buck if you want that custom look without the custom price tag.
Keeping it nice: Pretty easy to maintain. Smooth surfaces wipe clean, and it’s simple to touch up paint when needed.
Best rooms: Works everywhere, including kitchens and bathrooms if you seal it properly against moisture.
My sister-in-law Janet’s kitchen story: Janet installed flat panel wainscoting in her 1980s kitchen that still had that awful wallpaper border everyone had back then. It took her four weekends because she kept second-guessing herself (sound familiar?), but now it looks like something from Pinterest. Cost her about $400 in materials and probably saved her $2,000 compared to hiring someone.
3. Beadboard Paneling
Those narrow vertical planks with the little grooves between them that scream “charming cottage” or “cozy farmhouse.” It’s got texture, character, and that casual elegance that makes spaces feel welcoming instead of stuffy.
Where it works best: Bathrooms (if properly sealed), kitchens, breakfast nooks, anywhere you want that cozy, lived-in vibe without looking sloppy.
How hard is it to install: Not too bad for DIYers. You install one plank at a time, so if you mess up one piece, you don’t ruin the whole project. Much more forgiving than trying to get large panels perfect.
What it’ll cost you: Pretty reasonable, especially if you go with pine. You can get the look for a decent price, though hardwoods will cost more if you want to get fancy.
Keeping it nice: Those grooves collect dust like nobody’s business. You’ll need a brush or vacuum attachment to keep them clean, but it’s not terrible.
Best rooms: Great for bathrooms and kitchens where you want character but need something that can handle moisture and daily use.
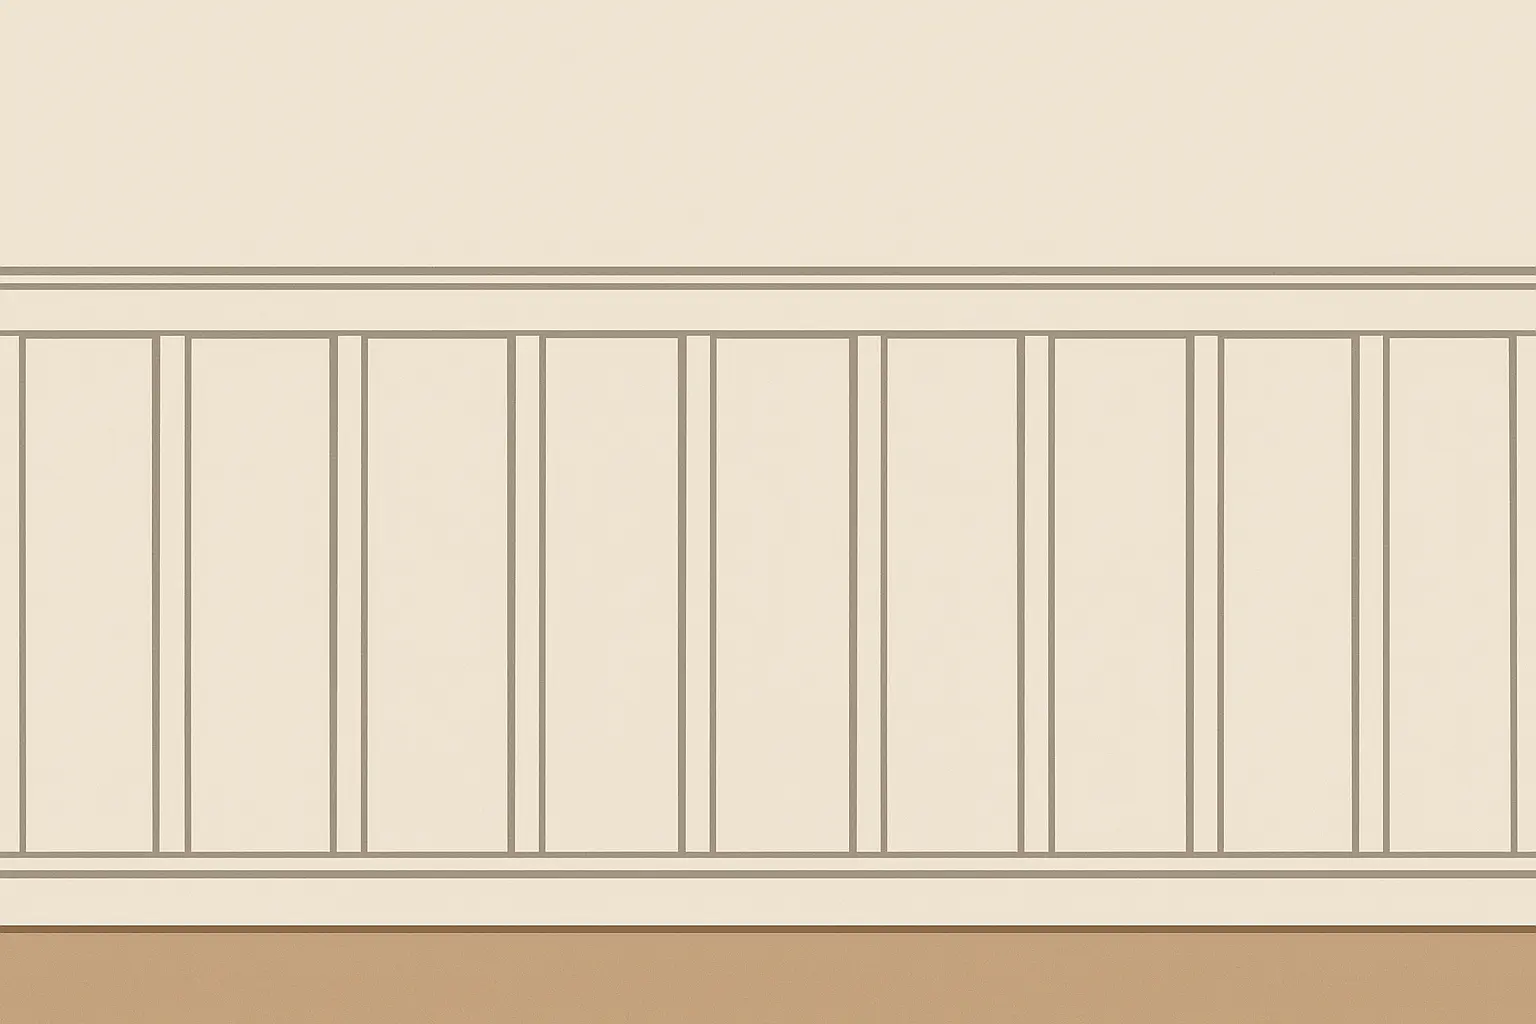
4. Board and Batten
Wide boards with skinny strips covering the joints – it’s like beadboard’s bolder sibling. The vertical lines can actually make your rooms look taller, which is a nice trick if you’re dealing with standard 8-foot ceilings that make everything feel like a cave.
Where it works best: Modern farmhouse spaces, kids’ rooms, anywhere you want visual interest without a lot of fuss. Great for making low ceilings feel higher.
How hard is it to install: Pretty straightforward if you can measure and use a nail gun. The hardest part is getting the spacing even, but it’s not rocket science.
What it’ll cost you: Very budget-friendly, especially with basic materials. You get a lot of visual impact for not much money.
Keeping it nice: Easy – smooth surfaces that are simple to clean and repaint when you want a color change.
Best rooms: Works anywhere, but especially good in spaces with lower ceilings where you want to add some height visually.
5. Picture Frame Molding
Just the frames without the panels – like empty picture frames on your wall that create geometric patterns. It’s elegant and formal without being too busy, and you can paint the inside a different color for extra drama.
Where it works best: Traditional dining rooms, formal living rooms, anywhere you want architectural detail without overwhelming the space.
How hard is it to install: Moderate difficulty. The tricky part is getting all those corners to line up perfectly – miter cuts need to be spot-on or it looks sloppy.
What it’ll cost you: Pretty reasonable since you’re just buying molding strips. The main cost is time and precision, not expensive materials.
Keeping it nice: Easy to maintain once it’s up. Simple surfaces that paint well and don’t collect dust in weird places.
Best rooms: Formal spaces where you want to add interest without practical concerns like moisture or heavy use.
Modern and Contemporary Paneling Options
If traditional paneling feels too stuffy or old-fashioned for your taste, these modern options might be more your speed. I’ve been experimenting with these contemporary approaches lately as more people want something fresh and different from the usual suspects.
These styles emphasize clean lines, interesting geometry, and that minimalist aesthetic that makes your space feel current and intentional rather than like you’re living in your grandmother’s house (not that there’s anything wrong with grandma’s house).
6. Geometric Panel Designs
Think hexagons, diamonds, or other funky shapes that create patterns on your wall. It’s like architectural art that also happens to be functional. I installed a hexagon pattern in my home office last year, and it’s become the background for every video call – people always ask about it.
Where it works best: Modern homes, creative spaces, anywhere you want people to walk in and say “whoa, that’s cool.” Works great as an accent wall behind a desk or bed.
How hard is it to install: This one’s tricky. You need to plan carefully, make templates, and be really precise with your cuts. I recommend sketching it out on graph paper first (learned that the hard way).
What it’ll cost you: Can range from moderate to expensive depending on how complex you get and what materials you use. Custom work always costs more.
Keeping it nice: Usually pretty easy since most geometric designs have smooth surfaces without a lot of detail to collect dust.
Best rooms: Home offices, bedrooms, modern living spaces where you want to make a statement without overwhelming the room.
7. Horizontal Slat Paneling
Instead of vertical lines, these run horizontally across the wall with gaps between them. It’s sleek, contemporary, and makes rooms feel wider instead of taller. Perfect if you want that spa-like, zen aesthetic.
Where it works best: Modern bedrooms, contemporary living rooms, anywhere you want clean lines and a calming vibe.
How hard is it to install: Moderately challenging because getting consistent spacing and keeping everything level is crucial. One wonky slat and the whole thing looks off.
What it’ll cost you: Mid-range option that gives you a lot of visual impact. Materials are reasonable, but the installation takes time and precision.
Keeping it nice: Pretty low maintenance – just dust the slats occasionally and you’re good to go.
Best rooms: Bedrooms and living areas where you want a modern, relaxing atmosphere.
8. Minimalist Flat Panels
Large, simple panels with clean edges and minimal detail. It’s all about proportion and spacing rather than fancy details. Think “expensive hotel lobby” rather than “grandma’s dining room.”
Where it works best: Contemporary homes, minimalist spaces, anywhere you want sophistication without fuss.
How hard is it to install: Not too bad if you can measure accurately and cut straight lines. The simplicity actually makes it more forgiving than detailed traditional styles.
What it’ll cost you: Pretty reasonable since you’re not paying for complicated details or fancy materials. Simple can be surprisingly affordable.
Keeping it nice: Super easy – smooth surfaces that wipe clean and don’t have grooves or details to worry about.
Best rooms: Works everywhere, especially in open floor plans where you want visual continuity without busy patterns.
9. Mixed Material Panels
Combining different materials like wood and metal, or wood and fabric, to create unique textures and visual interest. It’s definitely for people who like to push boundaries and aren’t afraid of something different.
Where it works best: Eclectic homes, creative spaces, anywhere you want something completely unique that nobody else has.
How hard is it to install: Pretty challenging since you’re dealing with different materials that may require different installation methods. Usually needs professional help.
What it’ll cost you: Can get expensive fast since you’re buying multiple materials and the installation is complex. But the results are truly one-of-a-kind.
Keeping it nice: Depends on what materials you use. Some combinations are easy to maintain, others require special care for different components.
Best rooms: Creative spaces, modern living areas where visual impact is more important than practicality.
10. Asymmetrical Panel Layouts
Panels of different sizes arranged in non-uniform patterns – it’s like breaking all the traditional rules on purpose. Takes some artistic vision to pull off, but when it works, it really works.
Where it works best: Modern homes, artistic spaces, anywhere you want to challenge expectations and create something totally unique.
How hard is it to install: Pretty challenging because you need to plan the whole layout carefully and have a good eye for composition. Lots of measuring and re-measuring.
What it’ll cost you: Mid to high range depending on complexity. The planning phase takes time, but it prevents expensive mistakes.
Keeping it nice: Usually not too bad since most modern panels have smooth, easy-to-clean surfaces.
Best rooms: Creative spaces, modern living areas where you want something that sparks conversation.
Textured and Natural Material Approaches
If you’re tired of everything looking manufactured and perfect, these natural options bring real character and authenticity that you just can’t fake. I’ve become obsessed with these approaches lately because they add soul to a space in ways that synthetic materials never can.
Each of these materials tells a story and ages beautifully, developing character over time instead of just looking worn out.
11. Reclaimed Wood Paneling
Old barn wood, fence boards, or other weathered lumber with history and character that you can’t buy new. Every piece is different, with its own grain patterns, nail holes, and weathering that tells a story.
Where it works best: Rustic homes, farmhouse styles, anywhere you want authentic character instead of that fake “distressed” look from the store.
How hard is it to install: Moderately challenging because every piece is different. You’ll spend time sorting through boards, cleaning them up, and figuring out how to make irregular pieces work together.
What it’ll cost you: Can range from reasonable (if you find a good source) to expensive (if you want premium reclaimed materials). The character is worth it though.
Keeping it nice: Pretty low maintenance, but you might want to seal it to prevent further weathering if that’s not the look you’re going for.
Best rooms: Living rooms, dens, anywhere you want that lived-in, authentic feel that makes guests want to curl up with a book.
12. Live Edge Wood Panels
Wood that keeps its natural edge instead of being cut straight – it’s like bringing a piece of the forest inside. Each piece is completely unique and celebrates the tree’s natural shape.
Where it works best: Modern rustic homes, nature-inspired spaces, anywhere you want something that’s obviously one-of-a-kind.
How hard is it to install: Pretty challenging since every piece is different and you need to work with irregular shapes. Usually requires professional installation.
What it’ll cost you: Definitely on the expensive side due to the uniqueness and custom work required. But you’re getting something nobody else has.
Keeping it nice: Needs some special care to prevent the natural edges from cracking or splitting. Think of it like having a nice leather couch – it needs attention.
Best rooms: Spaces where you want artistic impact and don’t mind spending time maintaining something special.
|
Material Type |
Can it handle moisture? |
How long will it last? |
How much work to maintain? |
Where should you use it? |
|---|---|---|---|---|
|
Reclaimed Wood |
Not really |
Forever if treated right |
Some work needed |
Living rooms, dens, bedrooms |
|
Live Edge Wood |
Nope |
Long time with care |
High maintenance |
Artistic spaces, feature walls |
|
Stone Veneer |
Totally fine |
Basically forever |
Almost none |
Kitchens, bathrooms, entryways |
|
Cork/Bamboo |
Pretty good |
Long lasting |
Not much |
Eco-friendly homes, modern spaces |
|
Textured Plaster |
Okay |
Very durable |
Almost none |
Mediterranean, artistic interiors |
13. Stone or Brick Veneer Panels
Thin slices of real stone or brick that give you the authentic look without the weight and expense of full masonry. It’s like having a stone wall without needing to reinforce your foundation.
Where it works best: Rustic homes, industrial spaces, anywhere you want something that looks substantial and permanent.
How hard is it to install: Moderately challenging – you need the right adhesives and techniques, but it’s not impossible for a determined DIYer.
What it’ll cost you: Mid to high range depending on the stone type. Natural stone costs more but looks amazing and lasts forever.
Keeping it nice: Super low maintenance once it’s installed. Stone and brick just get better looking with age.
Best rooms: Kitchens, entryways, anywhere you want durability and visual impact that’ll outlast everything else in your house.
14. Textured Plaster Panels
Hand-applied plaster with artistic textures that look like old European walls. It’s got that handcrafted quality that makes everything else look mass-produced.
Where it works best: Mediterranean styles, artistic spaces, anywhere you want that Old World craftsmanship vibe.
How hard is it to install: Pretty challenging – you need plastering skills and artistic ability. Definitely consider hiring someone who knows what they’re doing.
What it’ll cost you: On the expensive side due to the skilled labor required. But the results are like having custom artwork on your walls.
Keeping it nice: Very low maintenance once it’s sealed properly. Plaster is surprisingly durable and ages beautifully.
Best rooms: Spaces where you want artistic expression and unique character that you can’t get anywhere else.
15. Cork or Bamboo Paneling
Sustainable materials that bring unique textures while being environmentally responsible. Cork has this soft, warm feel, while bamboo brings clean lines with natural variation.
Where it works best: Eco-conscious homes, contemporary spaces, anywhere you want to be kind to the planet without sacrificing style.
How hard is it to install: Not too bad – similar to regular wood installation with standard tools and techniques.
What it’ll cost you: Mid-range pricing that feels reasonable when you factor in the environmental benefits.
Keeping it nice: Pretty easy to maintain, though you might need special cleaners for some types.
Best rooms: Modern homes where sustainability is important but you don’t want to compromise on looks.
Budget-Friendly Paneling Solutions
Let’s be real – not everyone has unlimited funds for home improvement projects. These five options prove you can get great-looking paneling without emptying your savings account or eating ramen for six months.
I’ve used all of these approaches when budgets were tight, and honestly, some of my favorite installations have been the budget-friendly ones where creativity mattered more than expensive materials.
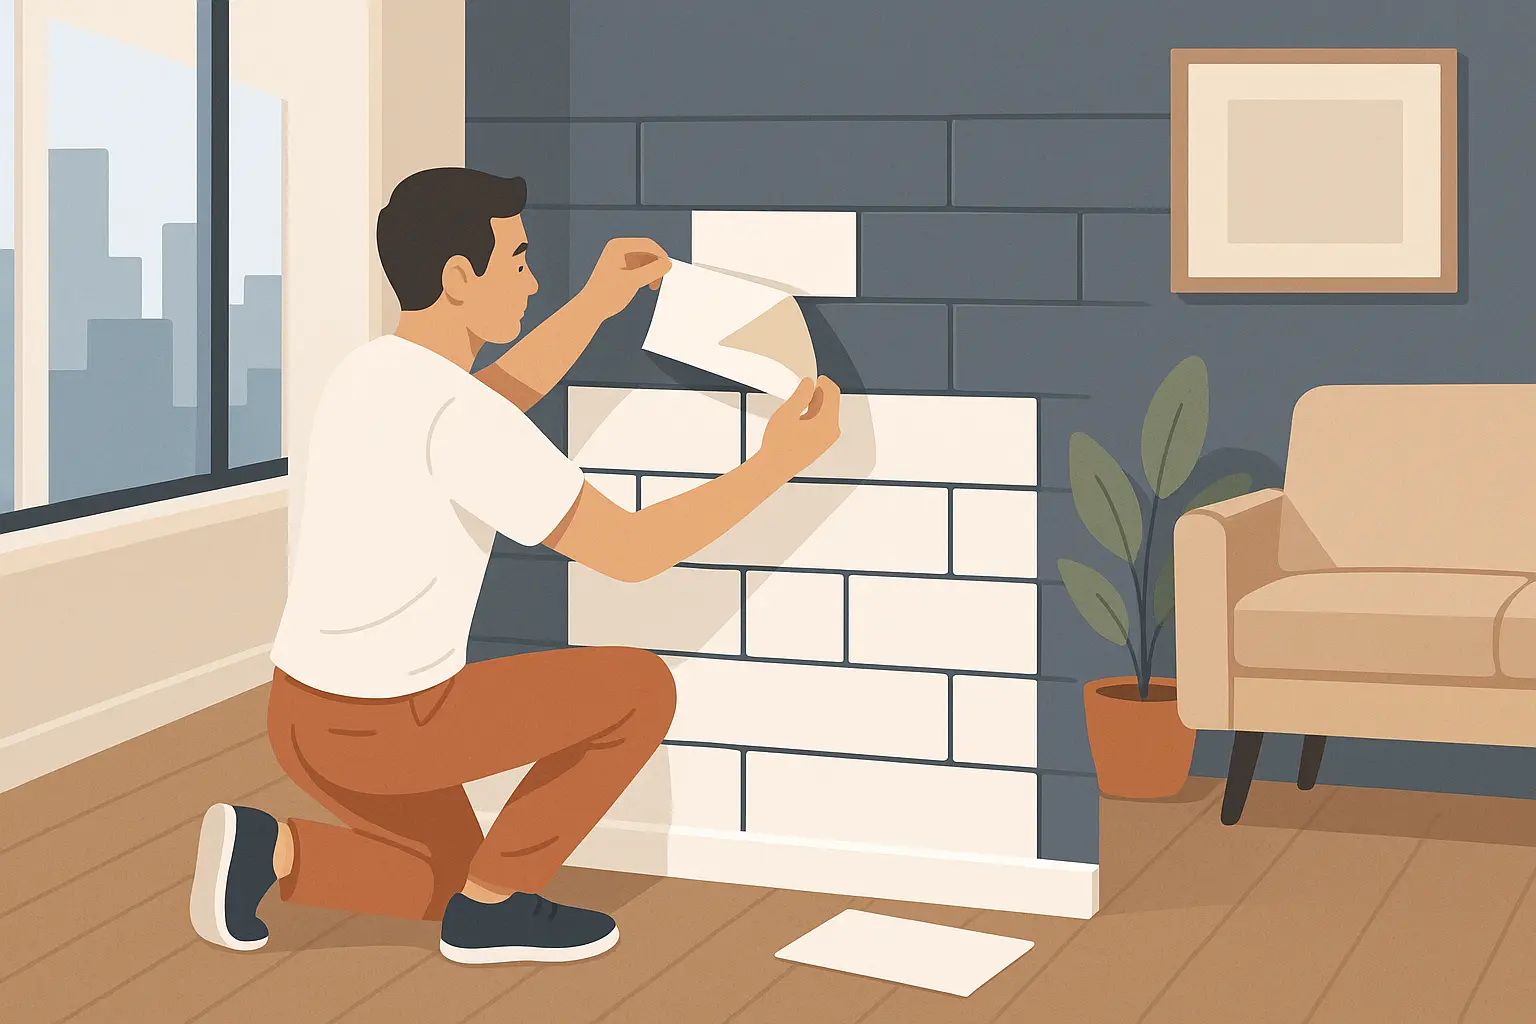
16. Peel-and-Stick Panels
The ultimate instant gratification option – just peel off the backing and stick them to the wall. Perfect for renters or anyone who wants to test out a look without committing to major construction.
Where it works best: Rental properties, temporary solutions, or anywhere you want to experiment with paneling without permanent changes.
How hard is it to install: So easy your kids could probably do it. Just peel and stick – no tools, no mess, no crying in frustration.
What it’ll cost you: Super budget-friendly. You can transform a room for under $100 in materials.
Keeping it nice: Easy to clean, and if you damage a panel, just replace that one piece instead of redoing everything.
Best rooms: Great for testing ideas or when you need something temporary that won’t tick off your landlord.
17. MDF Panel Systems
Medium-density fiberboard that’s consistent, smooth, and takes paint beautifully. It’s like the reliable friend of building materials – not flashy, but gets the job done well.
Where it works best: Anywhere you plan to paint. MDF gives you that smooth, expensive look without the expensive price tag.
How hard is it to install: Pretty straightforward with basic carpentry skills. Standard tools, standard techniques, no surprises.
What it’ll cost you: Very reasonable for the professional look you get. Great value for money.
Keeping it nice: Easy to maintain and repaint when you want a color change or touch-ups.
Best rooms: Works everywhere as long as you seal it properly in moisture-prone areas.
My neighbor Mike’s home office story: Mike transformed his boring home office with MDF panels for under $200. He created a sophisticated navy blue look that makes his video calls look professional instead of like he’s working from his bedroom. Took him two weekends, and now people ask if he hired a designer.
18. Pine Board Paneling
Real wood at budget prices. Pine is soft, so it dents easier than hardwoods, but it’s genuine wood with real grain patterns that paint can’t replicate.
Where it works best: Farmhouse styles, casual spaces, anywhere you want real wood character without hardwood prices.
How hard is it to install: Pretty manageable with basic carpentry skills. Pine is easy to work with and forgiving if you make small mistakes.
What it’ll cost you: Budget-friendly while still giving you real wood benefits and that authentic look.
Keeping it nice: Pine can dent and ding, but it takes paint and stain well when you want to refresh the look.
Best rooms: Good for most interior spaces, though it might show wear in high-traffic areas faster than harder woods.
19. Vinyl Panel Systems
Modern vinyl that actually looks good and handles moisture like a champ. Don’t think of the old fake-looking vinyl – today’s options can fool people into thinking it’s real wood or tile.
Where it works best: Bathrooms, kit chens, anywhere moisture is an issue and you need something that won’t warp or rot.
How hard is it to install: Designed for easy DIY installation with click-together or adhesive systems that don’t require special skills.
What it’ll cost you: Budget-friendly with great durability. You’ll save money on maintenance and replacement costs down the road.
Keeping it nice: Super low maintenance – just wipe it clean. No painting, staining, or special care required.
Best rooms: Perfect for bathrooms and kitchens where traditional materials might fail or need constant maintenance.
20. DIY Picture Frame Molding
Basic molding strips arranged in rectangles to create that expensive custom look for a fraction of the cost. It’s like tricking people into thinking you spent way more than you did.
Where it works best: Traditional spaces where you want architectural detail without the architectural budget.
How hard is it to install: Moderate difficulty – you need to cut accurate angles and measure carefully, but it’s totally doable with patience.
What it’ll cost you: Very budget-friendly using standard molding from any home improvement store. No special orders or custom work needed.
Keeping it nice: Easy to maintain and paint when you want to change colors or freshen up the look.
Best rooms: Formal areas where you want elegance on a budget.
|
Budget Option |
What you’ll spend on materials |
How long it’ll really take |
How handy do you need to be? |
Total damage to your wallet |
|---|---|---|---|---|
|
Peel-and-Stick |
$50-100 |
Half a day (if you don’t overthink it) |
Can you peel a banana? |
$50-150 |
|
MDF Panels |
$100-200 |
A weekend (plus trips for forgotten supplies) |
Some DIY experience helpful |
$150-350 |
|
Pine Boards |
$150-300 |
Two weekends (because you’ll second-guess yourself) |
Decent with basic tools |
$200-450 |
|
Vinyl Systems |
$200-400 |
A weekend (surprisingly easy) |
Pretty much anyone |
$250-500 |
|
DIY Picture Frame |
$75-150 |
Two weekends (measuring is everything) |
Comfortable with angles and cutting |
$100-250 |
Room-Specific Paneling Applications
Different rooms beat up your walls in different ways and have different needs. What works great in a living room might be a disaster in a bathroom, and what’s perfect for a kitchen might look weird in a formal dining room.
Here’s what I’ve learned about matching paneling to specific room requirements through trial, error, and a few expensive mistakes.
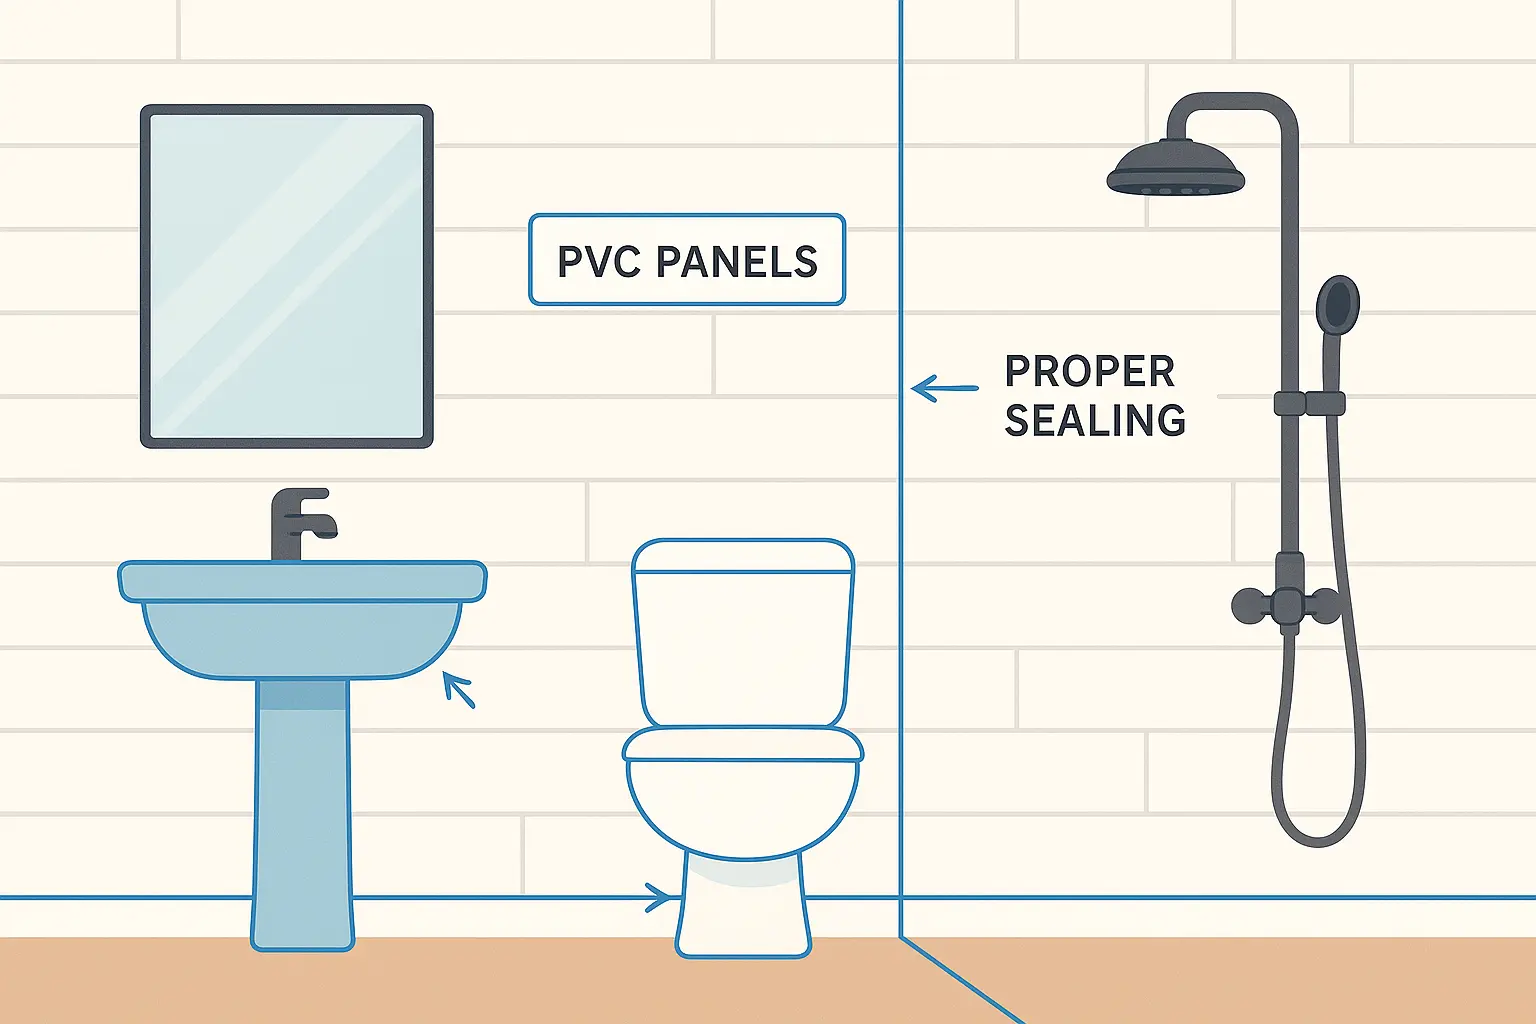
21. Bathroom Half Wall Paneling Ideas
Bathrooms are tough on materials – all that moisture, steam, and humidity will destroy the wrong paneling faster than you can say “black mold.” But get it right, and paneling can transform a boring bathroom into something special.
What works: PVC, vinyl, or properly sealed wood that can handle moisture without warping, rotting, or growing science experiments.
How hard is it: Moderately challenging because you need to pay attention to moisture sealing, ventilation, and waterproofing. Skip these steps and you’ll be redoing it in a year.
What it’ll cost: Mid-range due to specialized materials and the extra work needed to make it moisture-proof.
Keeping it nice: Watch for moisture and mold, but generally easy to maintain with proper ventilation.
Best approach: Choose materials specifically designed for wet areas and don’t cut corners on the moisture barrier.
22. Half Wall Paneling Ideas Kitchen
Kitchens are messy – grease, food splashes, moisture from cooking, and daily wear from busy family life. Your paneling needs to handle all of that while still looking good.
What works: Sealed wood, PVC, or anything that wipes clean easily and won’t stain when you inevitably splatter something on it.
How hard is it: Moderate complexity because you’re working around outlets, switches, and existing fixtures while trying to keep clean lines.
What it’ll cost: Mid-range, potentially higher if you need to work around a lot of existing kitchen elements.
Keeping it nice: Needs to handle grease and food splashes, so choose materials that clean easily with standard kitchen cleaners.
Best approach: Think about how you actually cook and choose materials that can handle your real-life kitchen chaos.
My friend Jennifer’s kitchen story: Jennifer installed beadboard behind her kitchen peninsula to protect walls from cooking splashes. She chose moisture-sealed pine painted in sage green to complement her white cabinets. Cost $300 in materials, took one weekend, and now she doesn’t worry about sauce splatters ruining her walls.
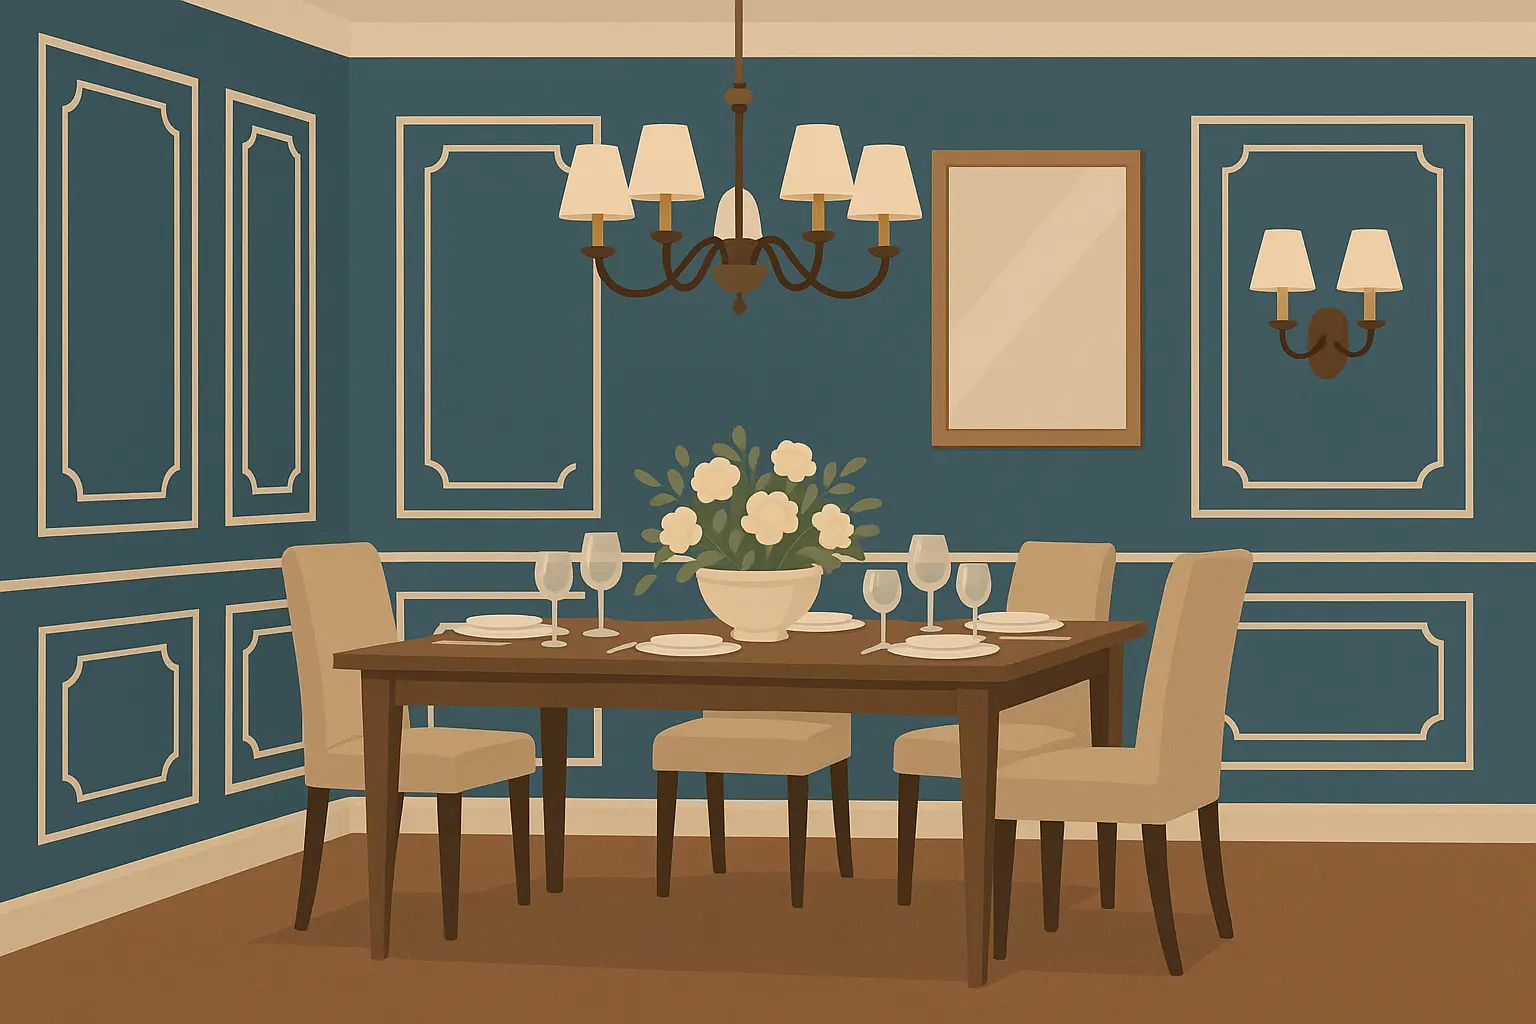
23. Half Wall Paneling Ideas Dining Room
Dining rooms are where you want to feel fancy, whether it’s Tuesday night dinner or hosting your in-laws for the holidays. This is where you can go more formal and elegant since you’re not dealing with moisture or heavy daily wear.
What works: Pretty much anything goes here – raised panels, picture frame molding, elegant flat panels. It’s about creating atmosphere more than surviving daily abuse.
How hard is it: Depends on what style you choose, but you have more options here since you don’t have to worry about moisture or extreme durability.
What it’ll cost: Can range from budget-friendly to expensive depending on how formal you want to get.
Keeping it nice: Generally low maintenance since dining rooms don’t get the daily beating that kitchens and bathrooms do.
Best approach: Focus on creating elegance and atmosphere that makes every meal feel a little special.
Creative and Unique Paneling Options
If you’re tired of seeing the same paneling everywhere and want something that’ll make your friends ask “where did you get that idea?”, these two options push the boundaries of what paneling can be.
I’ve experimented with both of these recently, and while they’re definitely not for everyone, they create results that are truly one-of-a-kind.
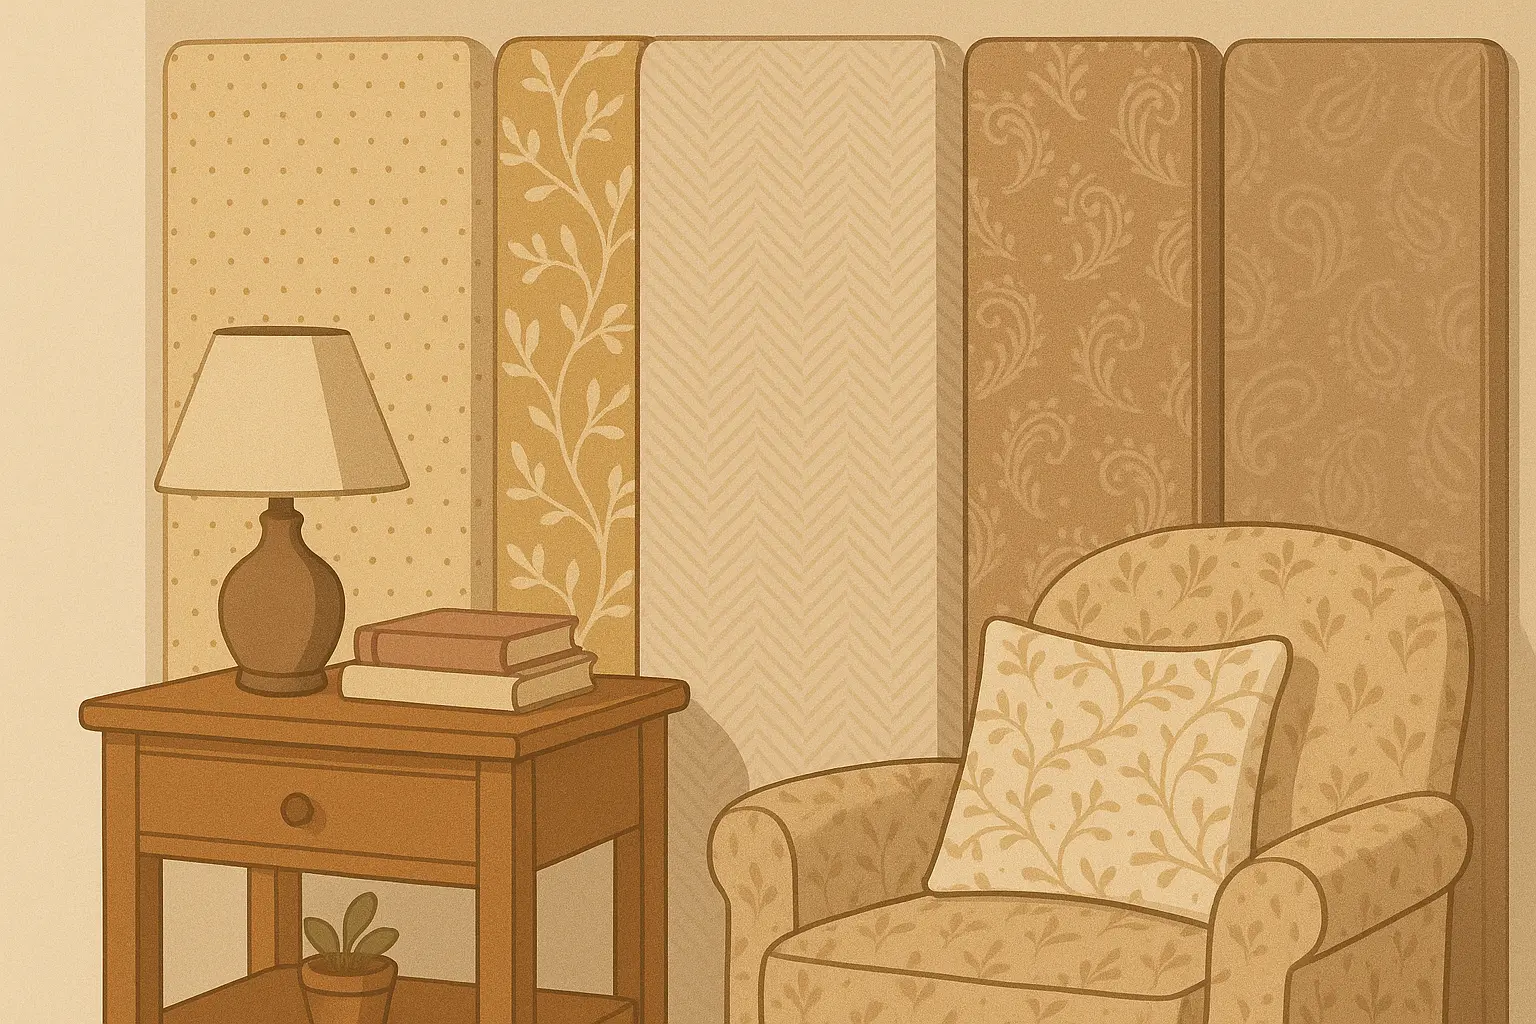
24. Fabric-Wrapped Panels
Upholstered panels that bring softness and sound control to your walls. It’s like having custom artwork that also makes your room quieter and cozier.
Where it works best: Bedrooms, home offices, anywhere you want to reduce noise and add a luxurious, soft element that hard materials can’t provide.
How hard is it to install: Moderate complexity – you need some upholstery skills and the right backing materials. It’s like making custom wall pillows.
What it’ll cost: Can get expensive depending on fabric choice and complexity. High-end fabrics will push costs up quickly.
Keeping it nice: This is the high-maintenance option – fabric needs regular cleaning and might need replacement over time, especially if you have pets or kids who like to touch everything.
Best rooms: Bedrooms, studies, or anywhere you prioritize comfort and sound control over easy maintenance.
25. Metal Panel Accents
Industrial materials like corrugated metal or perforated steel that create bold, contemporary statements. It’s definitely not subtle, but when you want to make a statement, this delivers.
Where it works best: Industrial lofts, contemporary homes, anywhere you want dramatic visual impact that says “I’m not afraid of bold design choices.”
How hard is it to install: Moderately challenging – you’re working with metal, which requires different tools and techniques than wood. Safety is important here.
What it’ll cost: Mid to high range depending on the type of metal and finishing requirements. Custom metalwork always costs more.
Keeping it nice: Actually pretty low maintenance once it’s installed. Metal is durable and doesn’t need much care beyond occasional cleaning.
Best rooms: Spaces where you want maximum visual impact and aren’t worried about traditional comfort considerations.
How Jiffy Junk Simplifies Your Paneling Project Cleanup
Let’s be real – paneling projects create a ridiculous amount of trash. Old stuff comes down, packaging piles up, and somehow you end up with sawdust everywhere, even in rooms you weren’t working in. Whether you’re ripping out old wallpaper, dealing with mountains of cardboard from your new materials, or cleaning out spaces to prep for installation, the cleanup can become a major headache that takes away from the fun parts of your project.

This is where Jiffy Junk comes in handy. Instead of making seventeen trips to the dump in your car (because let’s face it, that old paneling isn’t going to fit), or having a garage full of debris for months because you keep putting off dealing with it, they handle all the messy stuff.
What I like about their approach is they don’t just haul everything to a landfill like some companies do. They actually sort through materials, donating stuff that’s still good and recycling what they can. So your old wood paneling or unused materials might get a second life instead of just taking up space in a landfill.
Their pricing is straightforward – no surprise fees when they show up, which is refreshing after dealing with contractors who seem to discover “unexpected complications” that cost extra money. They give you a free estimate upfront so you can budget for cleanup along with everything else.
The convenience factor is huge when you’re already dealing with measuring, cutting, and trying not to mess up your installation. While you’re focused on getting your panels straight and your corners tight, you don’t want to worry about where to put all the debris or how you’re going to haul away that pile of old drywall.
For bigger projects involving multiple rooms or major prep work, they also have dumpster rentals if you prefer to work at your own pace and fill it up as you go. Then they just come pick it up when you’re done – no multiple trips or scheduling hassles.
The team is licensed and insured, which matters when people are working in your house around your new installation. They’re careful not to damage your newly paneled walls while removing debris, understanding that your project represents time and money you don’t want to see get messed up during cleanup.
Whether you’re doing a simple peel-and-stick project in one room or tackling an elaborate raised panel installation throughout your house, having someone handle the cleanup lets you focus on the parts that actually matter – like making sure your measurements are right and your panels look amazing.
Contact Jiffy Junk at (844) 543-3966 or visit jiffyjunk.com to schedule cleanup and stop worrying about the mess so you can focus on creating something beautiful.
Final Thoughts
Half wall paneling can totally transform a space, but success comes down to being realistic about your situation, your skills, and your budget rather than just picking whatever looks prettiest online. I’ve learned this through plenty of mistakes and do-overs that could have been avoided with better planning upfront.
The key is matching your choice to what your room actually needs and what you can realistically handle. Sure, those peel-and-stick panels might not impress anyone, but if you’re a beginner or renting, they’re perfect for getting your feet wet. On the flip side, if you’ve got the skills and budget for raised panel wainscoting, the results can be absolutely stunning and add real value to your home.
Don’t let perfect be the enemy of good – some of my favorite installations have been the budget-friendly ones where creativity mattered more than expensive materials. A well-executed MDF panel system can look just as impressive as premium hardwood if you take your time and do it right.
Room function should drive your decisions more than just what looks good in photos. That gorgeous reclaimed wood might look amazing online, but if you’re putting it in a bathroom, you’ll be dealing with warping and mold issues that’ll make you regret not choosing something boring but practical.
Be honest about maintenance too. If you can barely keep up with regular house cleaning, don’t choose materials that need special care, regular sealing, or frequent touch-ups. There’s no shame in picking low-maintenance options that’ll still look good in five years without constant attention.
Professional cleanup services help keep you focused on the creative parts instead of worrying about debris management and multiple trips to the dump. It’s one less thing to stress about when you’re already dealing with measurements, cuts, and trying not to mess up your installation.
Most importantly, don’t be afraid to start small and work your way up to more complex projects. Every expert was once a beginner who probably made the same mistakes you’re worried about making. With proper planning and realistic expectations, your paneling project can transform your space from “meh” to “wow, did you hire a designer?” – and you’ll have the satisfaction of knowing you did it yourself.