25 Ingenious Low Basement Ceiling Ideas for 2025: Transform Your Space Without Losing Height
Table of Contents
-
Understanding Low Basement Ceiling Challenges
-
Minimalist Approaches for Low Ceilings
-
Budget-Friendly Ceiling Solutions
-
Visual Tricks to Create Height Illusion
-
Functional Solutions for Unfinished Basements
-
Premium Low-Profile Ceiling Options
-
How Jiffy Junk Can Help With Your Basement Renovation
-
Final Thoughts
Understanding Low Basement Ceiling Challenges
When I’m working with a basement that has limited headroom, I always consider several critical factors before recommending a ceiling solution. The most pressing concern? Height constraints. Anything that further reduces your already limited space needs careful evaluation, especially if your ceiling sits below 7 feet.
Building codes typically require a minimum height of 7 feet for finished living spaces, so I always recommend checking your local regulations first. Your budget will significantly impact your options too – solutions range from inexpensive paint jobs to premium coffered ceilings that can transform your space.
You’ll also need to think about utility access. Most basements contain important plumbing, electrical, and HVAC components that might need occasional maintenance. Some ceiling solutions provide easy access, while others make reaching these utilities more challenging.
Before starting your basement renovation, you might want to consider a thorough basement cleanout to give yourself a clean slate for implementing these low basement ceiling ideas.
Most residential building codes mandate 7-foot minimum ceiling heights for habitable spaces, though some jurisdictions allow exceptions for basements (6’8″ or 6’4″ in specific circumstances). I always verify with the local building department before finalizing plans with my clients.
Moisture management is another critical factor in basement environments. I recommend maintaining relative humidity between 30-50% to prevent mold growth on ceiling materials. This often requires proper ventilation systems and potentially specialized moisture-resistant materials like PVC-based products.
|
Basement Ceiling Consideration |
Why It Matters |
Impact on Decision |
|---|---|---|
|
Current Height |
Determines available space for ceiling treatment |
Critical – dictates which options are viable |
|
Building Codes |
Legal requirements for finished spaces |
May limit options in extremely low ceilings |
|
Budget |
Cost constraints for materials and labor |
Affects quality and complexity of solution |
|
Moisture Levels |
Basement humidity affects material durability |
Determines material selection for longevity |
|
Utility Access |
Need to reach plumbing, electrical, HVAC |
May require access panels or removable sections |
Minimalist Approaches for Low Ceilings
1. Exposed Ceiling with Paint
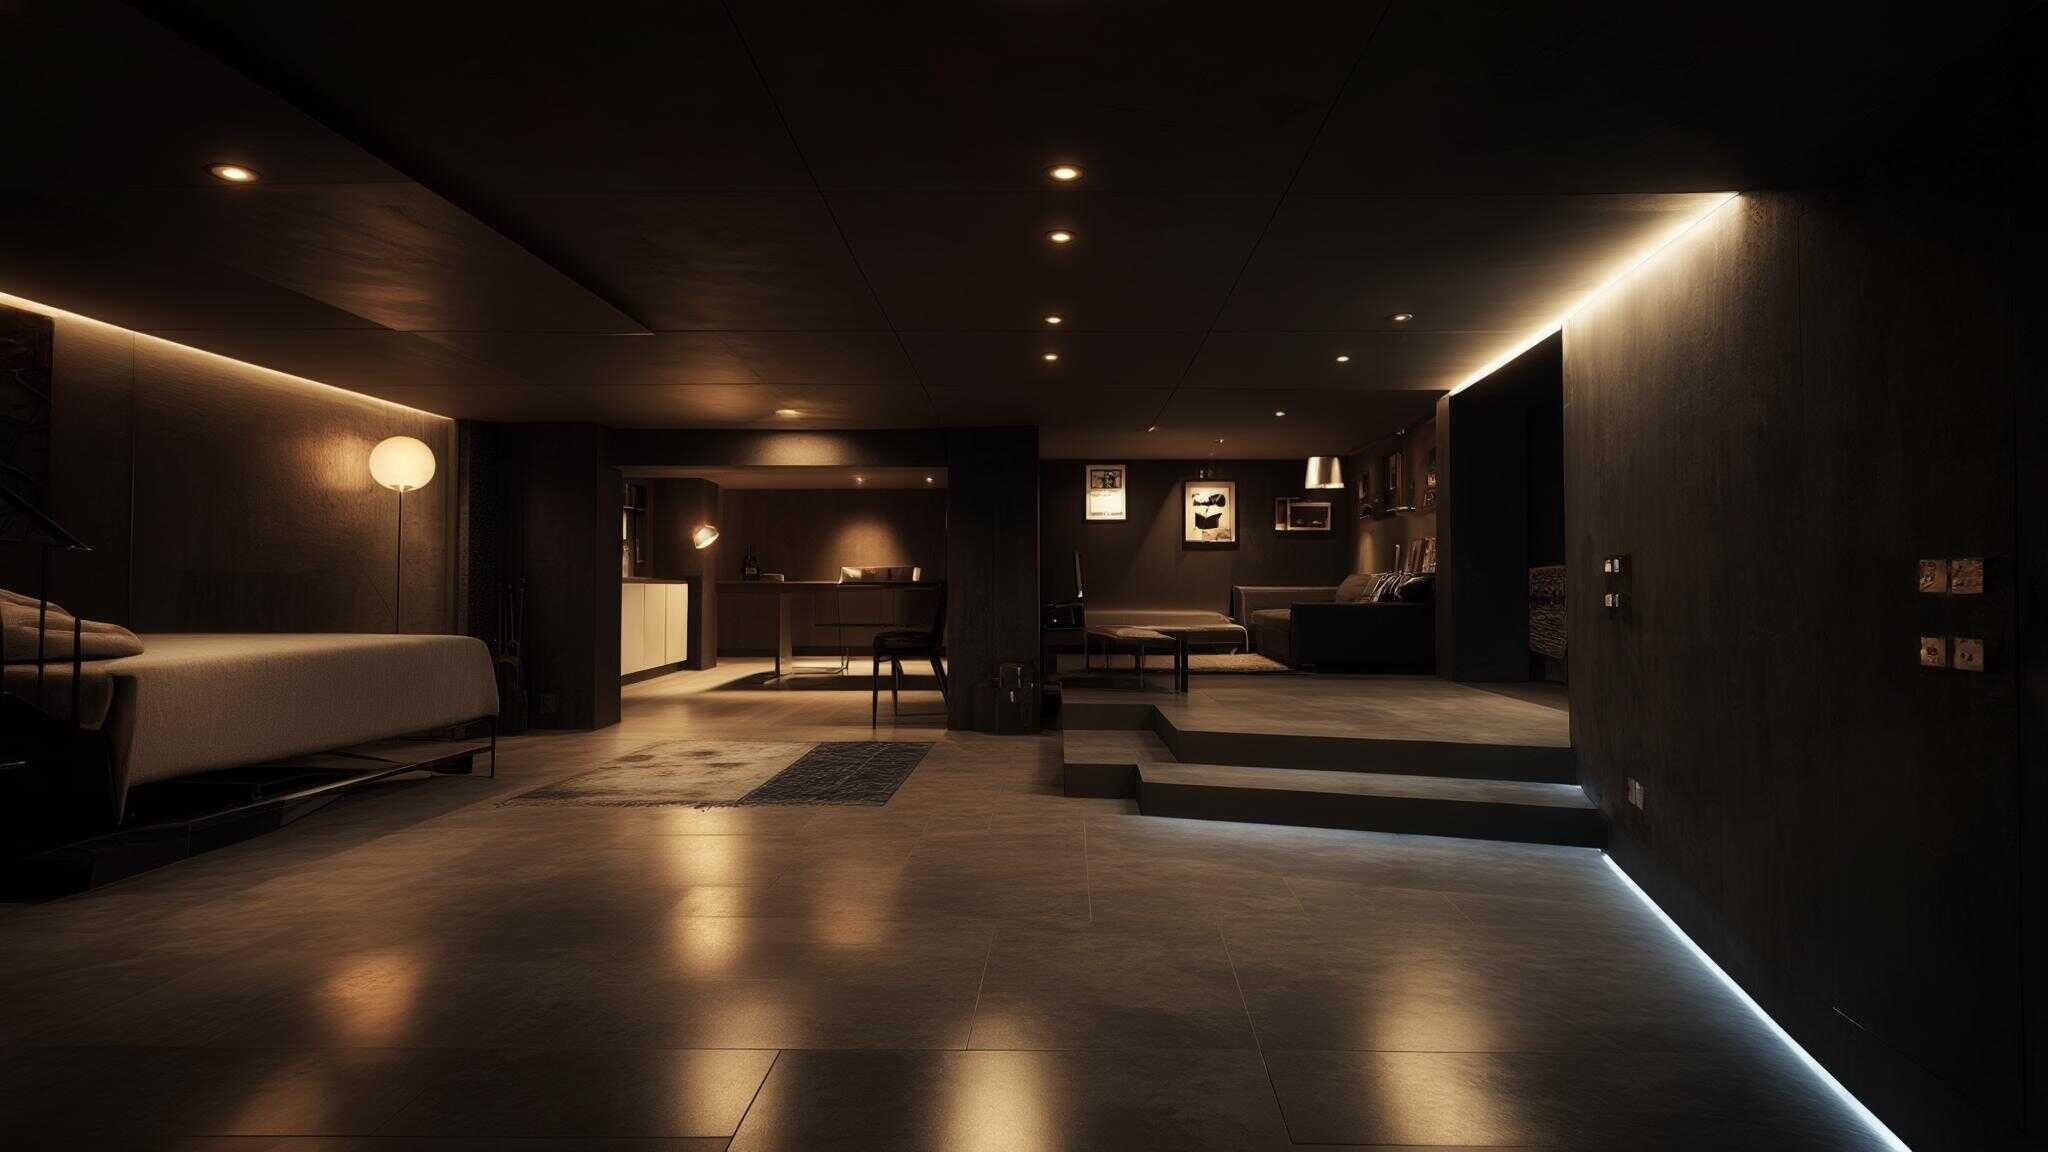
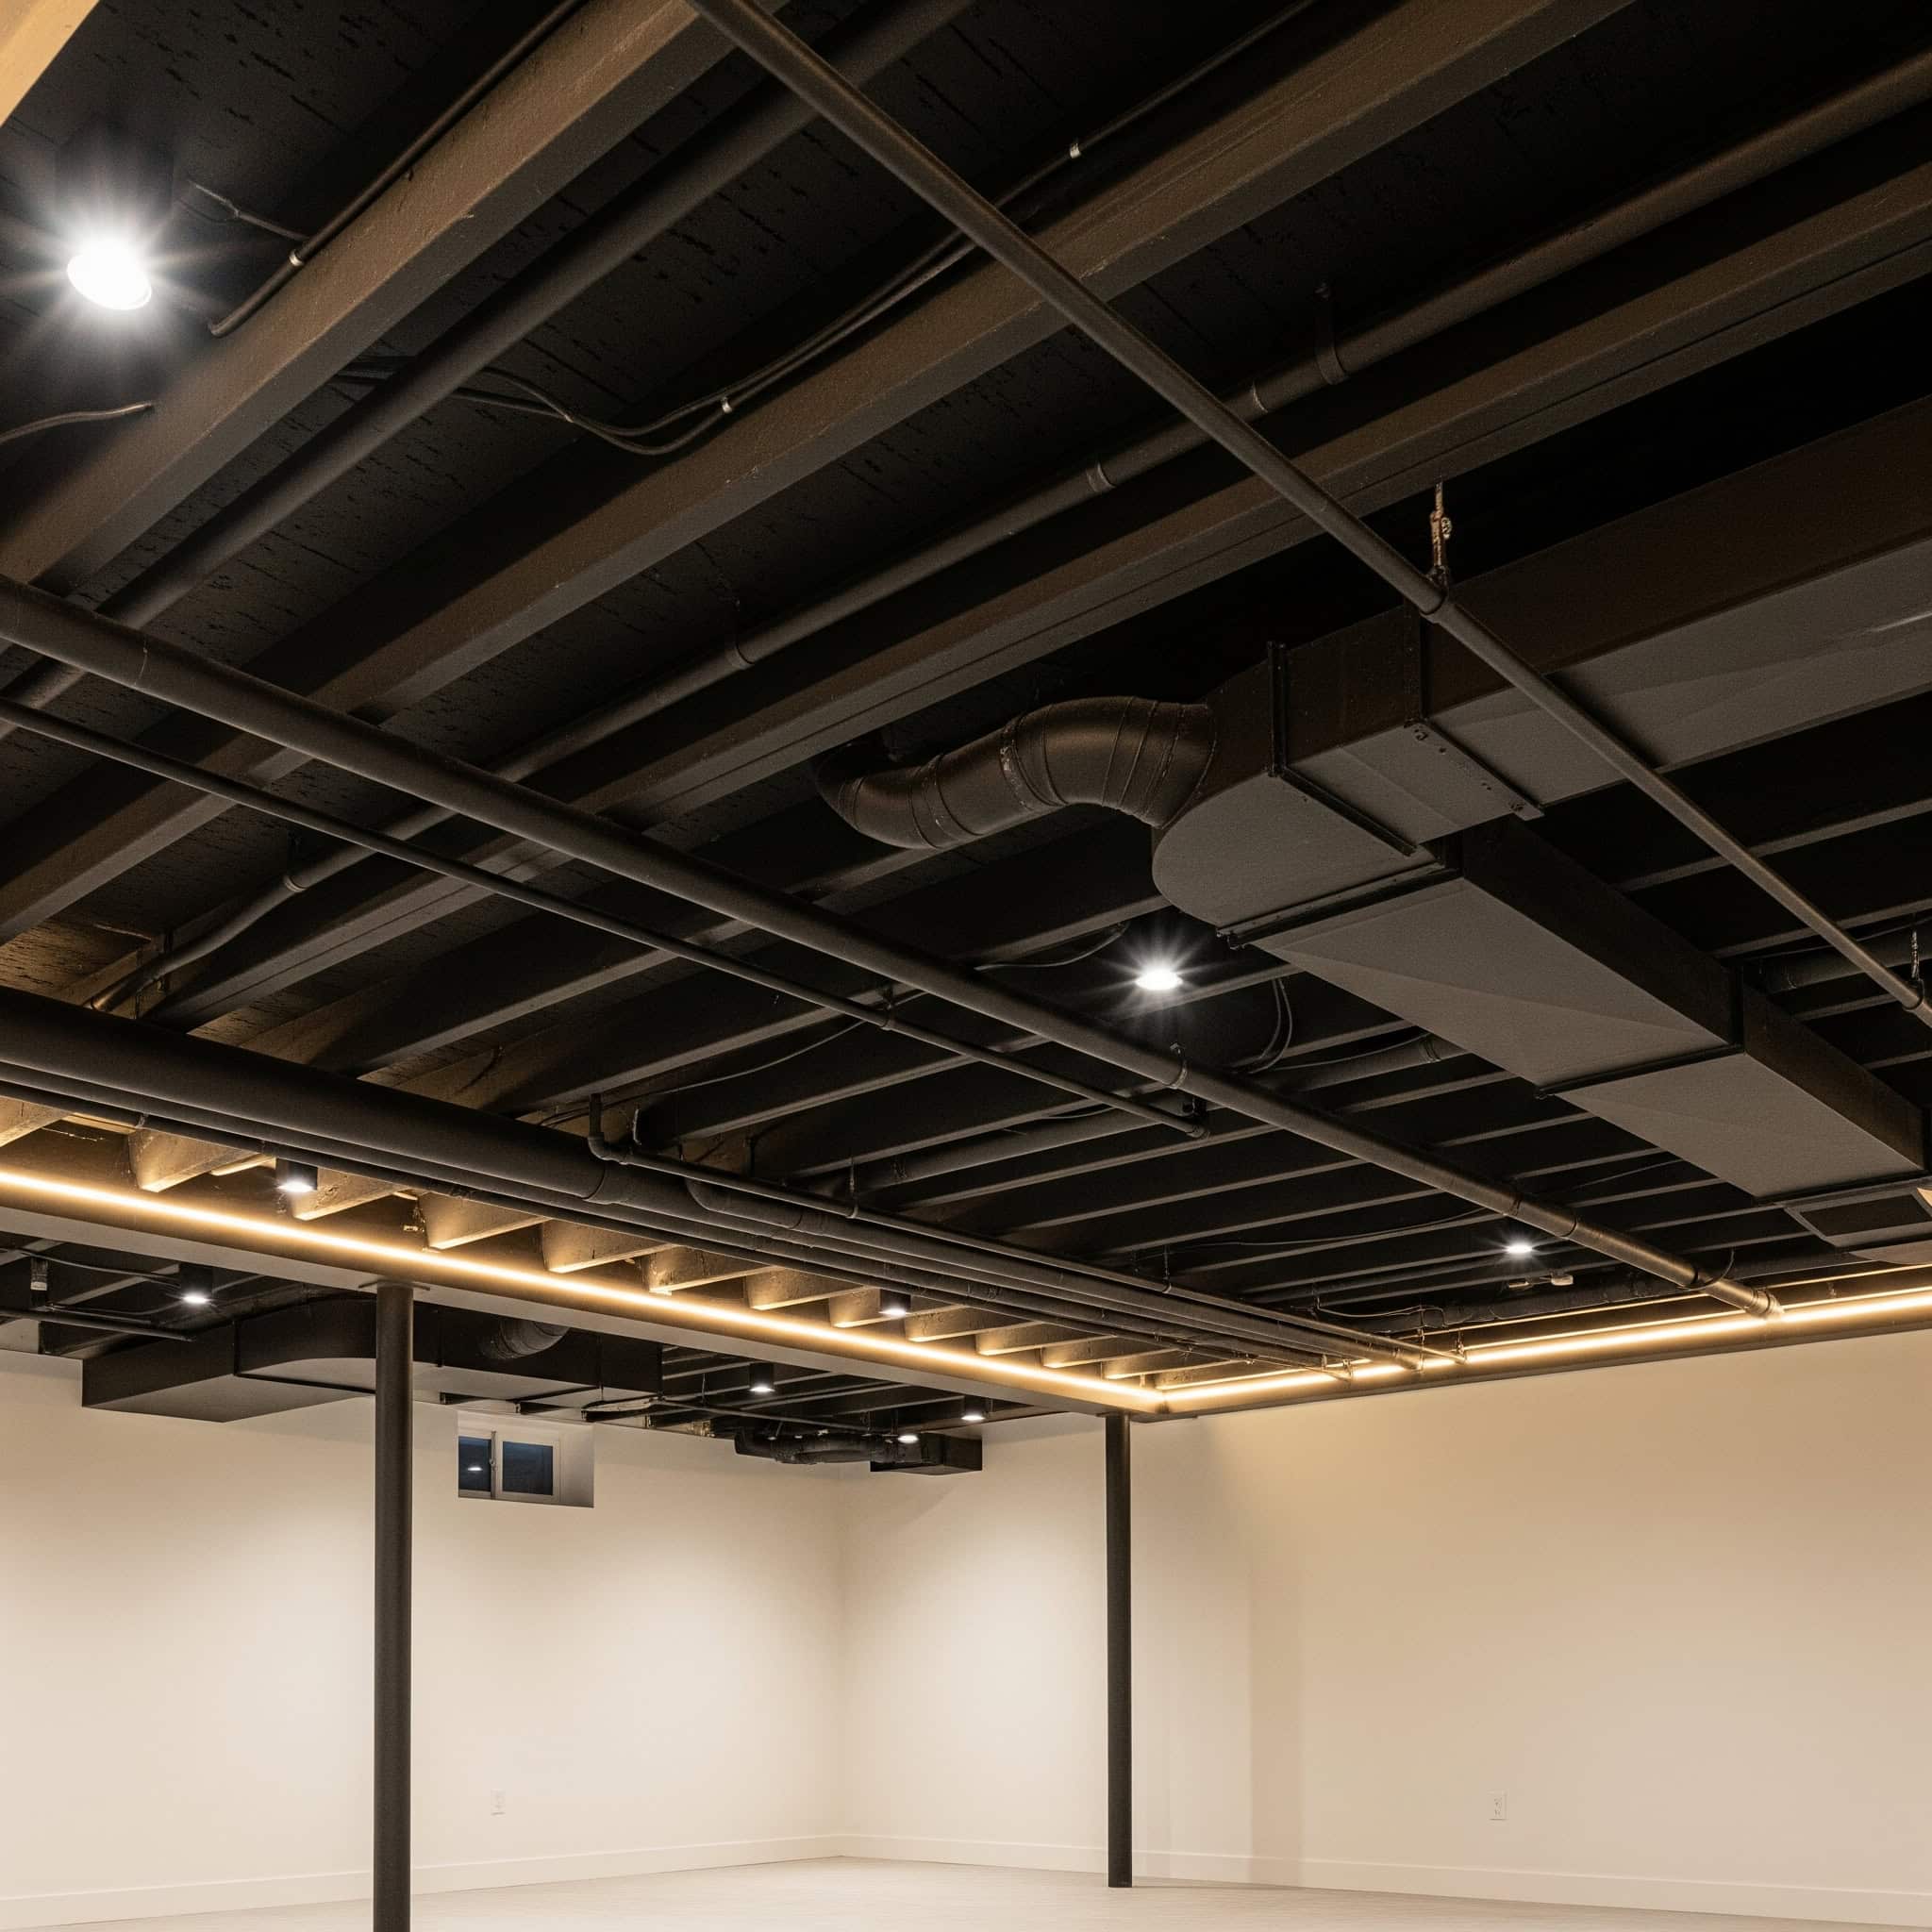
I’ve found that one of the most effective low basement ceiling ideas is simply embracing what’s already there. The exposed ceiling with paint approach involves spraying all structural elements—joists, pipes, ducts, and wiring—with a single color (typically matte black or white). This extremely budget-friendly option costs between $200-$500 and preserves 8-12 inches of height compared to drop ceilings.
You’ll maintain easy access to all utilities with this approach, but there is a tradeoff: minimal sound insulation. Proper preparation is essential for a professional finish. I always recommend thorough cleaning, taping off areas that shouldn’t be painted, and using the right spray equipment.
A homeowner in Portland transformed their 6’8″ basement ceiling by thoroughly cleaning all exposed elements, using an airless sprayer to apply matte black paint to the joists, ductwork, and electrical conduits, then installing strategic track lighting aimed at the floor rather than the ceiling. The result maintained full height while creating a modern industrial look that effectively disguised the basement’s mechanical systems. The entire painting process took a weekend and cost approximately $350 for paint, primer, and supplies, while saving over $2,000 compared to installing a drop ceiling.
Oil-based primers are my go-to recommendation for unfinished basement ceilings as they provide better adhesion to multiple surface types (wood, metal, PVC) and create a uniform base for your topcoat, preventing inconsistent sheen across different materials.
Airless paint sprayers operating at 1500-3000 PSI deliver the most consistent coverage for exposed ceiling elements, but require careful masking of walls and floors as they generate significant overspray compared to HVLP systems.
2. Industrial Open Concept
I’m a big fan of the industrial open concept for basement ceiling ideas. This approach maintains your ceiling’s structural elements as visible features while adding strategic lighting between joists and organizing cables neatly. It’s cost-effective ($300-$600) and preserves maximum height while creating a trendy aesthetic.
You’ll need to commit to regular dusting and accept limited soundproofing capabilities. The key to success is thoughtful organization of exposed elements and strategic lighting placement to create a deliberate, designed look rather than an unfinished appearance.
Cable management systems designed specifically for exposed ceilings use J-hooks, cable trays, and color-coded zip ties to transform chaotic wiring into organized runs that contribute to the industrial aesthetic while maintaining code compliance.
Directional lighting fixtures with beam spreads between 15-30 degrees create focused pools of light when mounted between joists, preventing the “cave effect” common in exposed ceiling designs with poorly planned lighting.
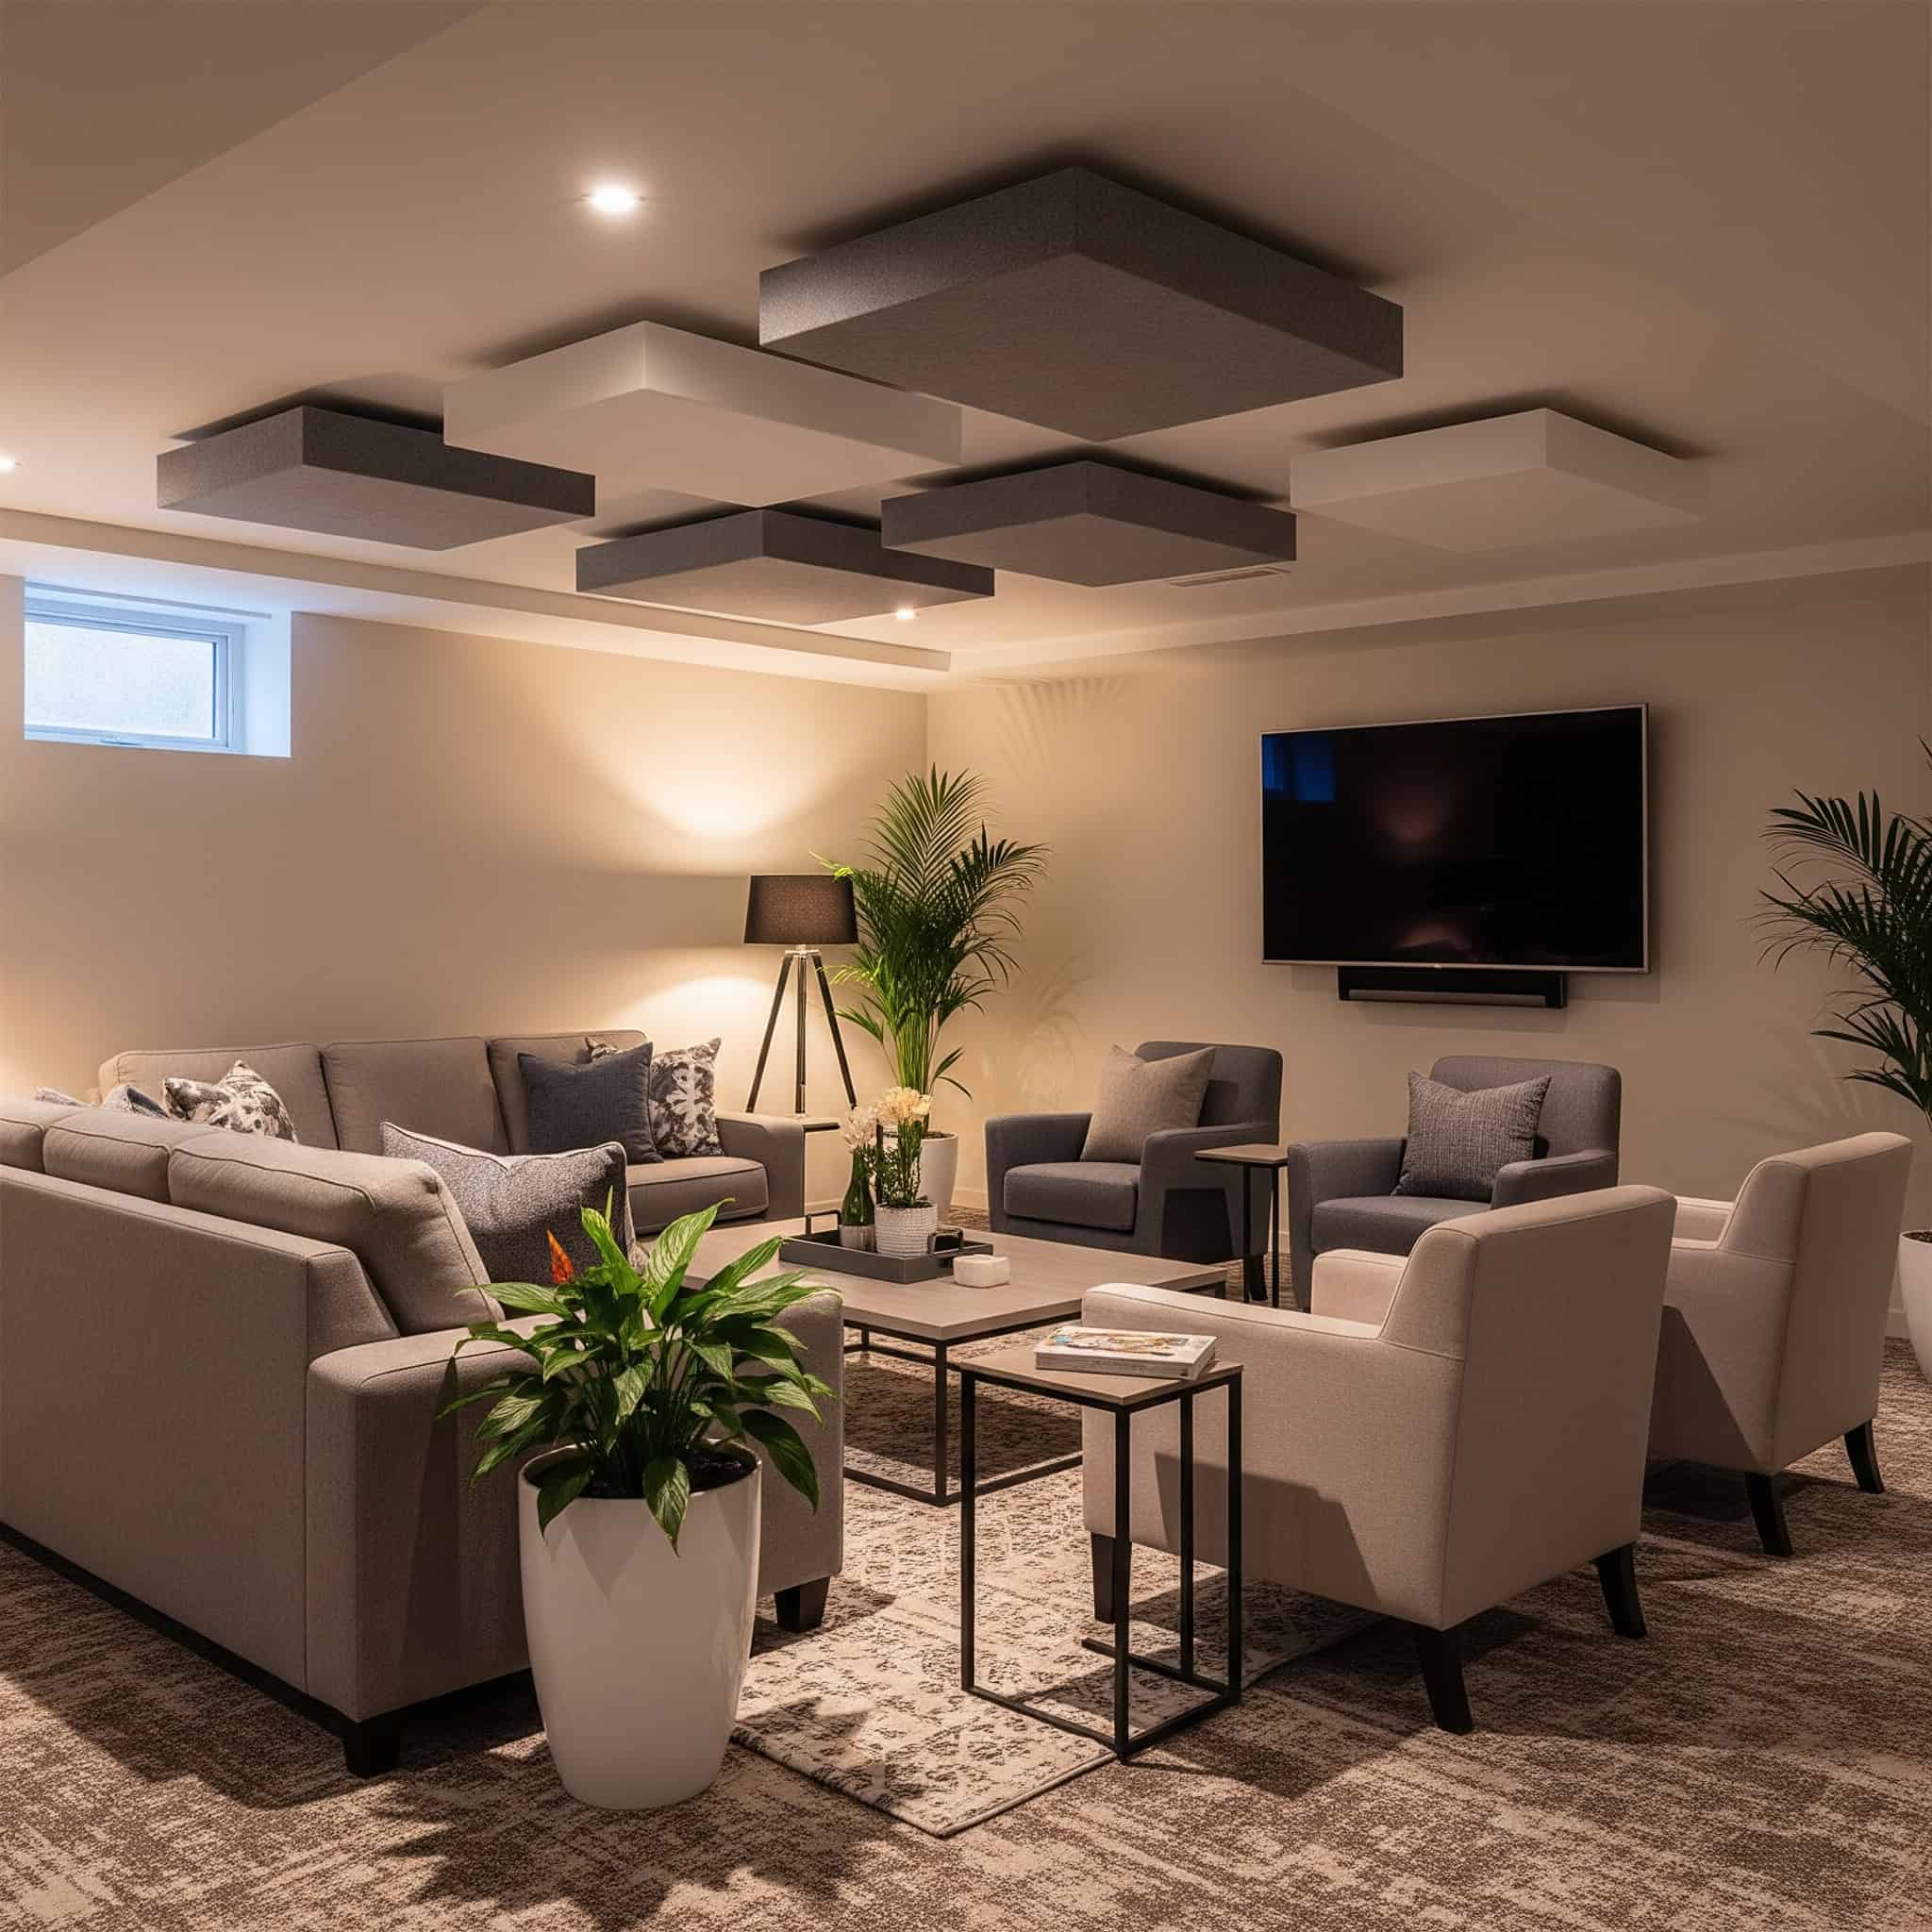
3. Partial Ceiling Clouds
One of my favorite low ceiling basement ideas involves installing floating acoustic panels in key areas like seating zones while leaving the rest of the ceiling exposed. These partial ceiling clouds create visual interest and improve acoustics in targeted areas without sacrificing ceiling height throughout the entire space.
This moderate-cost solution ($500-$1,500) allows you to maintain access to utilities and preserve most of your ceiling height while gaining significant sound absorption benefits where they matter most. The floating design adds architectural interest that can become a focal point in your basement design.
For a complete basement transformation, consider pairing your ceiling clouds with a thorough decluttering service to maximize the sense of openness and space in your basement.
Acoustic ceiling clouds typically provide an NRC (Noise Reduction Coefficient) rating between 0.75-0.95, significantly reducing sound reverberation in specific areas without the cost of treating the entire ceiling.
Cloud mounting systems using aircraft cable or rod suspensions allow precise height adjustment, with optimal placement typically 8-12 inches below the joists to maximize sound absorption while maintaining adequate headroom.
4. Painted Drywall with Minimal Profile
Installing thin (1/2-inch) drywall directly to joists with recessed lighting creates a clean, finished look while minimizing height loss. This is one of the basement ceiling ideas that provides a traditional finished appearance but limits access to utilities and typically requires professional installation for best results.
The smooth surface allows for any paint color and finish, making it versatile for various design styles. Recessed lighting fixtures must be carefully selected to work with the minimal depth available. This mid-range option typically costs between $1,000-$3,000.
Ultra-thin drywall panels (1/4″ to 3/8″) designed specifically for ceiling applications can reduce weight by up to 30% compared to standard 1/2″ panels, decreasing the load on ceiling joists while maintaining fire resistance ratings.
Low-profile recessed lighting fixtures with depths of 1/2″ to 2″ can be installed in minimal clearance situations, with IC-rated (Insulation Contact) models required when insulation is present above the drywall.
5. Fabric Ceiling Treatment
I’ve seen some amazing transformations using stretch fabric panels installed on a track system. This unique solution for ideas for low basement ceilings adds minimal thickness to your ceiling while providing numerous color and pattern options.
The panels remain removable for utility access, though they may sag over time and offer limited durability in humid conditions. The fabric creates a soft, warm aesthetic and can dramatically improve room acoustics depending on the material selected. This approach typically costs between $800-$2,500.
Professional stretch ceiling systems use PVC-based fabrics with tensile strengths of 3000-5000 N/m² that maintain their shape when properly installed, with perimeter track systems creating tension of approximately 15-20 kg per linear meter.
Antimicrobial fabric treatments containing silver ions or zinc pyrithione provide protection against mold and mildew growth in basement environments, extending the lifespan of fabric ceiling installations by 3-5 years in humid conditions.
Budget-Friendly Ceiling Solutions
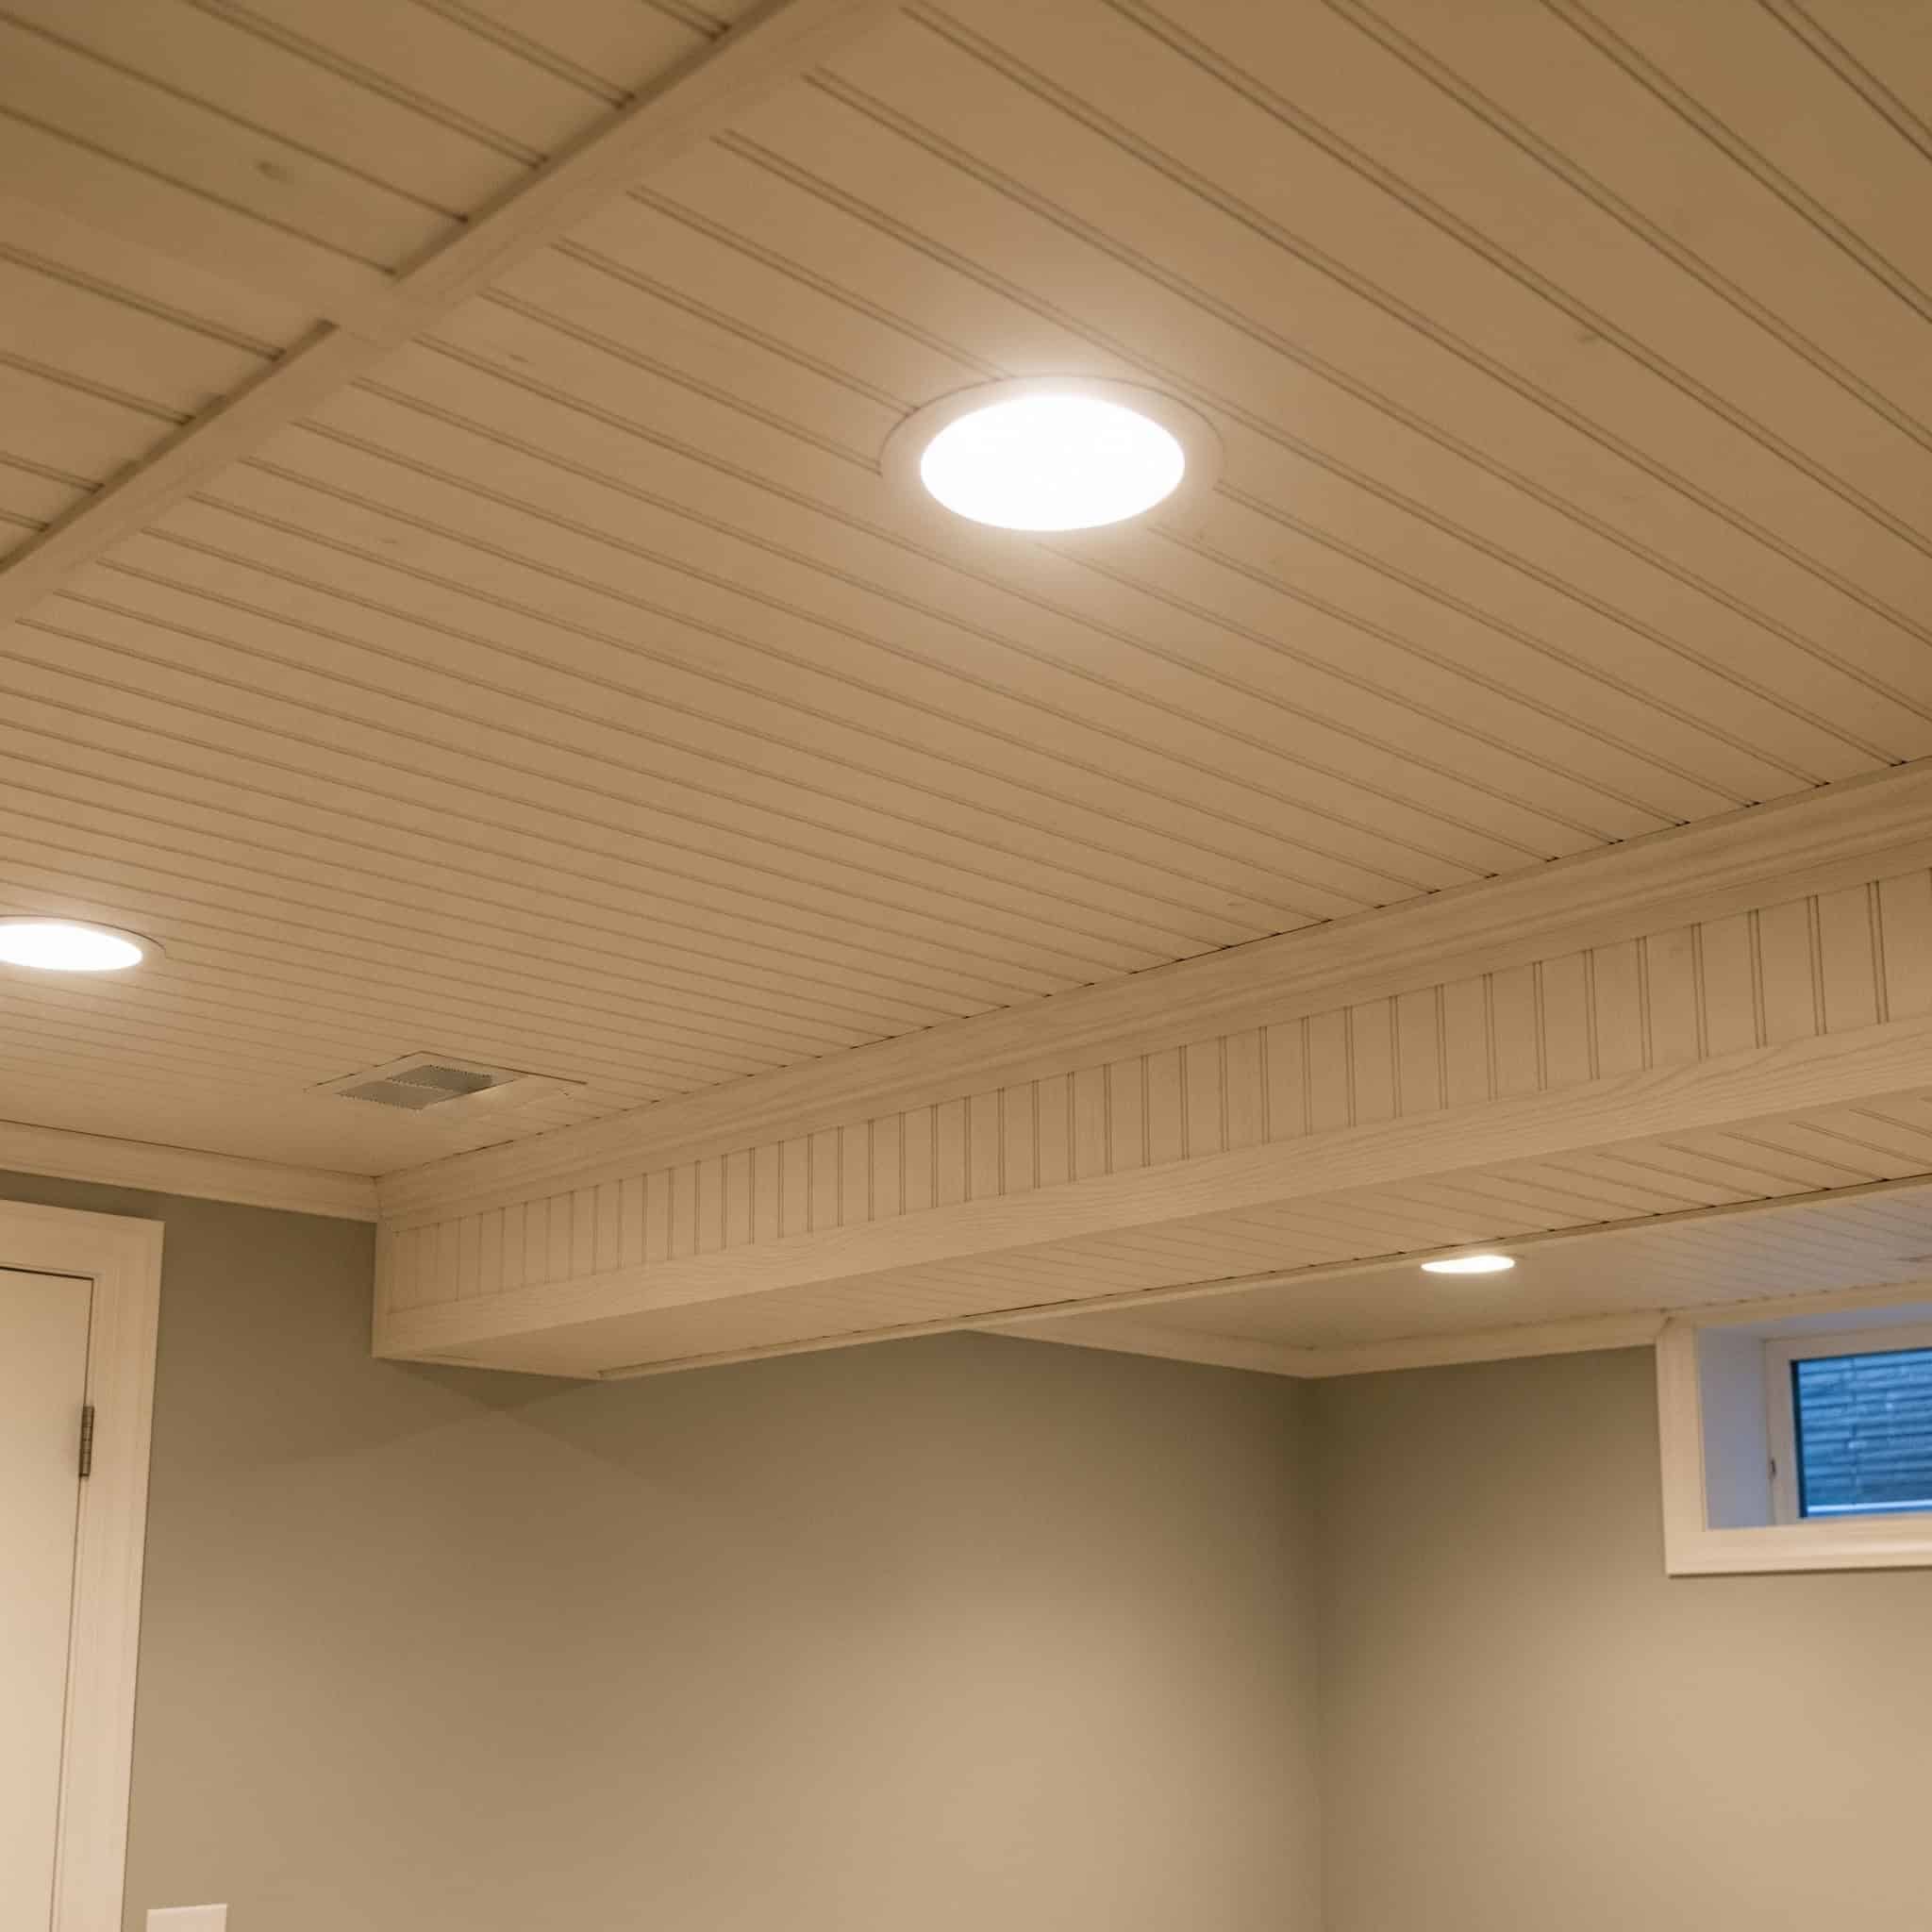
6. Beadboard Panels
Lightweight beadboard panels installed directly to joists create a cottage-inspired look that’s both budget-friendly ($500-$1,500) and height-preserving, adding only 1/4-inch thickness to your ceiling. These cheap ceiling ideas are DIY-friendly, though the panels offer minimal sound insulation and limited utility access once installed.
The distinctive texture adds character to your basement while the white or light-colored finish helps reflect light and brighten the space. Pre-primed panels save time during installation and create a more polished final appearance.
If you’re installing beadboard panels yourself, you’ll likely generate debris that needs proper disposal. Consider using eco-friendly junk removal services to responsibly handle your construction waste.
Modern beadboard ceiling panels are available in moisture-resistant MDF or PVC compositions, with the latter offering superior performance in basement environments by maintaining dimensional stability at relative humidity levels up to 80%.
Tongue-and-groove beadboard panel systems distribute weight across joists more effectively than flat panels, reducing the risk of sagging by up to 40% when properly installed with construction adhesive and finishing nails.
|
Budget-Friendly Ceiling Option |
Cost Range |
Height Loss |
DIY Difficulty |
Utility Access |
|---|---|---|---|---|
|
Beadboard Panels |
$500-$1,500 |
1/4″ |
Easy-Medium |
Limited |
|
Painted Plywood Panels |
$300-$1,000 |
1/4″-3/8″ |
Easy |
Limited |
|
Peel-and-Stick Ceiling Tiles |
$200-$800 |
1/8″-1/4″ |
Very Easy |
None |
|
Corrugated Metal |
$400-$1,200 |
1/2″-3/4″ |
Medium |
Limited |
|
Painted OSB |
$250-$800 |
3/8″-1/2″ |
Easy |
Limited |
7. Painted Plywood Panels
Cut plywood into manageable sections, sand, prime, paint, and install between joists for a very economical ceiling solution ($300-$1,000). This inexpensive basement ceiling idea preserves most of your ceiling height while offering a DIY-friendly installation process.
The key to success is careful preparation—sanding thoroughly, using quality primer, and applying multiple paint coats for a polished appearance. You can create various patterns by cutting and arranging the plywood in different configurations, adding visual interest to your basement ceiling.
Cabinet-grade plywood (typically 1/4″ to 3/8″ thick) with A-grade veneer on one side provides the smoothest surface for ceiling applications, requiring 150-220 grit progressive sanding to achieve a paint-ready finish.
High-build primers containing higher solids content (45-55%) fill minor imperfections in plywood surfaces, reducing the visibility of wood grain and creating a more uniform painted finish with fewer coats.
8. Peel-and-Stick Ceiling Tiles
I’ve installed these in several basements with great results. Lightweight vinyl or foam ceiling tiles that apply directly to a smooth surface offer an inexpensive ($200-$800) and extremely DIY-friendly solution. These cheap ceiling ideas are available in various patterns, including designs that create the illusion of height.
While less durable than permanent solutions, they install quickly and can dramatically transform your ceiling’s appearance. Some styles mimic more expensive materials like tin, wood, or plaster at a fraction of the cost and weight, making them perfect basement ceiling ideas for tight budgets.
Self-adhesive ceiling tiles typically use acrylic-based pressure-sensitive adhesives with initial tack strength of 2-4 psi, requiring surface temperatures between 65-85°F during installation for optimal bonding.
Decorative foam ceiling tiles with density ratings of 30-35 kg/m³ provide the best balance between durability and weight, with flame-retardant formulations meeting Class A fire ratings (flame spread index <25) for basement applications.
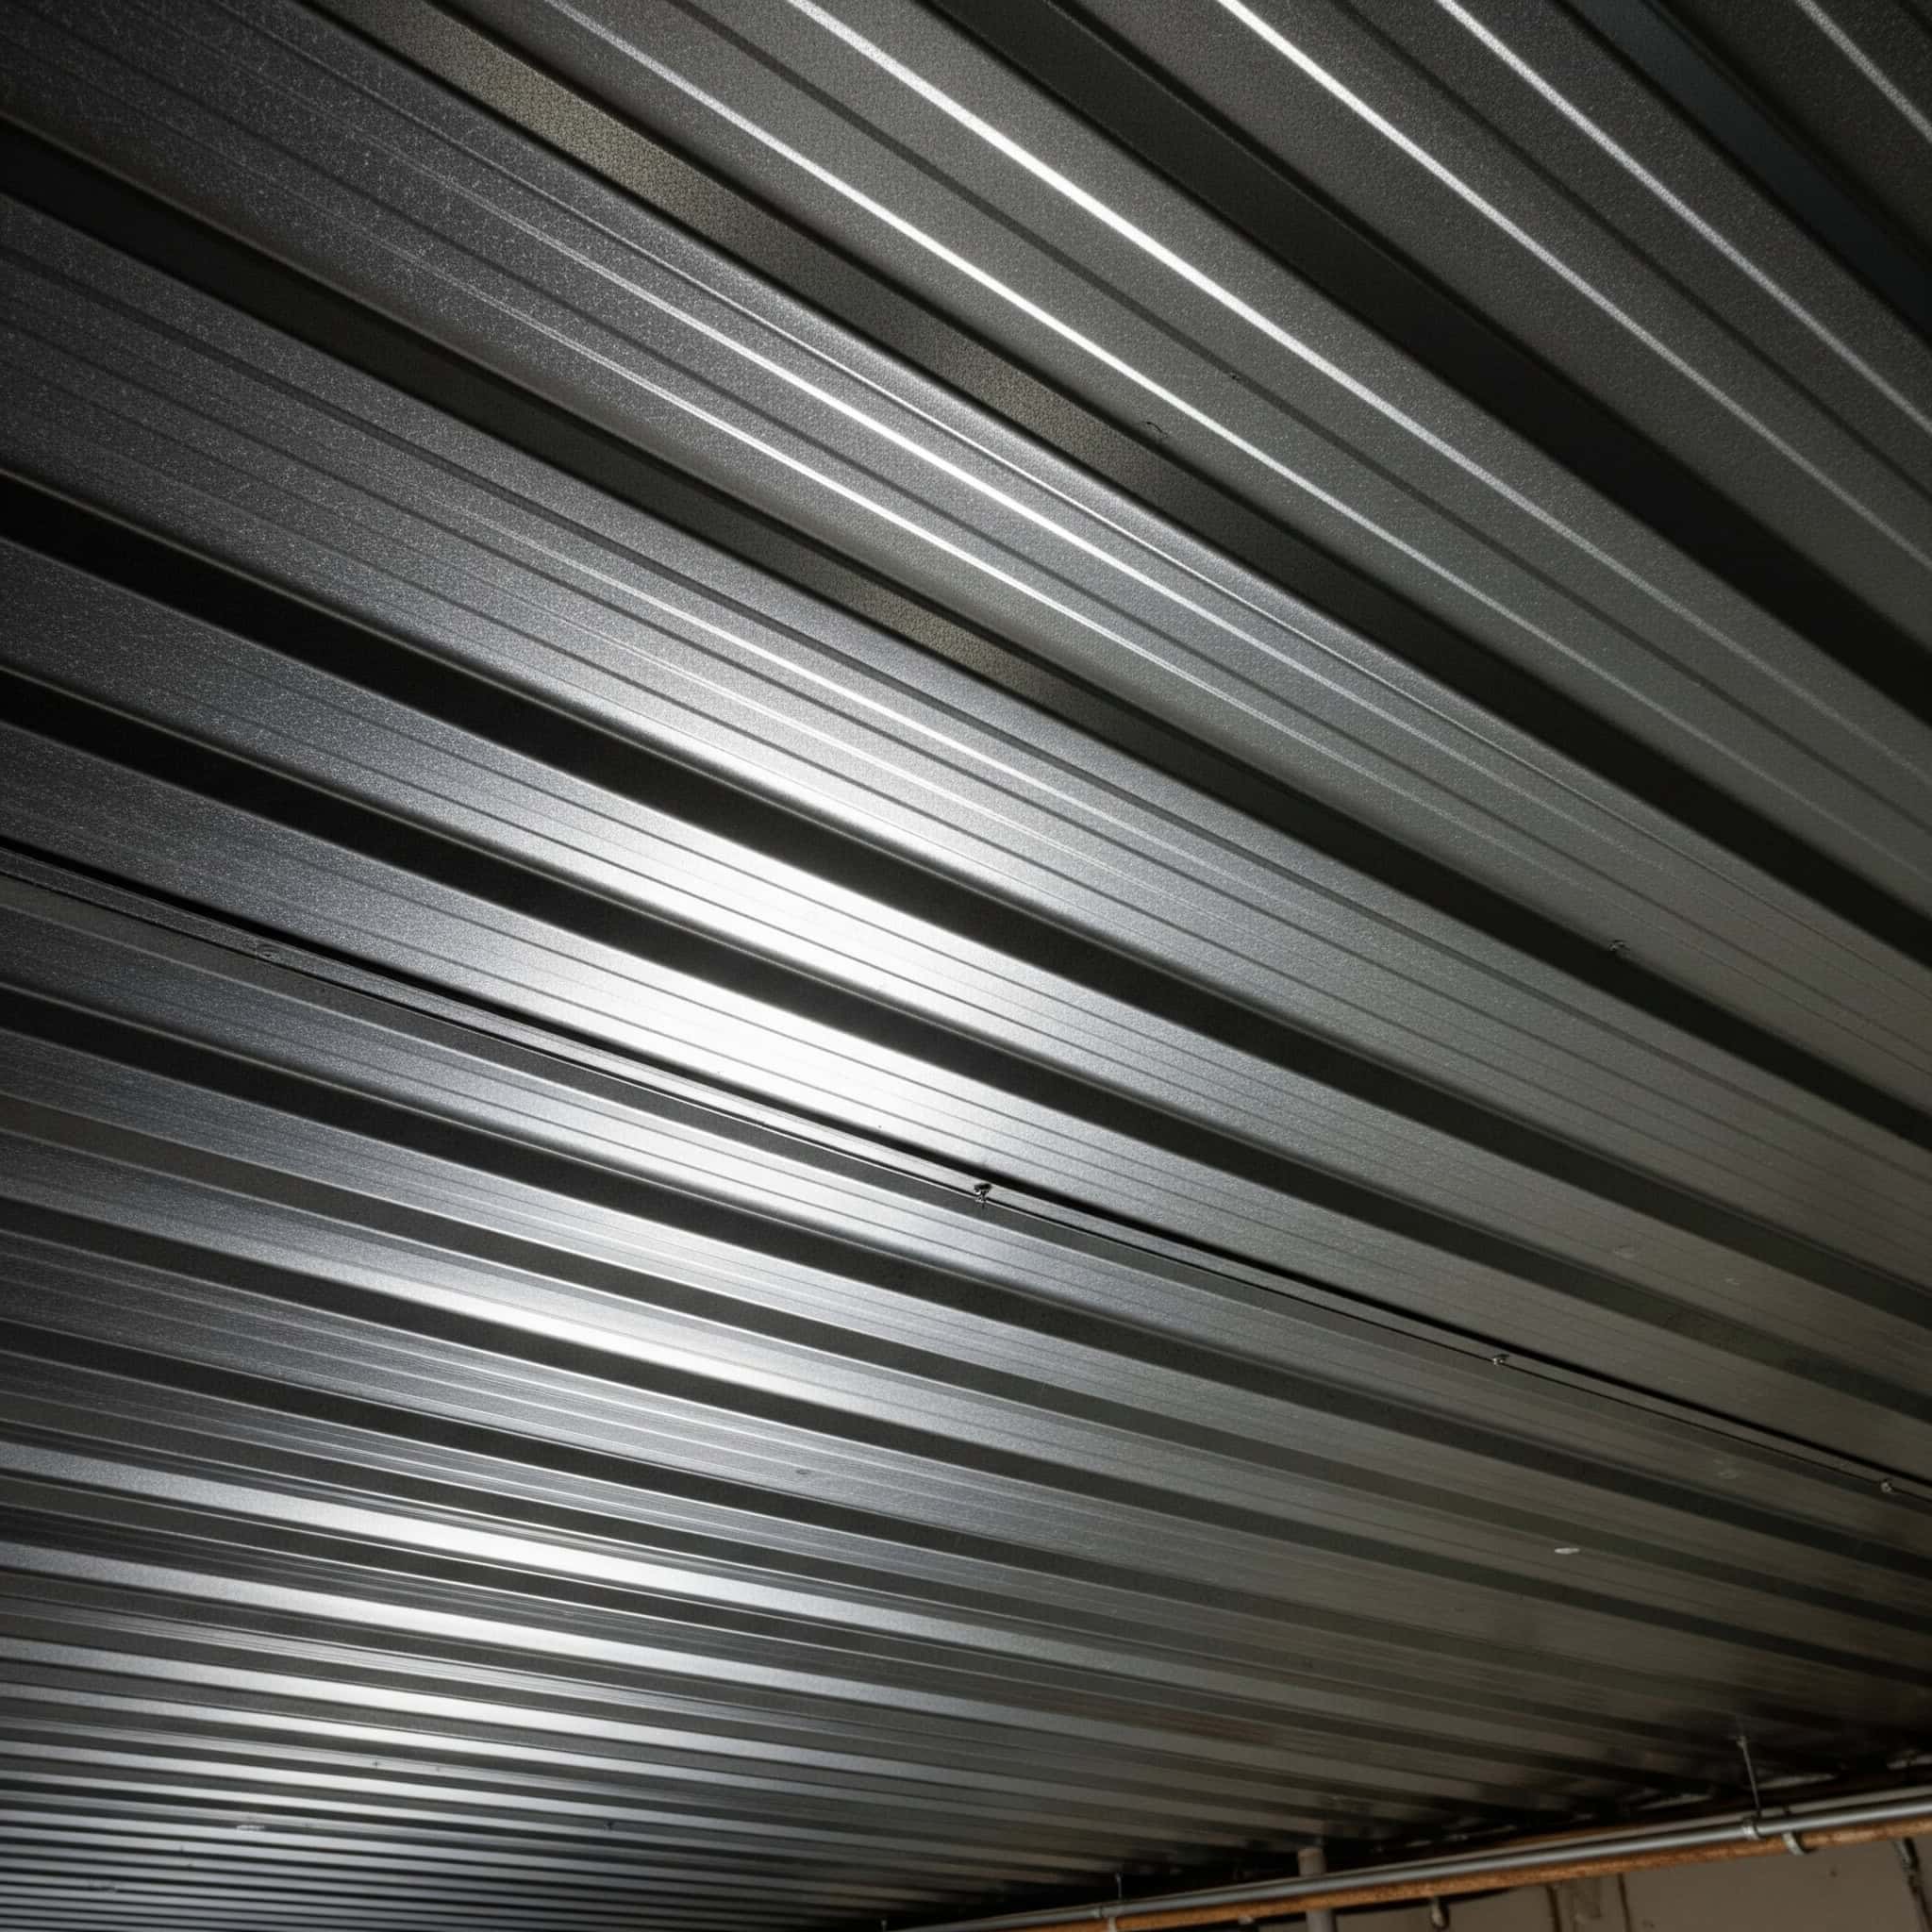
9. Corrugated Metal Panels
Installing lightweight corrugated metal sheets between or across joists creates an industrial-chic appearance at an affordable price point ($400-$1,200). The reflective quality of metal enhances lighting efficiency in your basement while adding distinctive texture. These basement ceiling ideas are highly durable and moisture-resistant, though they may create noise issues during rain if used on upper floors.
The panels can be left natural or painted to match your design scheme, offering versatility for various basement styles.
A Chicago homeowner with a 6’6″ basement ceiling installed corrugated aluminum panels directly to the joists in a staggered pattern, creating visual interest while maintaining maximum headroom. They used 0.019″ thick panels weighing only 0.3 lbs per square foot, allowing for easy DIY installation without additional structural support. The natural reflective quality of the aluminum increased the effectiveness of their minimal lighting fixtures, while strategic placement of sound-absorbing panels on the walls helped counteract the metal’s acoustic reflectivity. The entire project cost $950 and took three days to complete, resulting in a modern industrial space that felt significantly more spacious than with their previous drop ceiling.
Lightweight aluminum corrugated panels (0.019″-0.024″ thickness) weigh approximately 0.25-0.35 lbs per square foot, making them suitable for direct attachment to ceiling joists without additional structural support.
Galvanized steel corrugated panels offer superior durability but require protective coating at cut edges to prevent rust formation, with zinc-rich primers containing 65-70% zinc dust providing the most effective protection in basement environments.
10. Painted OSB Boards
Installing oriented strand board panels, priming thoroughly, and painting in a light color creates a very budget-friendly ceiling ($250-$800) with industrial texture and interest. This ceiling ideas cheap approach requires careful finishing to avoid a rough appearance. The distinctive texture of OSB becomes a design feature when properly prepared and painted.
Using a roller with a thick nap helps get paint into all the crevices for complete coverage. This is one of my favorite unfinished basement ceilings solutions for clients on tight budgets who want something with character.
After installing your OSB ceiling, you’ll likely have leftover materials and debris. For a hassle-free cleanup, consider professional junk removal services that can quickly clear away construction waste.
OSB panels require oil-based primers with stain-blocking properties to prevent tannin bleed-through, with two coats typically needed to fully seal the porous surface before applying water-based topcoats.
Edge swelling is a common issue with OSB in basement environments—panels with edge sealing technology or those treated with water-repellent preservatives (WRP) reduce moisture absorption by up to 60% compared to standard panels.
Visual Tricks to Create Height Illusion
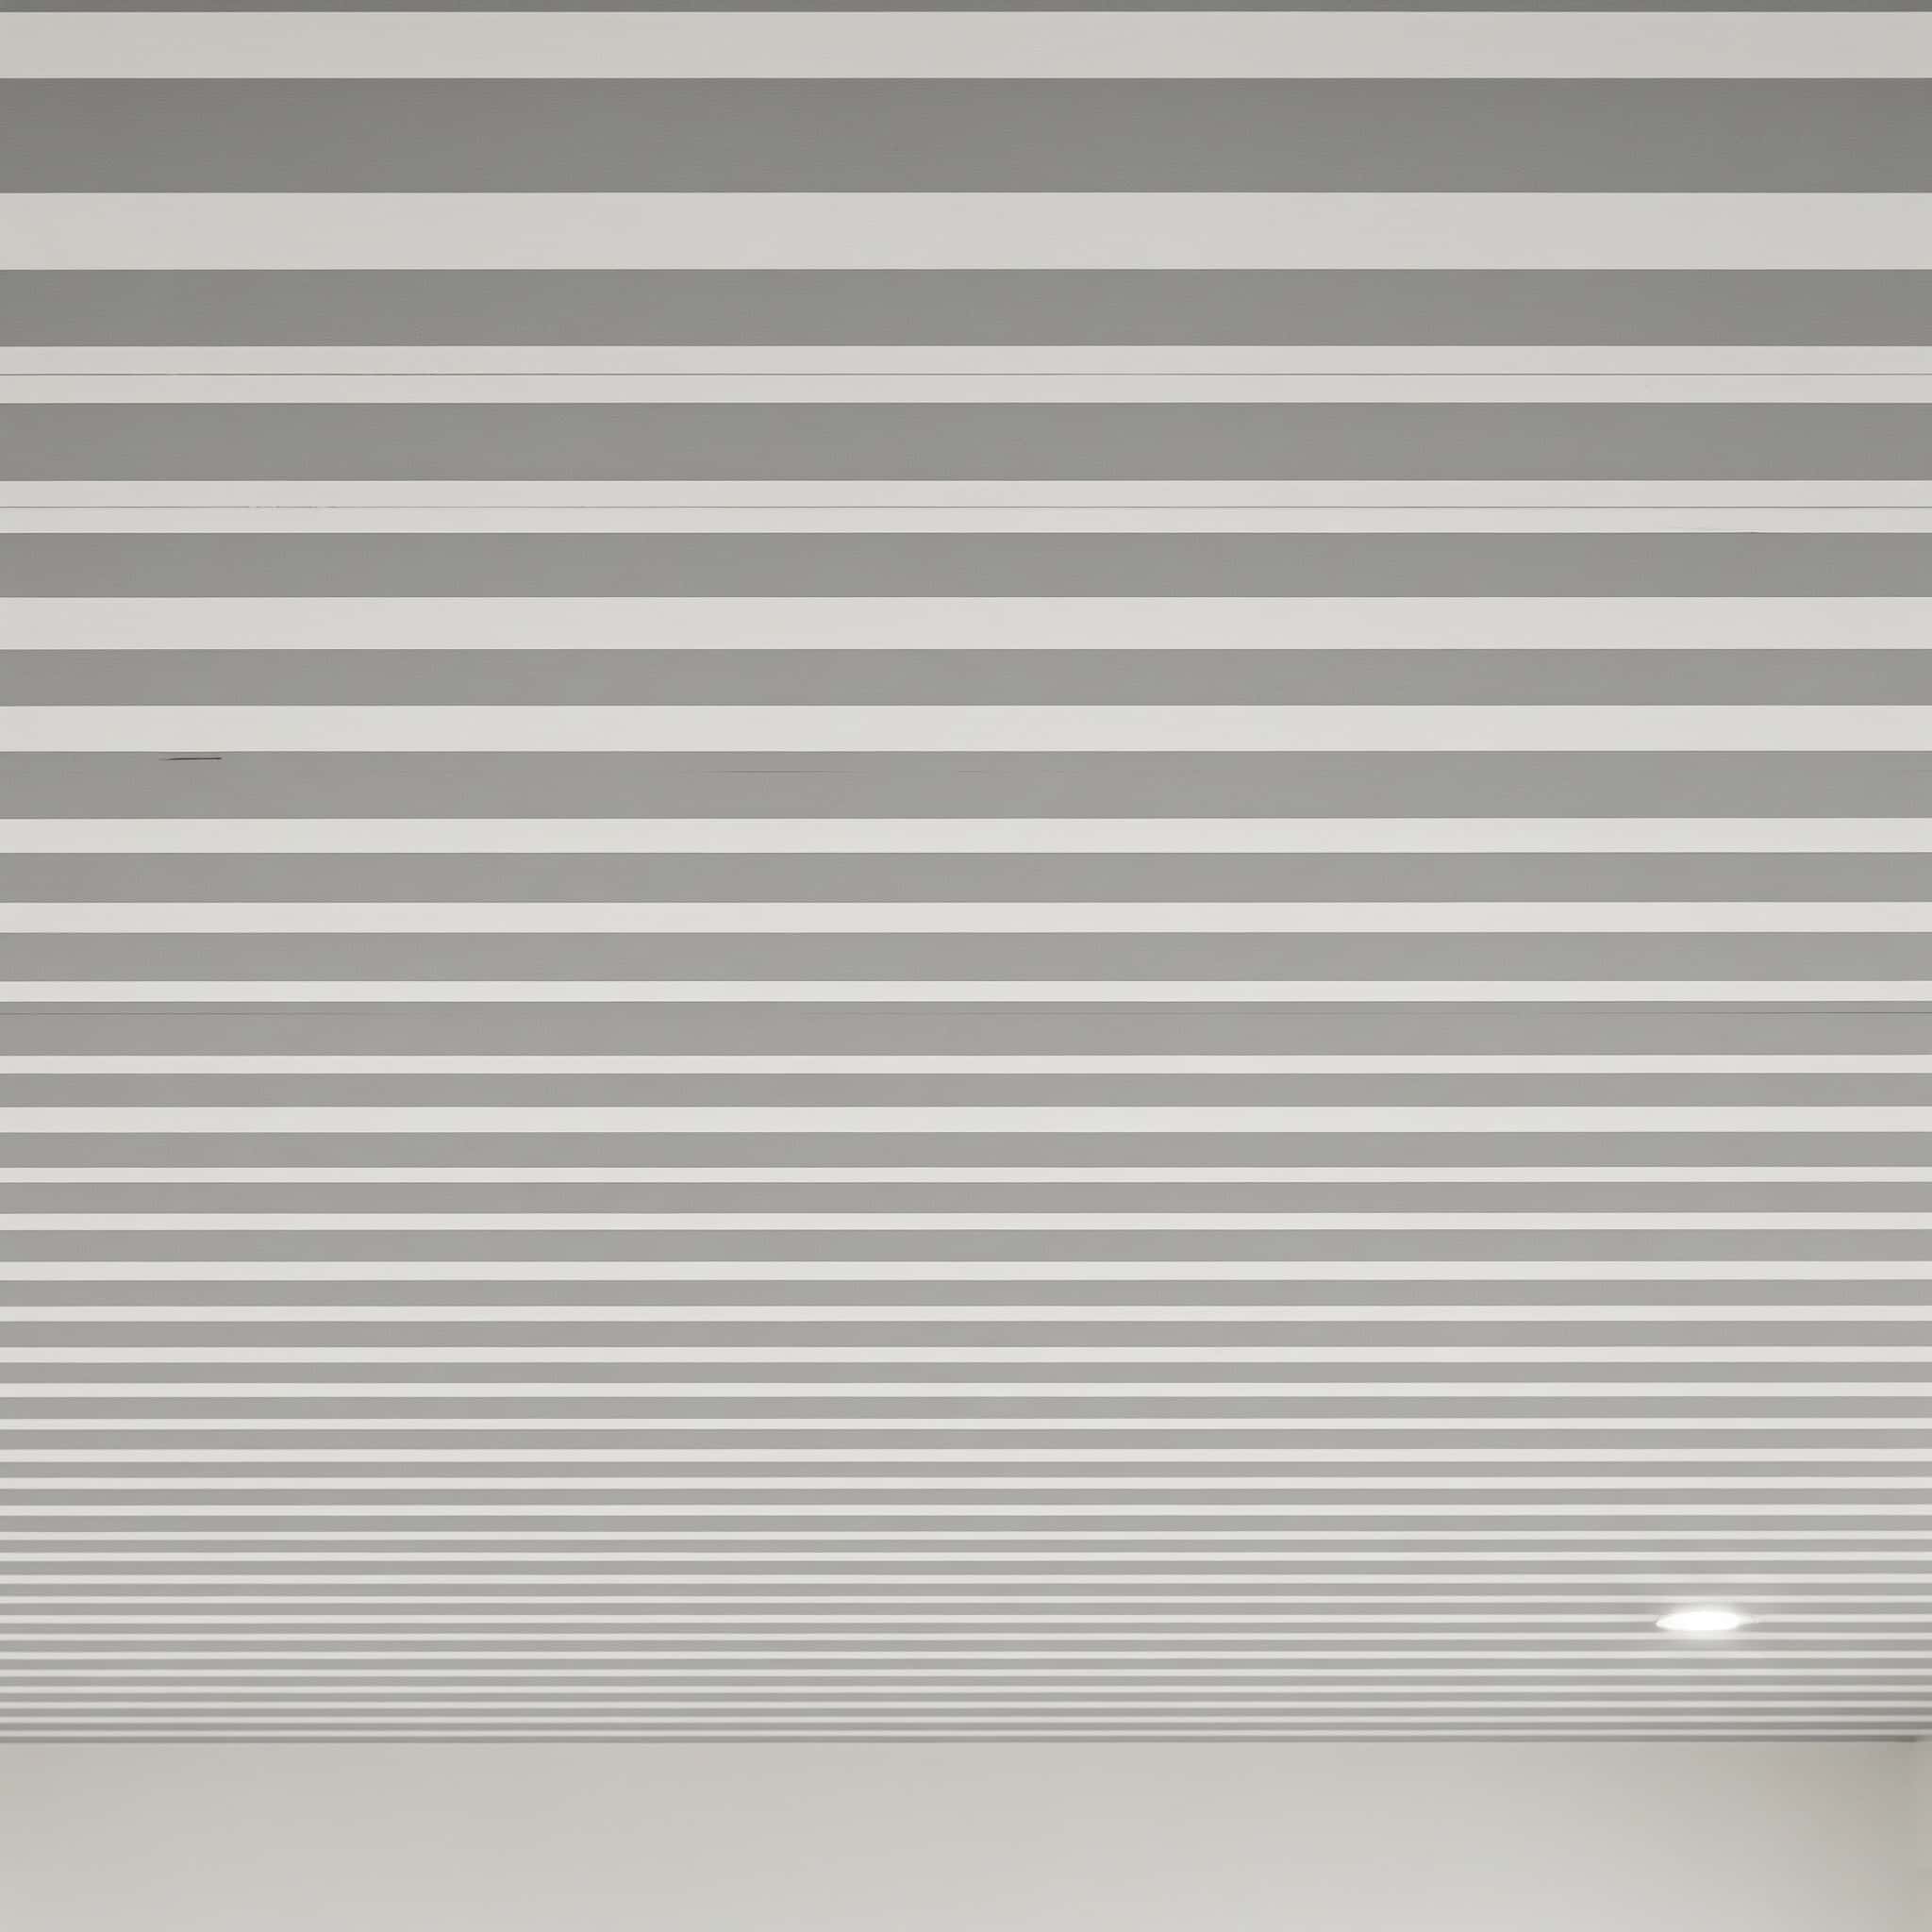
11. Vertical Striped Ceiling
I’ve used this trick in several basement renovations with amazing results. Painting alternating thin stripes in two similar tones running perpendicular to the longest wall creates an extremely affordable ($150-$400) visual trick that makes your ceiling appear higher. These basement ceiling ideas require only paint and patience but demand precision for professional results.
The stripe width matters—thinner stripes (1-2 inches) generally create a more pronounced height illusion than wider ones. Using low-contrast colors (like white and light gray) creates a subtle, sophisticated effect that doesn’t overwhelm the space.
The optimal stripe width-to-ceiling height ratio for creating maximum height illusion is approximately 1:24 (for example, 3-inch stripes on a 6-foot ceiling), with stripes oriented perpendicular to the room’s longest dimension.
Low-sheen paint finishes (eggshell or matte with 5-10% gloss) minimize light reflection differences between stripe colors, creating a more cohesive visual effect than when using contrasting sheens.
12. Ceiling-to-Wall Continuity
Using the same color and material on both ceiling and walls blurs boundaries and creates a seamless transition that makes your ceiling feel higher. The cost varies by material choice, but the visual impact is significant regardless of your budget. These low basement ceiling ideas work with most ceiling types and can be achieved with paint alone or by extending wall treatments onto the ceiling.
The continuous surface eliminates the hard line that typically defines ceiling height, creating a more expansive feeling. This is one of my favorite ceiling ideas cheap for clients who want maximum impact with minimal investment.
Color continuity between walls and ceilings eliminates the visual break that typically defines ceiling height, with studies showing perceived room height increases of 15-20% when using identical colors versus contrasting ones.
When using wallpaper or textured finishes for ceiling-to-wall continuity, corner bead elimination and rounded drywall corners (with 1/2″ to 3/4″ radius) enhance the seamless effect by removing sharp transition lines.
13. Glossy Ceiling Finish
Applying high-gloss paint or lacquer to a smooth ceiling surface creates a relatively inexpensive ($200-$500) solution that adds perceived depth through reflection. The mirror-like quality bounces light throughout your basement and creates the illusion of greater height. These basement ceiling ideas require perfectly smooth surface preparation and will highlight any imperfections.
Professional application often yields the best results, though careful DIYers can achieve success with proper preparation. I’ve seen stunning transformations using this technique in basements that previously felt cramped and confined.
High-gloss ceiling finishes with 85-90% light reflectance values (LRV) can increase perceived brightness by up to 30% compared to matte finishes, reducing the need for additional lighting fixtures in basement spaces.
Two-component polyurethane or catalyzed lacquer systems provide the most durable high-gloss ceiling finishes, with hardness ratings of 3H-4H on the pencil scale and superior resistance to yellowing compared to conventional alkyd high-gloss paints.
14. Ceiling Wallpaper with Vertical Patterns
Applying wallpaper with vertical stripes or patterns that draw the eye upward creates a moderate-cost solution ($300-$1,000) with significant visual impact. Available in removable options for easier future changes, wallpaper adds pattern and interest to your ceiling. These basement ceiling ideas can completely transform the feel of your space.
Installation can be challenging in overhead applications, and humidity may affect adhesion in some basement environments. Prepasted vinyl wallpapers offer the best moisture resistance for basement applications.
Prepasted vinyl wallpapers with acrylic adhesives maintain adhesion in relative humidity up to 65%, while clay-based adhesives begin failing at humidity levels above 55%, making adhesive selection critical for basement ceiling applications.
Geometric patterns with vertical elements creating visual movement upward (chevrons, diamonds, or elongated hexagons) produce stronger height illusions than simple stripes, with pattern repeat sizes under 24″ creating the most effective visual rhythm.
15. Tray Ceiling Illusion
Painting the center section of the ceiling in a lighter color than the perimeter creates a very affordable ($100-$300) illusion of height in the center of the room. These basement ceiling ideas require only paint but work best in rooms with adequate width.
The contrast between the darker perimeter and lighter center mimics the look of a tray ceiling without any construction. Adding a thin decorative molding between the two colors enhances the three-dimensional effect and creates a more finished appearance.
The optimal color value difference for tray ceiling illusions is 20-30 points on the LRV (Light Reflectance Value) scale, with the center area using the higher value to create perceived depth without harsh contrast.
Perimeter bands proportioned at 12-18% of the room width create the most convincing tray ceiling illusion, with narrower bands appearing as mere borders and wider bands diminishing the height-enhancing effect.
|
Visual Trick |
Cost |
Effectiveness |
Best For |
Implementation Difficulty |
|---|---|---|---|---|
|
Vertical Stripes |
$150-$400 |
High |
Narrow spaces |
Medium |
|
Ceiling-Wall Continuity |
Varies |
Very High |
All spaces |
Low |
|
Glossy Finish |
$200-$500 |
Medium-High |
Well-lit areas |
Medium-High |
|
Vertical Pattern Wallpaper |
$300-$1,000 |
High |
Medium-sized rooms |
Medium |
|
Tray Ceiling Illusion |
$100-$300 |
Medium |
Wider rooms |
Low |
Functional Solutions for Unfinished Basements
16. Wire-Hung Acoustic Ceiling
Suspending acoustic panels on a wire grid system 2-3 inches below joists offers a moderate-cost solution ($800-$2,000) that allows for minimal height loss while concealing utilities. This system provides significant sound absorption and offers access through removable panels. These unfinished basement ceilings solutions create a clean, finished appearance from below.
The slight drop creates enough space to route utilities in an organized fashion while maintaining a clean, finished appearance from below. Various panel styles and colors are available to match your design preferences, making these basement ceiling ideas versatile for different styles.
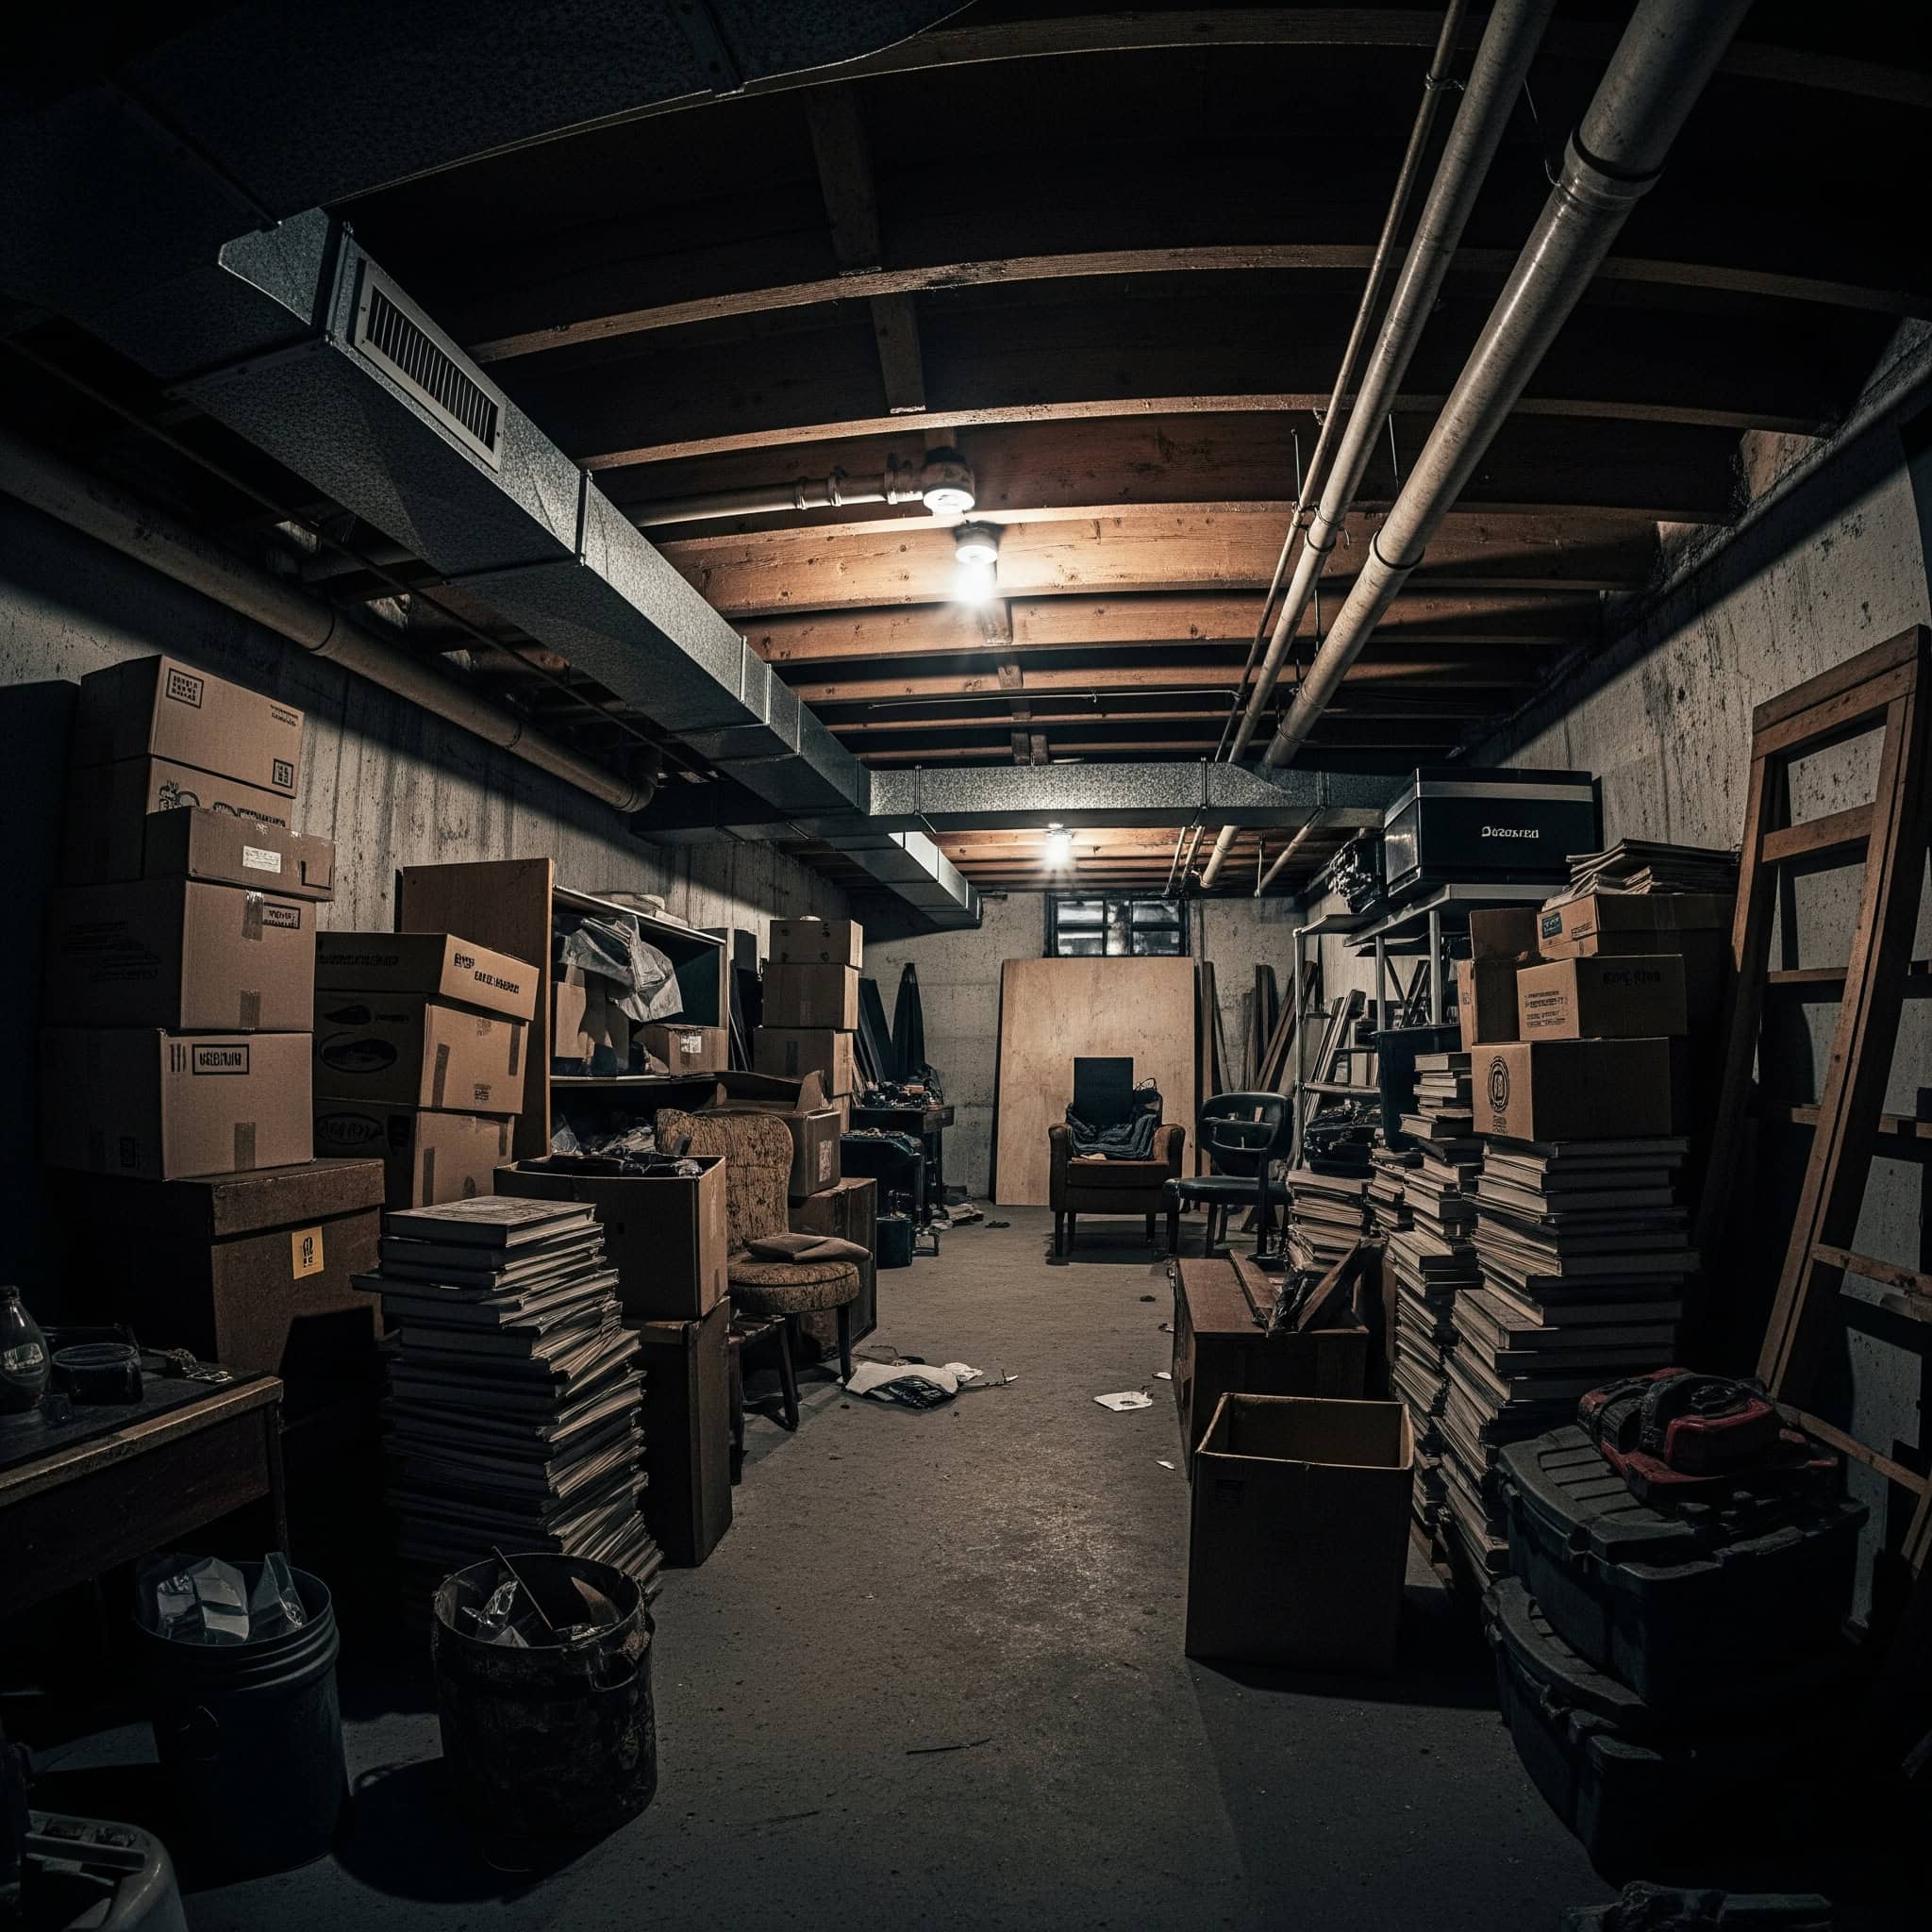
When planning your wire-hung ceiling installation, you might need to reclaim your basement space by clearing out existing clutter to give contractors room to work efficiently.
Wire-hung systems using 12-gauge galvanized steel wire can support up to 4 lbs/sq.ft. when properly tensioned to 200-250 lbs, allowing for the installation of lightweight acoustic panels without additional framing.
Acoustic ceiling panels with CAC (Ceiling Attenuation Class) ratings of 35-40 reduce sound transmission between floors by up to 50% compared to exposed joist ceilings, significantly improving basement livability in multi-story homes.
17. Basement Ceiling Grid System with Integrated Storage
Installing a modified drop ceiling with integrated storage compartments between joists combines utility concealment with practical storage at a higher cost ($1,500-$3,500). This system reduces ceiling height by 2-4 inches but adds valuable storage space in your basement. These basement ceiling ideas are perfect for homeowners who need extra storage but don’t want to sacrifice floor space.
The grid system requires careful planning and typically professional installation, but provides a unique solution to basement storage challenges while maintaining a finished appearance. I’ve installed these for clients who were amazed at how much additional storage they gained without losing floor space.
Integrated ceiling storage systems typically use aluminum T-grid frameworks with load ratings of 5-8 lbs/sq.ft. for distributed loads, with reinforced sections capable of supporting concentrated loads up to 25 lbs for storage compartments.
Storage compartment modules designed for ceiling integration use dust-resistant seals with EPDM gaskets providing protection equivalent to IP54 ratings, preventing dust infiltration while allowing easy access from below.
18. Flush-Mount Plywood Ceiling with Access Panels
Installing plywood directly to joists with strategically placed removable panels for utility access creates an economical solution ($600-$1,800) that preserves maximum height while providing a clean appearance. This cheap basement ceiling approach requires precise cutting and installation but balances finished aesthetics with practical access needs.
The removable panels can be disguised with matching paint or designed as intentional features with decorative hardware or contrasting finishes. This is one of my favorite unfinished basement ceilings solutions because it offers the best of both worlds – a finished look with practical access.
A Boston family renovating their 6’10” basement ceiling installed 3/8″ marine-grade plywood panels directly to the joists, preserving maximum headroom while creating a clean surface. They strategically placed six 16″x16″ access panels throughout the ceiling, disguising them with the same paint color as the surrounding ceiling but adding brushed nickel hardware that matched other fixtures in the room. The panels were positioned to provide access to key plumbing valves, electrical junction boxes, and HVAC dampers, eliminating concerns about future maintenance issues. The entire ceiling cost $1,400 and maintained nearly the full original ceiling height while providing a finished appearance and practical utility access.
Flush-mounted access panels with concealed hinges and magnetic pressure latches provide nearly invisible integration when closed, with reveal gaps of less than 1/8″ achievable using precision-cut panels and proper installation techniques.
Marine-grade plywood (BS1088) with phenolic glue systems offers superior moisture resistance for basement ceilings, maintaining dimensional stability with moisture content fluctuations of ±3% without warping or delamination.
19. Ceiling-Mounted Storage Solutions
Installing sliding storage racks that mount directly to joists in less frequently used areas turns your ceiling limitations into functional storage at varying costs ($300-$1,200 depending on system). These basement ceiling ideas require careful planning to avoid head clearance issues but maximize your basement’s cubic footage.
The systems typically use overhead tracks with sliding bins or platforms that can be pulled down when needed and pushed flush to the ceiling when not in use. I’ve installed these for clients who were amazed at how much storage they gained without losing valuable floor space.
Ceiling-mounted storage systems using ball-bearing slide mechanisms with load ratings of 75-100 lbs per linear foot provide smooth operation even when fully loaded, with soft-close features preventing impact damage during retraction.
Overhead storage platforms should maintain minimum clearance of 78″ from the floor when in the stored position to prevent head injuries, with safety stops preventing accidental deployment and locking mechanisms securing loads when extended.
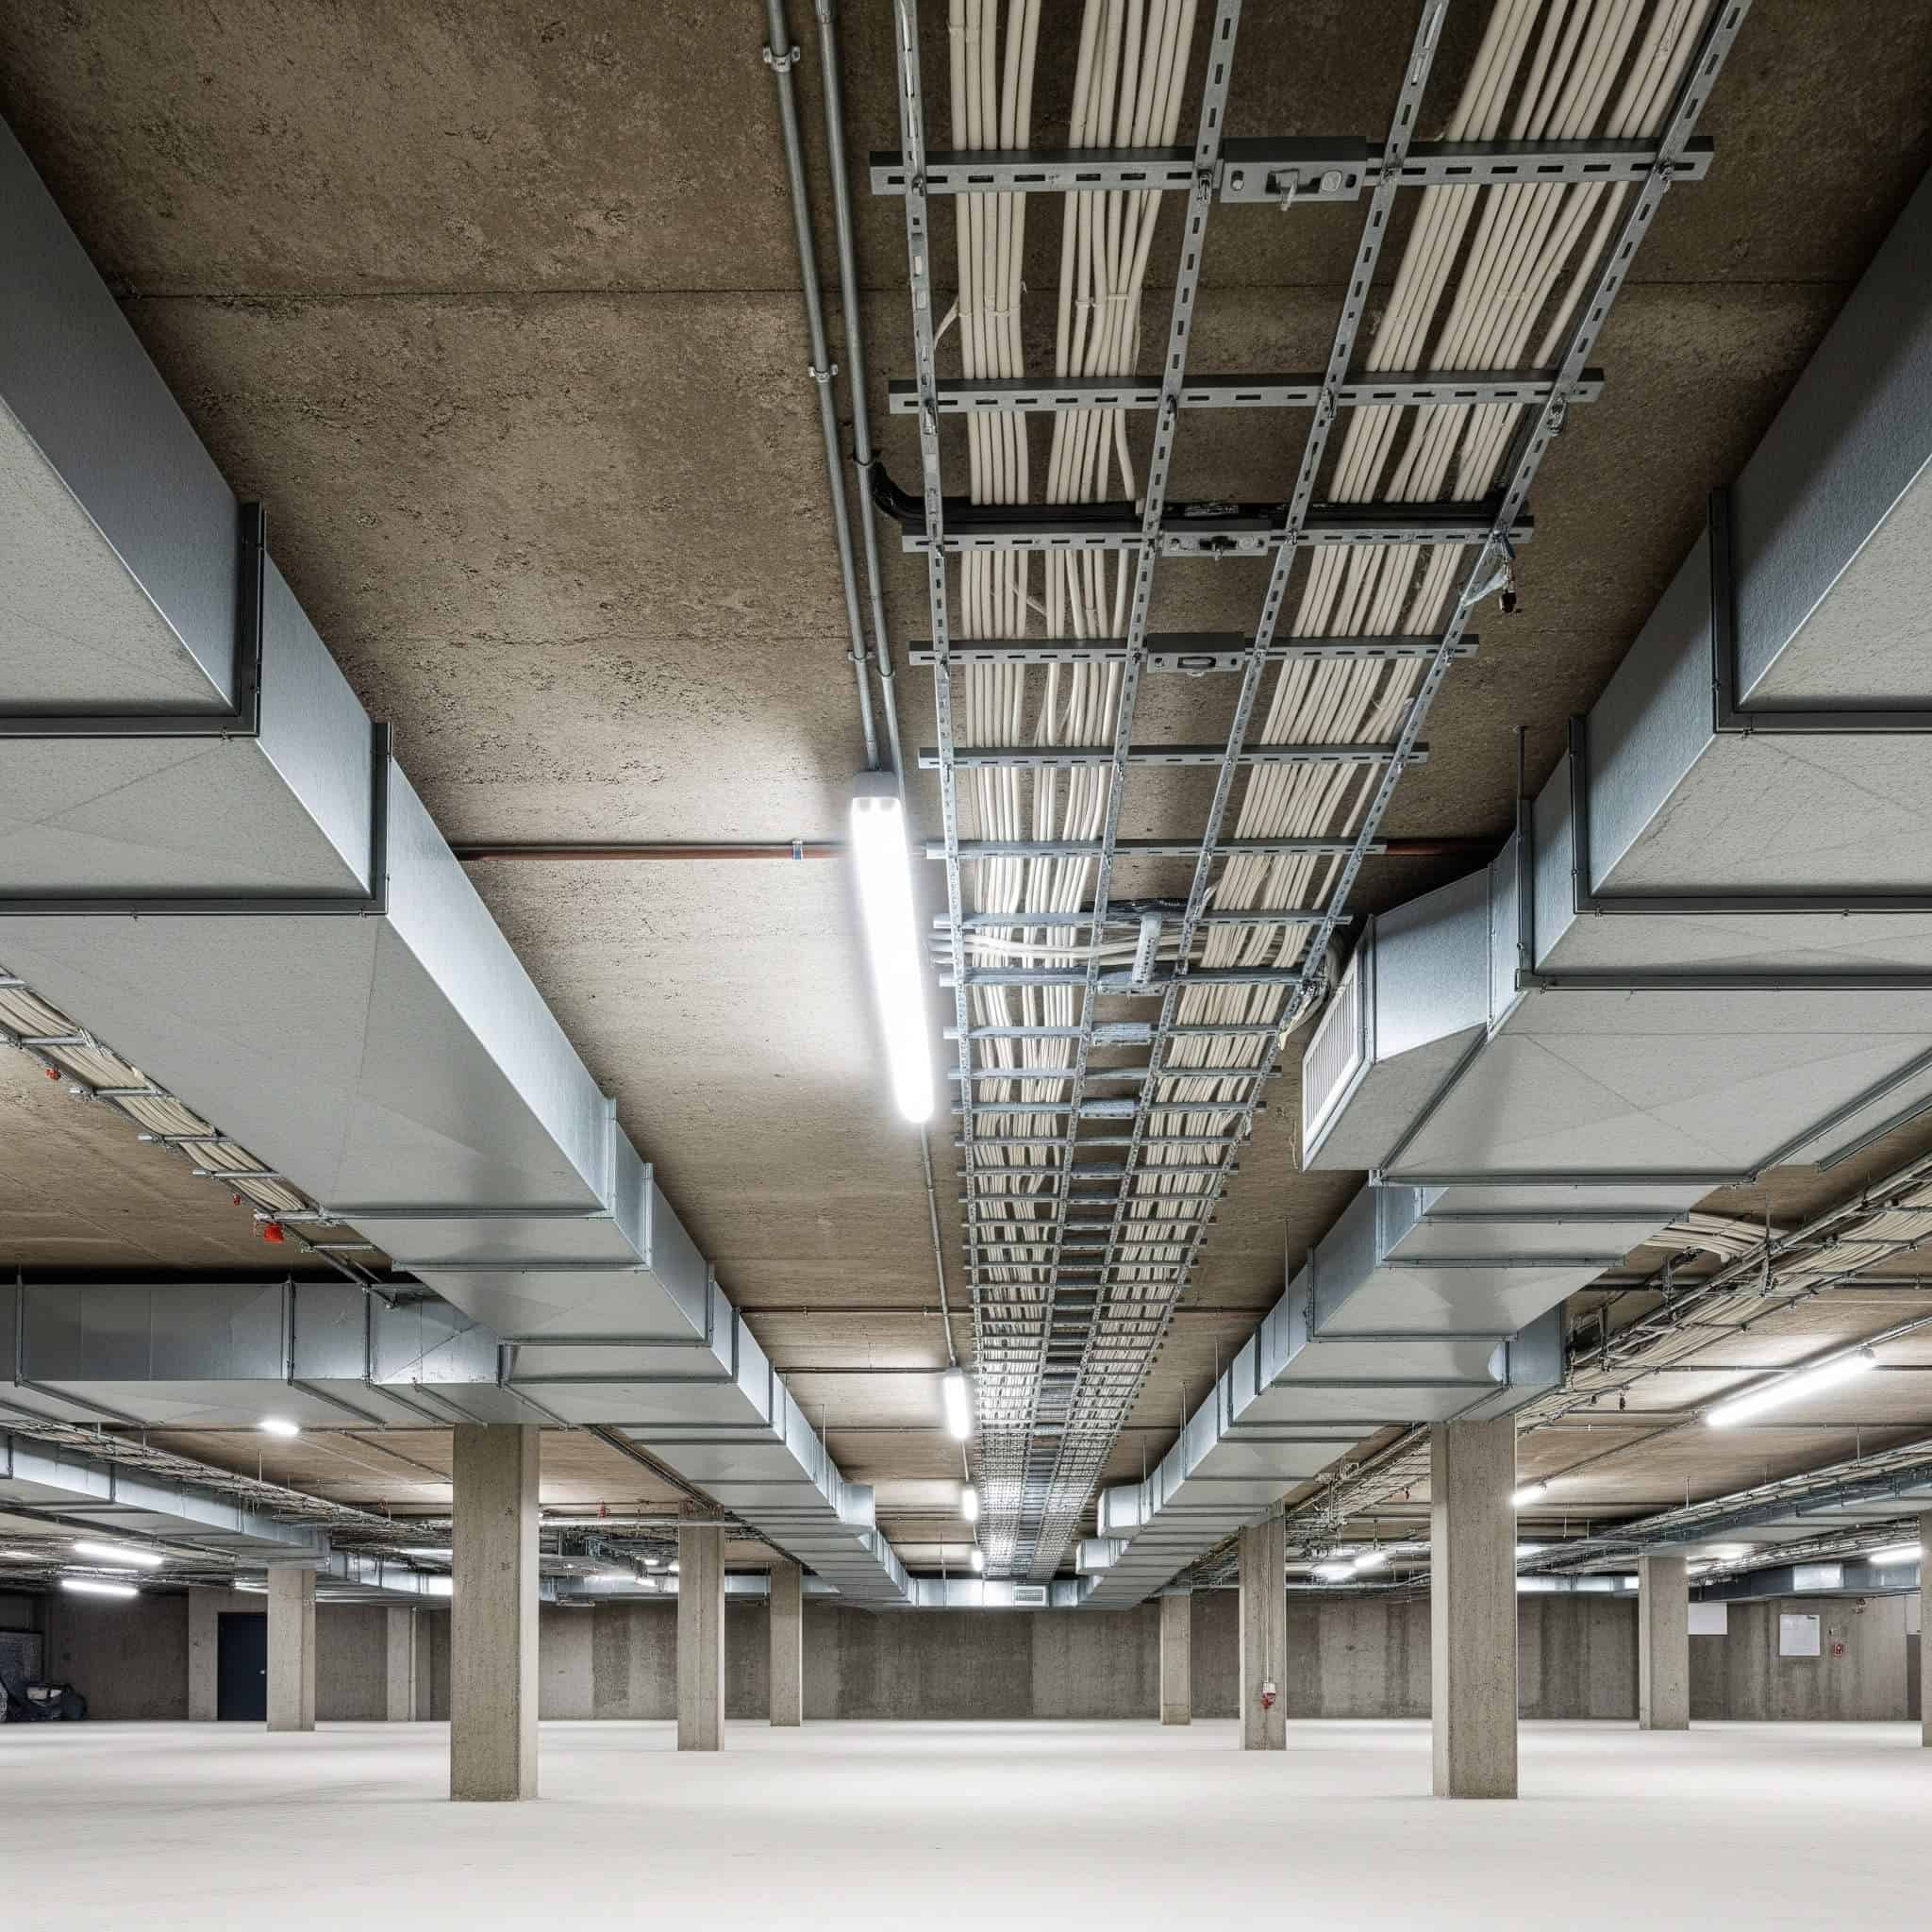
20. Conduit and Pipe Organization System
Rerouting and organizing exposed utilities with color-coded conduit covers and thoughtful arrangement creates a budget-friendly solution ($200-$800) that maintains full ceiling height while improving appearance. These basement ceiling ideas require careful planning and potentially professional help with utilities but transform necessary infrastructure into organized design elements.
Strategic use of color coding makes future maintenance easier while creating a coordinated appearance. I’ve helped clients transform chaotic exposed utilities into organized, intentional design features that actually enhance their basement’s appearance.
Color-coded utility identification systems following ANSI/ASME A13.1 standards (yellow for gas, green for water, blue for compressed air, etc.) improve safety and maintenance efficiency while creating visual organization.
Conduit routing optimization using 3D modeling software can reduce crossing points by up to 40% compared to standard installation practices, minimizing visual clutter while maintaining code-compliant separations between different utility types.
Premium Low-Profile Ceiling Options
21. Coffered Ceiling with Shallow Profiles
Installing a modified coffered ceiling using thin (1-2 inch) moldings to create geometric patterns adds architectural interest without significant height reduction at a higher cost ($2,000-$5,000). These basement ceiling ideas require professional installation for best results but create a premium appearance that can actually make your ceiling appear higher through visual interest.
The grid pattern breaks up the ceiling plane while adding sophistication and character to your basement. I’ve installed these for clients who wanted a high-end look without sacrificing precious ceiling height.
Lightweight polyurethane moldings with densities of 18-22 lbs/cu.ft. reduce the load on ceiling joists by up to 70% compared to traditional wood coffers while providing sharper detail definition and resistance to moisture damage.
Shallow coffered designs using 1:8 depth-to-width ratios (for example, 1″ deep coffers with 8″ wide grid patterns) create architectural interest while minimizing height loss, compared to traditional coffers with 1:3 or 1:4 ratios.
22. Stretch Ceiling System
Installing a professional PVC stretch ceiling system that’s tensioned just 1-2 inches below your existing structure creates a premium option ($2,500-$6,000) with a perfectly smooth surface. Available in hundreds of finishes including translucent options, these basement ceiling ideas offer minimal height loss and can be opened for utility access.
Professional installation is required, but the result is a flawless ceiling surface that can include integrated lighting effects and custom printing options. I’ve seen these transform basements into spaces that look nothing like traditional basements.
Professional stretch ceiling membranes maintain tension of approximately 5-7 N/cm² across spans up to 16 feet without visible sagging, with specialized harpoon-edge technology creating mechanical bonds to perimeter tracks capable of withstanding 30-45 kg of pull force per linear meter.
Translucent stretch ceiling membranes with light transmission values of 50-75% allow for backlit installations, diffusing LED or fluorescent sources to create even illumination without visible fixtures or hot spots.
23. Tongue and Groove Wood Planks
Installing thin (1/2-inch) wood planks directly to joists creates a warm, cabin-like feel at a mid to high-range cost ($1,500-$4,000). This approach adds minimal height reduction while bringing natural warmth and texture to your basement ceiling. The installation requires precision and proper sealing in humid environments but results in a timeless, quality appearance.
Various wood species and finishes allow for customization to match your design style. I’ve installed these in numerous basements, and clients are always amazed at how the natural wood transforms the space.
After completing your wood plank ceiling installation, you’ll likely have leftover materials that need proper disposal. Consider professional debris removal services to efficiently clear away construction waste and keep your renovation on track.
Kiln-dried tongue and groove planks with moisture content of 6-8% minimize expansion and contraction in basement environments, with quarter-sawn or rift-sawn boards offering up to 60% greater dimensional stability than plain-sawn alternatives.
Pre-finished tongue and groove systems with UV-cured urethane coatings provide 5-7 times greater moisture resistance than site-finished options, with aluminum oxide additives increasing wear resistance for long-term durability in basement applications.
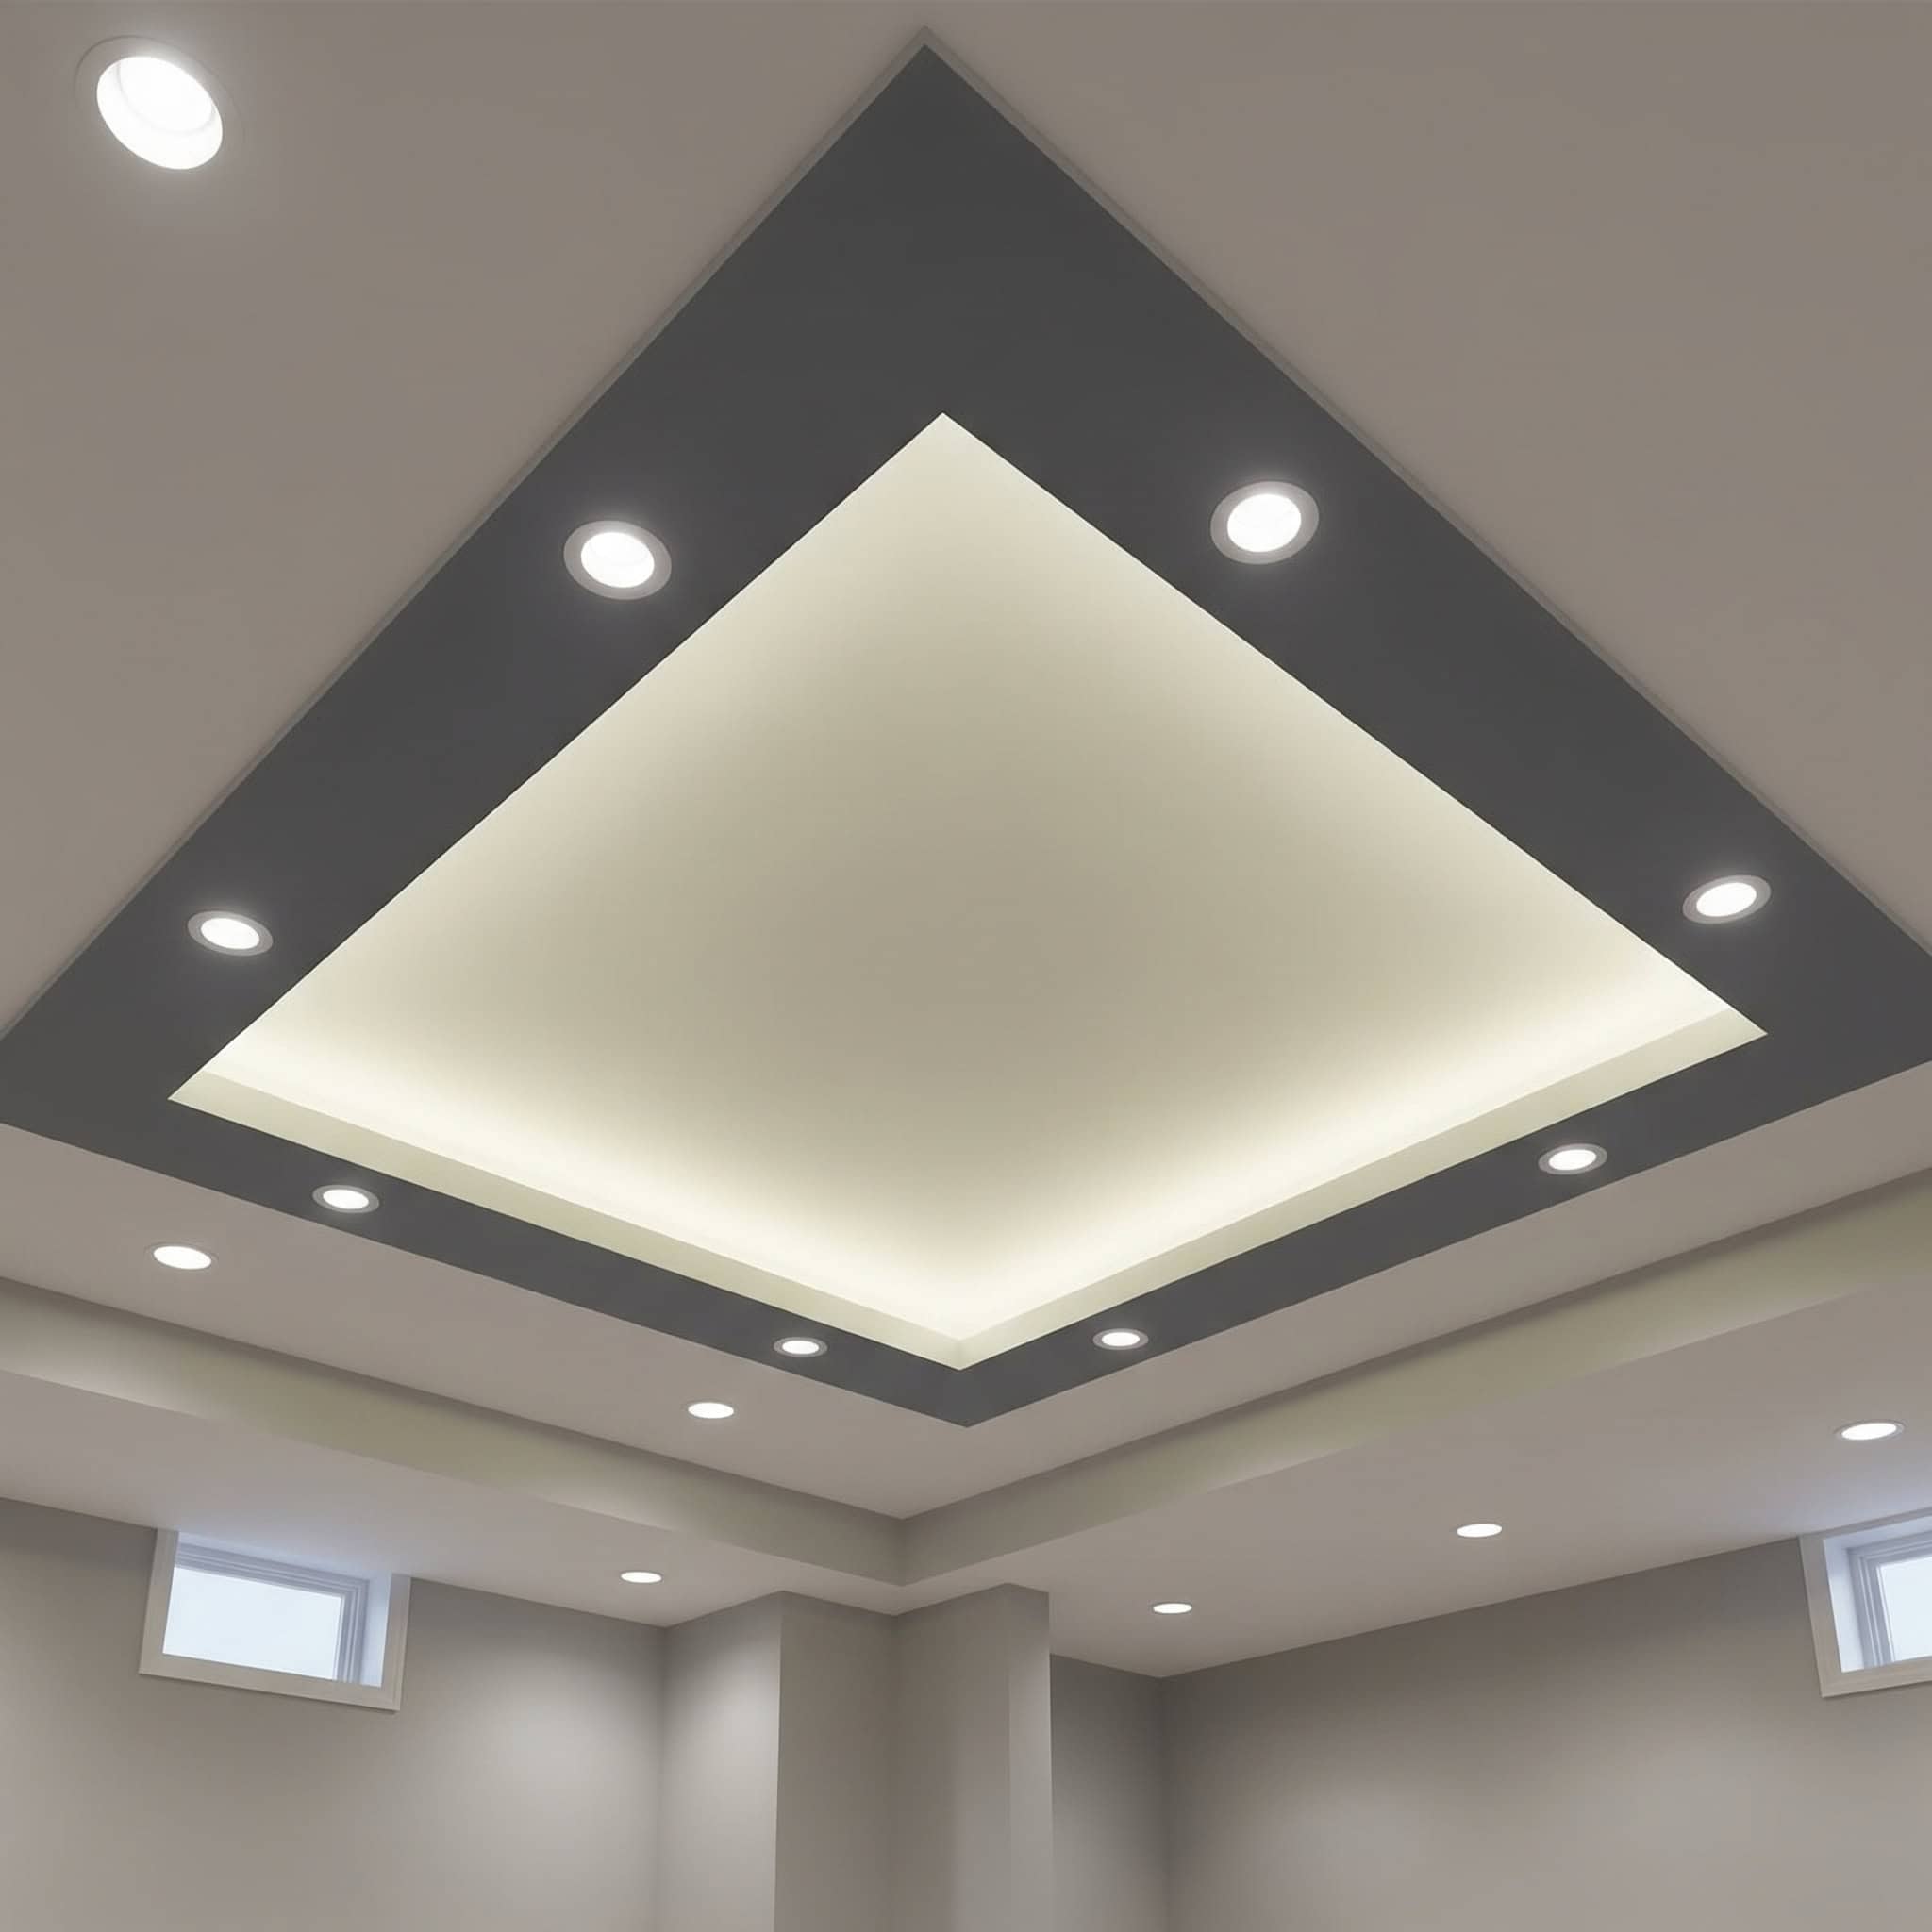
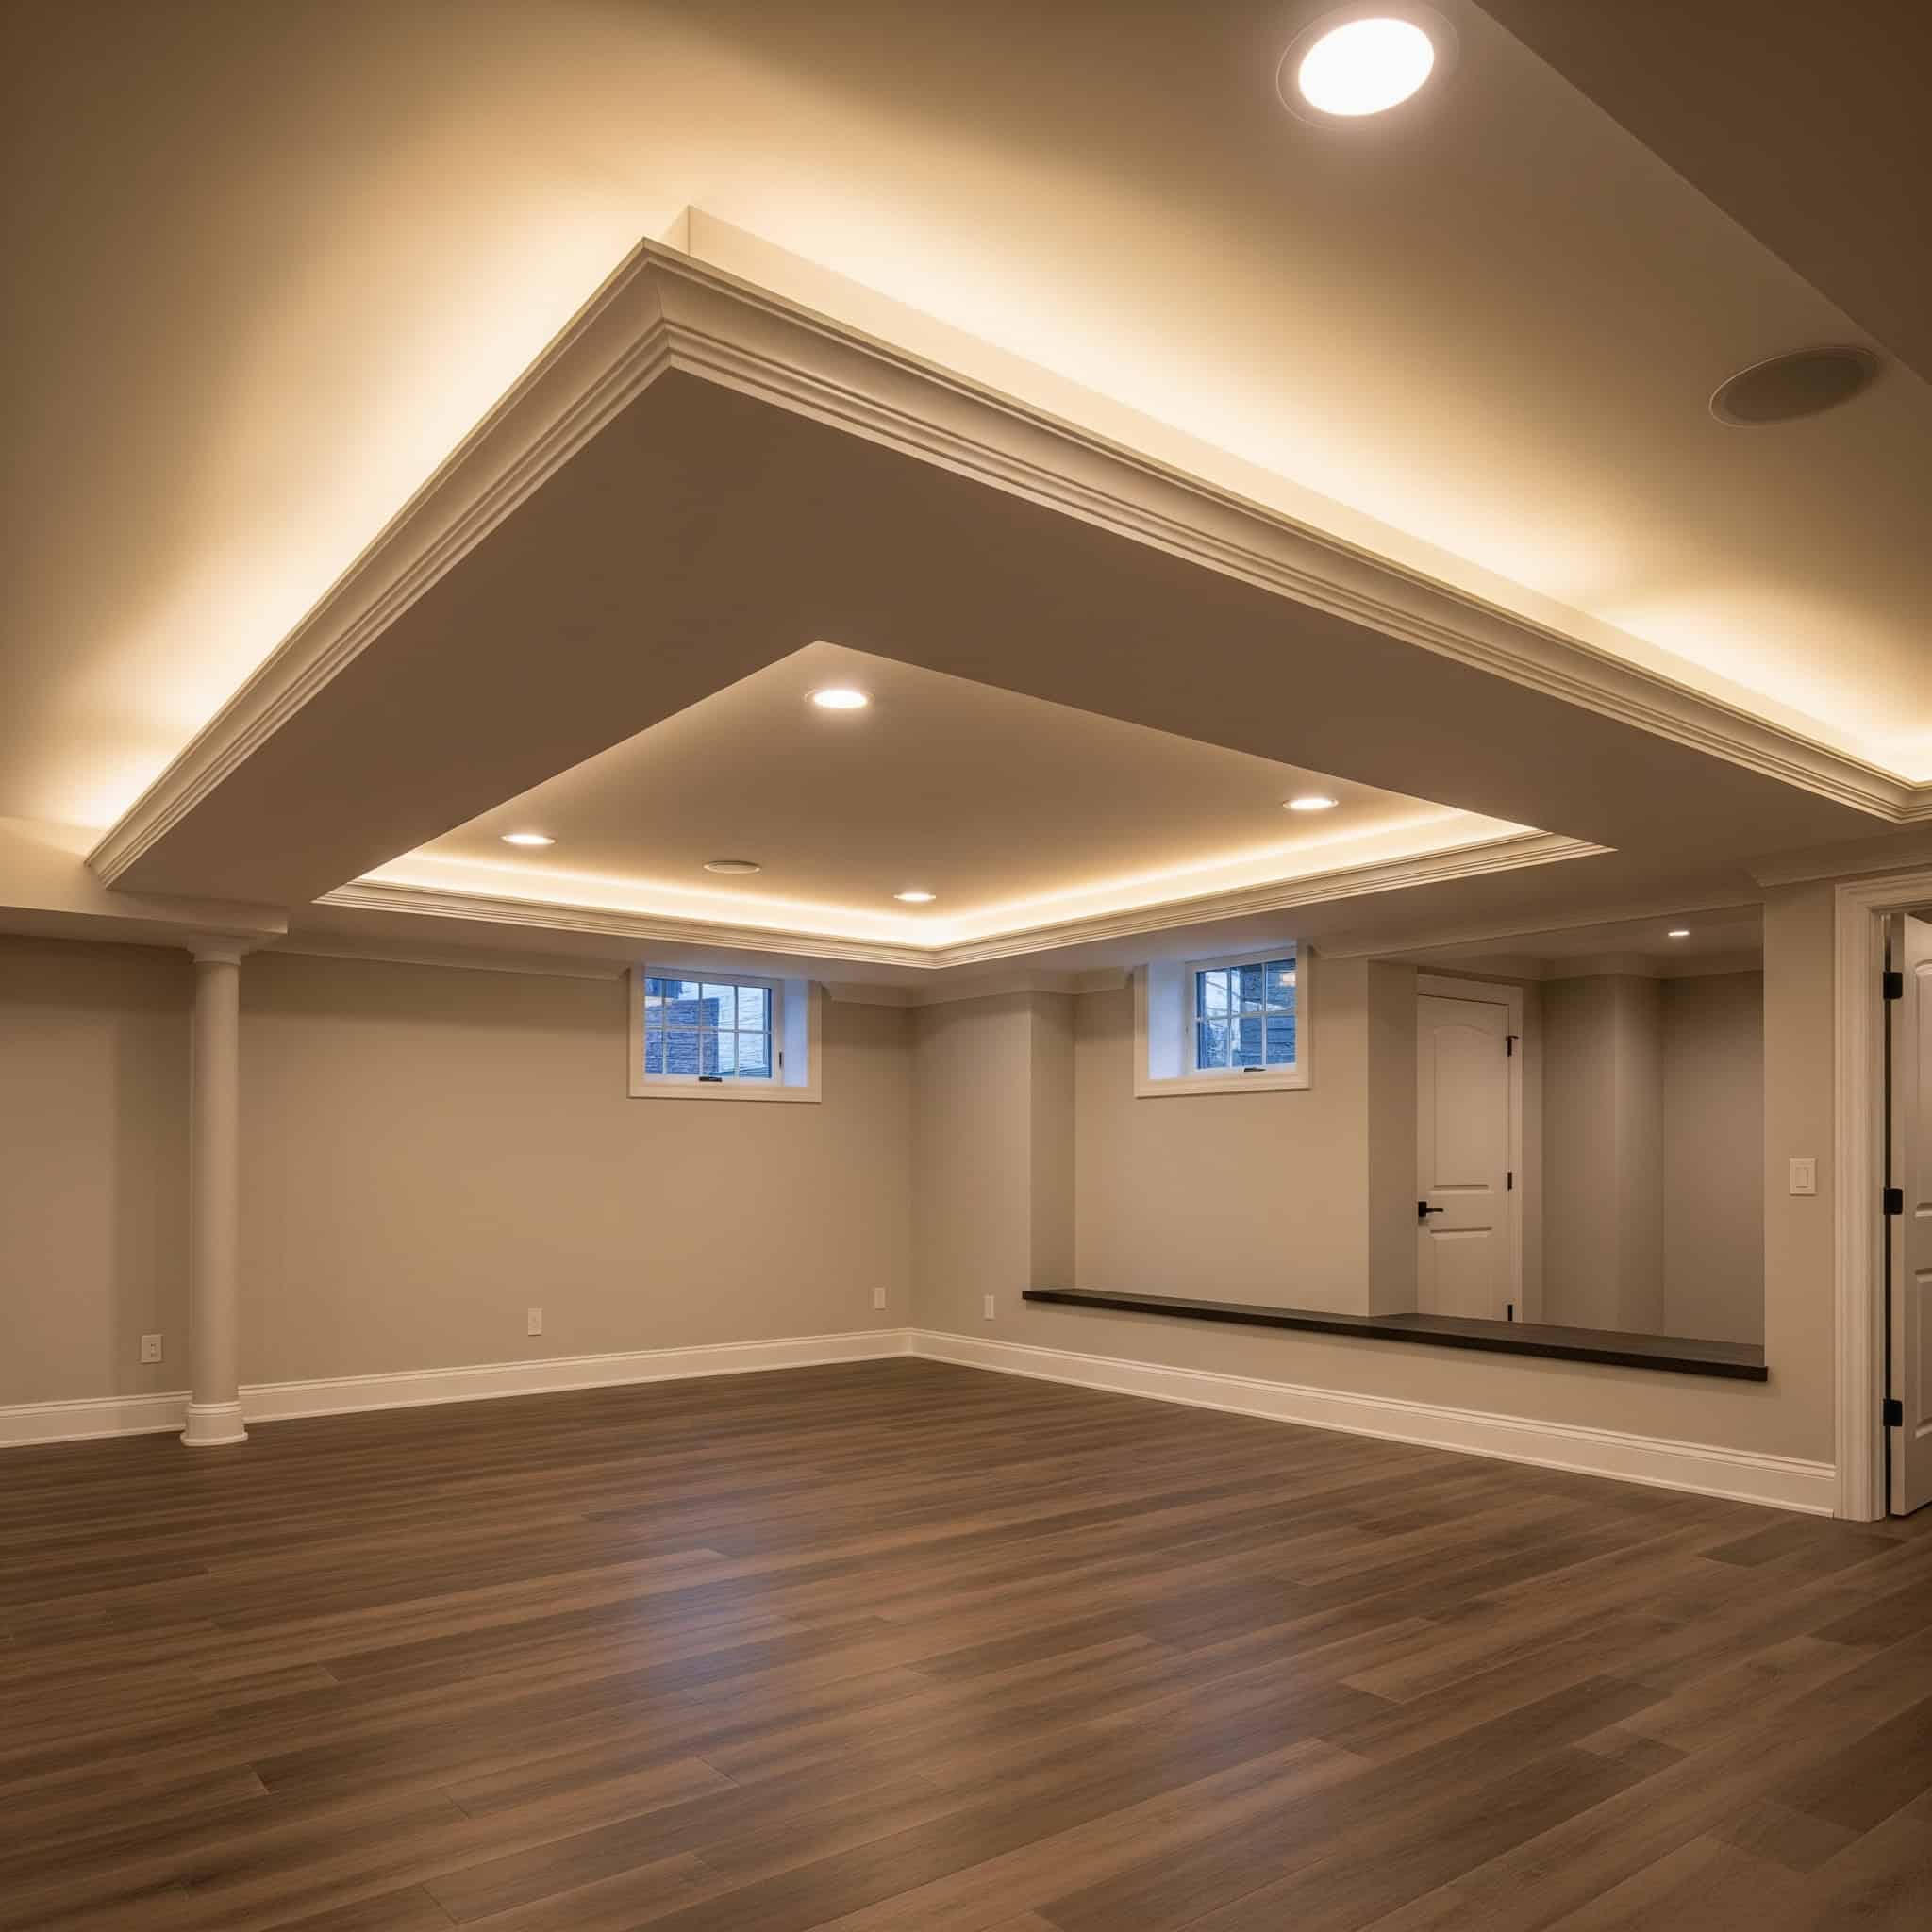
24. Integrated LED Cove Lighting System
Installing a perimeter drywall soffit with integrated LED lighting that washes light across the ceiling center creates a higher-investment solution ($2,000-$5,000) that uses lighting to create the illusion of height. These basement ceiling ideas reduce ceiling height at the perimeter but create sophisticated ambiance through indirect lighting.
Professional electrical work is required, but the dramatic lighting effect can transform your basement’s appearance and feel. I’ve installed these systems for clients who were amazed at how the lighting completely changed their perception of the space.
Cove lighting systems using LED strips with beam angles of 120-140 degrees and color temperatures of 2700-3000K create warm, even wall-washing effects that enhance perceived ceiling height by up to 30% compared to direct downlighting.
Dimmable LED drivers with pulse-width modulation (PWM) at frequencies above 25kHz eliminate visible flicker while providing smooth dimming to 1% of full output, creating flexible ambiance options without the buzzing common in traditional dimming systems.
25. Micro-Perforated Acoustic Panels
Installing sleek, modern acoustic panels with micro-perforations combines aesthetic appeal with acoustic performance at a premium price point ($2,500-$6,000). These panels add minimal thickness (1/2 to 1 inch) while significantly improving sound quality in your basement. Professional installation is recommended for seamless results, but the combination of visual minimalism and acoustic performance makes this an excellent option for media rooms or music spaces with low ceilings.
Micro-perforated acoustic panels with perforation diameters of 0.5-1.0mm and open area percentages of 0.5-2% achieve NRC ratings of 0.85-0.95 across frequencies of 250-4000Hz, providing superior sound absorption with minimal visual texture.
Composite micro-perforated panels using aluminum facing (0.5-0.7mm thickness) bonded to mineral wool cores (25-40kg/m³ density) provide optimal combinations of durability, fire resistance, and acoustic performance for basement ceiling applications.
How Jiffy Junk Can Help With Your Basement Renovation
Before implementing any low basement ceiling solution, you’ll need to clear out existing materials and debris from your space. I’ve worked with Jiffy Junk on numerous projects, and they provide comprehensive removal services that make your renovation significantly easier by handling all the heavy lifting of old ceiling materials, construction debris, and unwanted items.
Their White Glove Treatment leaves your space “broom clean” and ready for installation. They prioritize eco-friendly disposal, ensuring recyclable materials are properly processed rather than sent to landfills. Their commitment to donating and recycling aligns perfectly with sustainable renovation practices.
Before installing your new ceiling, you might need to remove outdated materials. Jiffy Junk offers specialized demolition waste removal services that can safely and efficiently clear away old ceiling materials.
Professional junk removal services can reduce basement preparation time by 60-70% compared to DIY debris removal, with trained teams efficiently dismantling and removing old ceiling materials without damaging surrounding structures.
Specialized waste sorting processes separate recyclable materials (metals, clean wood, cardboard) from construction debris, diverting up to 80% of basement renovation waste from landfills when handled by professional services versus approximately 30% with typical DIY disposal methods.
Final Thoughts
When selecting the ideal ceiling treatment for your low basement, I always recommend balancing practical considerations like height preservation, budget, and access requirements with your aesthetic preferences. For extremely limited budgets, options like painted exposed ceilings or strategic visual tricks offer significant impact with minimal investment.
Those seeking more finished appearances might consider beadboard, plywood panels, or drywall solutions that minimize height loss while creating a polished look. Remember that lighting plays a crucial role—recessed fixtures, wall sconces, or strategic LED systems can illuminate your space without further reducing headroom. Don’t overlook the power of color and pattern to create visual height when physical height is limited.
The perceived height of basement ceilings can be increased by up to 25% through the strategic combination of appropriate ceiling treatments, lighting design, and color selection, even when physical ceiling height remains unchanged.
Comprehensive basement ceiling planning should include future access considerations, with utility mapping documentation recording the location of junction boxes, valves, and critical connection points before concealment, reducing potential damage during future maintenance by up to 70%.
Ready to start your basement ceiling transformation? Contact Jiffy Junk today for a free estimate on clearing out your space and preparing it for your new ceiling installation. Our professional team will quickly remove old materials so you can focus on implementing your favorite low ceiling ideas for a transformed basement space.