25 Innovative Basement Gym Ideas for 2025: Transform Your Unused Space
Home fitness continues to grow, with 72% of Americans preferring to work out at home rather than at commercial gyms according to a 2024 survey. I started my fitness journey in a cluttered basement corner with just a yoga mat and resistance bands. Five years later, that same space has transformed into my personal fitness sanctuary. Whether you’re just starting out or looking to upgrade your existing setup, this comprehensive guide will walk you through everything you need to know about creating the perfect basement gym.
Table of Contents
-
What to Consider When Creating a Basement Gym
-
Unfinished Basement Gym Solutions
-
Finished Basement Gym Designs
-
Space-Efficient Solutions for Small Basements
-
Budget-Friendly Basement Workout Rooms
-
Specialized Basement Exercise Rooms
-
How Jiffy Junk Can Help Prepare Your Space
-
Final Thoughts
What to Consider When Creating a Basement Gym
Before jumping into specific basement gym ideas, you need to evaluate several key factors that will influence your design decisions. These considerations range from practical elements like available space and moisture control to comfort factors such as lighting and ventilation. Taking time to assess these aspects will help you create a functional, safe, and motivating basement workout room that meets your specific needs.
You’ll want to measure your basement dimensions carefully, accounting for ceiling height (minimum 7 feet for most activities), support columns, and awkward corners to determine equipment placement options. This initial planning phase is crucial – I’ve seen too many people rush into buying equipment only to discover it won’t fit properly in their space.
Evaluating moisture levels in your basement is equally important, as humidity and potential water issues can damage equipment and create unhealthy workout conditions. I learned this lesson the hard way when my first set of dumbbells developed rust spots after just three months in my improperly sealed basement.
|
Basement Gym Consideration |
Why It Matters |
Recommended Solution |
|---|---|---|
|
Ceiling Height |
Determines exercise options and equipment compatibility |
Minimum 7′ for most activities; 8’+ ideal for overhead movements |
|
Moisture Level |
Affects equipment longevity and air quality |
Install dehumidifier; maintain 30-50% humidity |
|
Flooring Type |
Protects equipment, reduces noise, provides comfort |
Rubber tiles (3/8″-3/4″ thick) based on activity type |
|
Ventilation |
Prevents overheating and improves air quality |
6-8 air changes per hour; fans or dedicated HVAC |
|
Lighting |
Impacts motivation and exercise safety |
300-500 lux minimum; layered lighting approach |
|
Electrical Capacity |
Powers equipment and climate control |
Dedicated 20-amp circuits for major equipment |
|
Sound Control |
Prevents noise disturbance to household |
Mass-loaded vinyl under flooring; acoustic panels |
1. Space Assessment and Planning
The first step in creating your basement gym is conducting a thorough space assessment. You’ll need to measure not just the floor dimensions but also ceiling height, which is particularly important for exercises requiring overhead movements. Note any obstacles like support columns, ductwork, or utilities that might limit your layout options. Creating a scaled floor plan can help you visualize different equipment arrangements before making any purchases.
Creating zones based on workout types (strength, cardio, recovery) will maximize efficiency in limited spaces. I’ve found that dividing my basement gym into distinct areas has dramatically improved my workout flow and prevented equipment crowding.
Allow for adequate clearance around equipment (typically 2-3 feet) for safe movement during exercises. This spacing isn’t just about comfort—it’s about safety. I’ve banged my elbows on walls and nearly tripped over nearby equipment when I initially set up my space too tightly.
When planning my basement gym, I discovered a load-bearing column in the center of the space that initially seemed like an obstacle. Rather than working around it, I incorporated it into my design by mounting a cable pulley system to the column. This turned the structural element into a functional part of my gym while maximizing the surrounding space for other equipment. The column now serves as the centerpiece of my functional training zone, demonstrating how structural limitations can become design opportunities with creative thinking.
2. Moisture and Environmental Controls
Basements are naturally prone to higher humidity and potential water issues, which can quickly damage fitness equipment. Before installing your basement gym, address any existing moisture problems through proper waterproofing. Consider installing a dehumidifier to maintain optimal humidity levels (between 30-50%). For finished basement gyms, moisture-resistant materials for walls and flooring provide additional protection for your investment.
Installing a hygrometer to monitor humidity levels is essential, with readings above 60% indicating potential problems for equipment longevity. I check mine weekly and have programmed my dehumidifier to maintain ideal conditions automatically.
Consider applying waterproof sealant to concrete floors and walls in unfinished basements before adding gym equipment. This relatively inexpensive step can save thousands in equipment replacement costs down the road. I applied two coats of concrete sealer before installing my rubber flooring, and it’s made a significant difference in maintaining a dry, healthy environment.
3. Flooring Solutions
Proper flooring serves multiple purposes in a basement workout room: it protects your equipment, reduces noise transmission, provides comfort during exercises, and safeguards the underlying structure. Options range from interlocking rubber tiles and rolled rubber flooring to specialized lifting platforms for heavy weight training. The right choice depends on your primary activities, budget, and whether your basement is finished or unfinished.
For weight training areas, minimum recommended flooring thickness is 3/8″ for light dumbbells and 3/4″ for heavy barbell work. I initially tried to save money with thinner mats and quickly regretted it when I noticed small cracks forming in my concrete after dropping weights.
Consider using different flooring types in different zones – thicker, more absorbent flooring for weight training and thinner, firmer surfaces for cardio equipment. This targeted approach can save money while optimizing each area for its specific use. My cardio area uses 1/4″ rubber while my lifting zone has 3/4″ tiles, providing appropriate protection where it’s most needed.
4. Ventilation and Air Quality
Proper airflow is essential in basement gyms, which often lack natural ventilation. Poor air circulation can make workouts uncomfortable and potentially unhealthy, especially during intense sessions. Solutions range from simple portable fans to window exhaust fans or even mini-split HVAC systems for comprehensive climate control. Don’t overlook air purification, particularly in basements where dust and mold spores may be present.
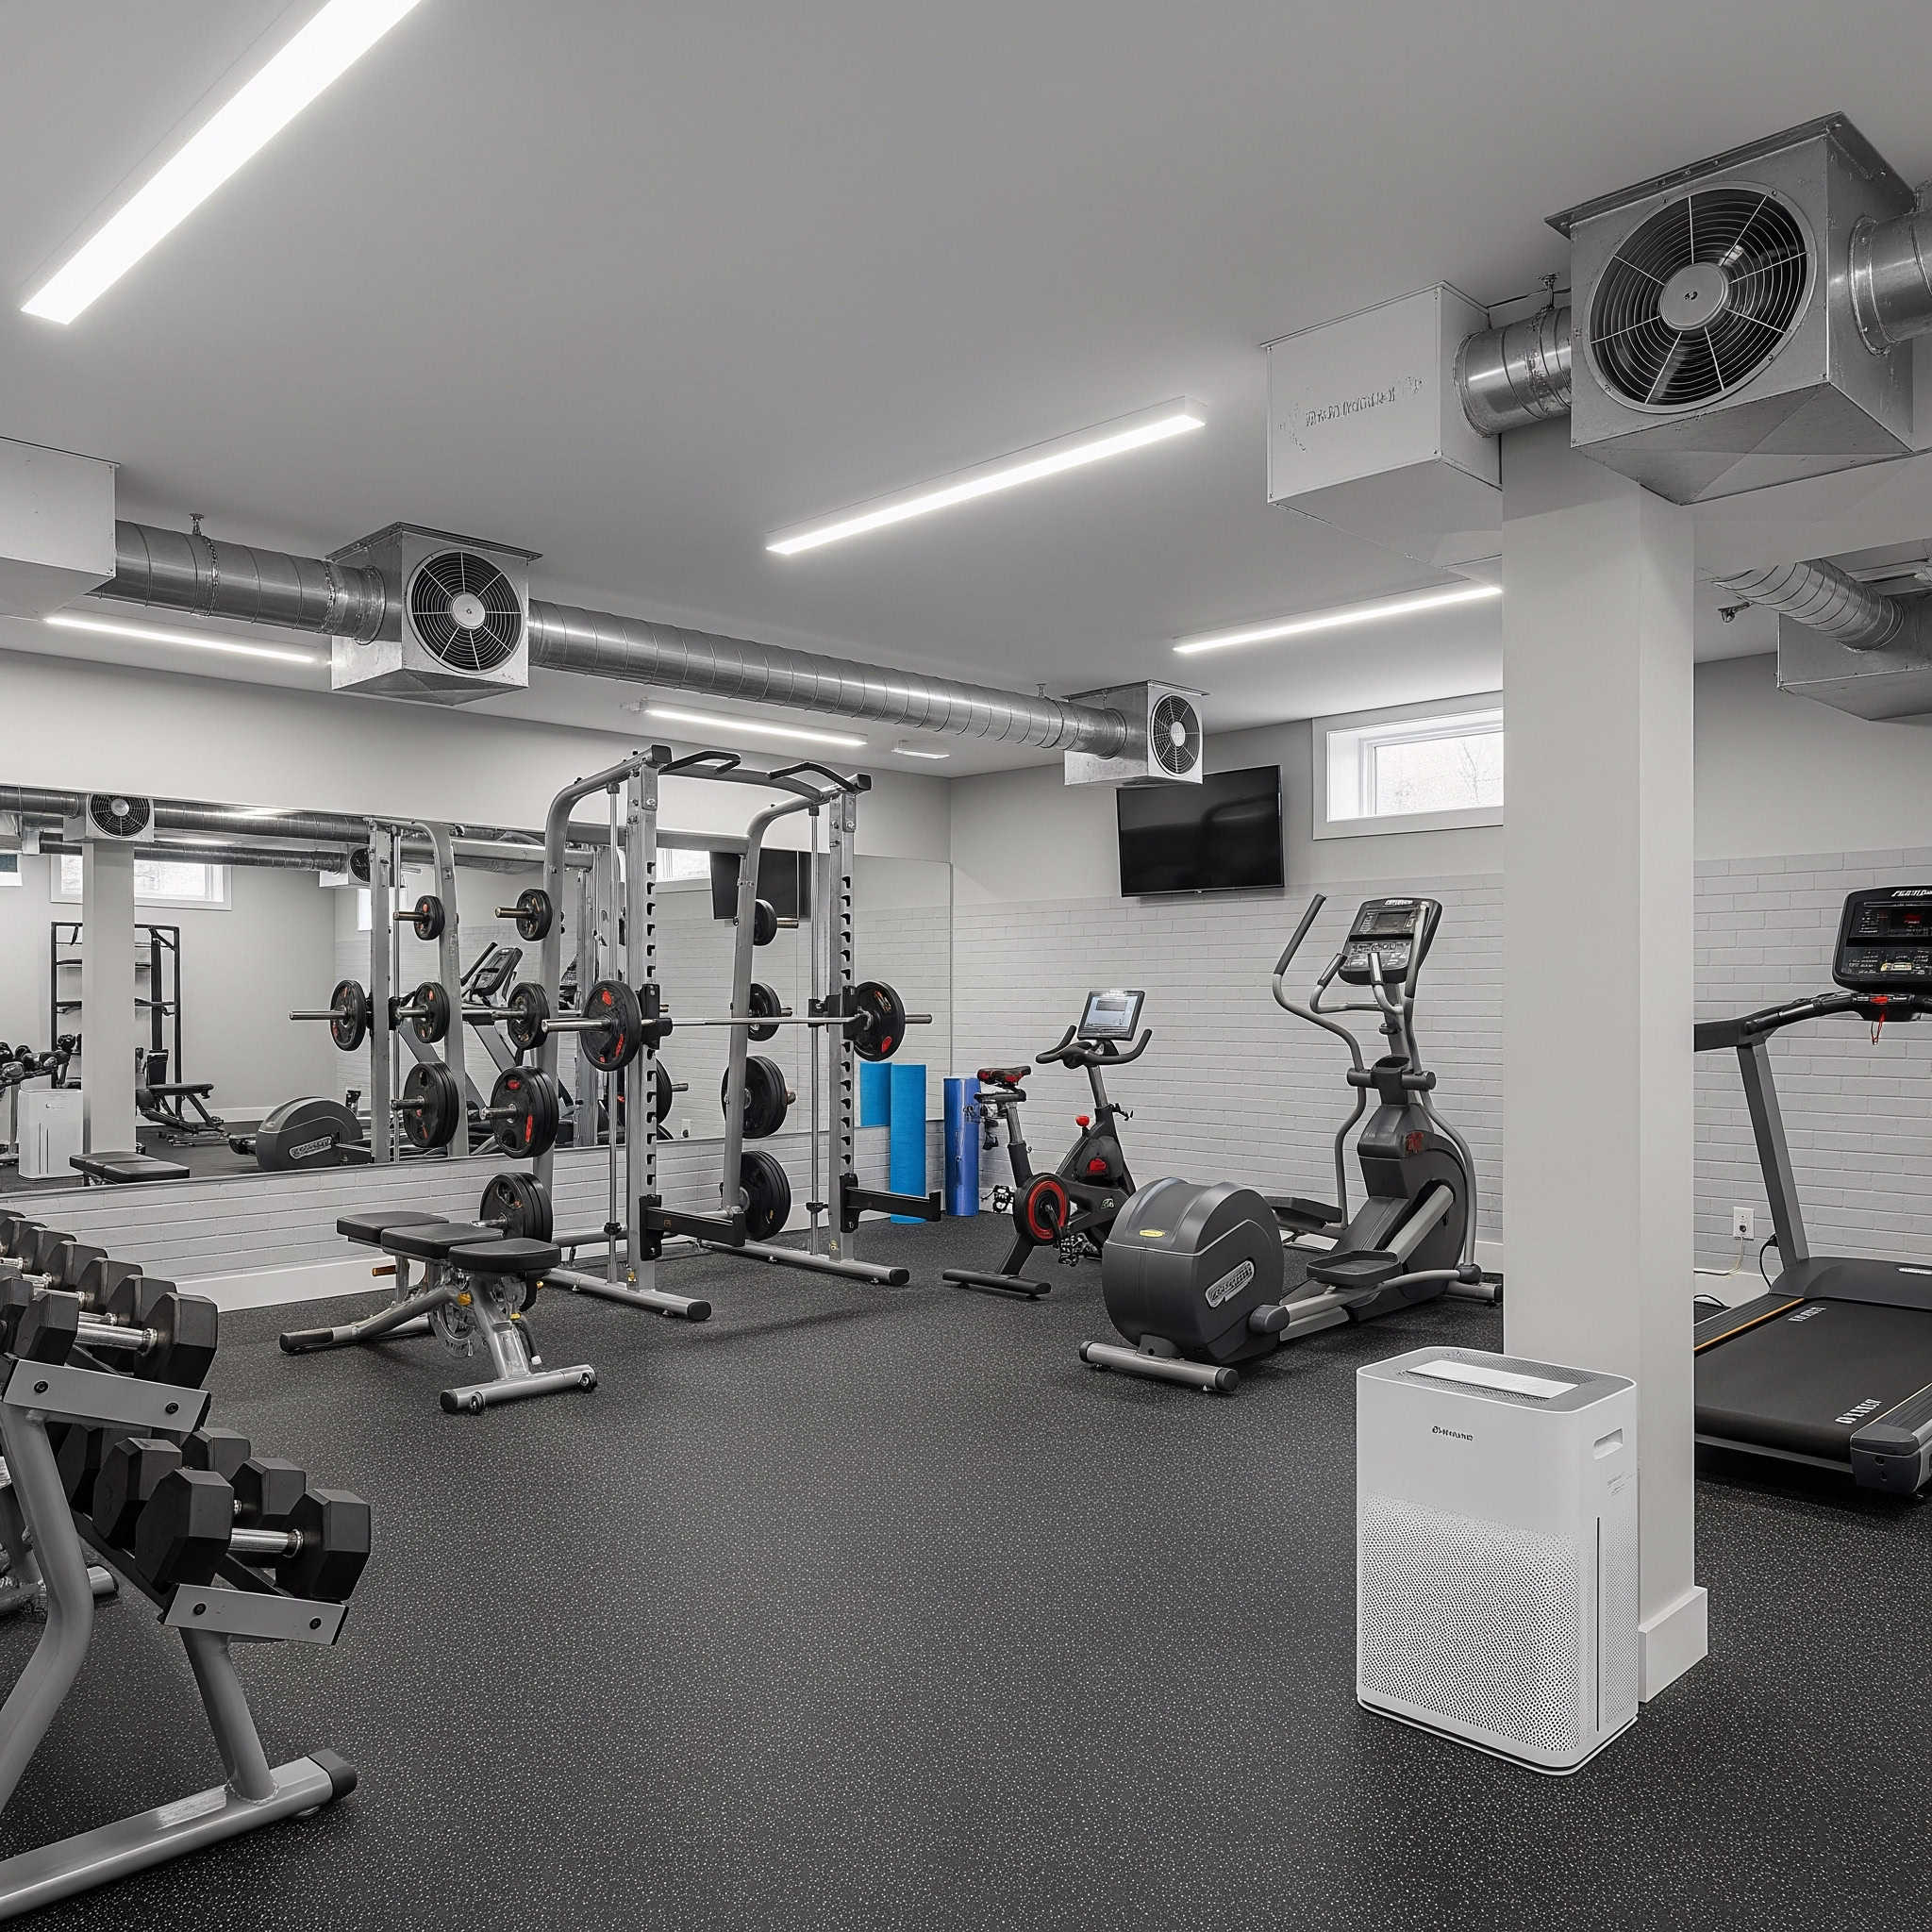
Calculate air exchange requirements based on room size – aim for 6-8 complete air changes per hour during active use. My 300 square foot basement gym requires approximately 400-500 cubic feet per minute of air movement to maintain comfortable conditions during intense workouts.
Position fans strategically to create cross-ventilation patterns that prevent stagnant air pockets. I’ve placed a high-velocity fan in one corner and an exhaust fan in the opposite corner to create a diagonal airflow pattern that efficiently moves air through the entire space without blowing directly on me during workouts.
5. Lighting Design
Effective lighting transforms a basement from a dark, uninspiring space into an energizing workout environment. Layered lighting works best, combining ambient illumination with task lighting for specific workout areas. LED options provide energy efficiency and minimal heat output. Consider adjustable brightness levels to match different workout intensities and times of day.
Aim for minimum light levels of 300-500 lux (lumens per square meter) for general workout areas and 500-750 lux for areas requiring precise movements. This isn’t just about aesthetics—proper lighting prevents injuries by ensuring you can see equipment settings and maintain proper form during exercises.
Install lighting fixtures that won’t interfere with equipment use – recessed ceiling lights or track lighting systems work well for low-ceiling basements. I replaced the single central light fixture in my basement with six recessed LED lights on a dimmer switch, which eliminated shadows and created a much more motivating environment.
6. Sound Management
Exercise equipment, especially cardio machines and weight training, can generate significant noise that travels through your home’s structure. Implementing sound dampening measures protects both your household peace and neighbor relations. Strategic flooring choices, wall insulation, and ceiling treatments can dramatically reduce sound transmission while creating a more pleasant acoustic environment for your workouts.
Add mass-loaded vinyl under rubber flooring in weight training areas to reduce impact noise transmission by up to 25 decibels. This material is relatively thin but extremely effective at absorbing vibrations before they transfer to your home’s structure.
Consider acoustic panels on walls and ceilings, focusing on areas directly above occupied rooms. I installed simple fabric-wrapped acoustic panels on the ceiling beneath my living room, which reduced the sound of dropping weights by about 70%. My family hardly notices when I’m working out now, even during heavy deadlift sessions.
7. Electrical Requirements
Most modern gym equipment requires electrical power, from treadmills and ellipticals to fans and entertainment systems. Assess your basement’s existing electrical capacity and determine if additional outlets or dedicated circuits are needed. Proper electrical planning prevents tripped breakers during workouts and ensures safety in a potentially damp environment.
High-powered cardio equipment like treadmills typically requires dedicated 20-amp circuits to prevent power fluctuations. I learned this lesson when my treadmill kept shutting down mid-workout until I had an electrician install a dedicated circuit.
Install GFCI (Ground Fault Circuit Interrupter) outlets in all basement workout room areas to protect against electrical shocks in potentially damp environments. This safety feature is especially important in basement settings where moisture issues can develop unexpectedly.
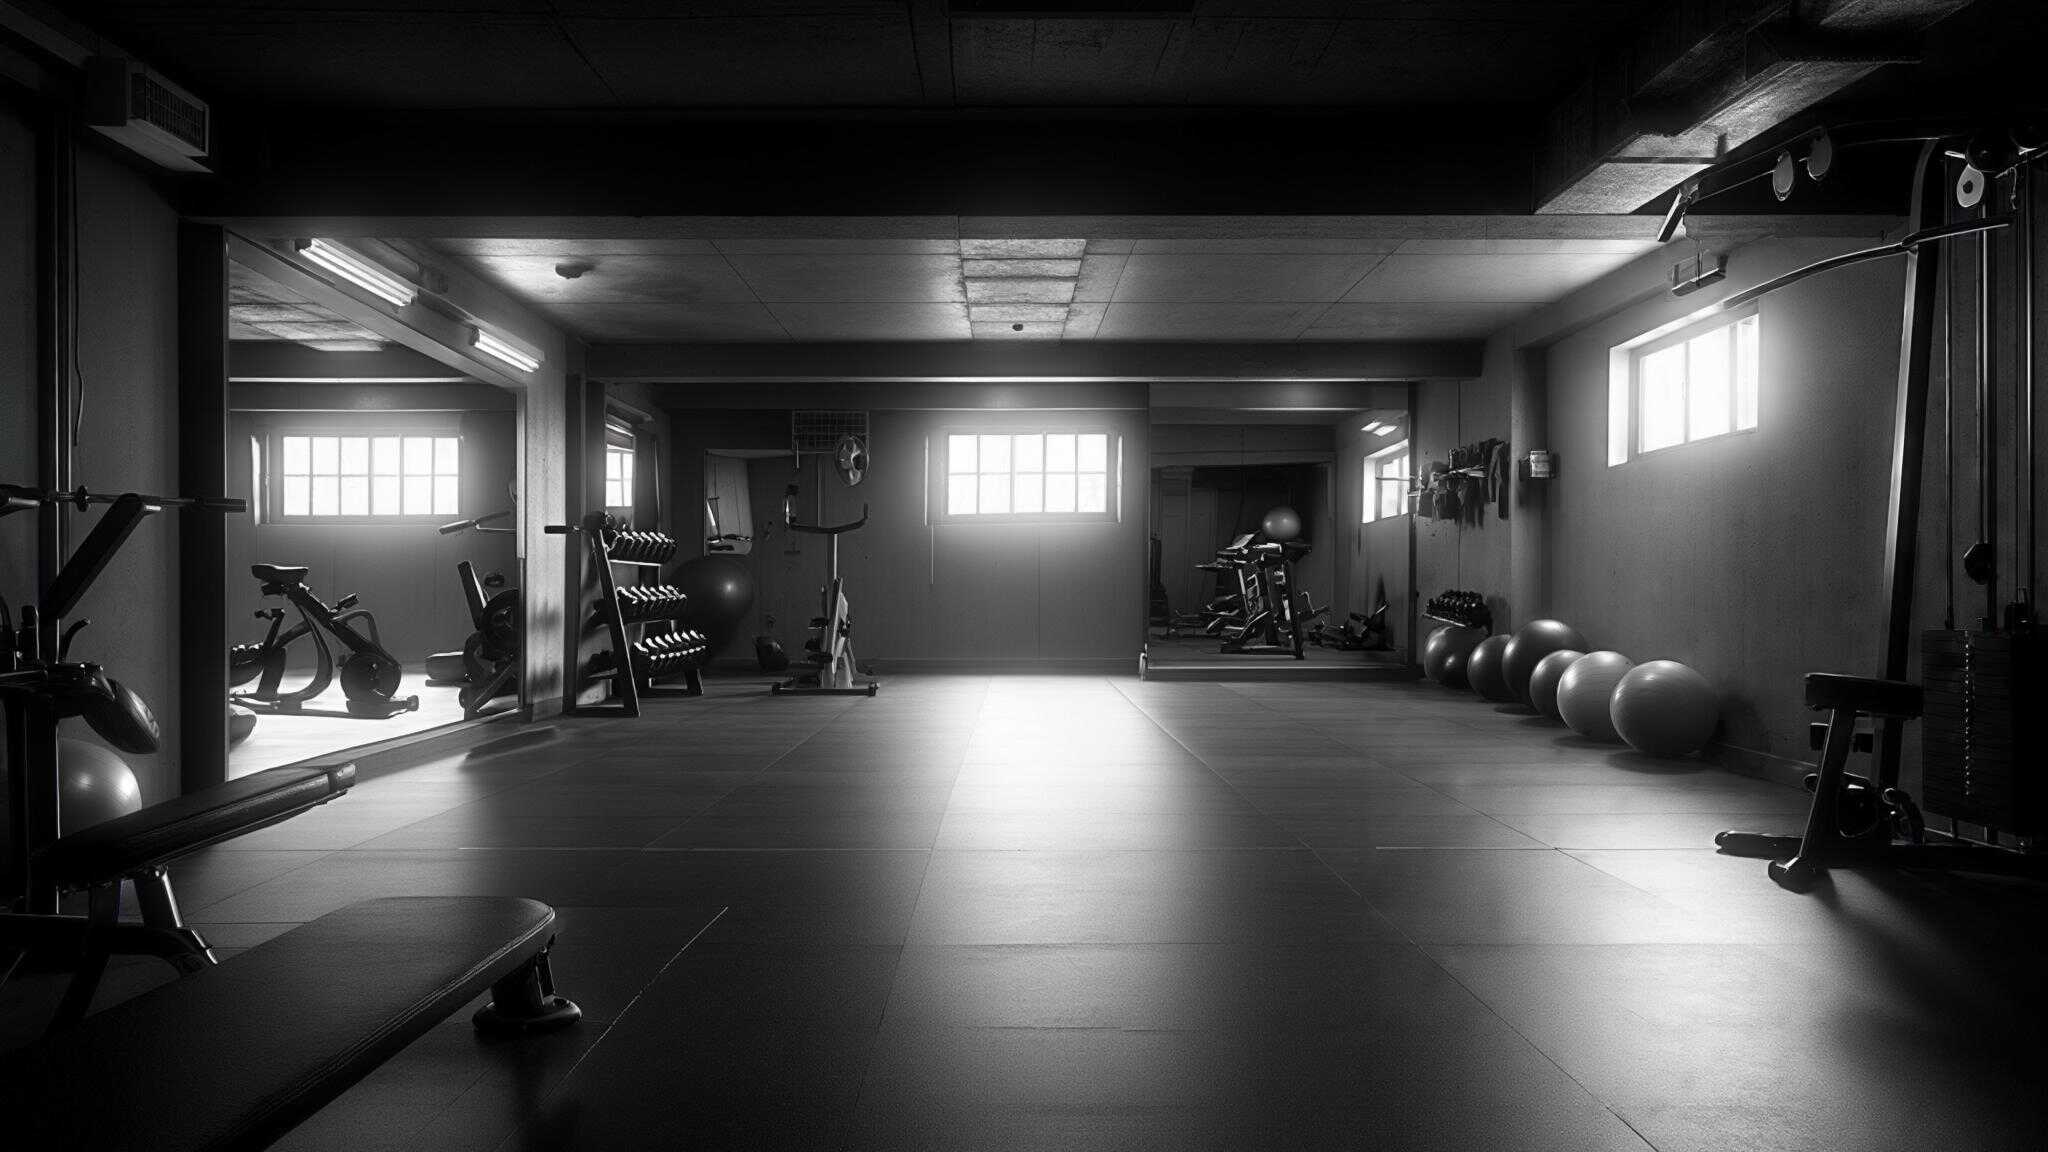
Unfinished Basement Gym Solutions
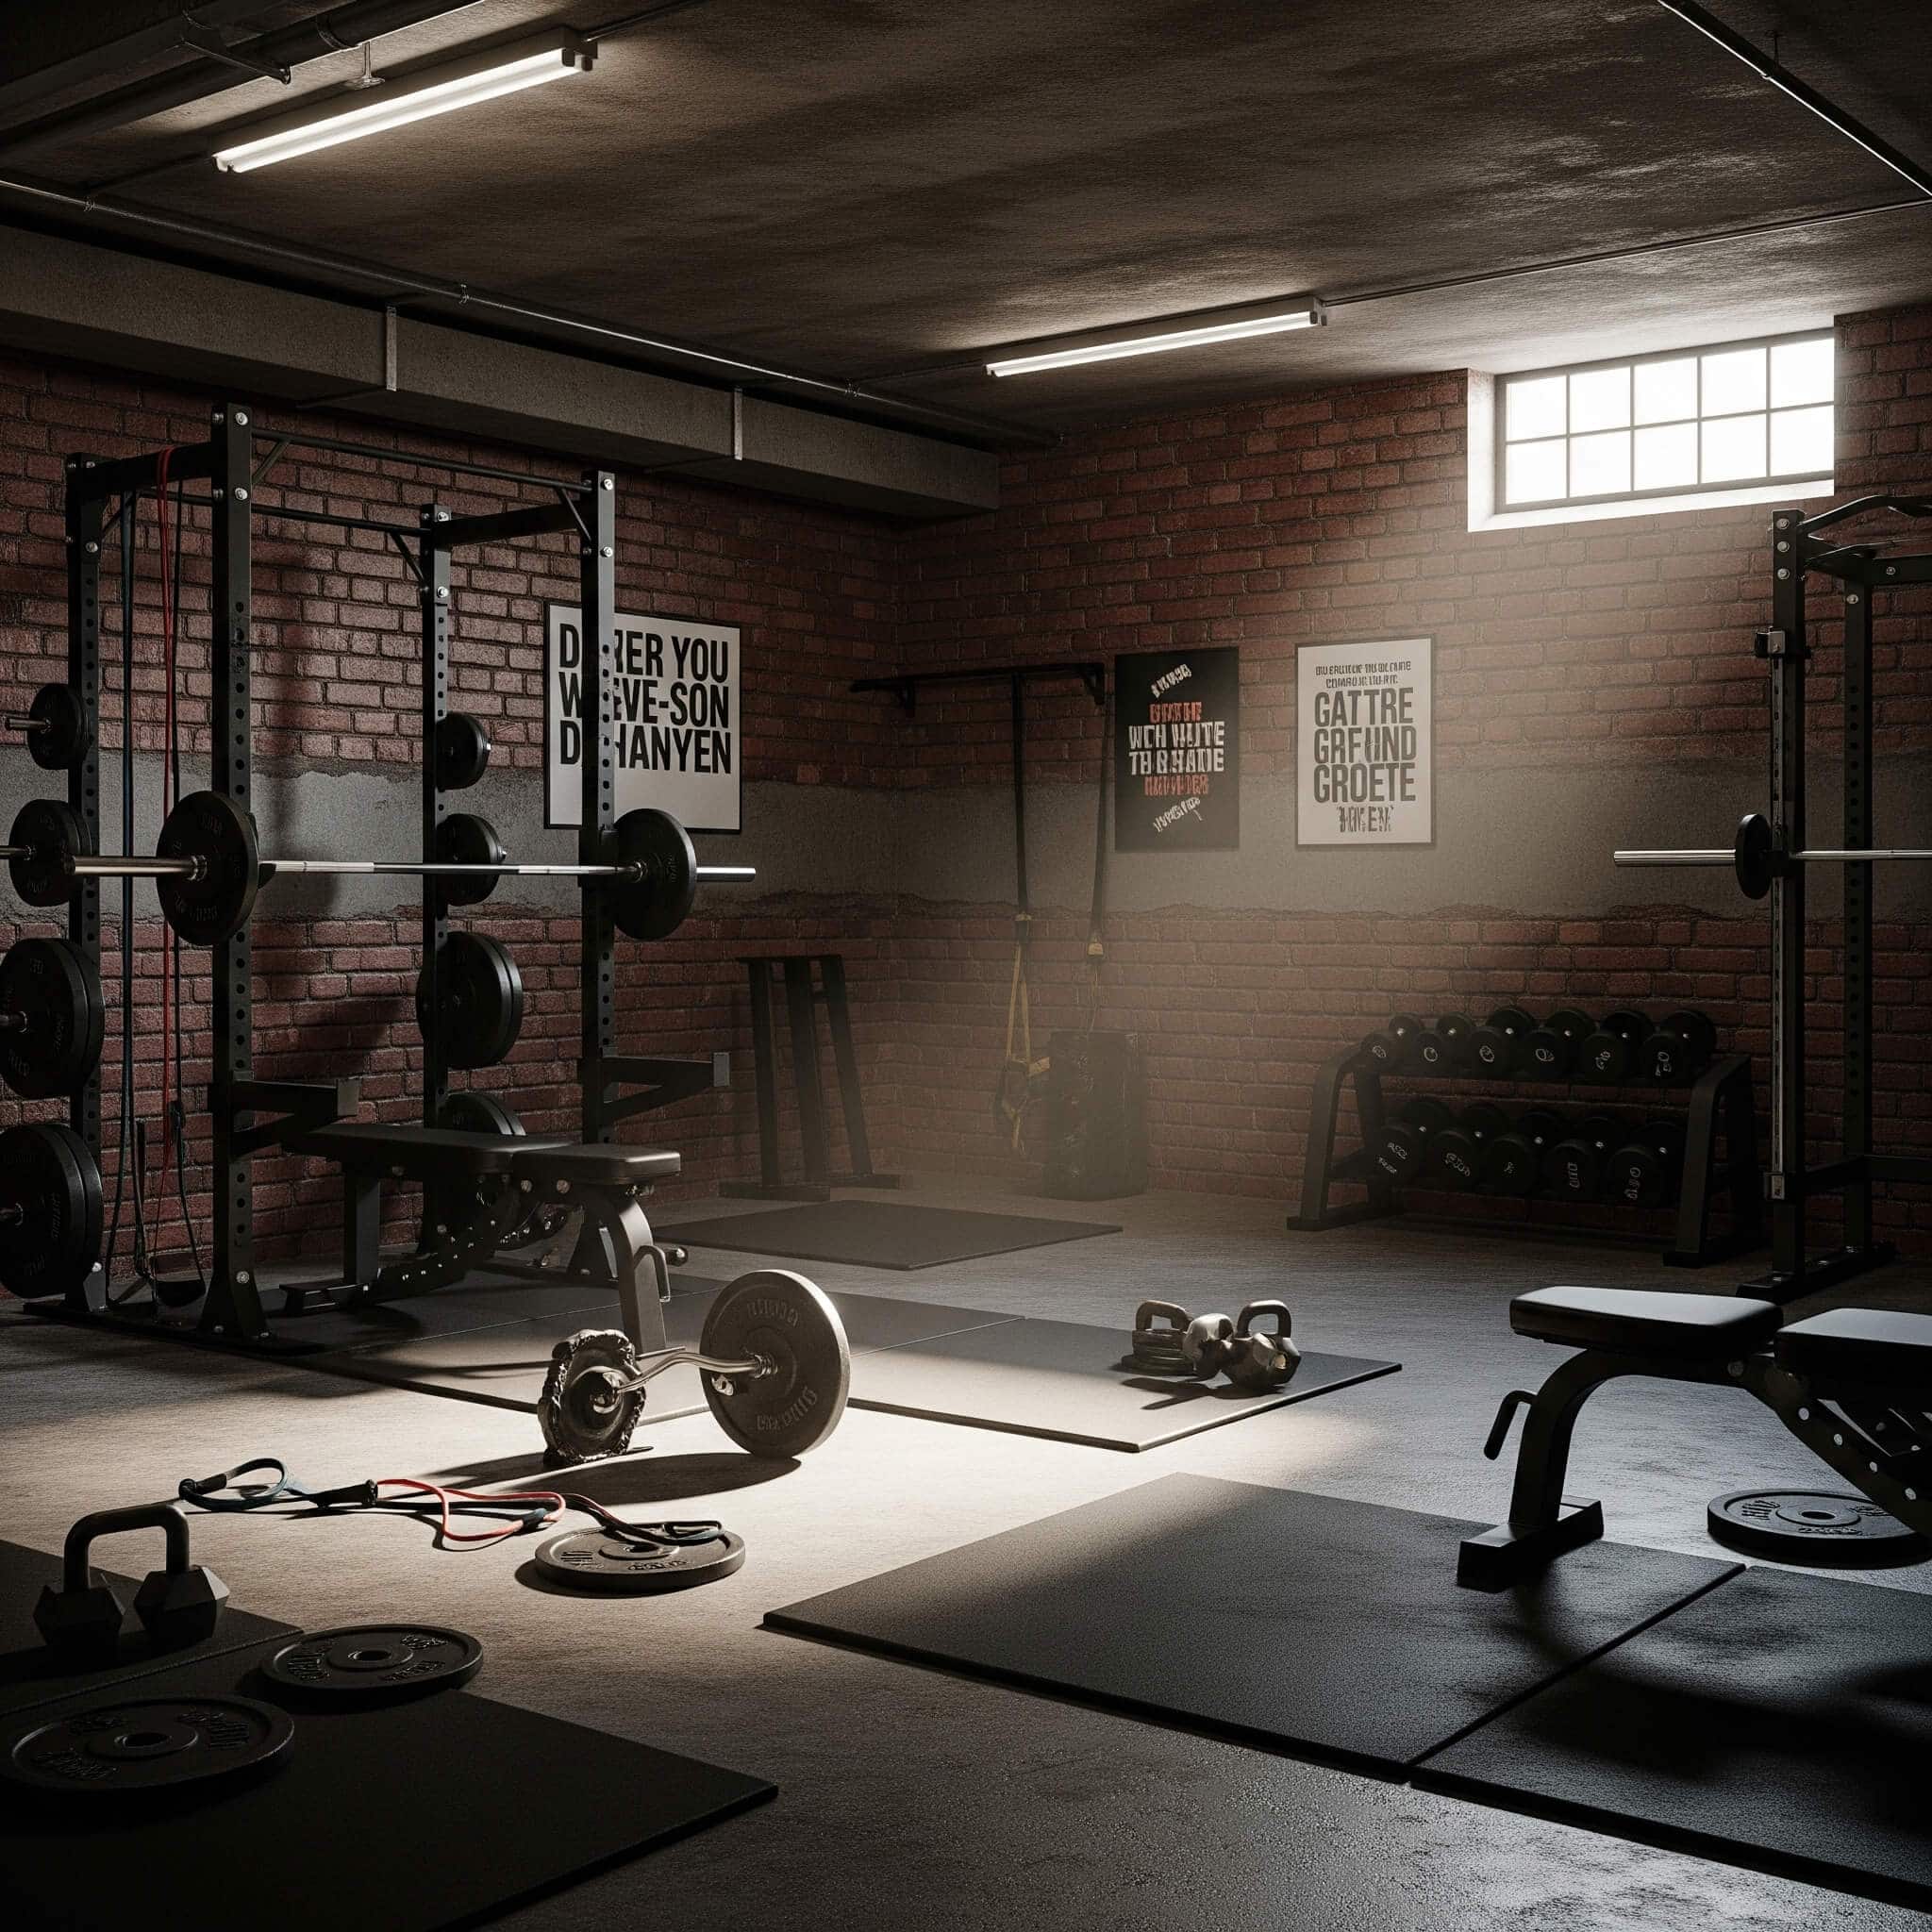
Unfinished basements offer excellent potential for home gyms with their open layouts and industrial aesthetic. These spaces provide practical advantages like exposed ceiling joists for mounting equipment and concrete floors that can handle heavy weights. The following unfinished basement gym ideas embrace the raw characteristics of unfinished basements while creating functional, effective workout environments without requiring extensive renovations.
Unfinished basements typically offer 15-30% more usable vertical space due to exposed ceiling joists. This extra height can be crucial for exercises like pull-ups, overhead presses, or rope climbs that require vertical clearance.
Apply concrete dust sealant before installing gym equipment to prevent equipment damage and improve air quality. Unsealed concrete continuously releases fine dust that can infiltrate equipment bearings and create respiratory irritation during workouts.
1. Minimalist Strength Corner
This approach focuses on essential strength equipment positioned strategically in a basement corner. By limiting your setup to core items like a power rack, barbell, adjustable bench, and weight plates, you create an effective strength training station with minimal space requirements. Defining the area with rubber flooring creates a visual boundary while protecting both equipment and flooring.
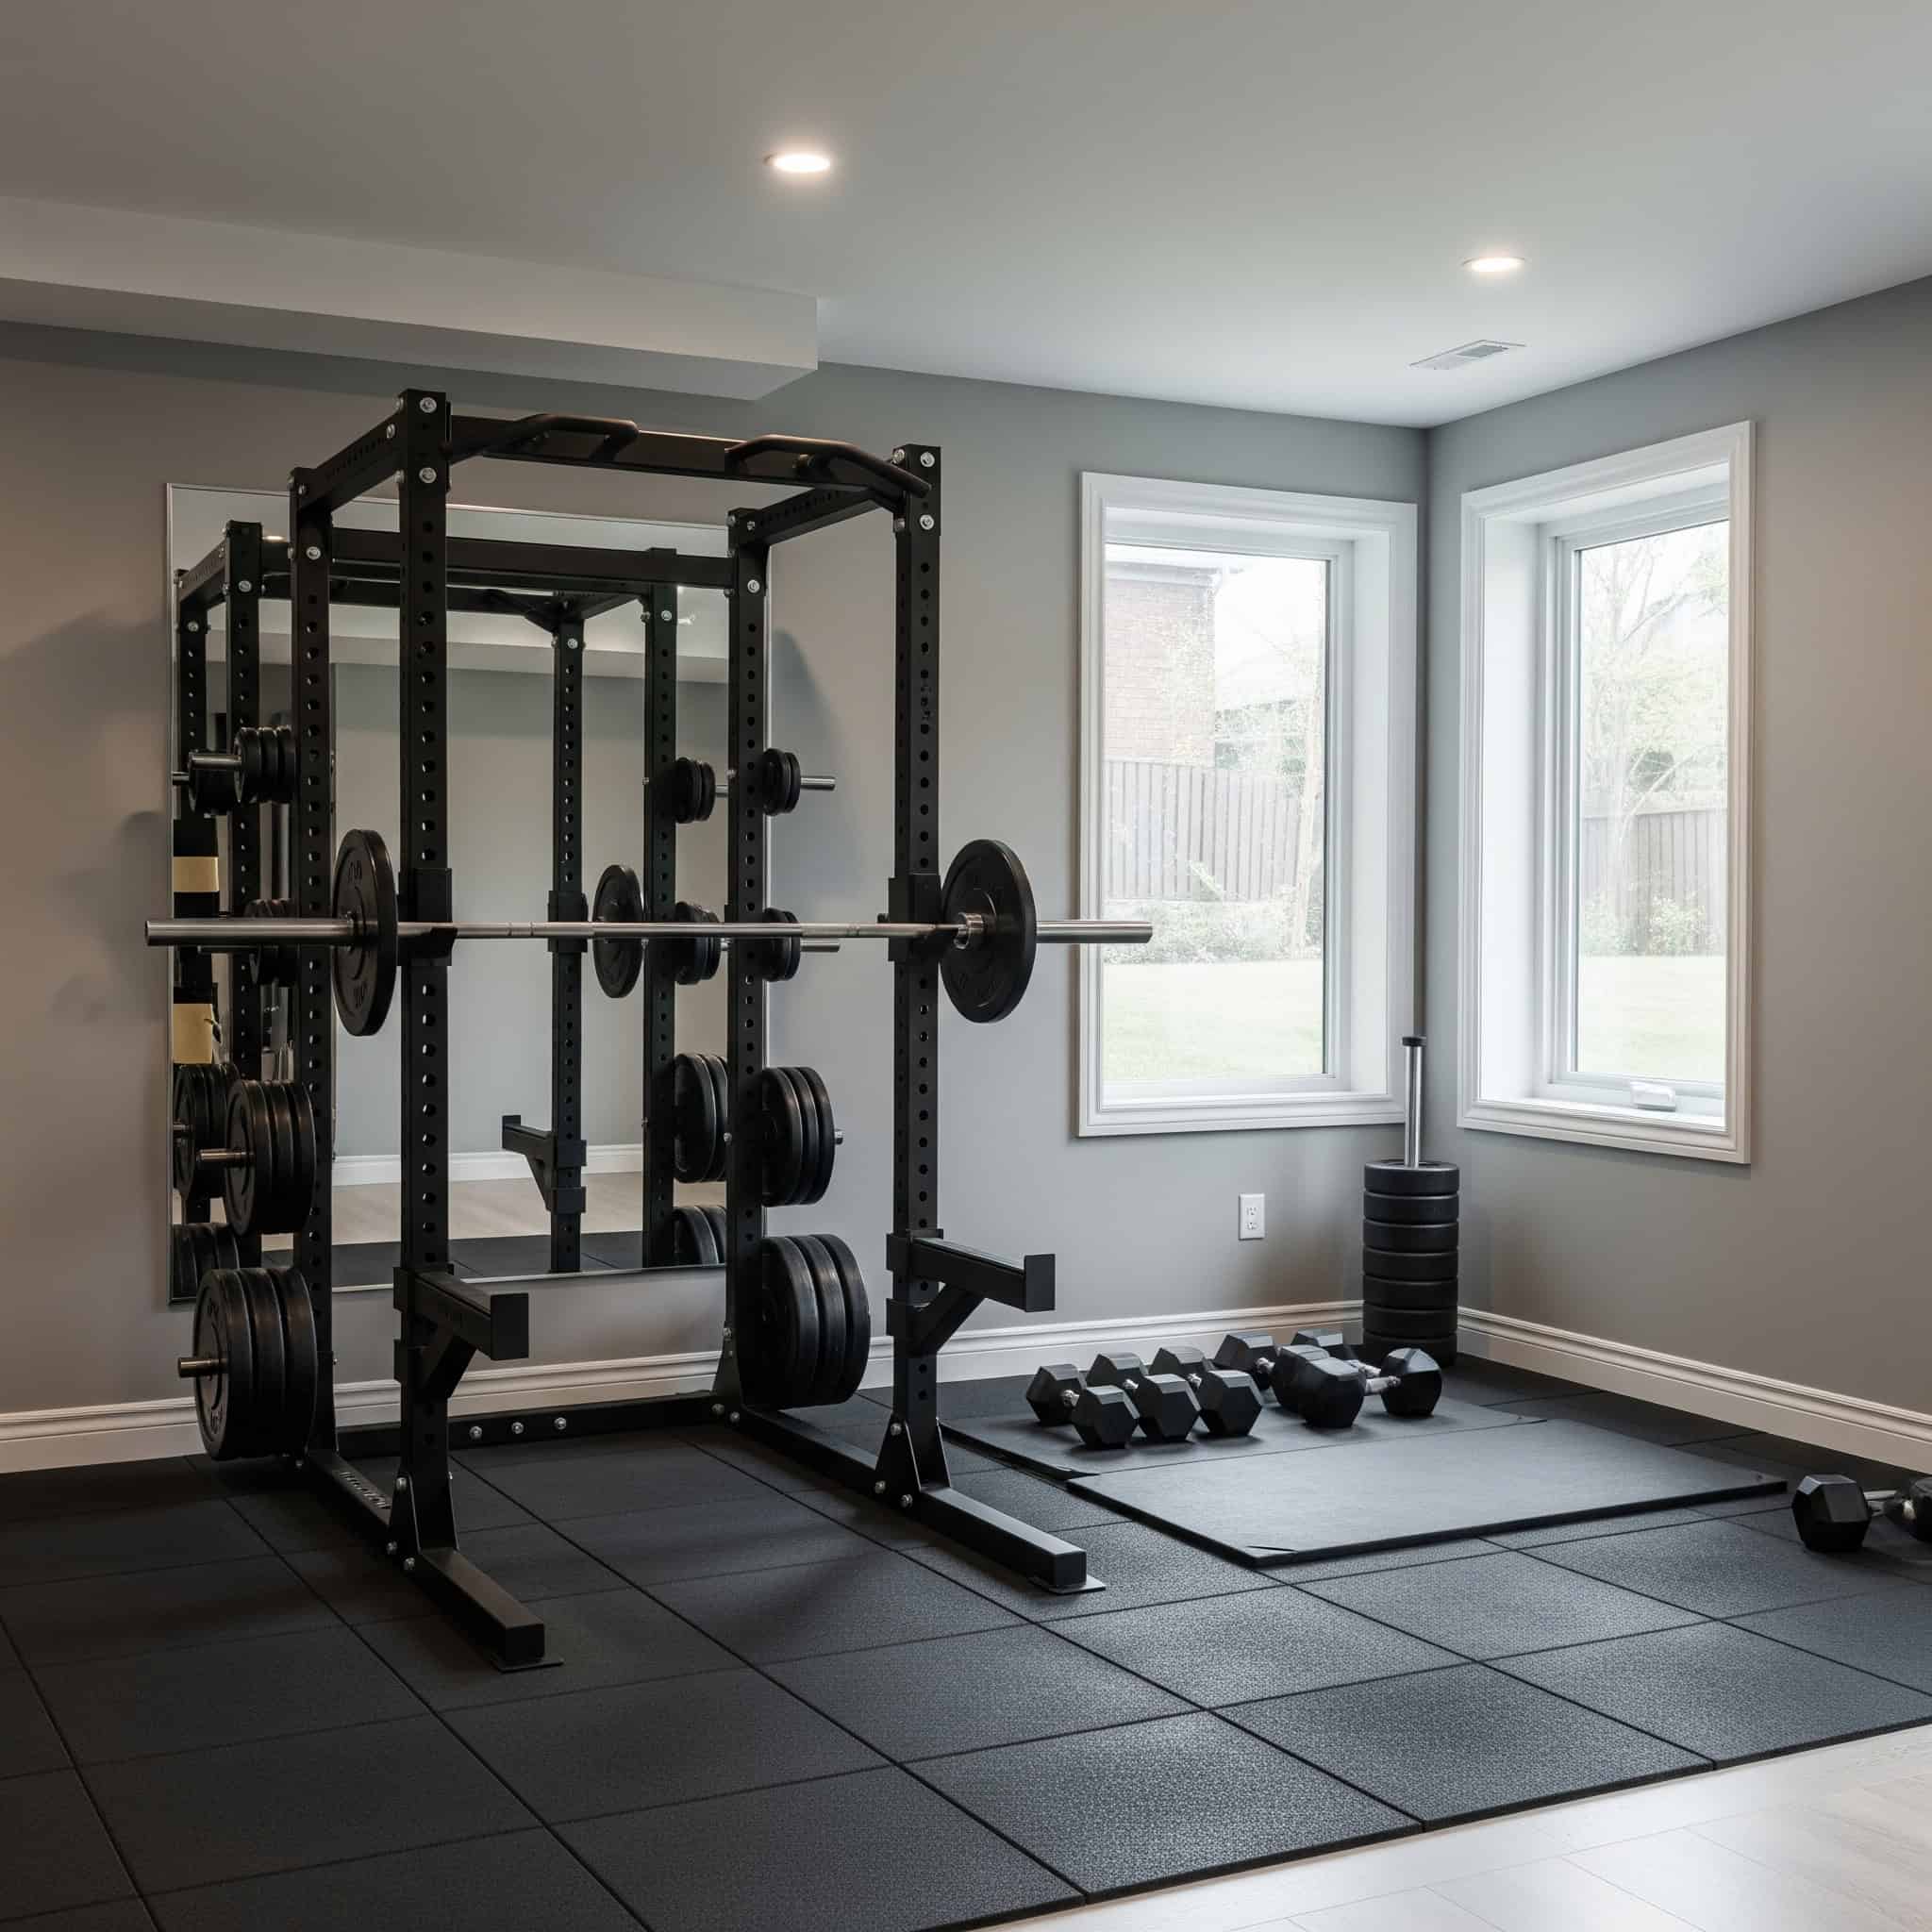
A functional strength corner requires minimum dimensions of 8’x8′ with 7.5′ ceiling clearance for most exercises. I’ve found this size accommodates a standard power rack with enough space for barbell movements without feeling cramped.
Rubber flooring thickness should be at least 3/4″ for deadlifts and other heavy lifting to protect concrete underneath. This thickness provides adequate impact absorption while maintaining a stable surface for exercises requiring balance and stability.
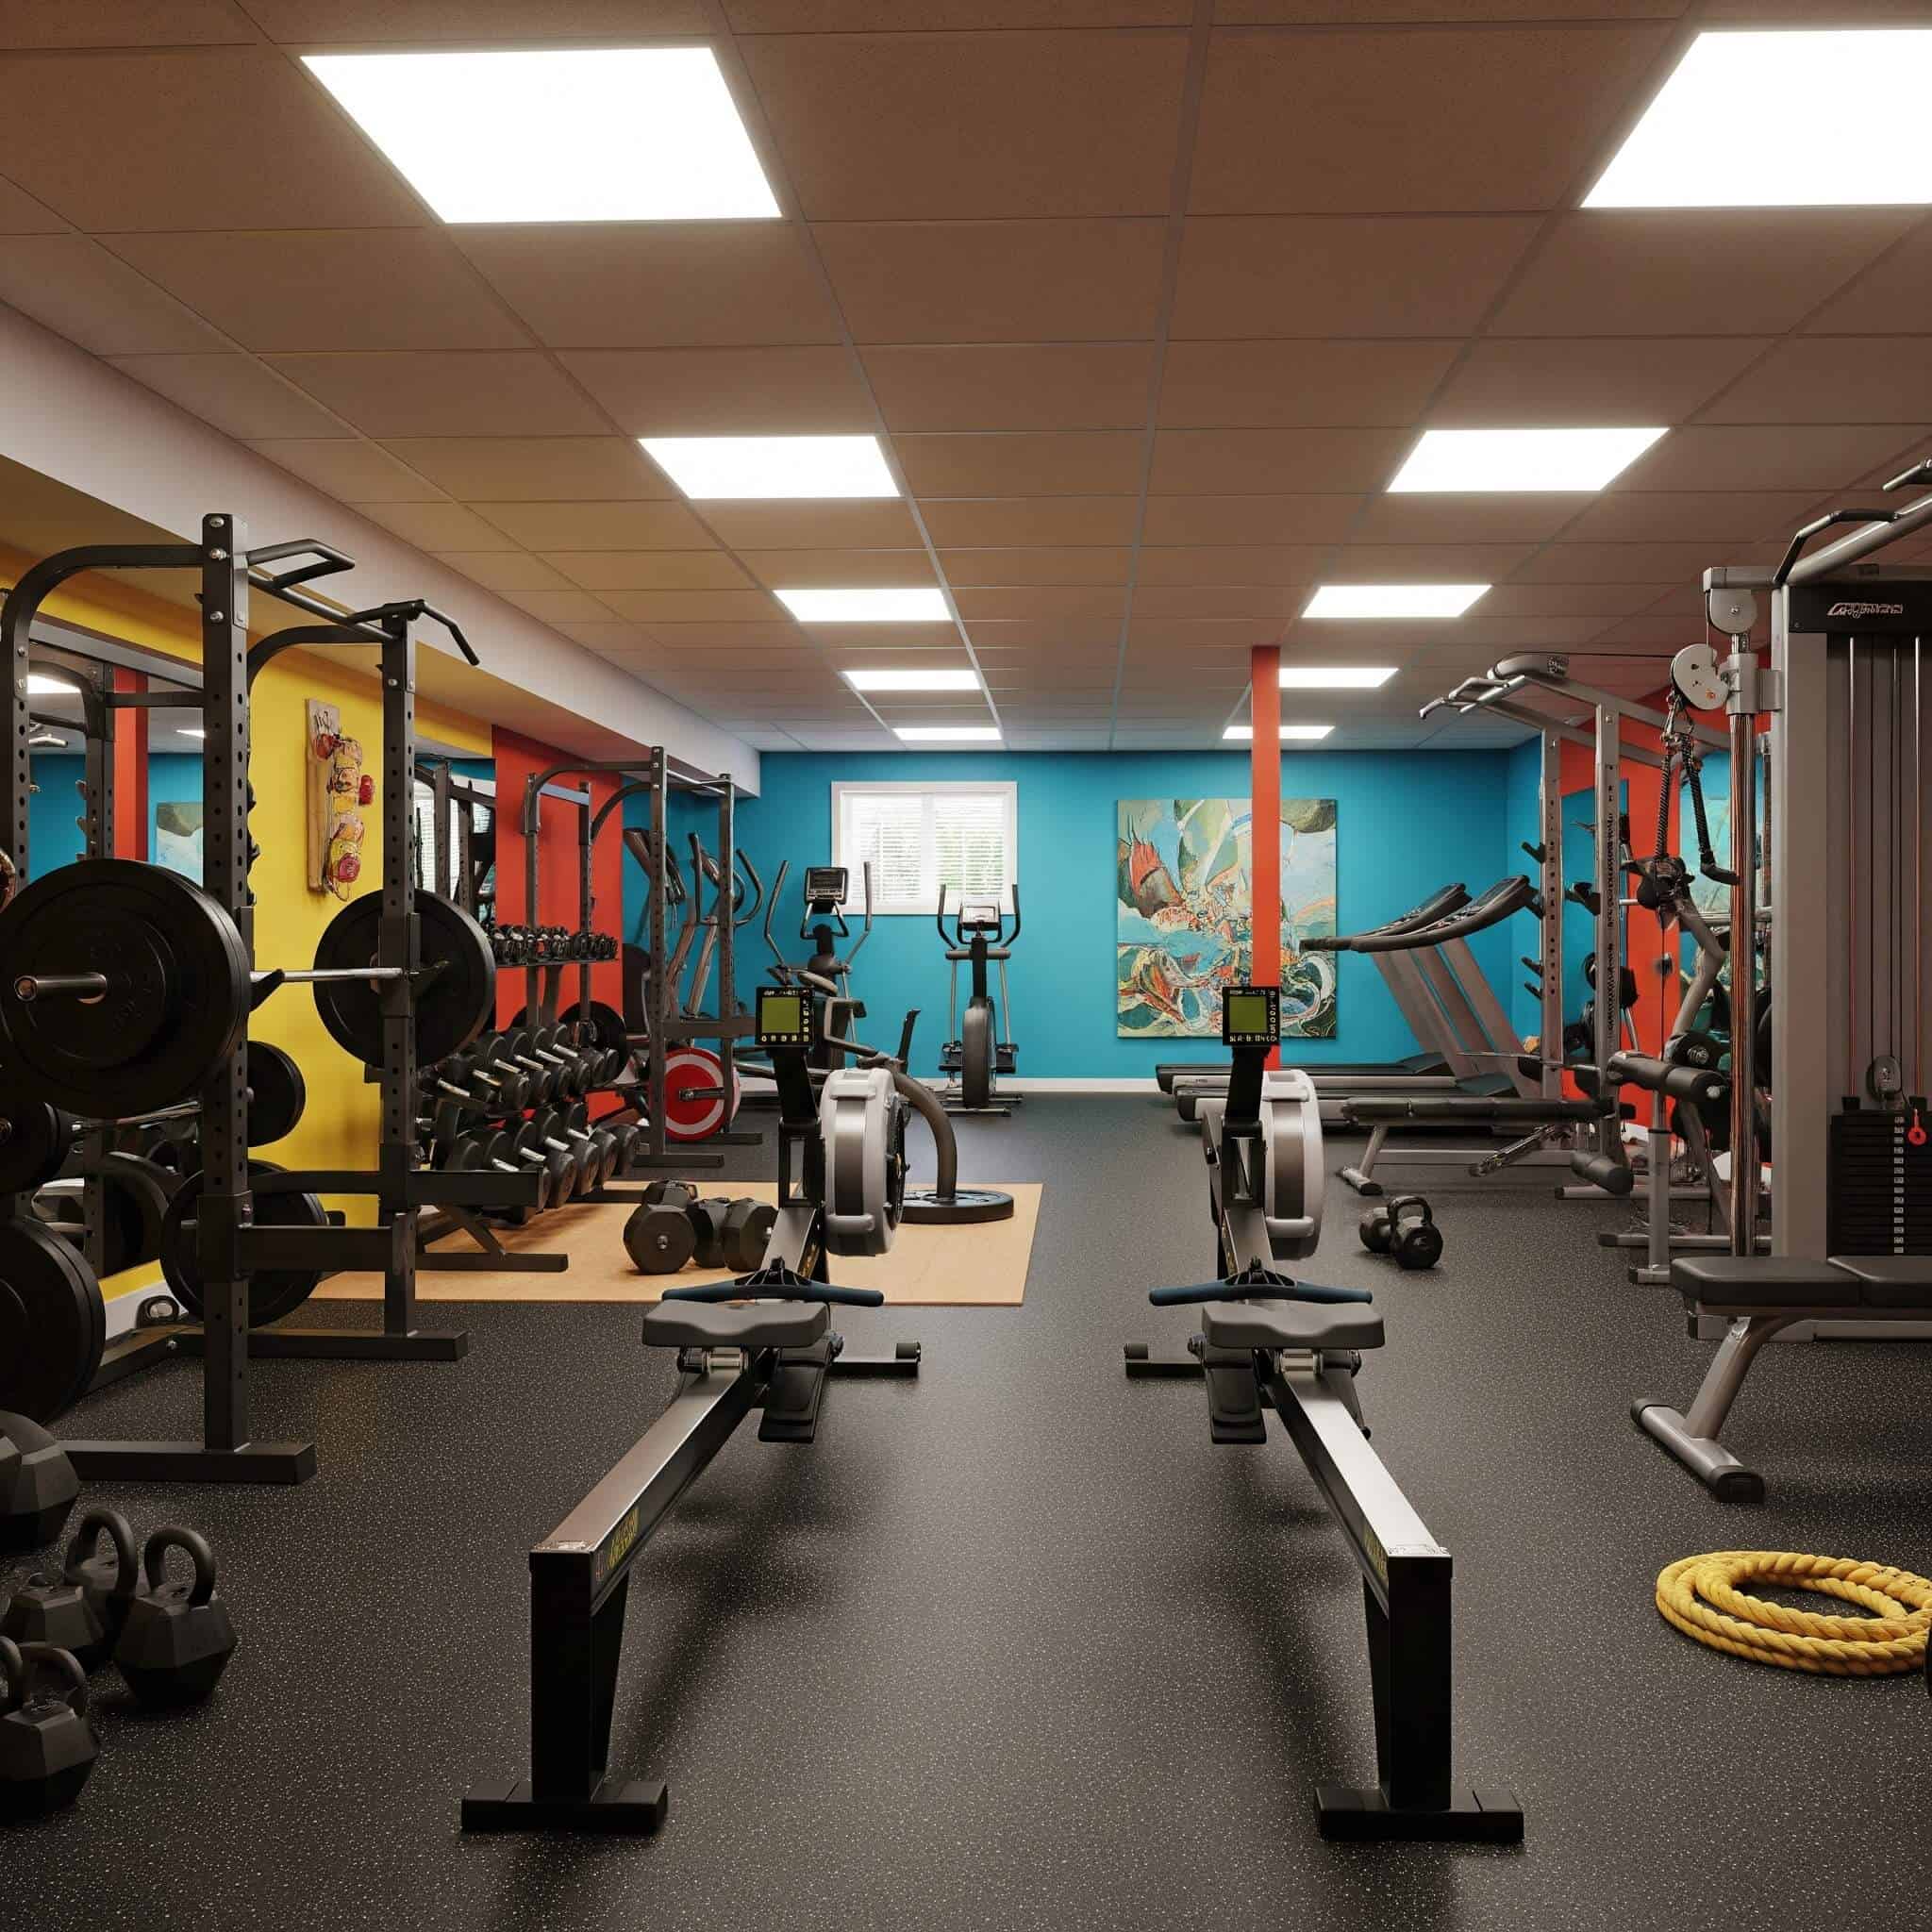
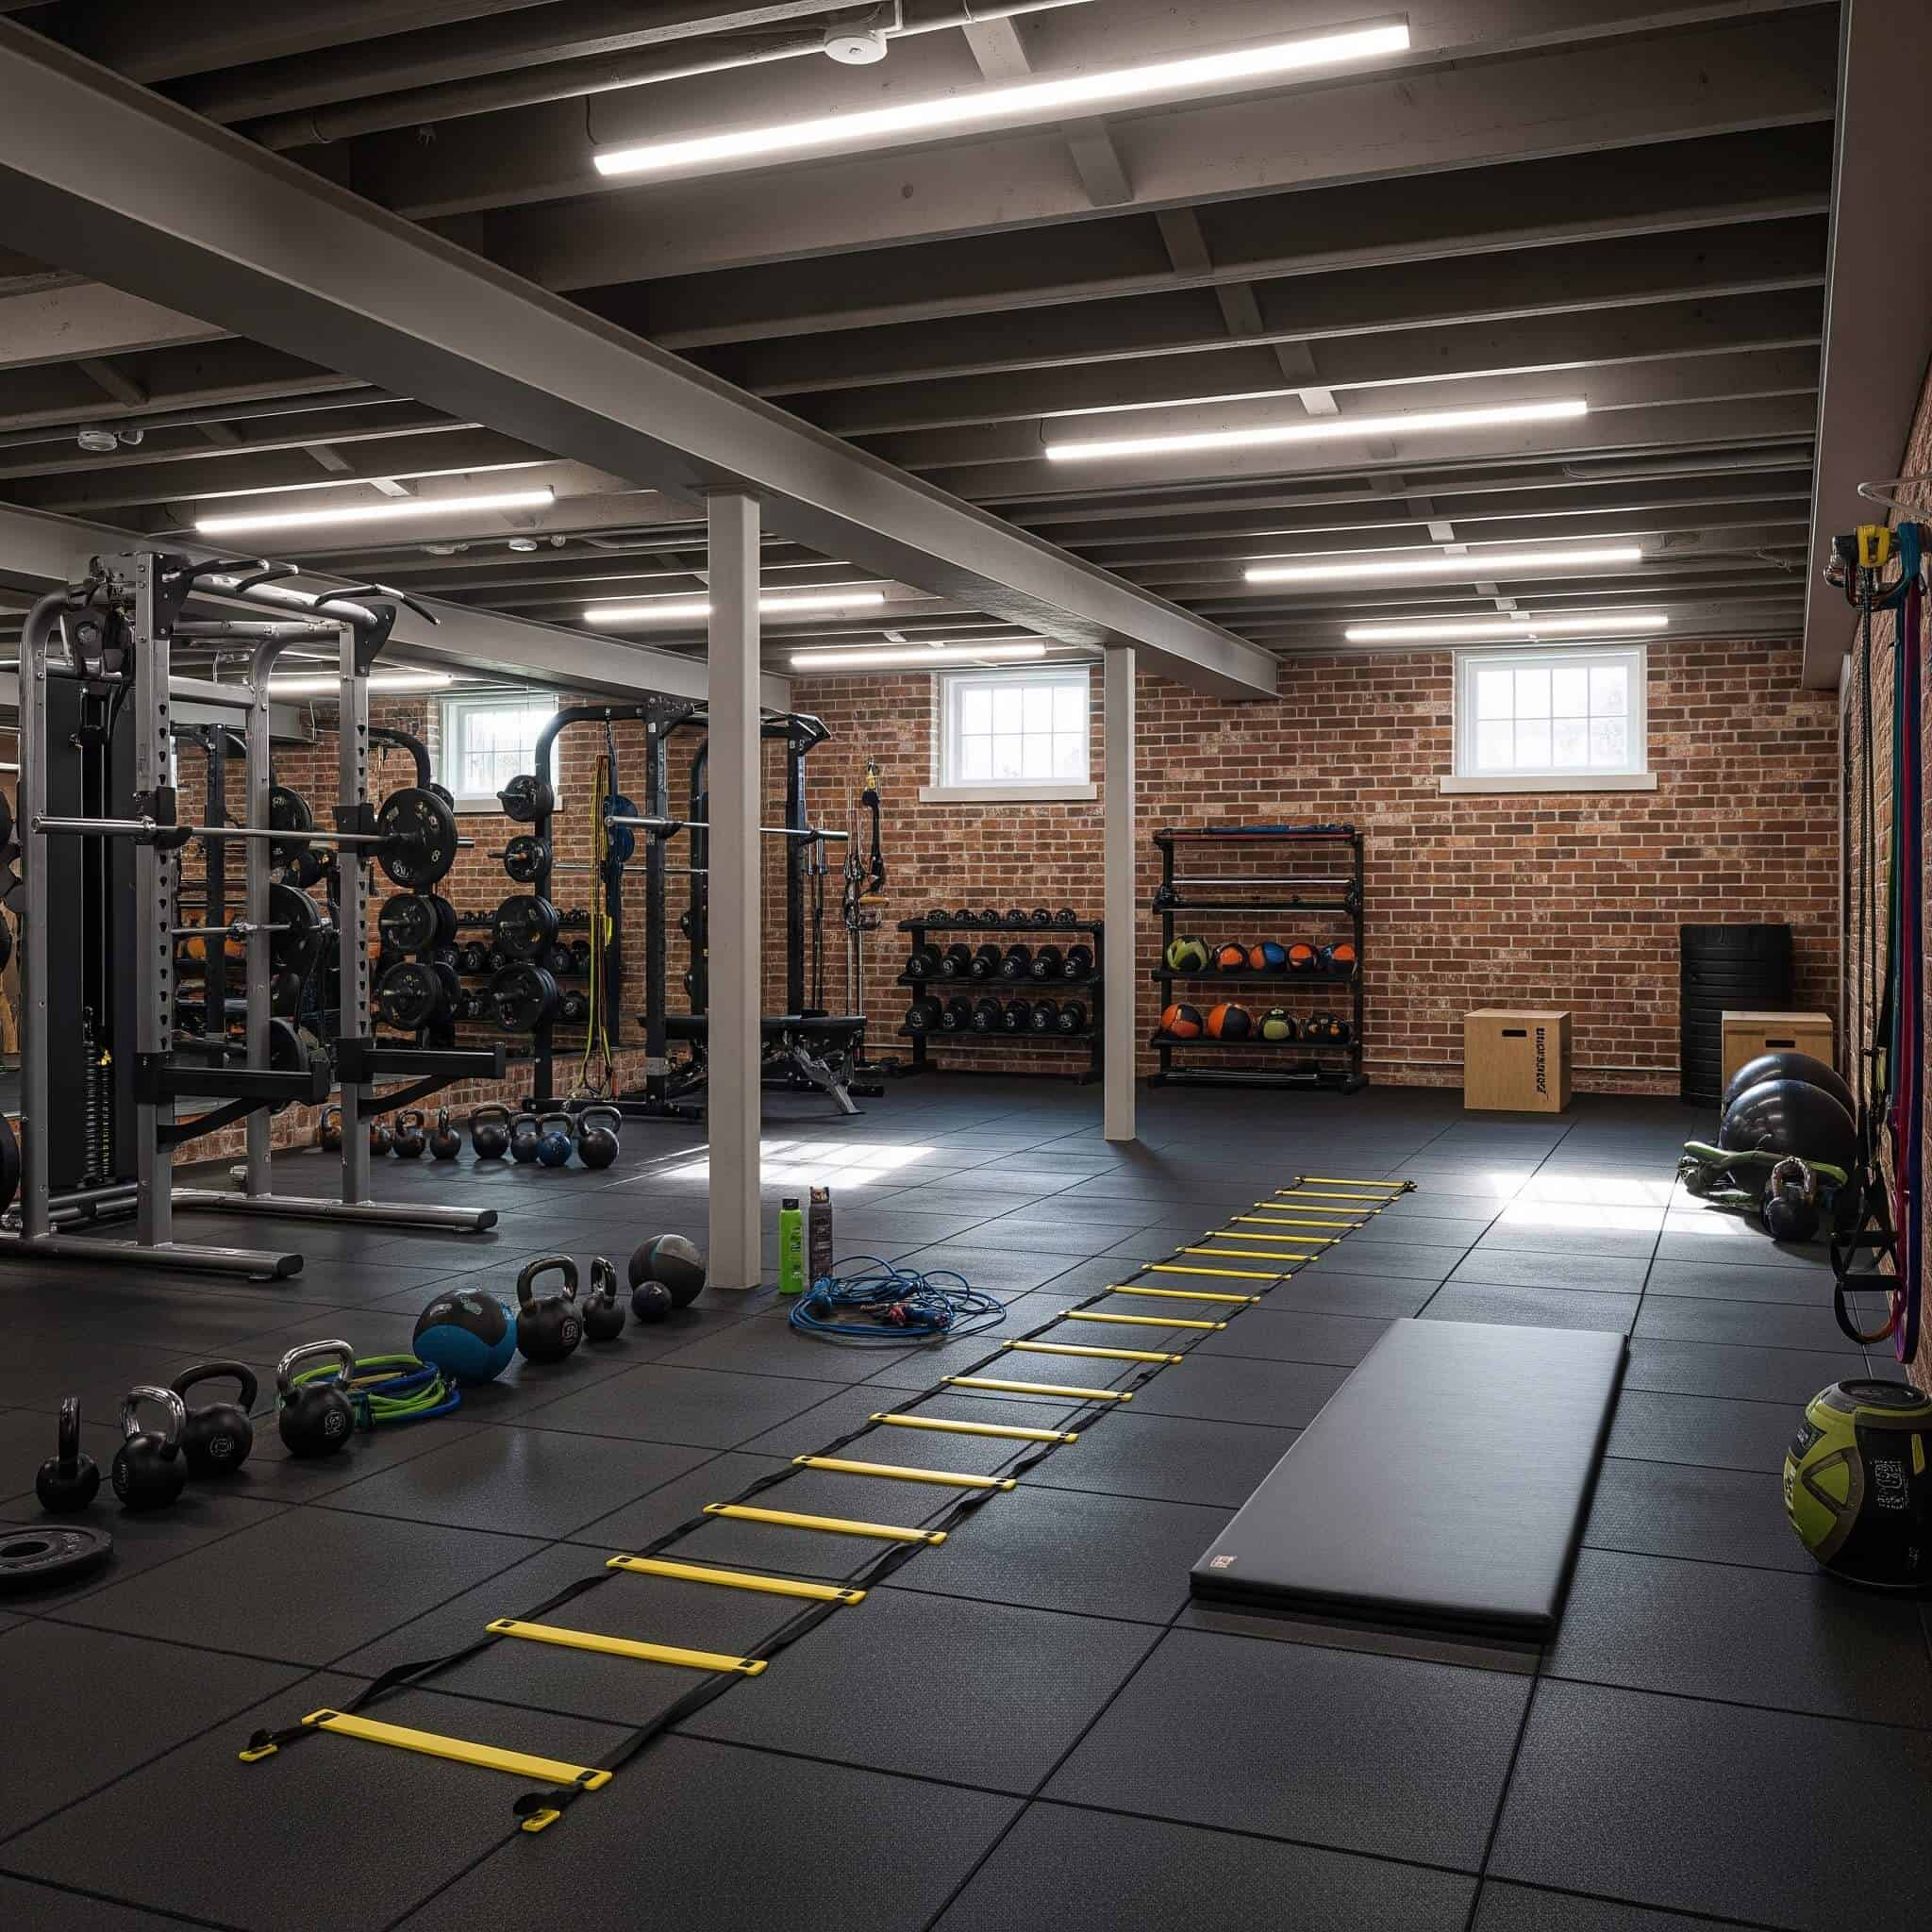
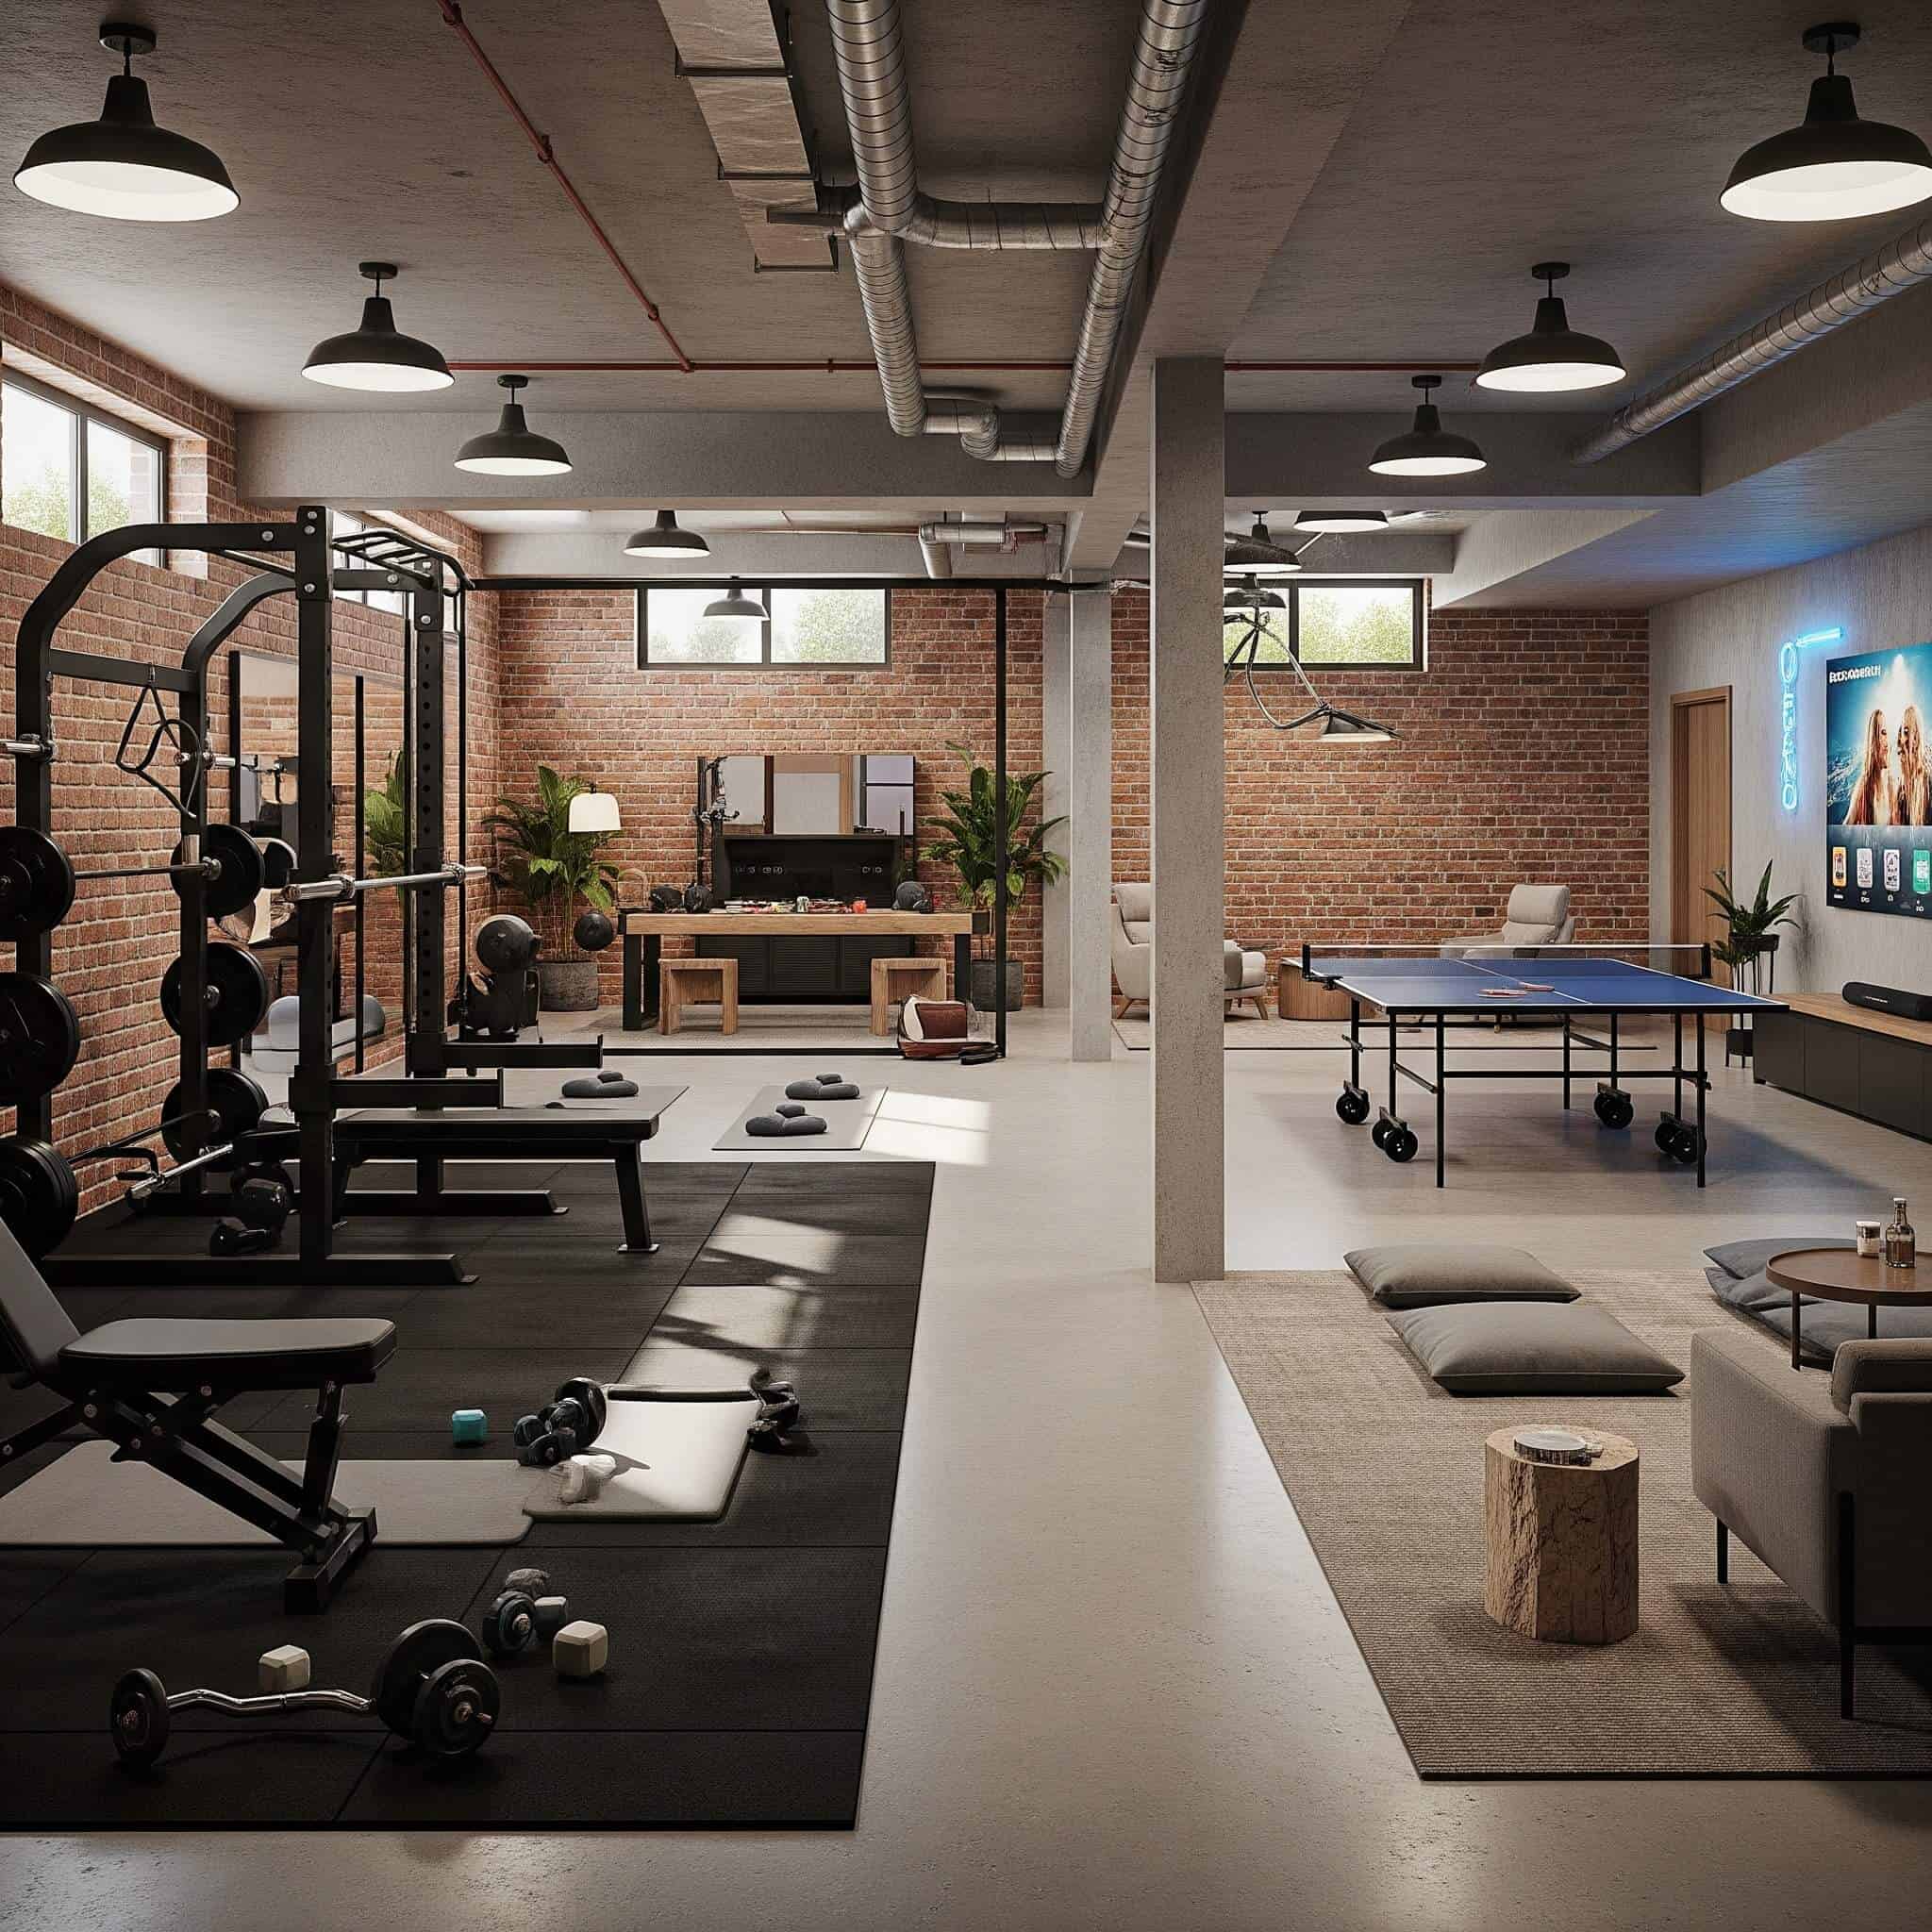
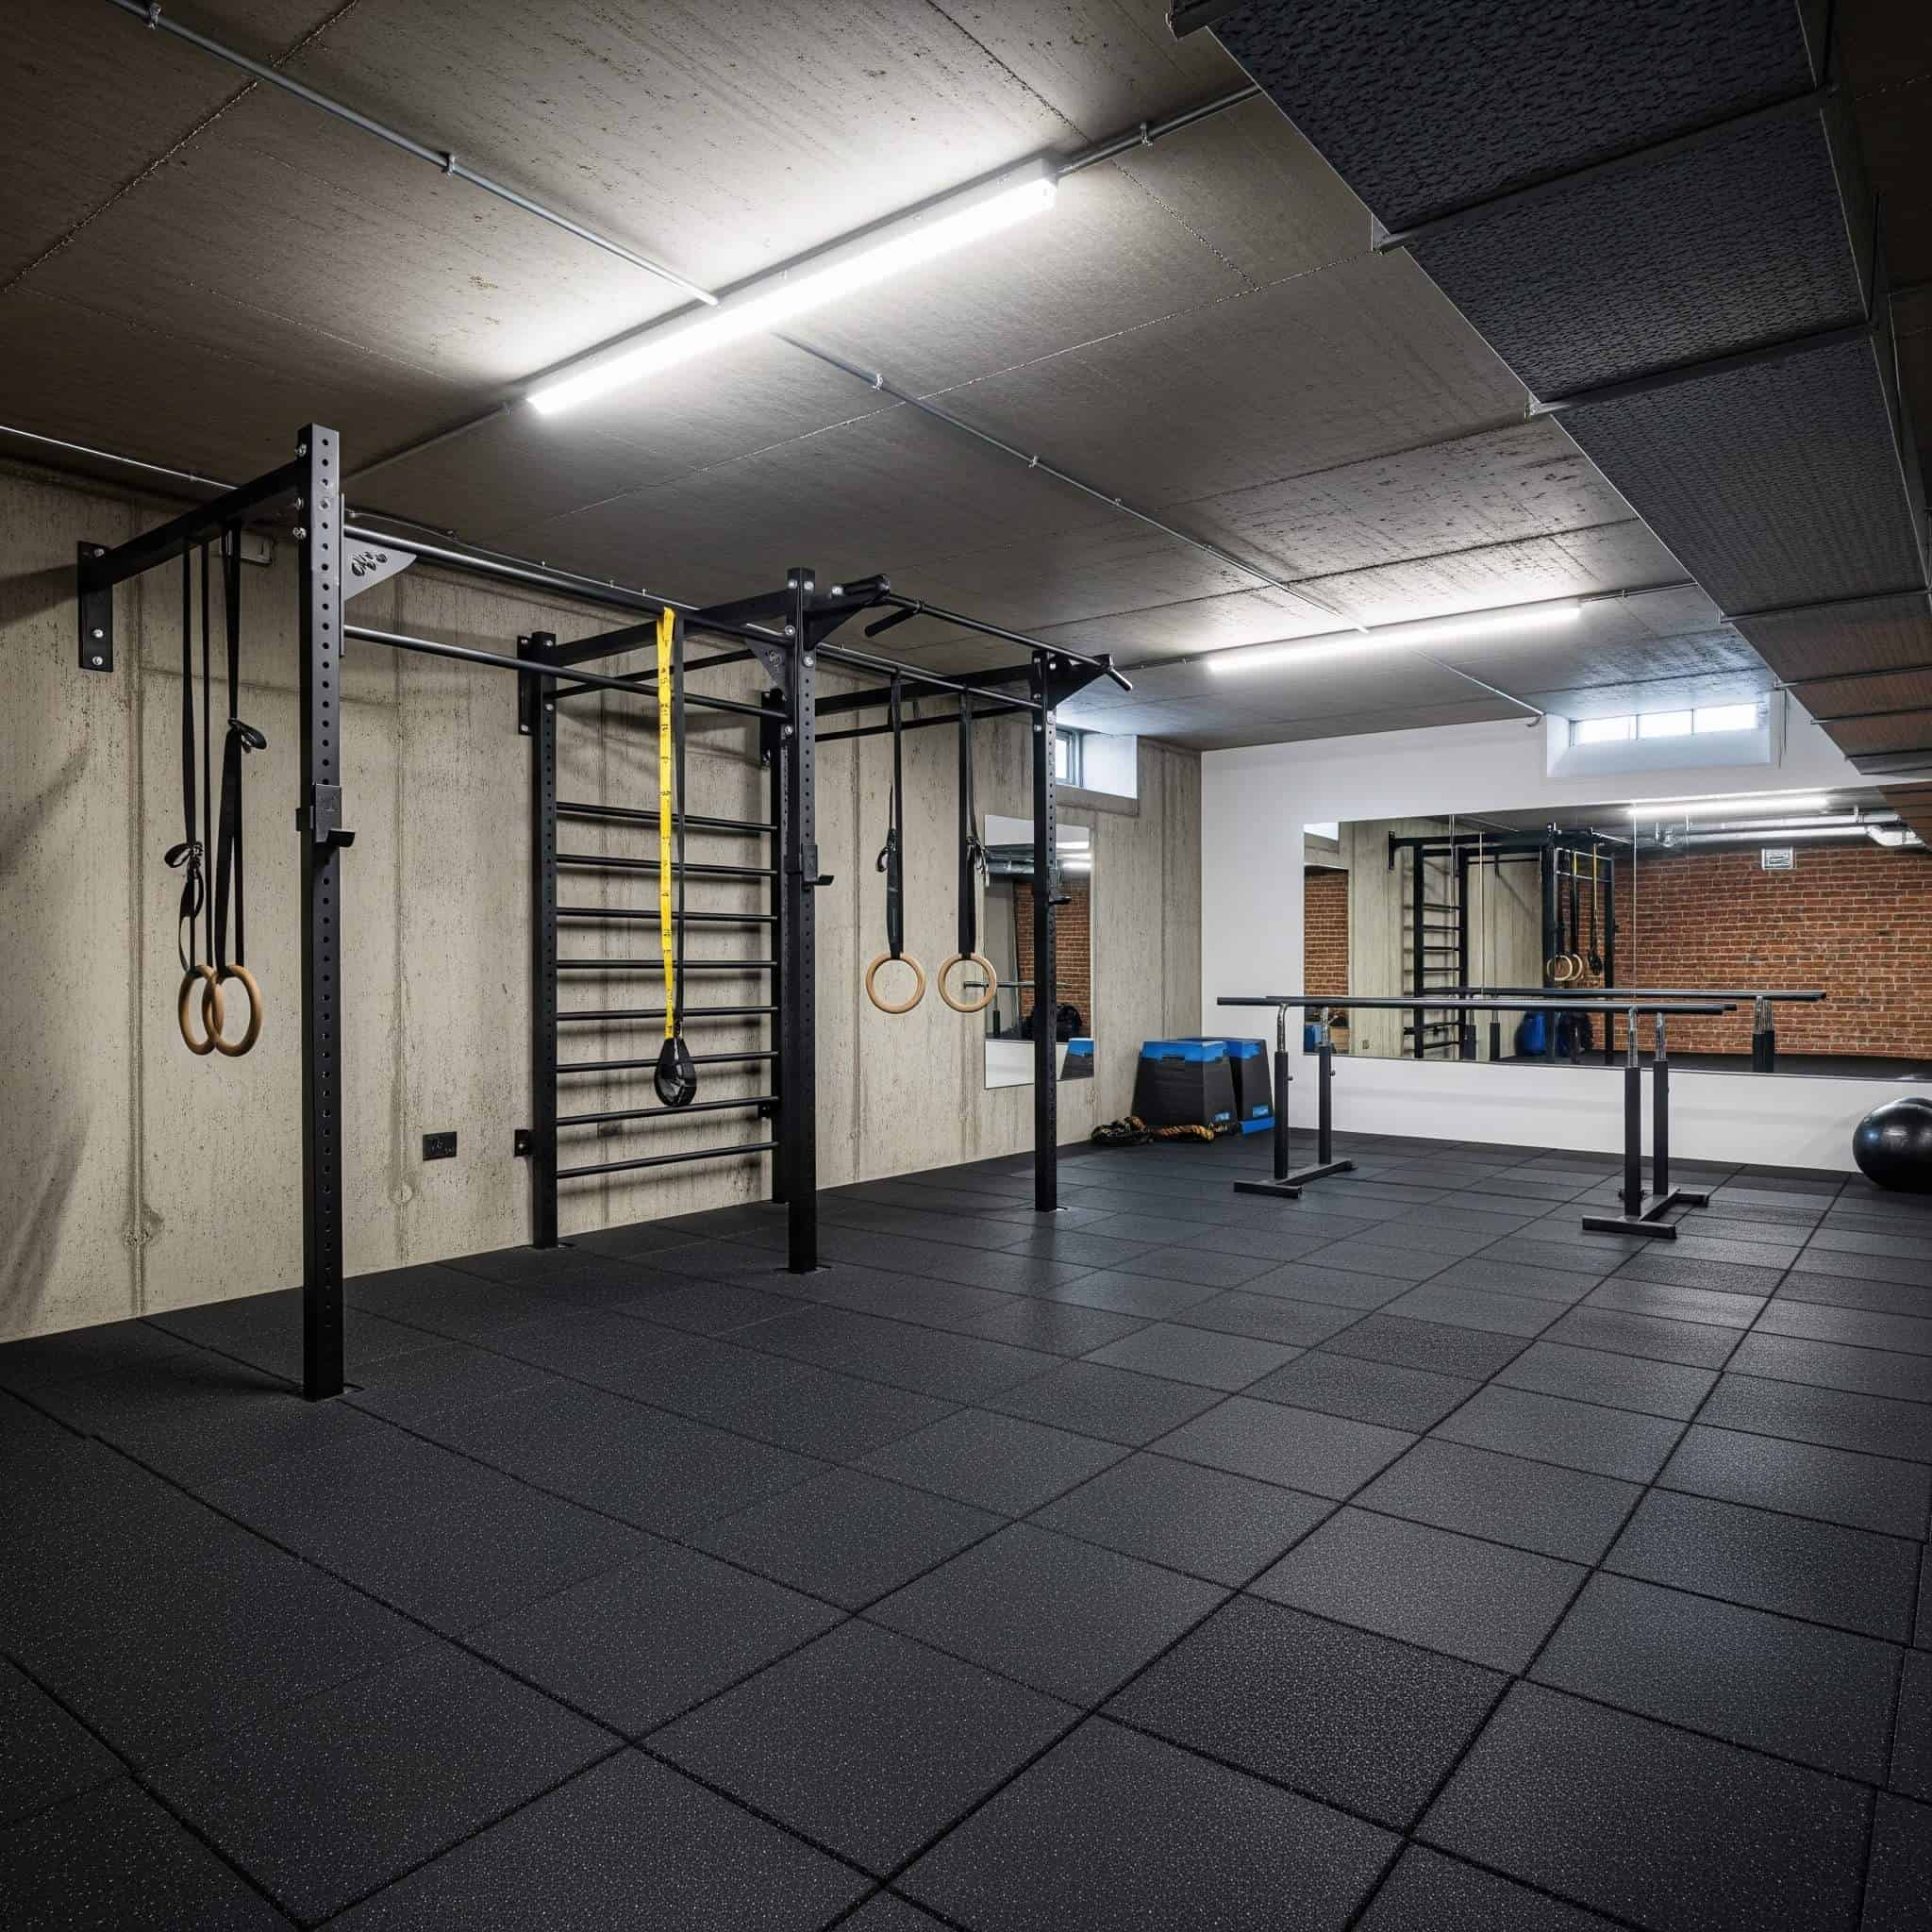
2. Industrial-Style Open Concept
This design embraces the unfinished nature of your basement rather than hiding it. By painting exposed ductwork and pipes in contrasting colors (typically black), adding strategic LED lighting, and using the concrete floor with targeted rubber matting, you create an intentionally industrial aesthetic. This approach saves on finishing costs while creating a distinctive, functional space.
Use moisture-resistant paint formulations specifically designed for basement environments when painting exposed elements. Standard interior paints can peel and flake in the higher humidity conditions typical of basements, creating an ongoing maintenance headache.
Install LED strip lighting along beams or ductwork to create indirect lighting that minimizes shadows and enhances the industrial aesthetic. I added color-changing LED strips along my exposed ceiling joists, which not only improved visibility but also created an energizing atmosphere that makes workouts more enjoyable.
3. Zone-Based Functional Training Area
Maximize an open unfinished basement by creating distinct workout zones marked by different colored flooring or simple floor tape. Typical zones include strength training, cardio, mobility/recovery, and storage areas. This approach organizes your space efficiently while accommodating various workout styles without permanent modifications to the basement structure.
Allow minimum clearances between zones: 4′ for primary walkways and 2′ for secondary paths to ensure safe movement during workouts. These pathways become especially important during circuit training when you’re moving quickly between different areas.
Use color psychology principles when selecting zone colors – red/orange for high-intensity areas, blue/green for recovery zones. I’ve used colored rubber tiles to define my workout zones, with red in my lifting area, blue in my mobility section, and black for general circulation spaces. The visual cues help me mentally transition between different workout modalities.
4. Ceiling-Mounted TRX and Ring Station
Leverage exposed ceiling joists in unfinished basements to create a versatile bodyweight training station. By mounting suspension trainers, gymnastic rings, and other hanging equipment directly to structural beams, you create a space-efficient setup that can be easily stowed away when not in use. This approach works well even in basements with limited floor space.
Mount suspension anchors to ceiling joists using 3/8″ lag bolts that penetrate at least 2″ into solid wood for safety. This mounting method ensures your equipment can safely support dynamic movements without pulling free from the ceiling.
Install equipment with minimum 4′ spacing between hanging elements to prevent collision during dynamic movements. I’ve mounted my suspension trainer, gymnastic rings, and battle ropes along different joists with sufficient spacing to allow simultaneous use by multiple people without interference.
5. Modular Storage Wall System
Keeping equipment organized and off potentially damp floors is crucial in unfinished basements. A wall-mounted storage system with adjustable components like hooks, shelves, and bins maximizes floor space while protecting your investment. These systems can be expanded over time as your equipment collection grows, making them ideal for evolving home gyms.
Secure wall-mounted storage systems to wall studs using appropriate anchors rated for 2-3 times the expected load weight. This safety margin ensures your storage won’t fail even when fully loaded with heavy equipment.
Position frequently used items between waist and shoulder height to minimize strain during access. I’ve organized my storage wall with kettlebells and dumbbells at mid-height, rarely used specialty equipment up high, and heavy plates on the lowest level for easy access without excessive lifting.
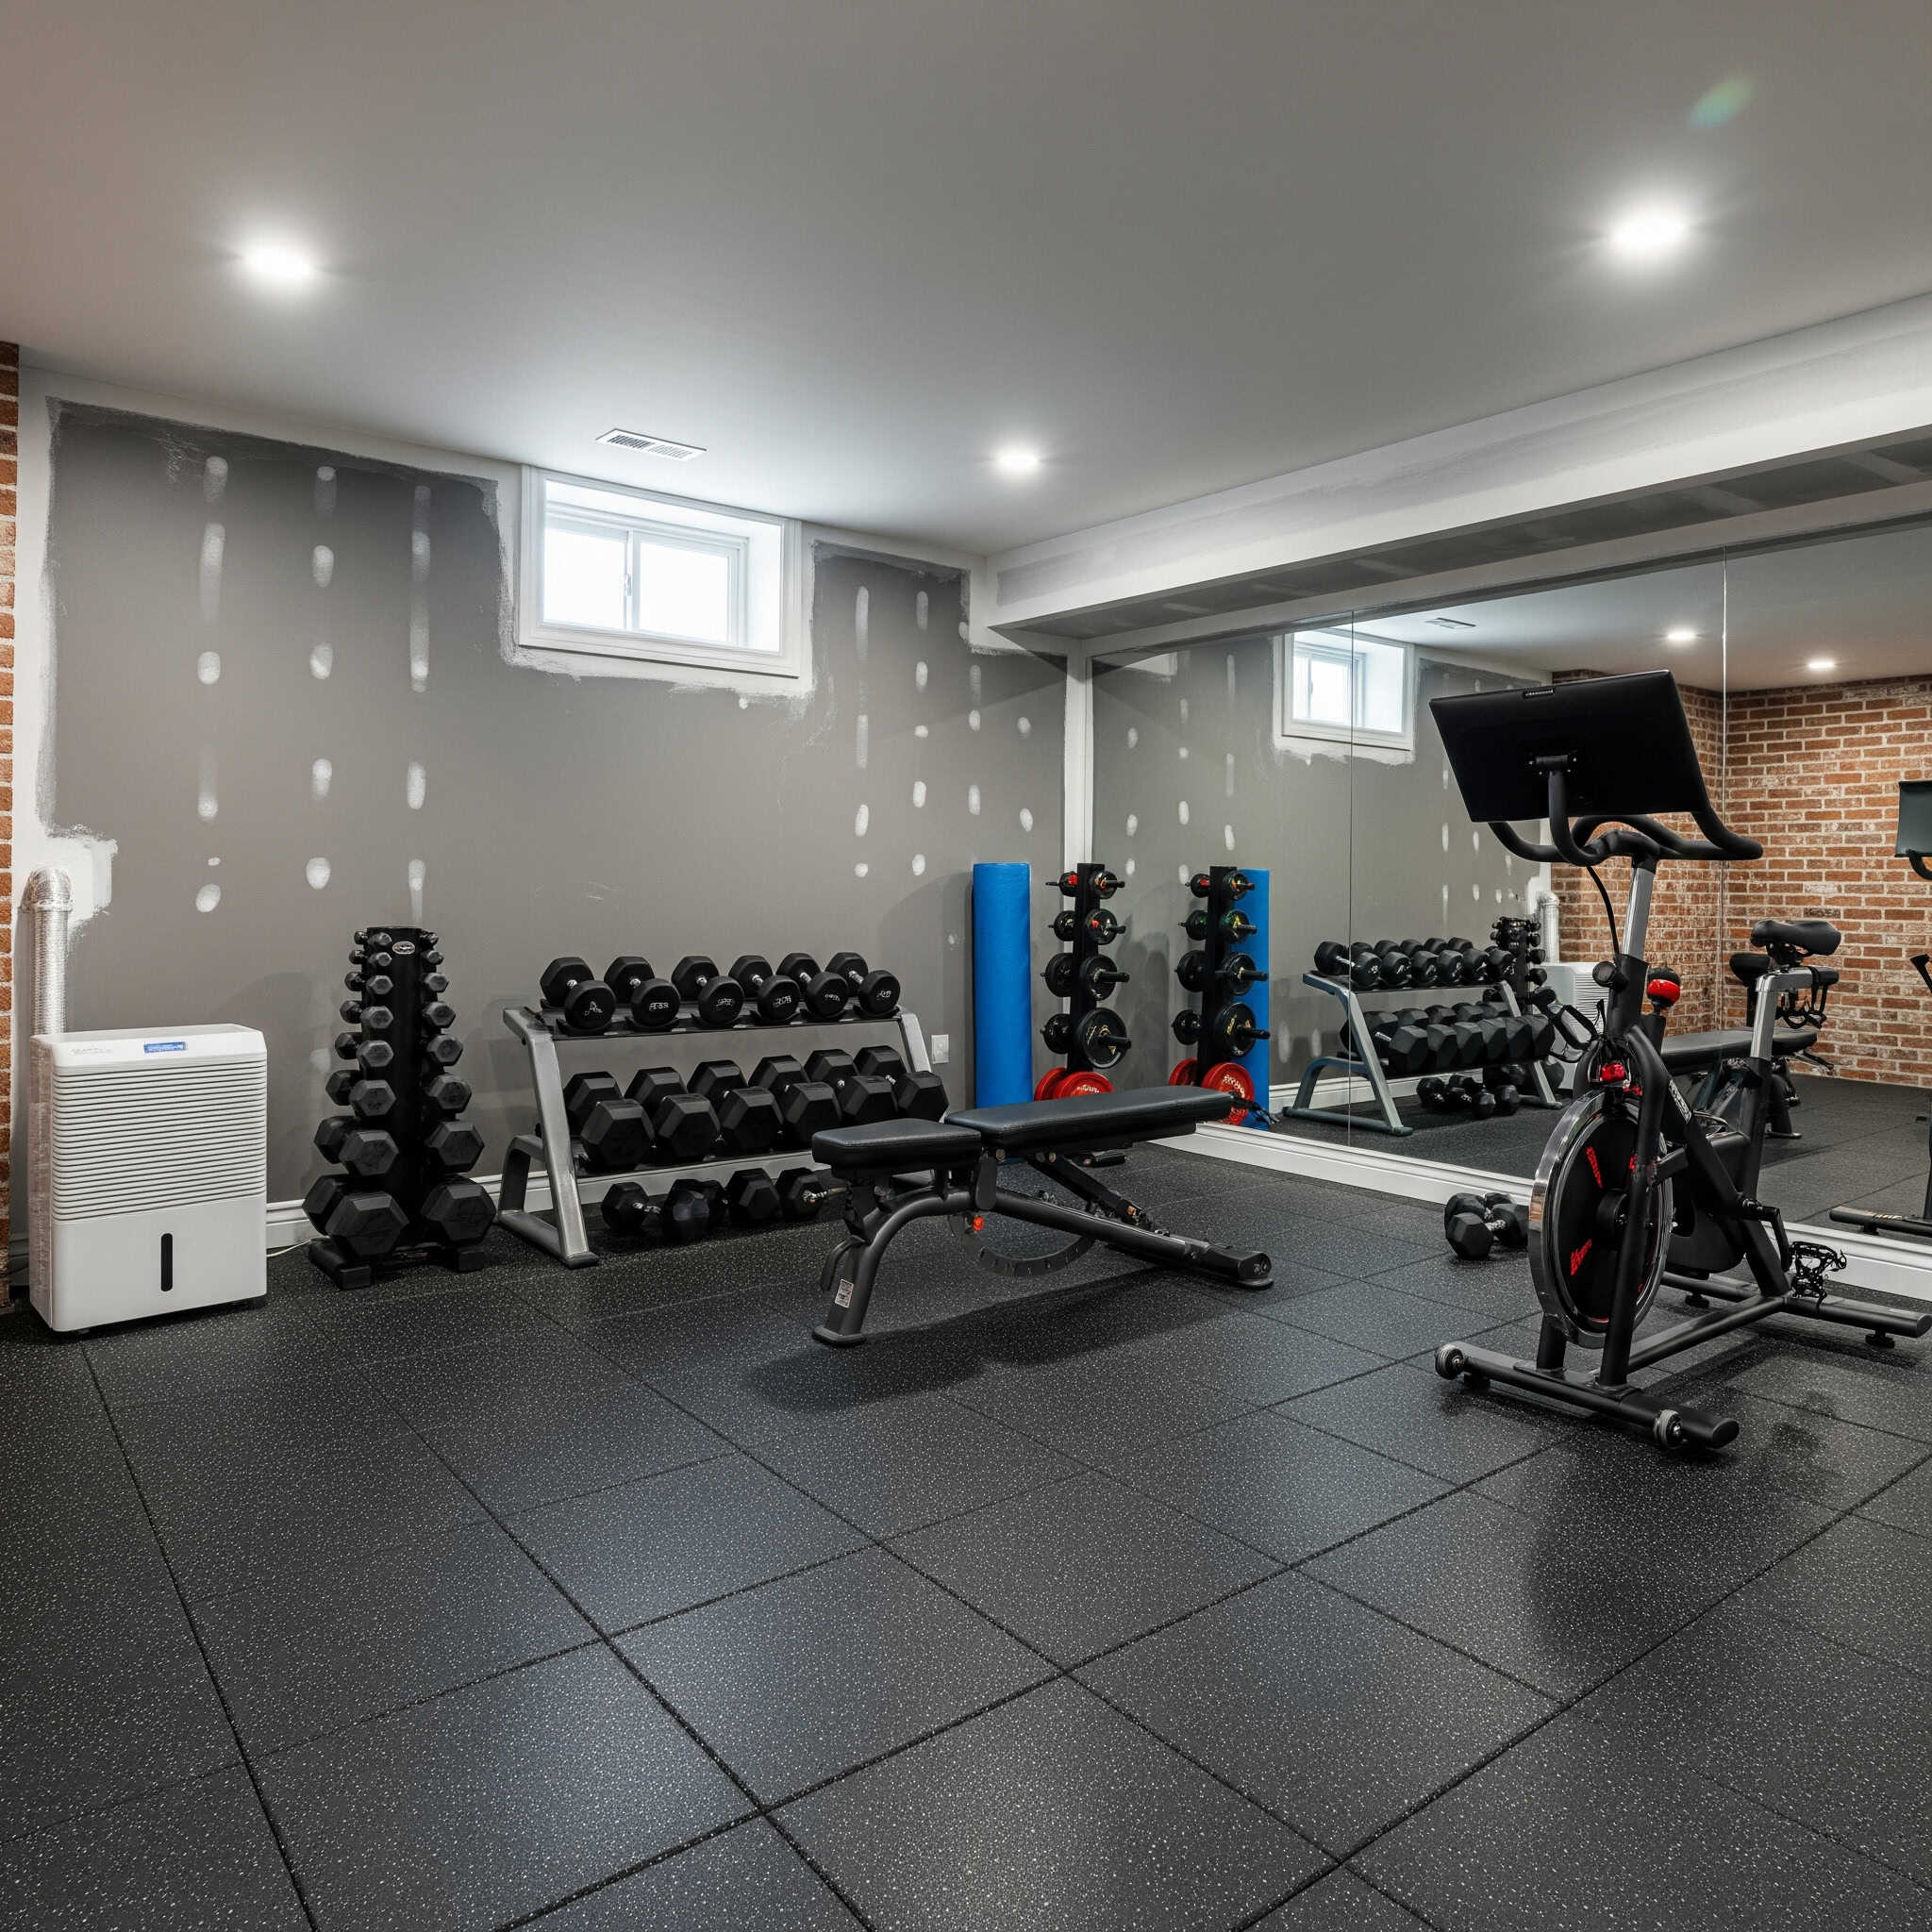
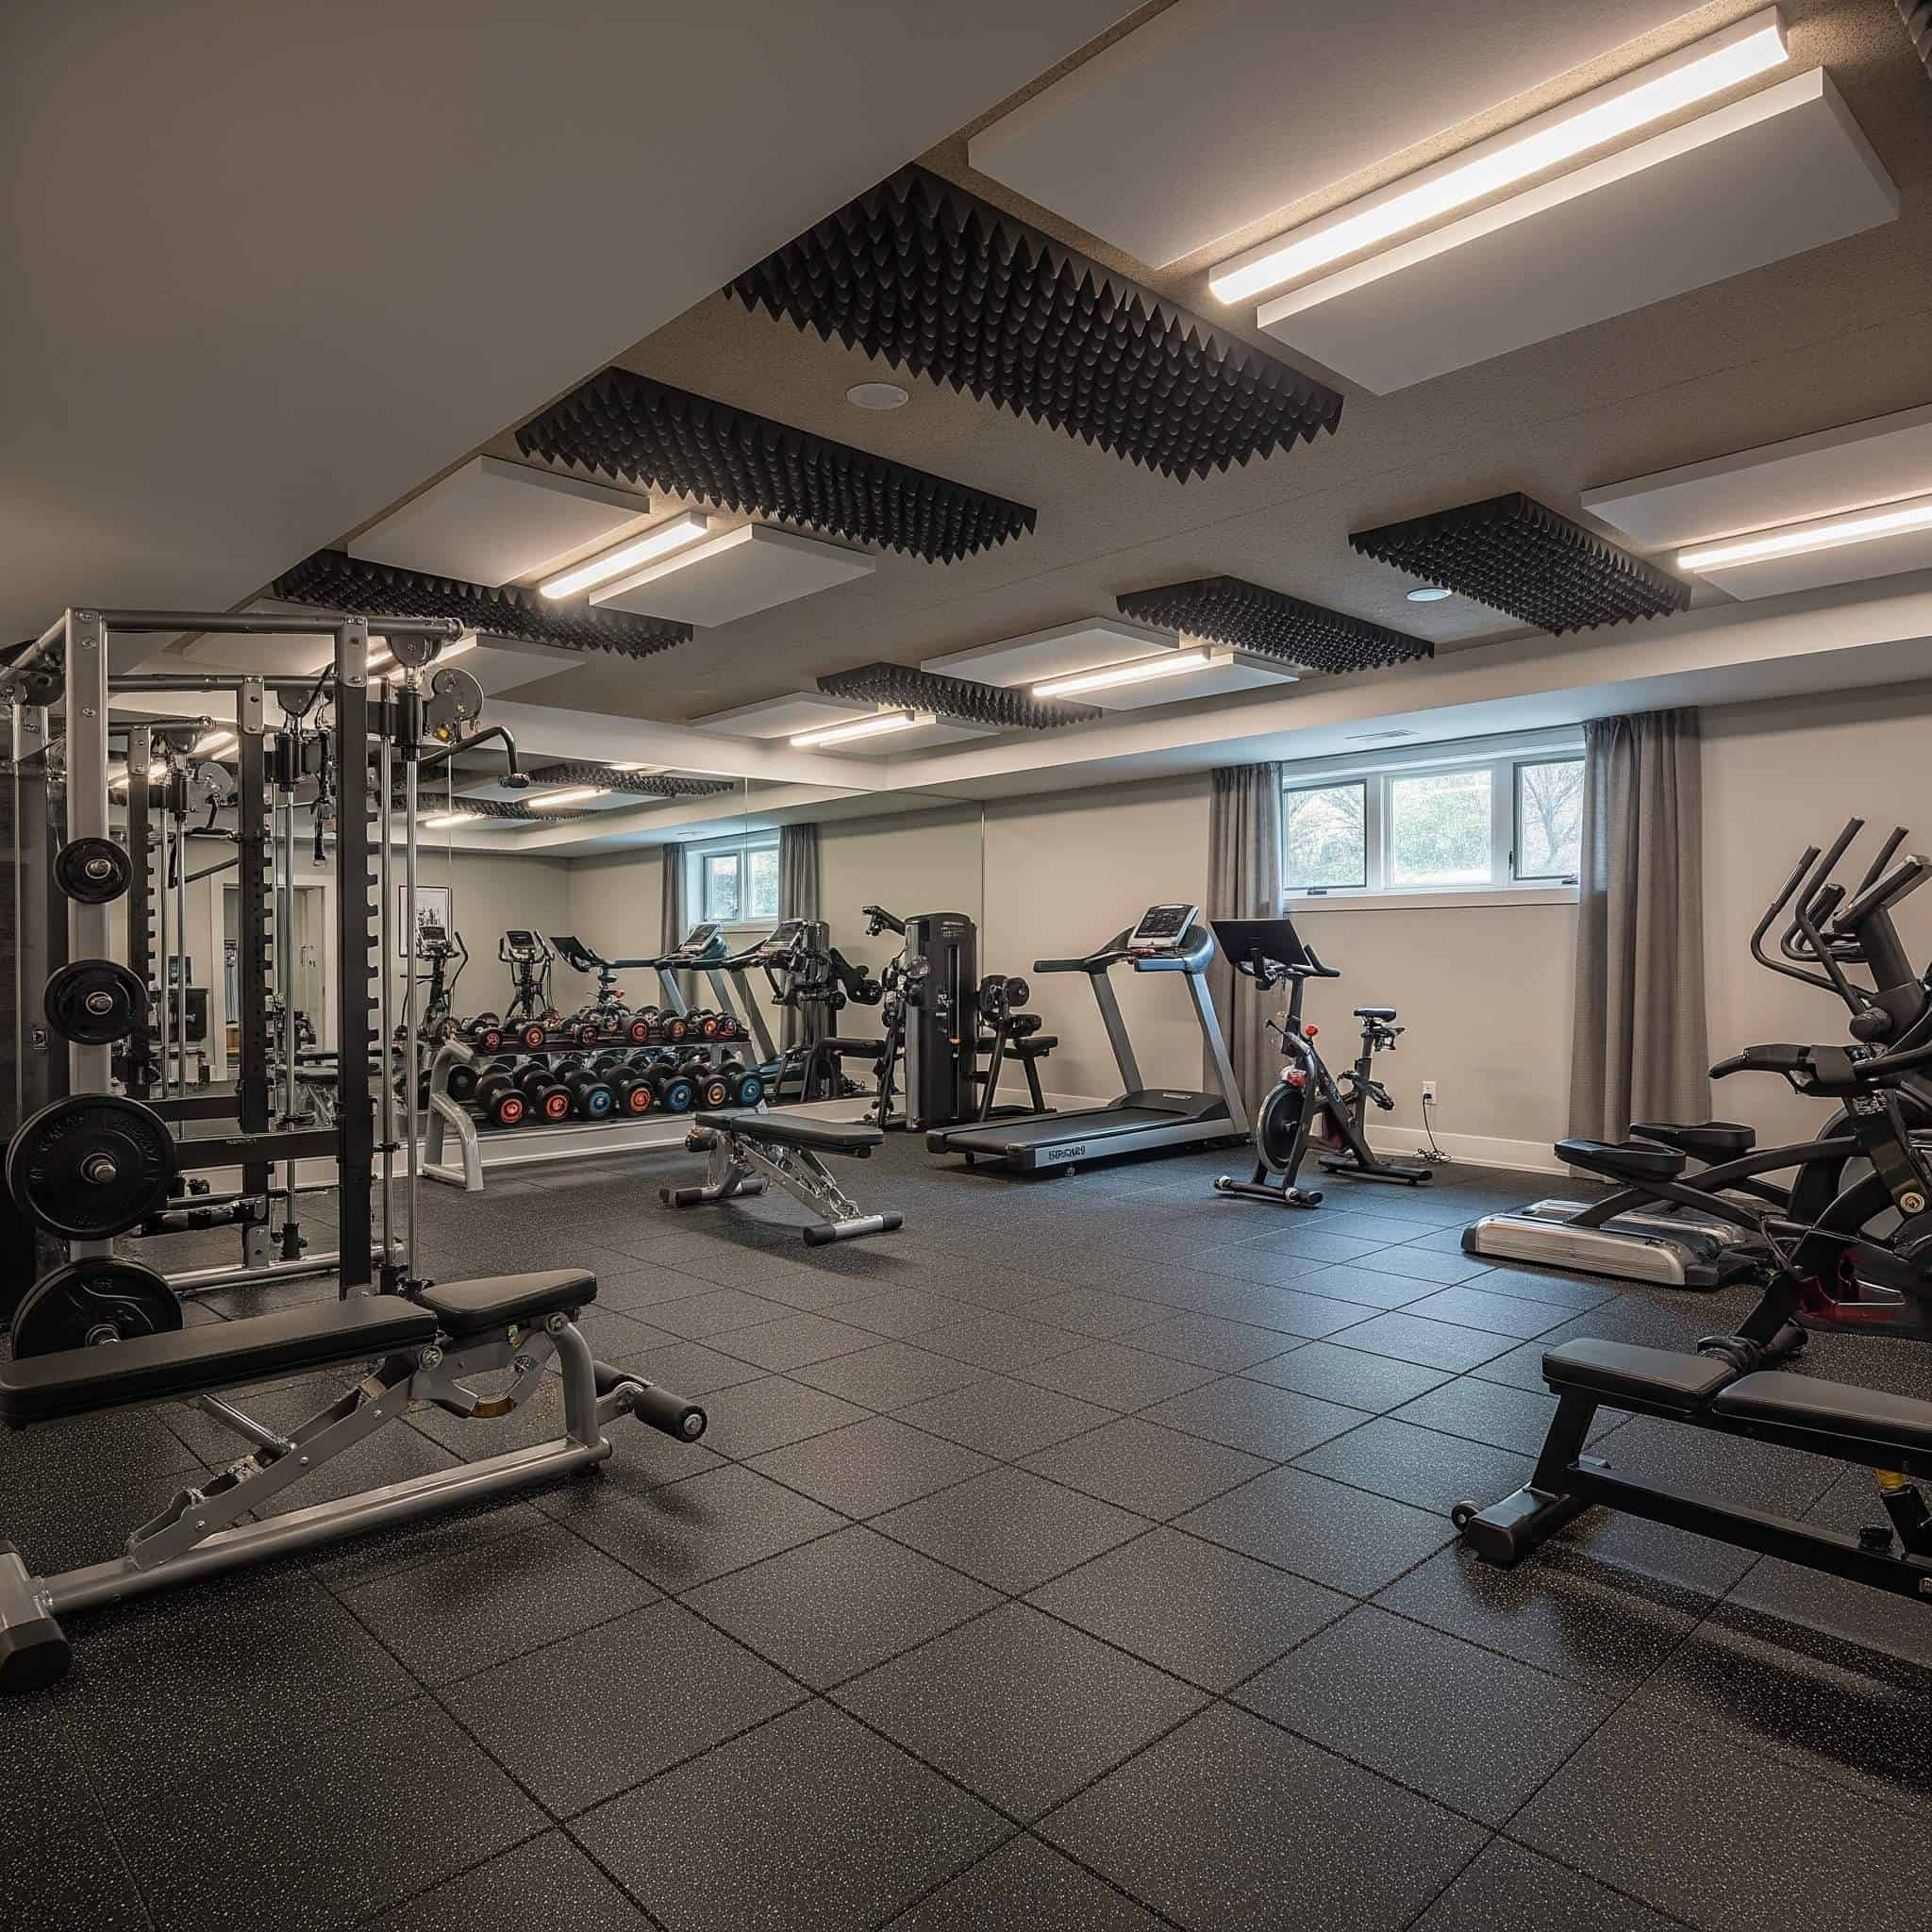
Finished Basement Gym Designs
Finished basements provide additional design possibilities for creating polished, comfortable workout environments. These spaces typically offer better temperature control, moisture management, and aesthetic appeal than unfinished areas. The following finished basement gym ideas take advantage of finished basement features while incorporating specialized elements that elevate the home gym experience beyond basic functionality.
Finished basements typically maintain more stable temperatures (within 5-10°F of main living areas) compared to unfinished spaces. This temperature stability creates a more comfortable workout environment year-round without requiring extensive supplemental heating or cooling.
Verify wall construction before mounting heavy equipment – most finished basement walls use 1/2″ drywall which requires specific mounting hardware. I always use a stud finder and appropriate anchors when installing equipment in my finished basement to ensure everything stays securely in place during use.
|
Finished Basement Gym Style |
Key Design Elements |
Equipment Recommendations |
Estimated Budget Range |
|---|---|---|---|
|
Boutique Fitness Studio |
Wall-to-wall mirrors, premium flooring, branded color scheme, custom lighting |
Commercial-grade cardio, matching equipment sets, studio accessories |
$10,000-$25,000 |
|
Home CrossFit Box |
Rig/rack system, open floor space, lifting platforms, chalk station |
Wall-mounted or free-standing rig, Olympic weights, conditioning tools |
$5,000-$15,000 |
|
Wellness Suite |
Defined workout and recovery zones, calming aesthetics, air purification |
Standard gym equipment plus recovery tools (foam rollers, massage guns) |
$8,000-$20,000 |
|
Virtual Fitness Studio |
Large display or projector, open floor space, minimal equipment |
Smart fitness mirror, streaming-compatible devices, versatile floor space |
$3,000-$12,000 |
|
Multi-Purpose Space |
Modular equipment, convertible elements, strategic storage |
Foldable/storable equipment, multi-use furniture, hidden storage |
$4,000-$15,000 |
6. Boutique Fitness Studio Replica
Recreate the premium experience of high-end fitness studios in your own basement. This design features wall-to-wall mirrors, professional-grade rubber flooring, customizable lighting systems, and dedicated audio equipment. The result is a motivating, Instagram-worthy space that rivals commercial facilities while offering the convenience of home workouts.
Install mirrors with proper moisture barriers (minimum 1/4″ air gap) between mirror and wall surface to prevent moisture damage. This gap allows air circulation that prevents condensation from forming behind mirrors, which can lead to discoloration and eventual failure of the mirror adhesive.
Use commercial-grade rubber flooring (minimum 8mm thickness) with interlocking design to prevent shifting during use. I invested in premium flooring for my boutique-style basement gym, and the difference in feel and performance compared to basic home gym mats is remarkable—well worth the additional cost.
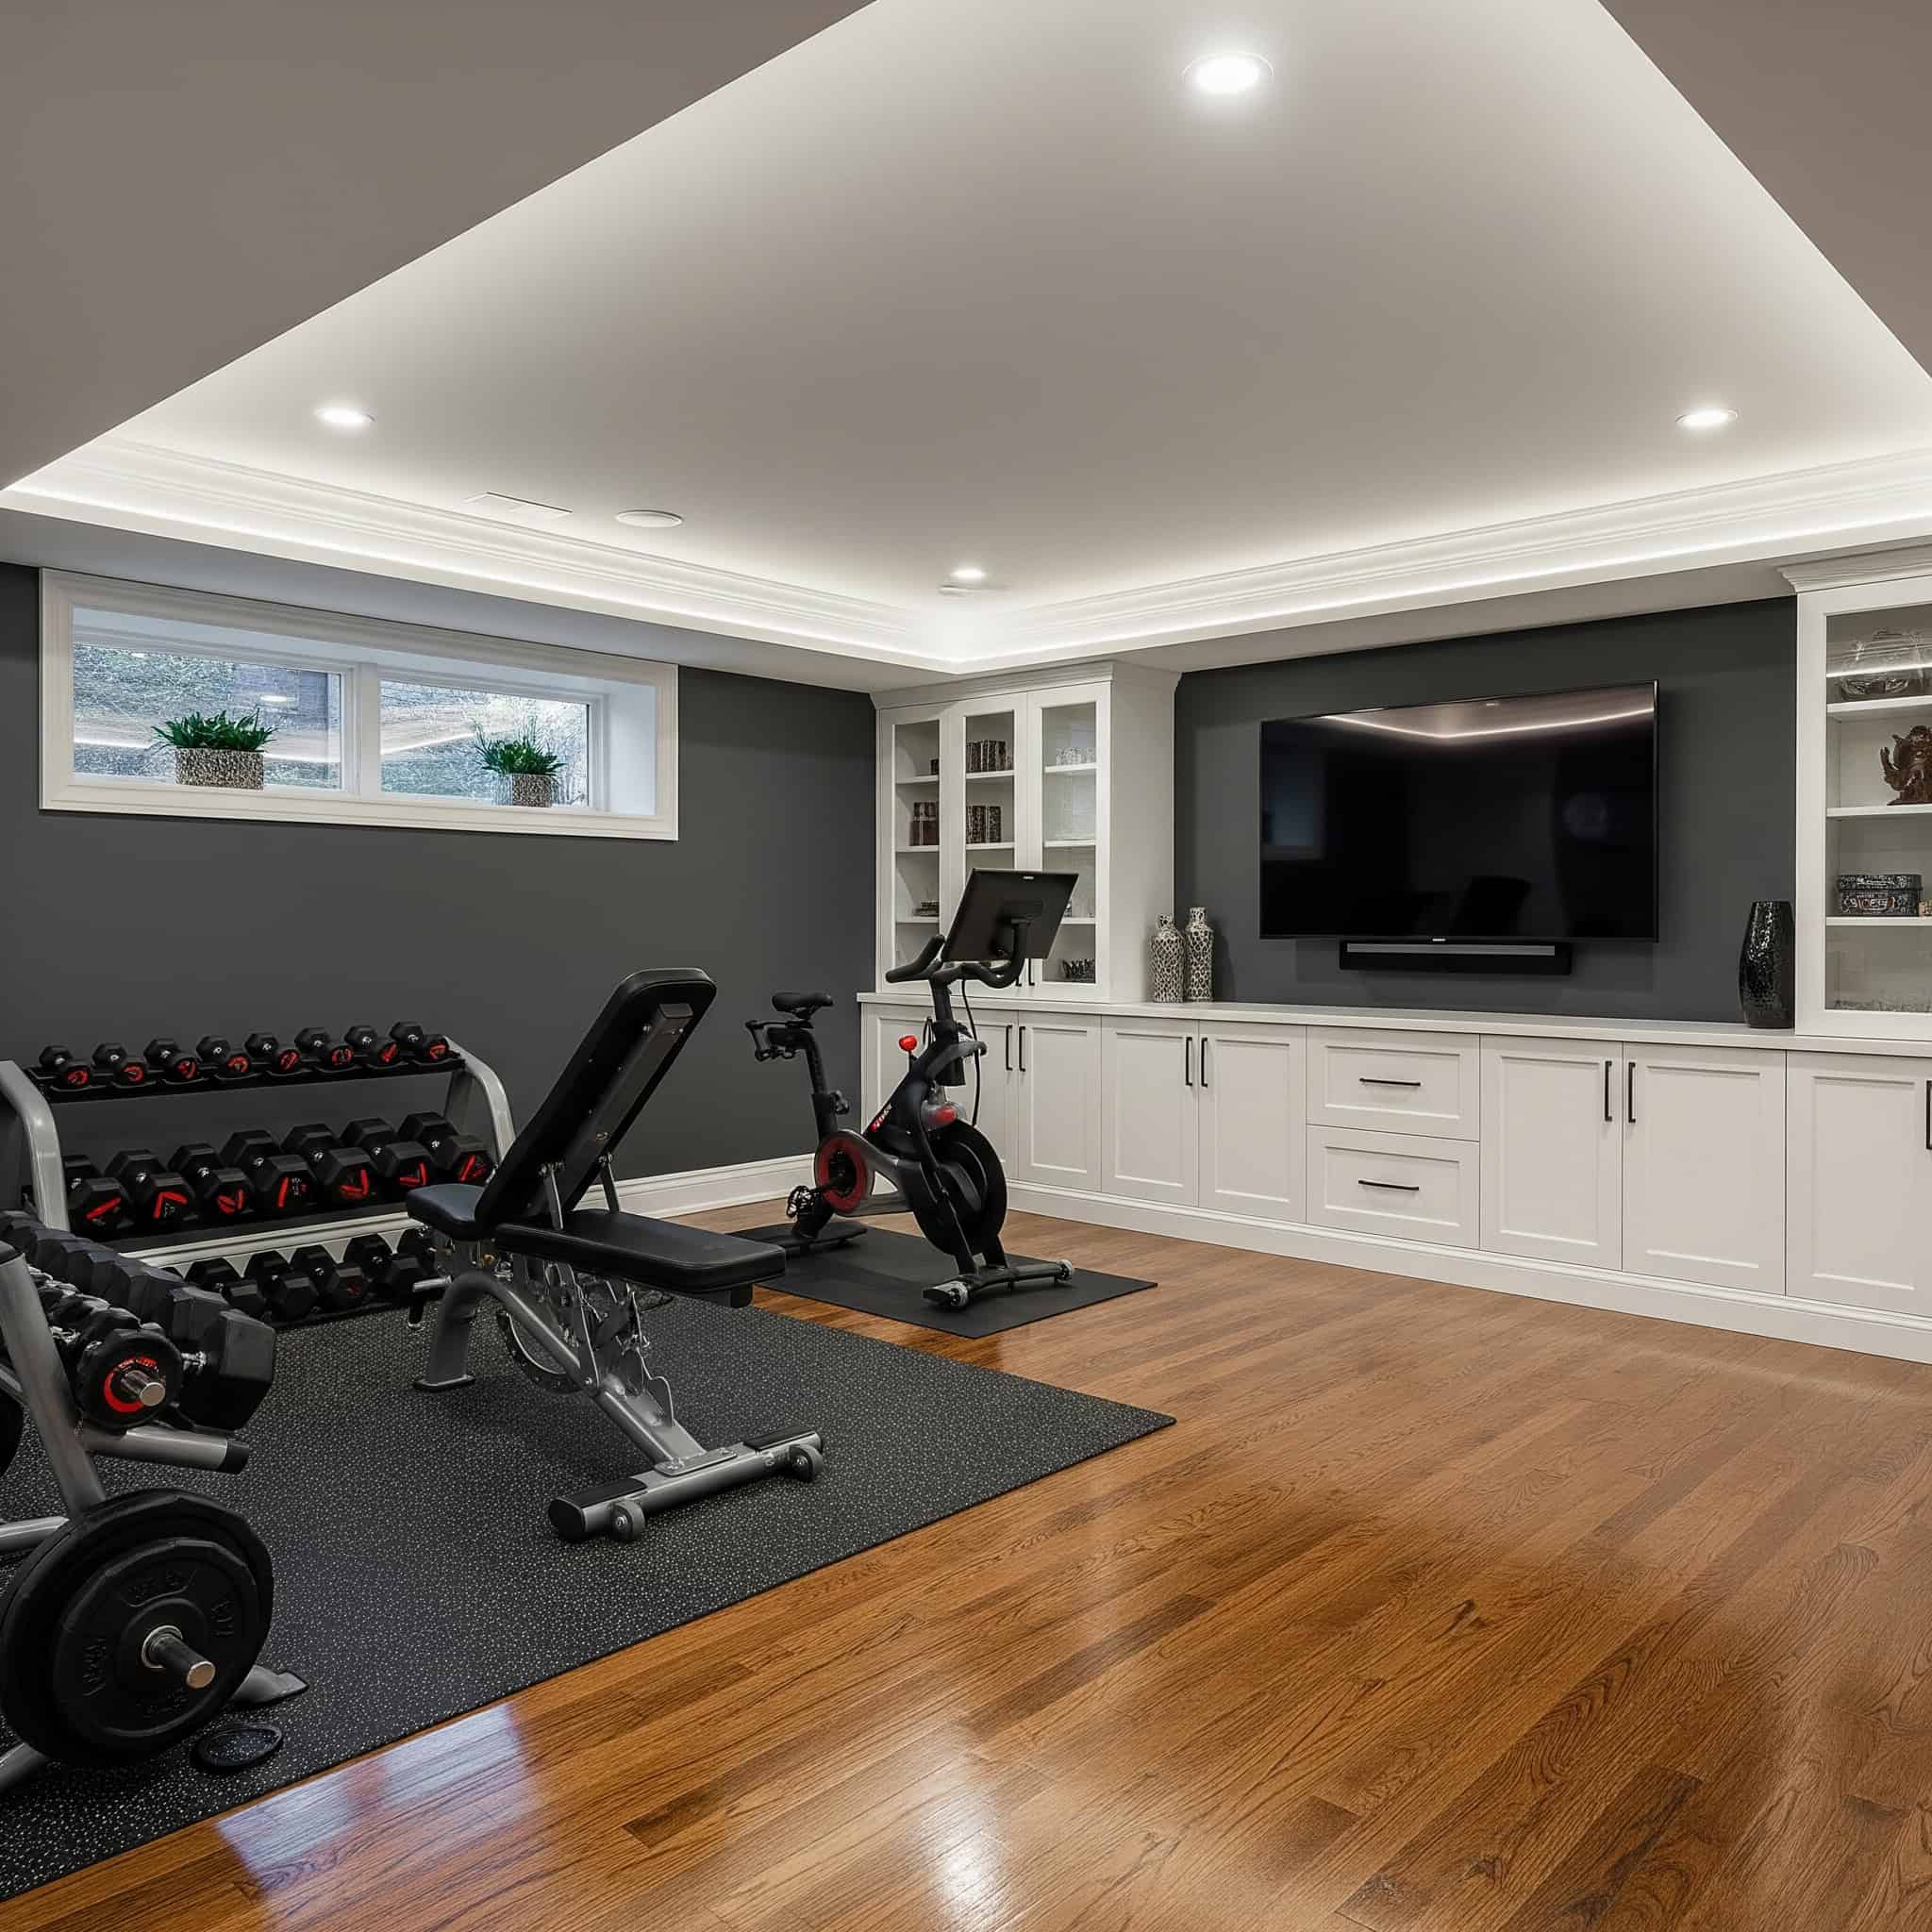
7. Multi-Purpose Fitness and Recreation Space
Maximize your basement’s utility by designing a space that transitions between workout area and entertainment zone. This approach incorporates retractable or storable fitness equipment, modular furniture, and versatile flooring solutions. Smart storage solutions and thoughtful layout planning allow quick conversions between functions without compromising either experience.
Implement modular flooring systems that can withstand both exercise equipment and social gatherings (minimum compression rating of 400 psi). These specialized flooring options maintain their appearance and performance despite the varied demands of different activities.
Design electrical plans with separate circuits for fitness equipment and entertainment systems to prevent overloads during simultaneous use. I’ve installed a dedicated electrical panel in my basement with clearly labeled circuits for different zones, which prevents tripped breakers during parties or family movie nights.
The Johnson family transformed their 400 sq. ft. finished basement into a multi-purpose space that seamlessly transitions between fitness center and entertainment area. They installed a wall-mounted folding squat rack that tucks away when not in use, a custom storage cabinet that houses their dumbbells and kettlebells behind attractive doors, and a modular sectional sofa that can be rearranged to create open floor space. The flooring solution was key to their success: they used interlocking rubber tiles with a wood-grain appearance that provides proper cushioning for workouts while looking stylish enough for social gatherings. With a 15-minute transition time between configurations, they’ve effectively doubled their usable basement space without compromising on either function.
8. Home CrossFit Box
Create a dedicated functional fitness space modeled after CrossFit gyms. This design features wall-mounted or free-standing rig systems, open floor space for metabolic conditioning, and specialized areas for Olympic lifting. Comprehensive rubber flooring throughout protects both the structure and equipment during high-intensity, dynamic workouts.
Install platform systems with minimum 1.5″ thickness for Olympic lifting areas to absorb impact forces of up to 4x the weight being dropped. This specialized flooring prevents structural damage while reducing noise transmission to the rest of your home.
Ensure ceiling clearance of at least 9′ for overhead movements like wall balls and rope climbs. I had to modify several CrossFit workouts in my 7’6″ basement until I renovated a section to provide adequate clearance for full-range movements.
9. Wellness Suite with Workout and Recovery Zones
Expand beyond traditional fitness equipment by incorporating dedicated recovery tools and spaces. This comprehensive approach includes workout equipment alongside areas for stretching, foam rolling, and possibly advanced recovery options like infrared saunas or cold plunge tubs. The design focuses on creating a complete wellness environment rather than just a workout space.
Install dedicated ventilation systems capable of 10-12 air changes per hour for recovery equipment that generates heat or humidity. This enhanced ventilation prevents moisture buildup that could damage your basement finishes or create unhealthy conditions.
Use antimicrobial flooring materials in recovery zones to maintain hygiene in areas where direct skin contact is common. I’ve installed specialized yoga flooring in my recovery zone that resists bacterial growth and can be easily sanitized between uses.
10. Virtual Fitness Studio
Design your basement gym around digital fitness experiences with a wall-mounted large screen or projector system as the focal point. This setup creates an immersive environment for following along with streaming workouts, virtual classes, or fitness apps. The space prioritizes clear sightlines to the display and sufficient room to perform movements without obstacles.
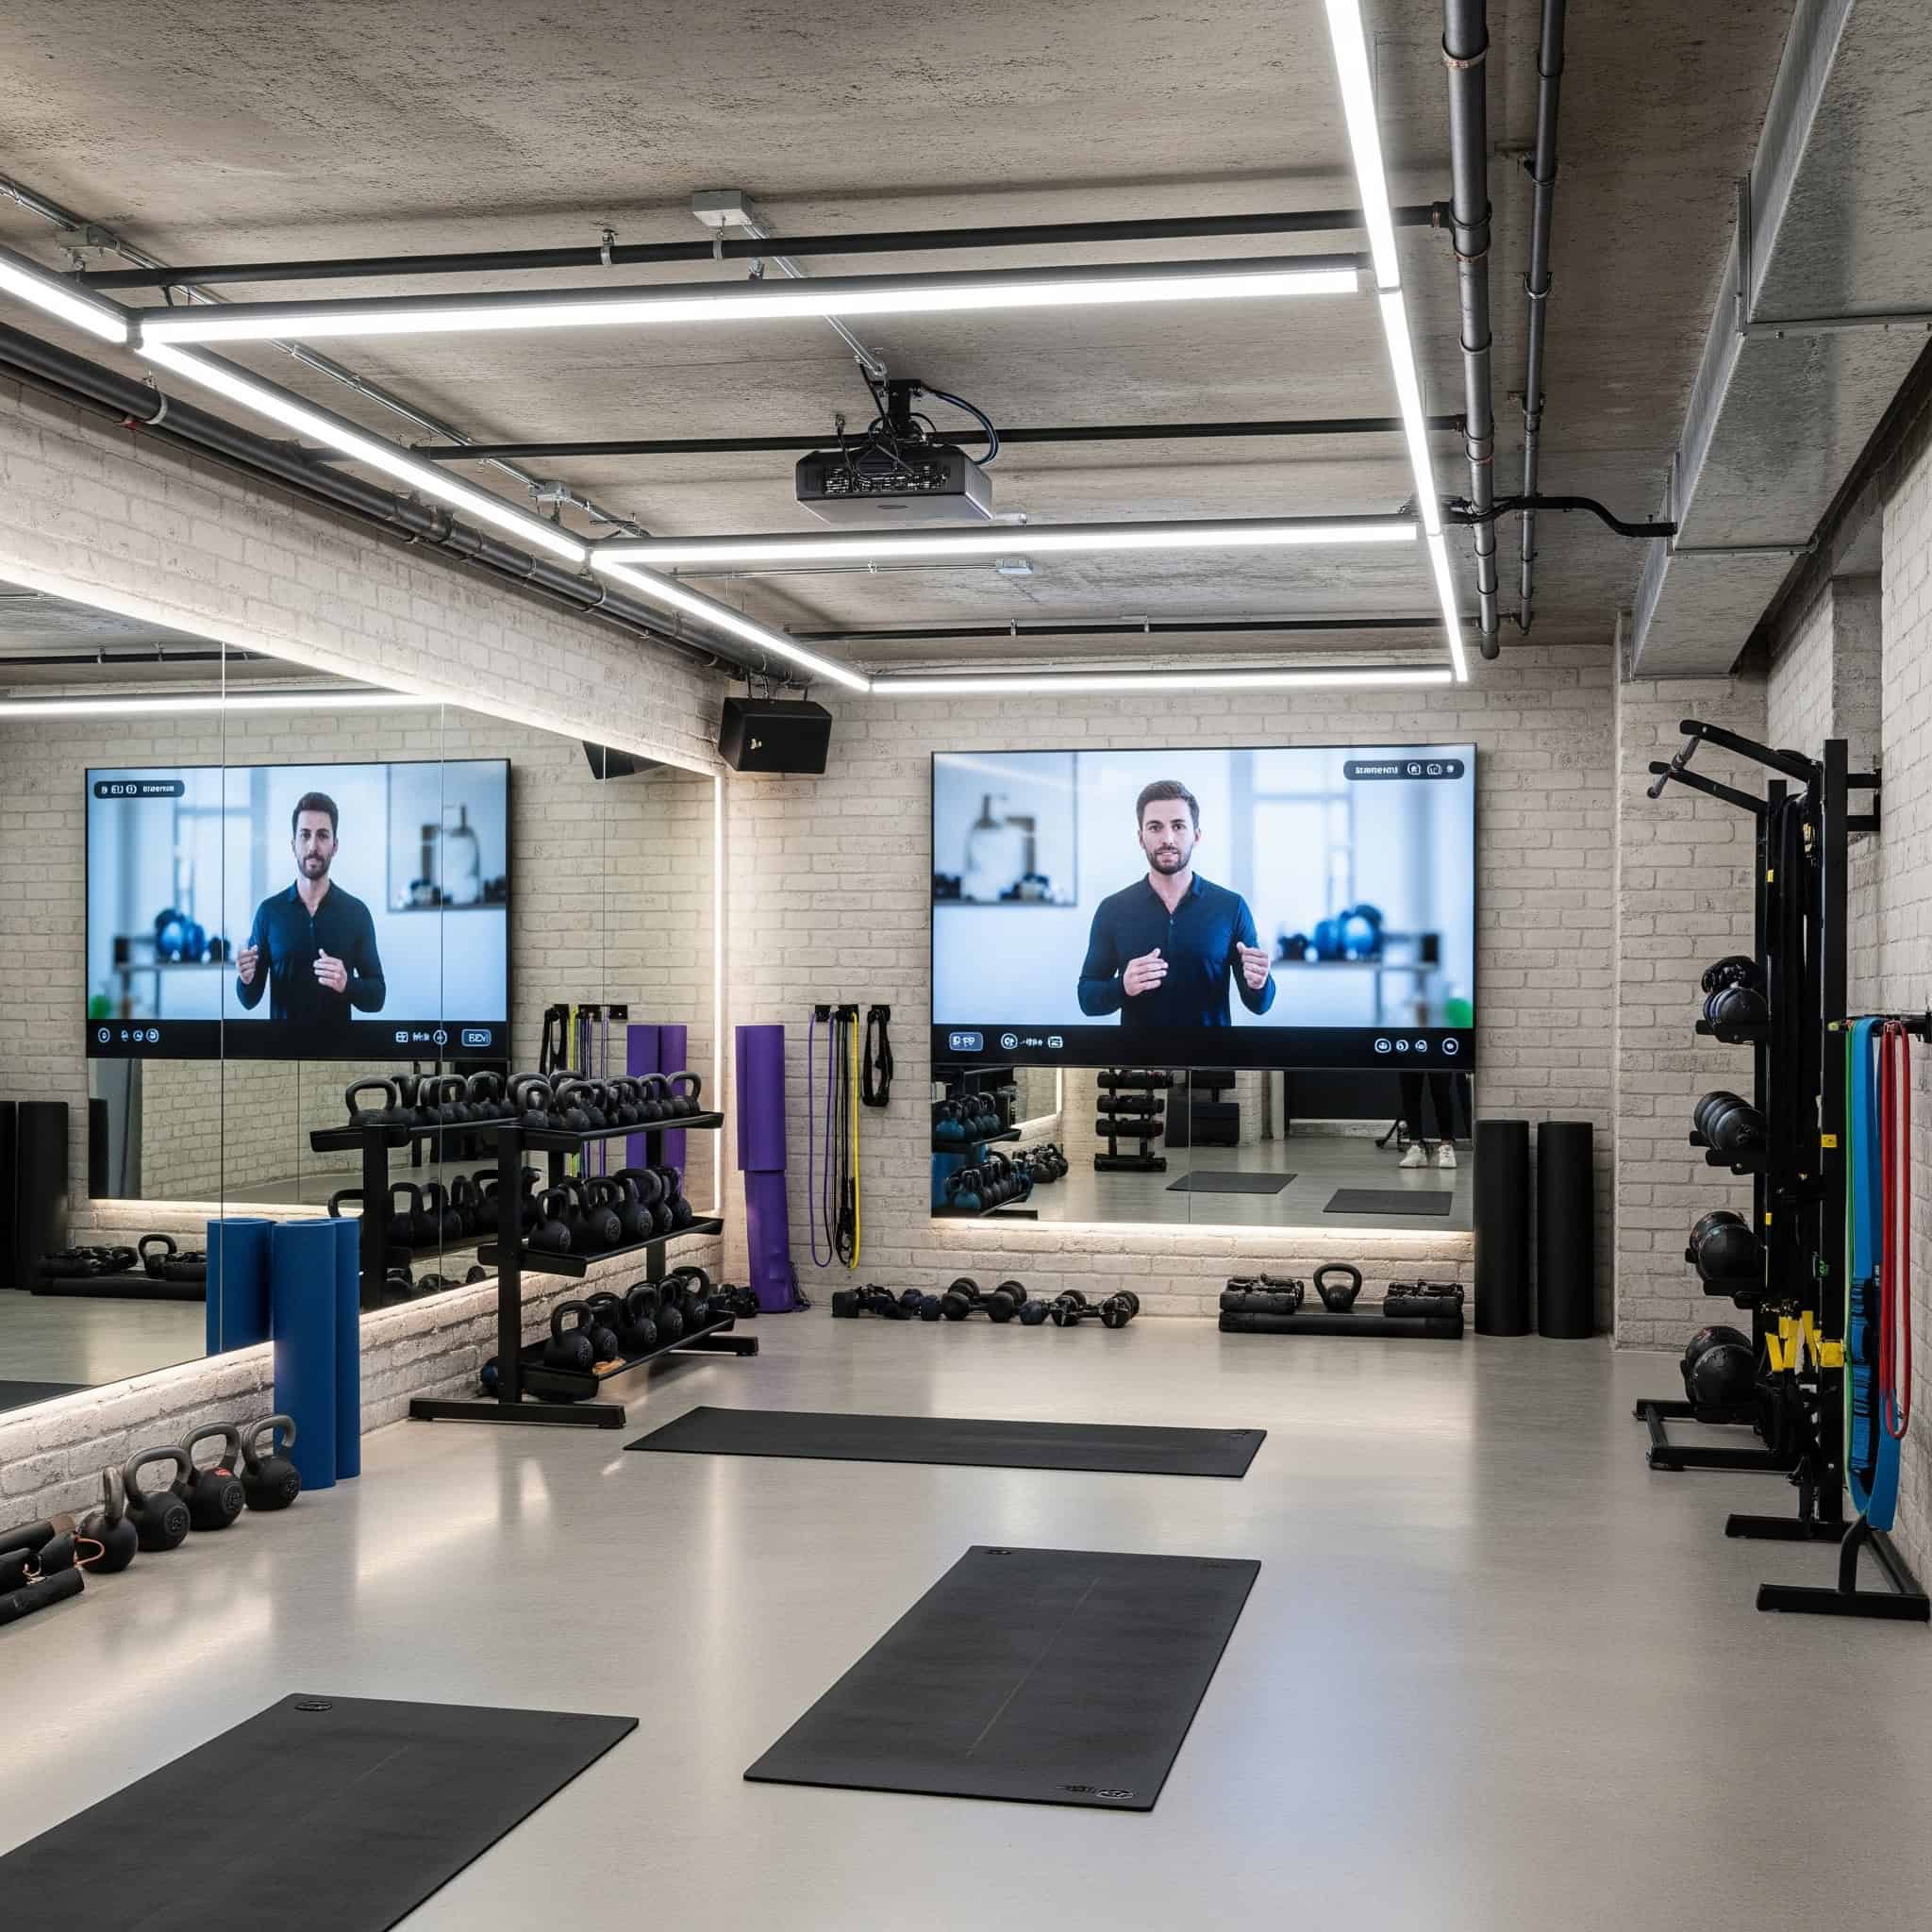
Position screens at eye level when in exercise position (typically 4-5′ from floor) to prevent neck strain during workouts. This ergonomic positioning makes a significant difference in comfort during longer workout sessions.
Install dedicated WiFi access points in basement areas to ensure minimum 25 Mbps consistent connection for streaming high-definition content. I added a mesh WiFi node specifically for my basement gym, which eliminated the buffering and connection drops that previously interrupted my streaming workouts.
Sarah, a fitness instructor who teaches virtual classes, converted her 300 sq. ft. basement into a professional-quality streaming studio for under $3,000. The key to her success was strategic lighting—she installed adjustable LED panel lights on two walls and ceiling-mounted ring lights that could be repositioned based on the time of day. For the background, she created a textured feature wall using peel-and-stick wood panels that provided visual interest without distracting viewers. Her flooring solution combined cushioned interlocking tiles with a vinyl overlay that created a clean, consistent look on camera while providing proper support for high-impact movements. The most innovative element was her three-zone setup: a central teaching position with perfect lighting and camera angles, a strength area with visible weight options, and a cardio space with enough room for dynamic movements—all visible within her camera frame to provide variety during streaming sessions.
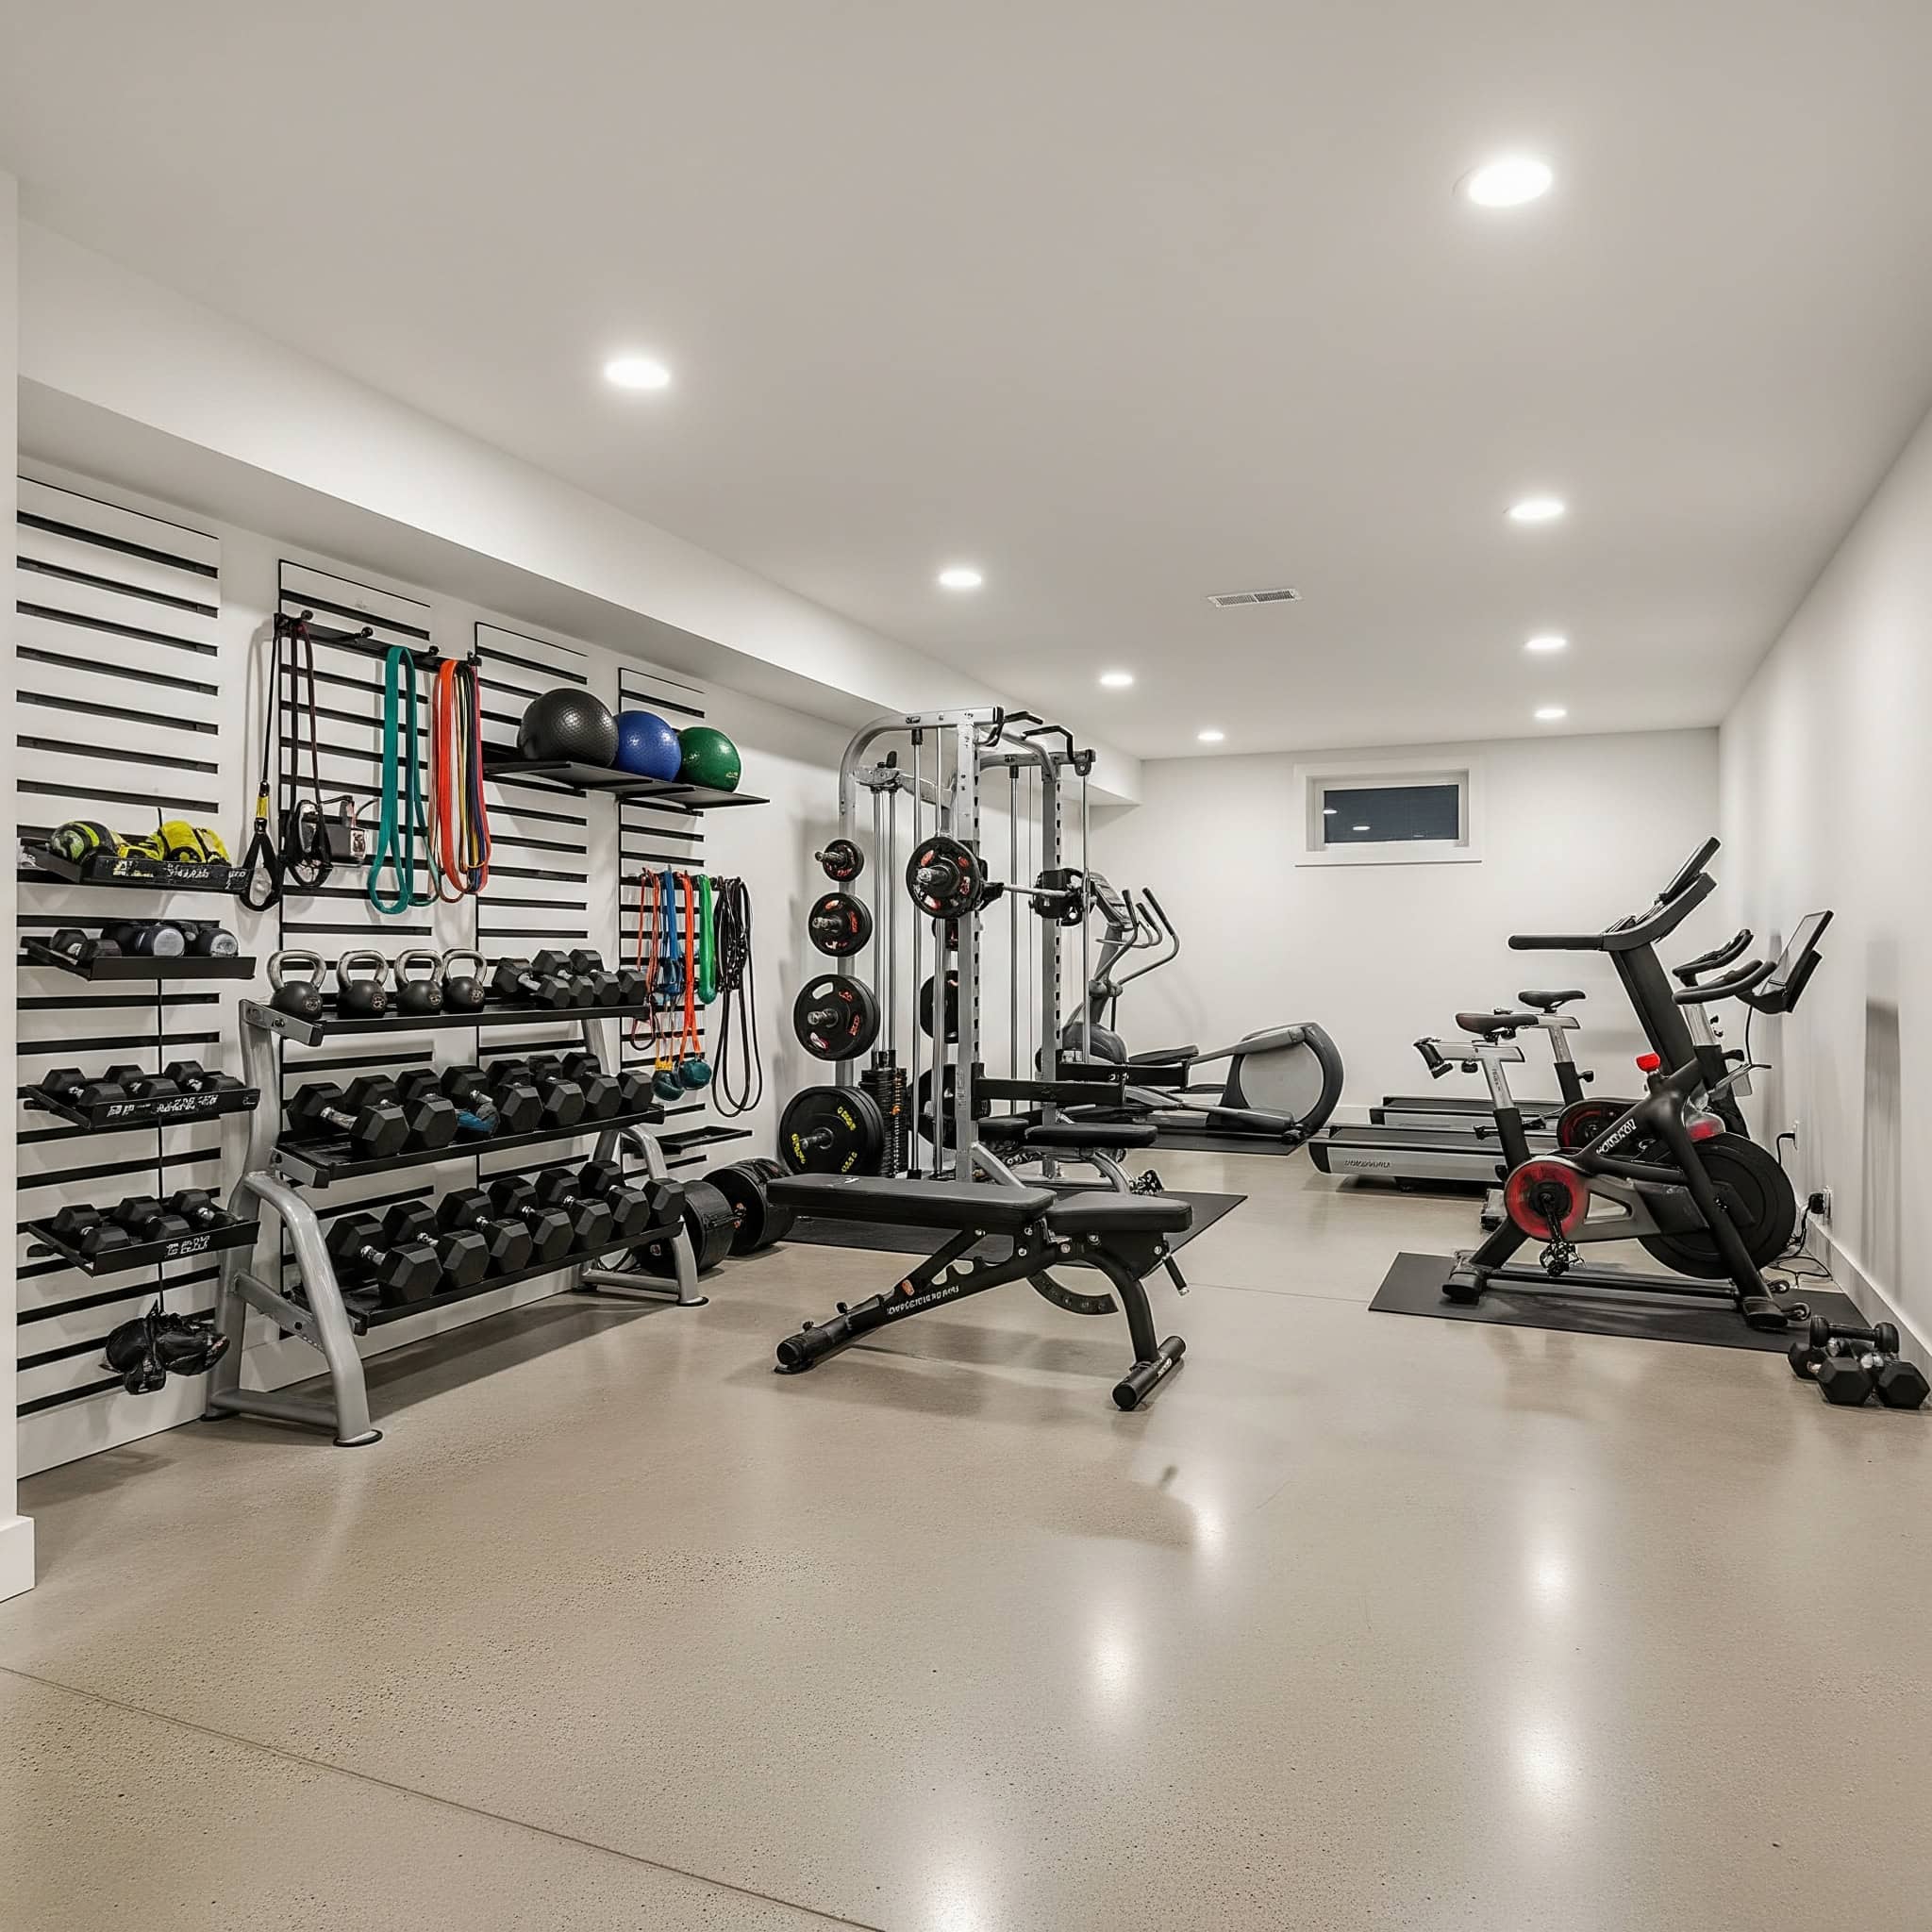
Space-Efficient Solutions for Small Basements
Limited basement square footage doesn’t mean limiting your fitness options. These specialized solutions maximize functionality in compact spaces through innovative equipment choices and strategic layout planning. By focusing on vertical space utilization, multi-function equipment, and clever storage solutions, even the smallest basements can become effective workout environments.
Small basement gyms (under 150 sq ft) benefit from equipment with footprint-to-functionality ratios of at least 1:5 (one square foot of space provides at least five exercise variations). This efficiency metric helps prioritize equipment that delivers maximum workout variety in minimal space.
Implement 3D space planning that utilizes height zones: floor level (0-1′), mid-level (1-6′), and ceiling level (6’+) for maximum efficiency. This three-dimensional approach to space planning can triple the functional capacity of small basement areas.
11. Wall-Mounted Folding Rack System
Wall-mounted folding racks provide full power rack functionality while occupying minimal floor space when not in use. These systems typically extend only 4-6 inches from the wall when folded, then pull out to provide a full squat rack with pull-up capabilities during workouts. Paired with an adjustable bench and compact weight storage, this solution offers comprehensive strength training in extremely limited spaces.
Mount folding racks to wall studs using minimum 1/2″ lag bolts that penetrate at least 2.5″ into solid wood for safe weight capacity of 500+ pounds. This secure mounting is essential for safety during heavy lifts and pull-up exercises.
Allow minimum 7′ of clearance from the wall for proper rack deployment and exercise space. I initially tried to squeeze my folding rack into a tighter space, but quickly found that I needed the full recommended clearance to perform exercises safely and comfortably.
12. Vertical Equipment Storage
Traditional horizontal storage racks consume valuable floor space in small basements. Vertical storage solutions use wall-mounted systems to store dumbbells, kettlebells, resistance bands, and other accessories in a fraction of the space. These systems keep equipment organized, accessible, and protected from potential moisture while maximizing available workout area.
Distribute weight evenly across multiple wall studs, with maximum recommended load of 50-75 pounds per stud depending on construction. This weight distribution prevents overloading any single attachment point, which could lead to failure during use.
Position heaviest items at lower heights (between knee and waist level) to reduce strain during access and minimize wall stress. My vertical storage system places 50+ pound dumbbells at the bottom, with progressively lighter equipment as you move up the wall.
13. Multi-Function Single Equipment Focus
Rather than filling a small basement with multiple pieces of equipment, this approach centers on one high-quality, versatile machine that enables hundreds of exercises. Cable machines, functional trainers, or all-in-one gym systems provide comprehensive workout options with minimal footprint. This strategy delivers maximum exercise variety while preserving precious floor space for movement.
Select equipment with minimum 2:1 cable ratios for smoother operation and reduced maintenance requirements. Higher quality pulley systems make a significant difference in both the feel of exercises and the longevity of the equipment.
Ensure equipment offers at least 20 different adjustment positions to accommodate various exercises and user heights. My compact functional trainer provides 32 adjustment points, allowing me to perform over 200 different exercises in a 4’x4′ footprint.
14. Corner-Optimized Layout
Basement corners often become dead space in traditional gym layouts. This approach specifically designs your gym to utilize these corners effectively, positioning equipment like squat racks or cable machines to fit snugly into corners while remaining fully functional. Strategic mirror placement enhances the sense of space while improving exercise form visibility.
Use 45-degree equipment positioning in corners to maximize functional space while minimizing footprint. This angled positioning can reclaim previously unusable corner areas while maintaining full functionality.
Install mirrors at 15-20° angles in corners to create visual expansion effect that makes spaces appear up to 30% larger. Beyond the practical benefit for checking exercise form, these angled mirrors create an optical illusion that makes small basement gyms feel significantly more spacious.
15. Hidden Gym Behind Sliding Doors
For multi-purpose basements, concealing your gym equipment when not in use maintains the space’s versatility. This design incorporates sliding doors, room dividers, or curtain systems that can quickly reveal or hide your workout area. The approach works particularly well in finished basements where aesthetic considerations are important alongside functionality.
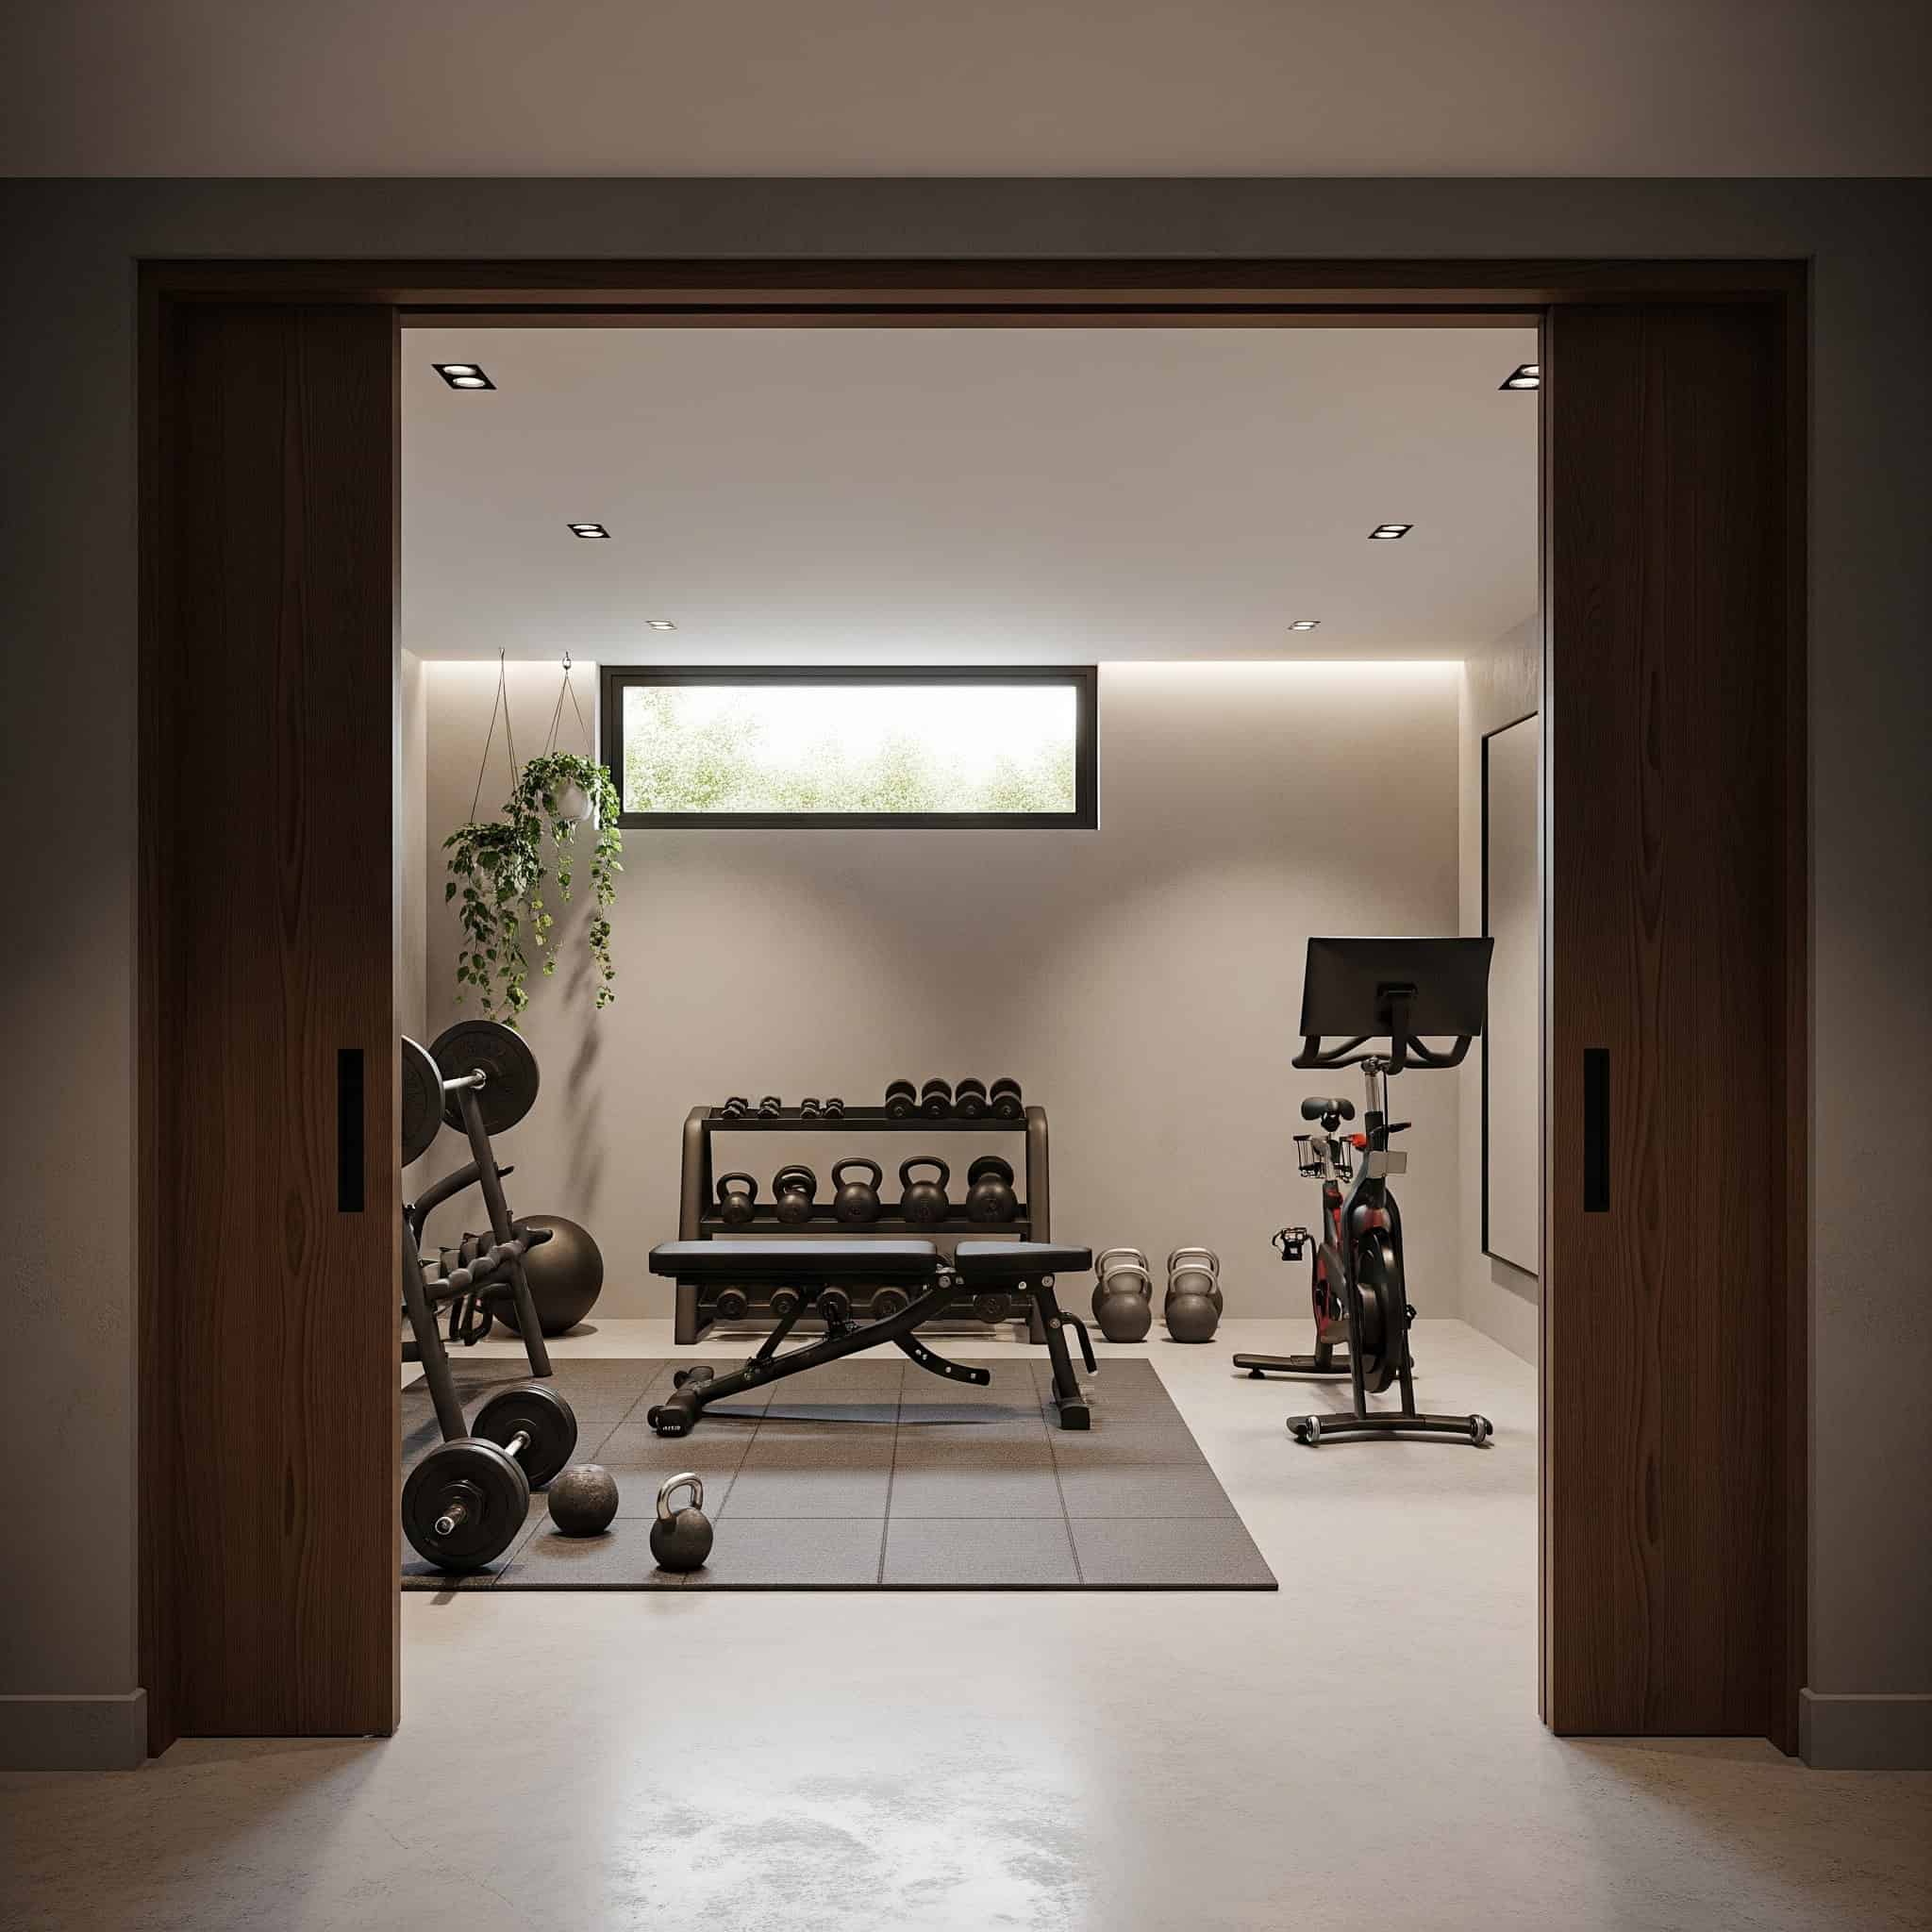
Install sliding door systems on tracks rated for minimum 1.5x the door weight to ensure smooth long-term operation. This weight rating accounts for the inevitable wear that occurs over years of regular use.
Incorporate ventilation solutions like louvered panels or gap allowances to maintain airflow when gym area is concealed. Proper ventilation prevents moisture buildup that could damage both your equipment and the surrounding basement finishes.
Budget-Friendly Basement Workout Rooms
Creating an effective basement workout room doesn’t require breaking the bank. These approaches focus on maximizing fitness functionality while minimizing costs through strategic equipment choices, DIY solutions, and creative repurposing. By prioritizing essential elements and implementing cost-saving strategies, you can create a highly effective workout space regardless of budget constraints.
Budget-conscious gym builds typically allocate 60% of funds to essential equipment, 25% to flooring, and 15% to accessories and storage. This allocation ensures your limited budget goes toward the elements that most directly impact workout quality.
Implement phased purchasing plans that start with versatile foundational equipment and expand strategically as budget allows. I began with a simple adjustable bench, resistance bands, and dumbbells, then gradually added a power rack, barbell, and specialized accessories as my budget permitted.
|
Budget-Friendly Gym Solution |
Estimated Cost |
Key Benefits |
Potential Limitations |
|---|---|---|---|
|
Bodyweight Fitness Station |
$200-$500 |
Low initial investment, minimal space requirements, effective for general fitness |
Limited progressive resistance options, not ideal for specific strength goals |
|
Second-Hand Equipment Suite |
$500-$2,000 |
Commercial-quality equipment at fraction of retail price, environmentally friendly |
Requires patience to find quality items, potential for hidden wear issues |
|
DIY Platform and Rack |
$300-$800 |
Customized to space dimensions, significant cost savings over commercial options |
Requires construction skills and tools, time-intensive to build |
|
Strategic Rubber Matting |
$100-$400 |
Protects key areas while minimizing flooring costs, easy installation |
Less uniform appearance, potential for movement between mats |
|
Repurposed Storage Solutions |
$0-$200 |
Utilizes existing household items, reduces environmental impact |
May require modifications for stability, less specialized than gym-specific storage |
16. Bodyweight Fitness Station
Bodyweight training requires minimal equipment investment while offering tremendous fitness benefits. This setup centers around structural elements like wall-mounted pull-up bars, parallettes or dip stations, and floor space for mobility work. By focusing on leveraging your body weight rather than external resistance, you create an effective gym with minimal financial investment.
Install pull-up bars at height of user’s reach plus 8-10″ for optimal biomechanics during exercises. This positioning ensures full range of motion without excessive jumping or reaching to initiate exercises.
Create minimum 6’x6′ clear floor space for bodyweight movement patterns like burpees, mountain climbers, and floor-based exercises. This open area allows for dynamic movements without restriction, which is essential for effective bodyweight training.
17. Second-Hand Equipment Suite
The fitness equipment market has a robust secondary market where quality items can be found at 50-70% below retail prices. This approach focuses on strategically sourcing used equipment from online marketplaces, gym closures, or estate sales. With patience and knowledge about what to look for, you can build a comprehensive gym with commercial-quality equipment at a fraction of new prices.
Inspect used equipment for frame integrity, checking welds and connection points for cracks or excessive wear. These structural elements are difficult and expensive to repair, so thorough inspection before purchase is essential.
Test all moving parts and mechanisms before purchase, paying special attention to cable systems and adjustment mechanisms. I’ve saved thousands by purchasing second-hand equipment, but I always thoroughly test every function before finalizing any purchase.
18. DIY Platform and Rack Build
Building your own power rack and lifting platform can save thousands compared to commercial options while providing customized functionality. Using basic materials from hardware stores and following established design plans available online, you can create professional-quality equipment tailored to your specific space and needs. This approach requires basic construction skills but offers substantial cost savings.
Construct platforms using 3/4″ plywood layers with rubber mat impact zones, creating minimum 8’x8′ dimensions for standard barbell movements. This multi-layer approach provides the stability and shock absorption needed for heavy lifting at a fraction of commercial platform costs.
Use minimum 2″x3″ steel tubing with 11-gauge thickness for DIY power racks to ensure adequate load capacity of 500+ pounds. While wood racks are sometimes recommended for DIY projects, steel construction provides superior safety and longevity for serious training.
Mike, a high school teacher with limited budget but woodworking skills, built his entire basement gym for under $1,000. The centerpiece was his DIY power rack constructed from 4×4 pressure-treated lumber with 1″ steel pipe for the safety bars and j-hooks. He created a deadlift platform using three layers of 3/4″ plywood with horse stall mats on the sides for weight absorption. For storage, he repurposed an old bookshelf with reinforced shelves to hold his weight plates, and mounted resistance bands on hooks along the wall. His most innovative solution was converting an old door into a folding workout table that could be lowered for use as a workout bench or raised against the wall when not needed. Two years later, his DIY setup continues to perform as well as commercial equipment costing five times as much.
19. Concrete Floor with Strategic Matting
Rather than covering your entire basement with expensive flooring, this approach uses the existing concrete floor with targeted rubber matting only in high-impact areas. By placing appropriate thickness mats under weight training zones and cardio equipment, you protect both the concrete and your equipment while significantly reducing flooring costs.
Apply concrete sealer with moisture vapor transmission rate below 3 pounds per 1,000 square feet per 24 hours before placing equipment. This sealing step prevents moisture from damaging both your equipment and matting over time.
Use minimum 3/8″ thick rubber matting in standing areas and 3/4″ thickness in impact zones where weights might contact the floor. This targeted approach provides protection where it’s most needed while minimizing overall flooring costs.
20. Repurposed Furniture for Equipment Storage
Specialized gym storage solutions can be expensive, but many household furniture items can be repurposed effectively. Old dressers become perfect dumbbell storage, bookshelves transform into equipment organizers, and entertainment centers convert to workout stations with minor modifications. This approach combines sustainability with significant cost savings.
Reinforce furniture shelving with additional support brackets when storing heavy items like dumbbells (aim for minimum 40 pounds per square foot load capacity). This reinforcement prevents sagging and potential collapse under the weight of fitness equipment.
Elevate wooden furniture at least 1/2″ off concrete floors using rubber or plastic feet to prevent moisture damage. This simple modification protects your repurposed storage from the moisture that can wick up through concrete basement floors.
Specialized Basement Exercise Rooms
These designs move beyond general-purpose gyms to create spaces dedicated to specific fitness disciplines. By tailoring your basement environment to particular activities, you optimize both the functionality and experience for your preferred workout style. These specialized rooms incorporate specific equipment, flooring, and environmental elements that enhance performance and enjoyment of targeted fitness pursuits.
Specialized gym spaces typically require 20-30% more initial investment than general-purpose gyms but deliver superior experience for dedicated practitioners. This additional investment typically pays dividends in increased usage and satisfaction over time.
Design specialized spaces with 70% focus on primary activity requirements and 30% flexibility for complementary training. This balanced approach ensures optimal conditions for your main fitness pursuit while maintaining versatility for cross-training and evolving fitness goals.
21. Home Yoga and Pilates Studio
Create a serene practice space focused on mind-body disciplines with appropriate flooring, minimal equipment, and atmosphere-enhancing elements. This design emphasizes open floor space, proper surfaces for barefoot practice, and environmental factors like lighting and temperature control. The result is a dedicated sanctuary for yoga, Pilates, and other mindful movement practices.
Install flooring with appropriate compression factor (2-3mm deflection under body weight) to provide stability for balance poses while offering joint protection. This specialized flooring creates the perfect balance between support and comfort for barefoot practices.
Maintain ambient temperature between 68-72°F with humidity control between 40-60% for optimal comfort during practice. I’ve installed a separate thermostat in my yoga space to maintain these ideal conditions regardless of the temperature in the rest of my home.
22. Cardio-Focused Training Room
Design a space optimized for cardiovascular equipment and training with proper spacing, cooling solutions, entertainment options, and noise reduction. This approach addresses the specific needs of cardio workouts, including heat management, motivation factors, and the technical requirements of equipment like treadmills, bikes, rowers, and ellipticals.
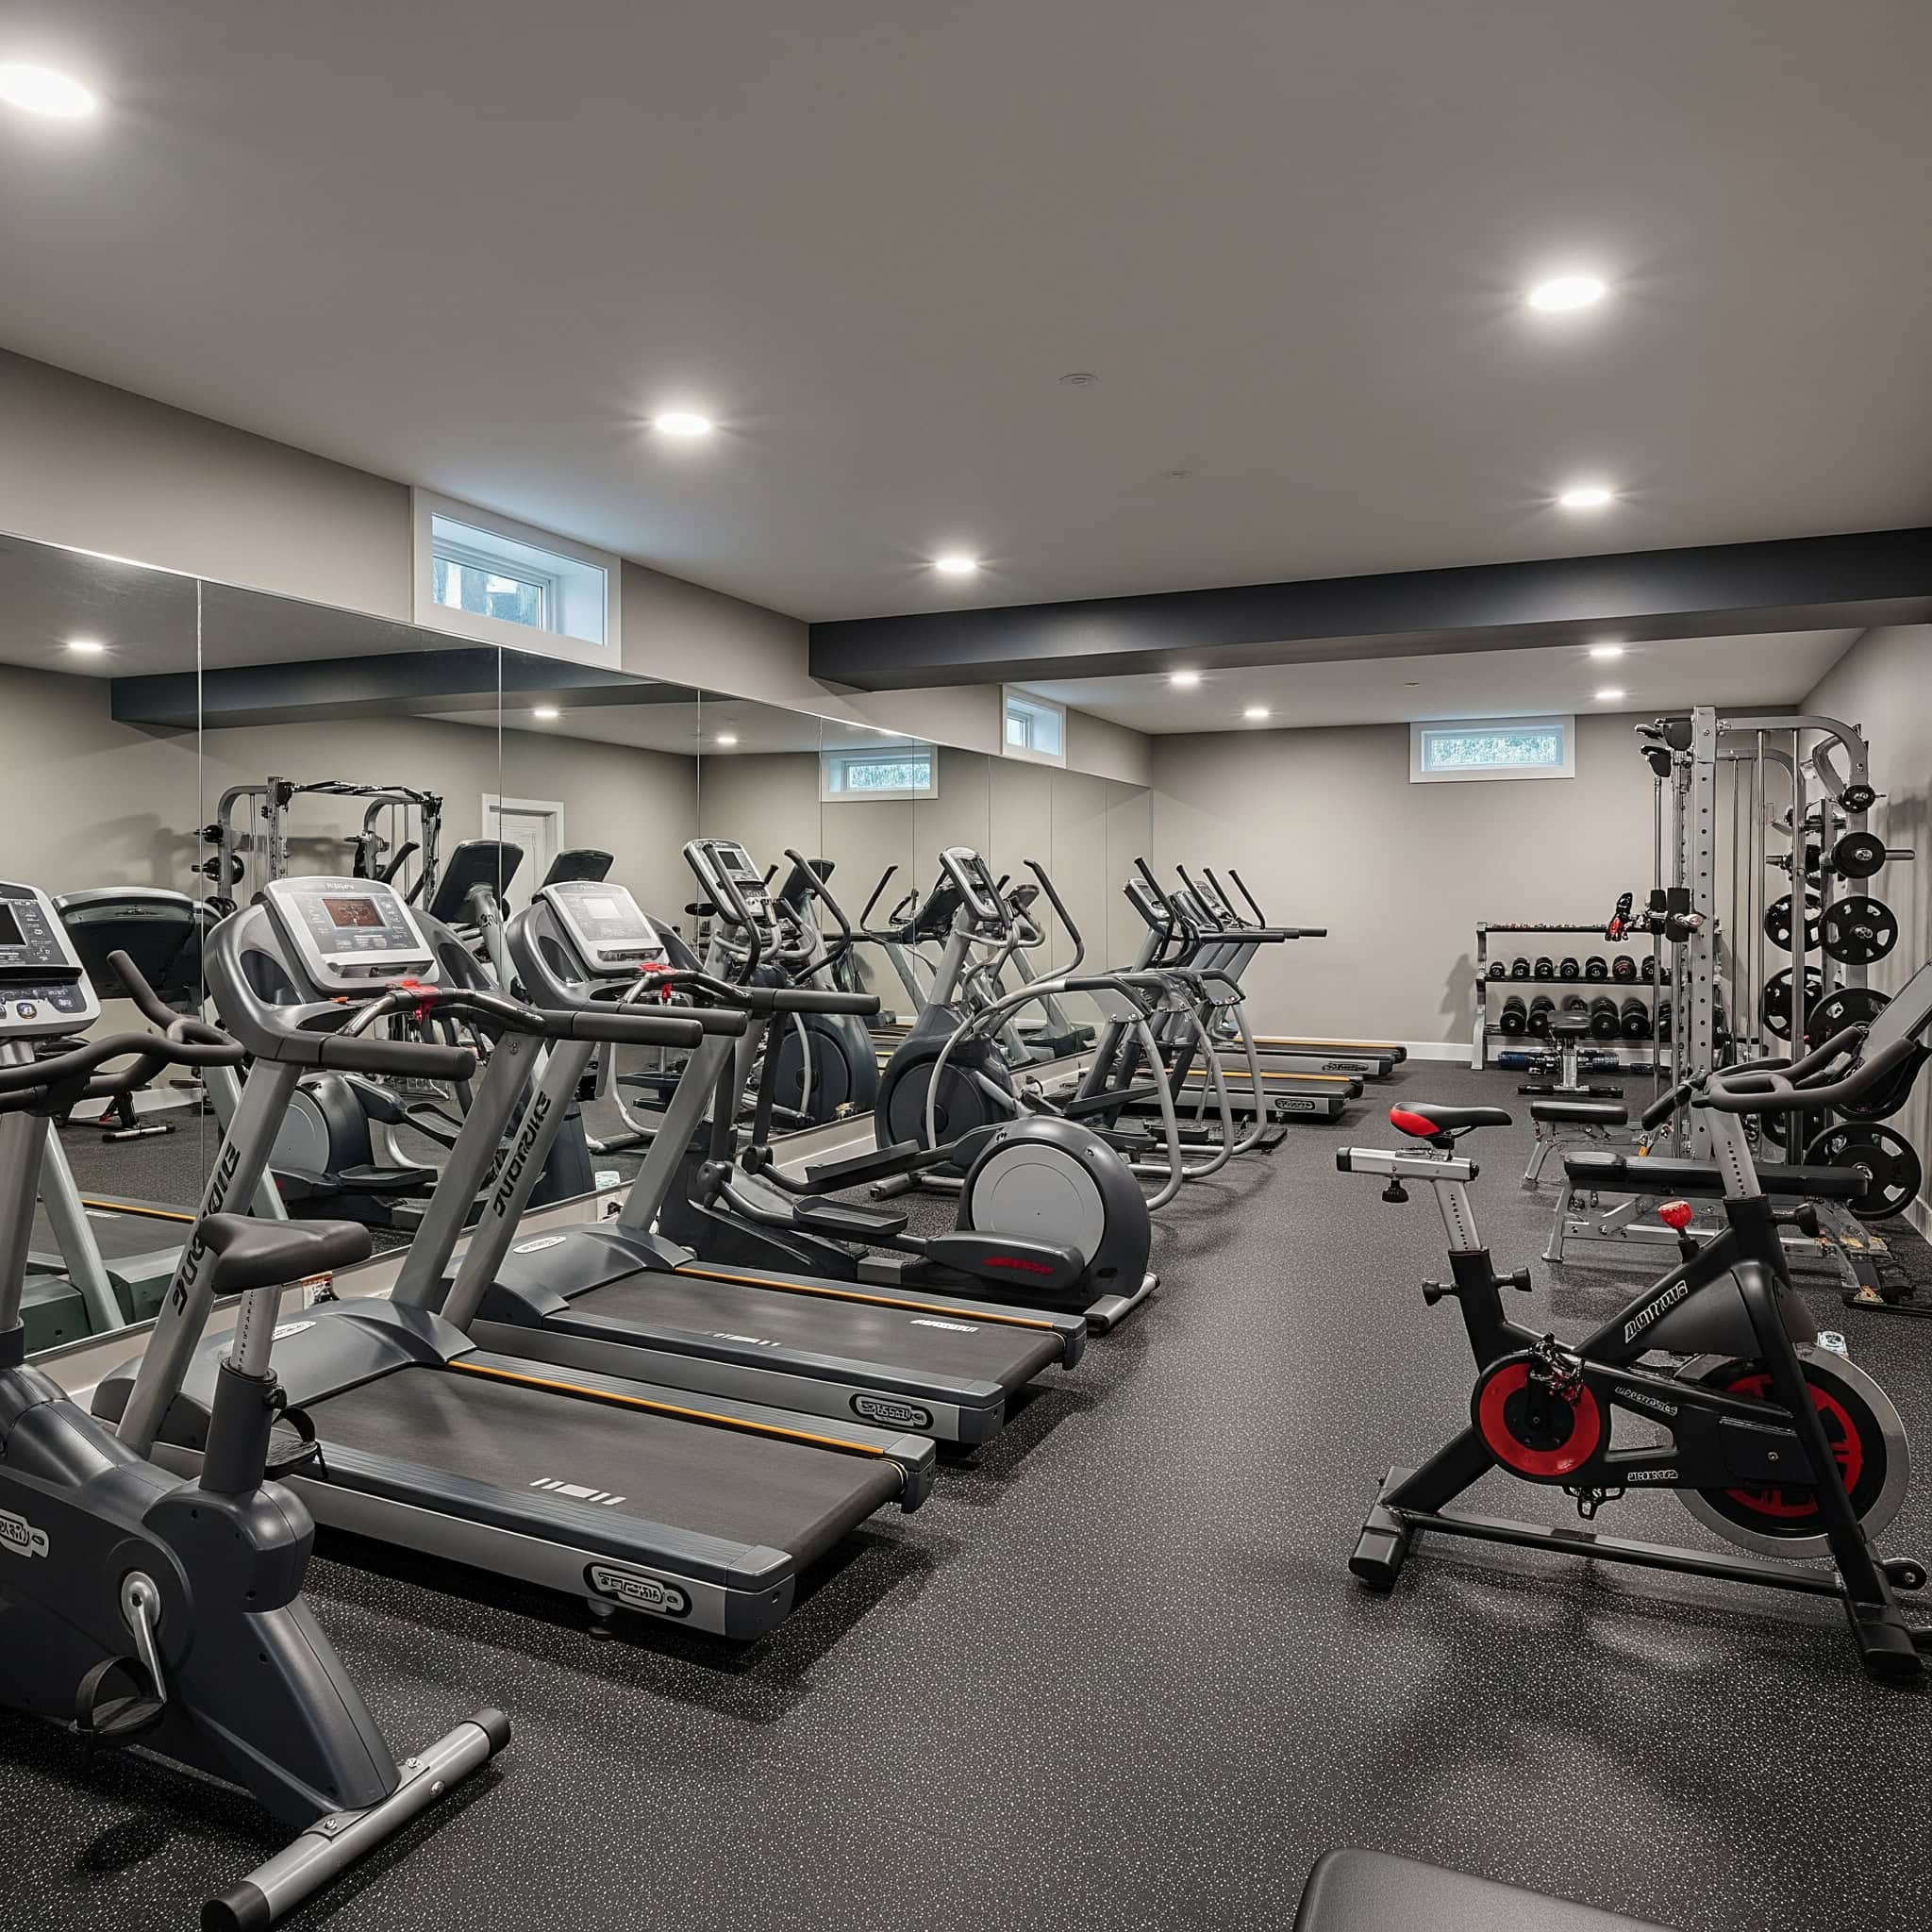
Install dedicated 20-amp circuits for each major piece of cardio equipment to prevent power fluctuations that can damage electronic components. This electrical separation is particularly important for modern cardio machines with sophisticated computer systems.
Position cooling fans to create airflow of 400-600 cubic feet per minute across workout areas to maintain comfortable temperature during intense sessions. I’ve installed ceiling-mounted fans above my cardio equipment that automatically activate when the room temperature exceeds 72°F, ensuring comfortable conditions even during my most intense interval sessions.
23. Climbing and Bouldering Wall Integration
Transform your basement walls into a home climbing gym with custom-built climbing or bouldering surfaces. This unique approach takes advantage of vertical space while providing an engaging, skill-based workout option. With proper safety matting and varying difficulty routes, a climbing wall creates a distinctive fitness feature that appeals to both adults and children.
Construct climbing walls using minimum 3/4″ plywood backed by 2×4 framing at 16″ centers, with all components securely anchored to wall studs and floor joists. This construction method ensures your climbing surface can safely support dynamic movements.
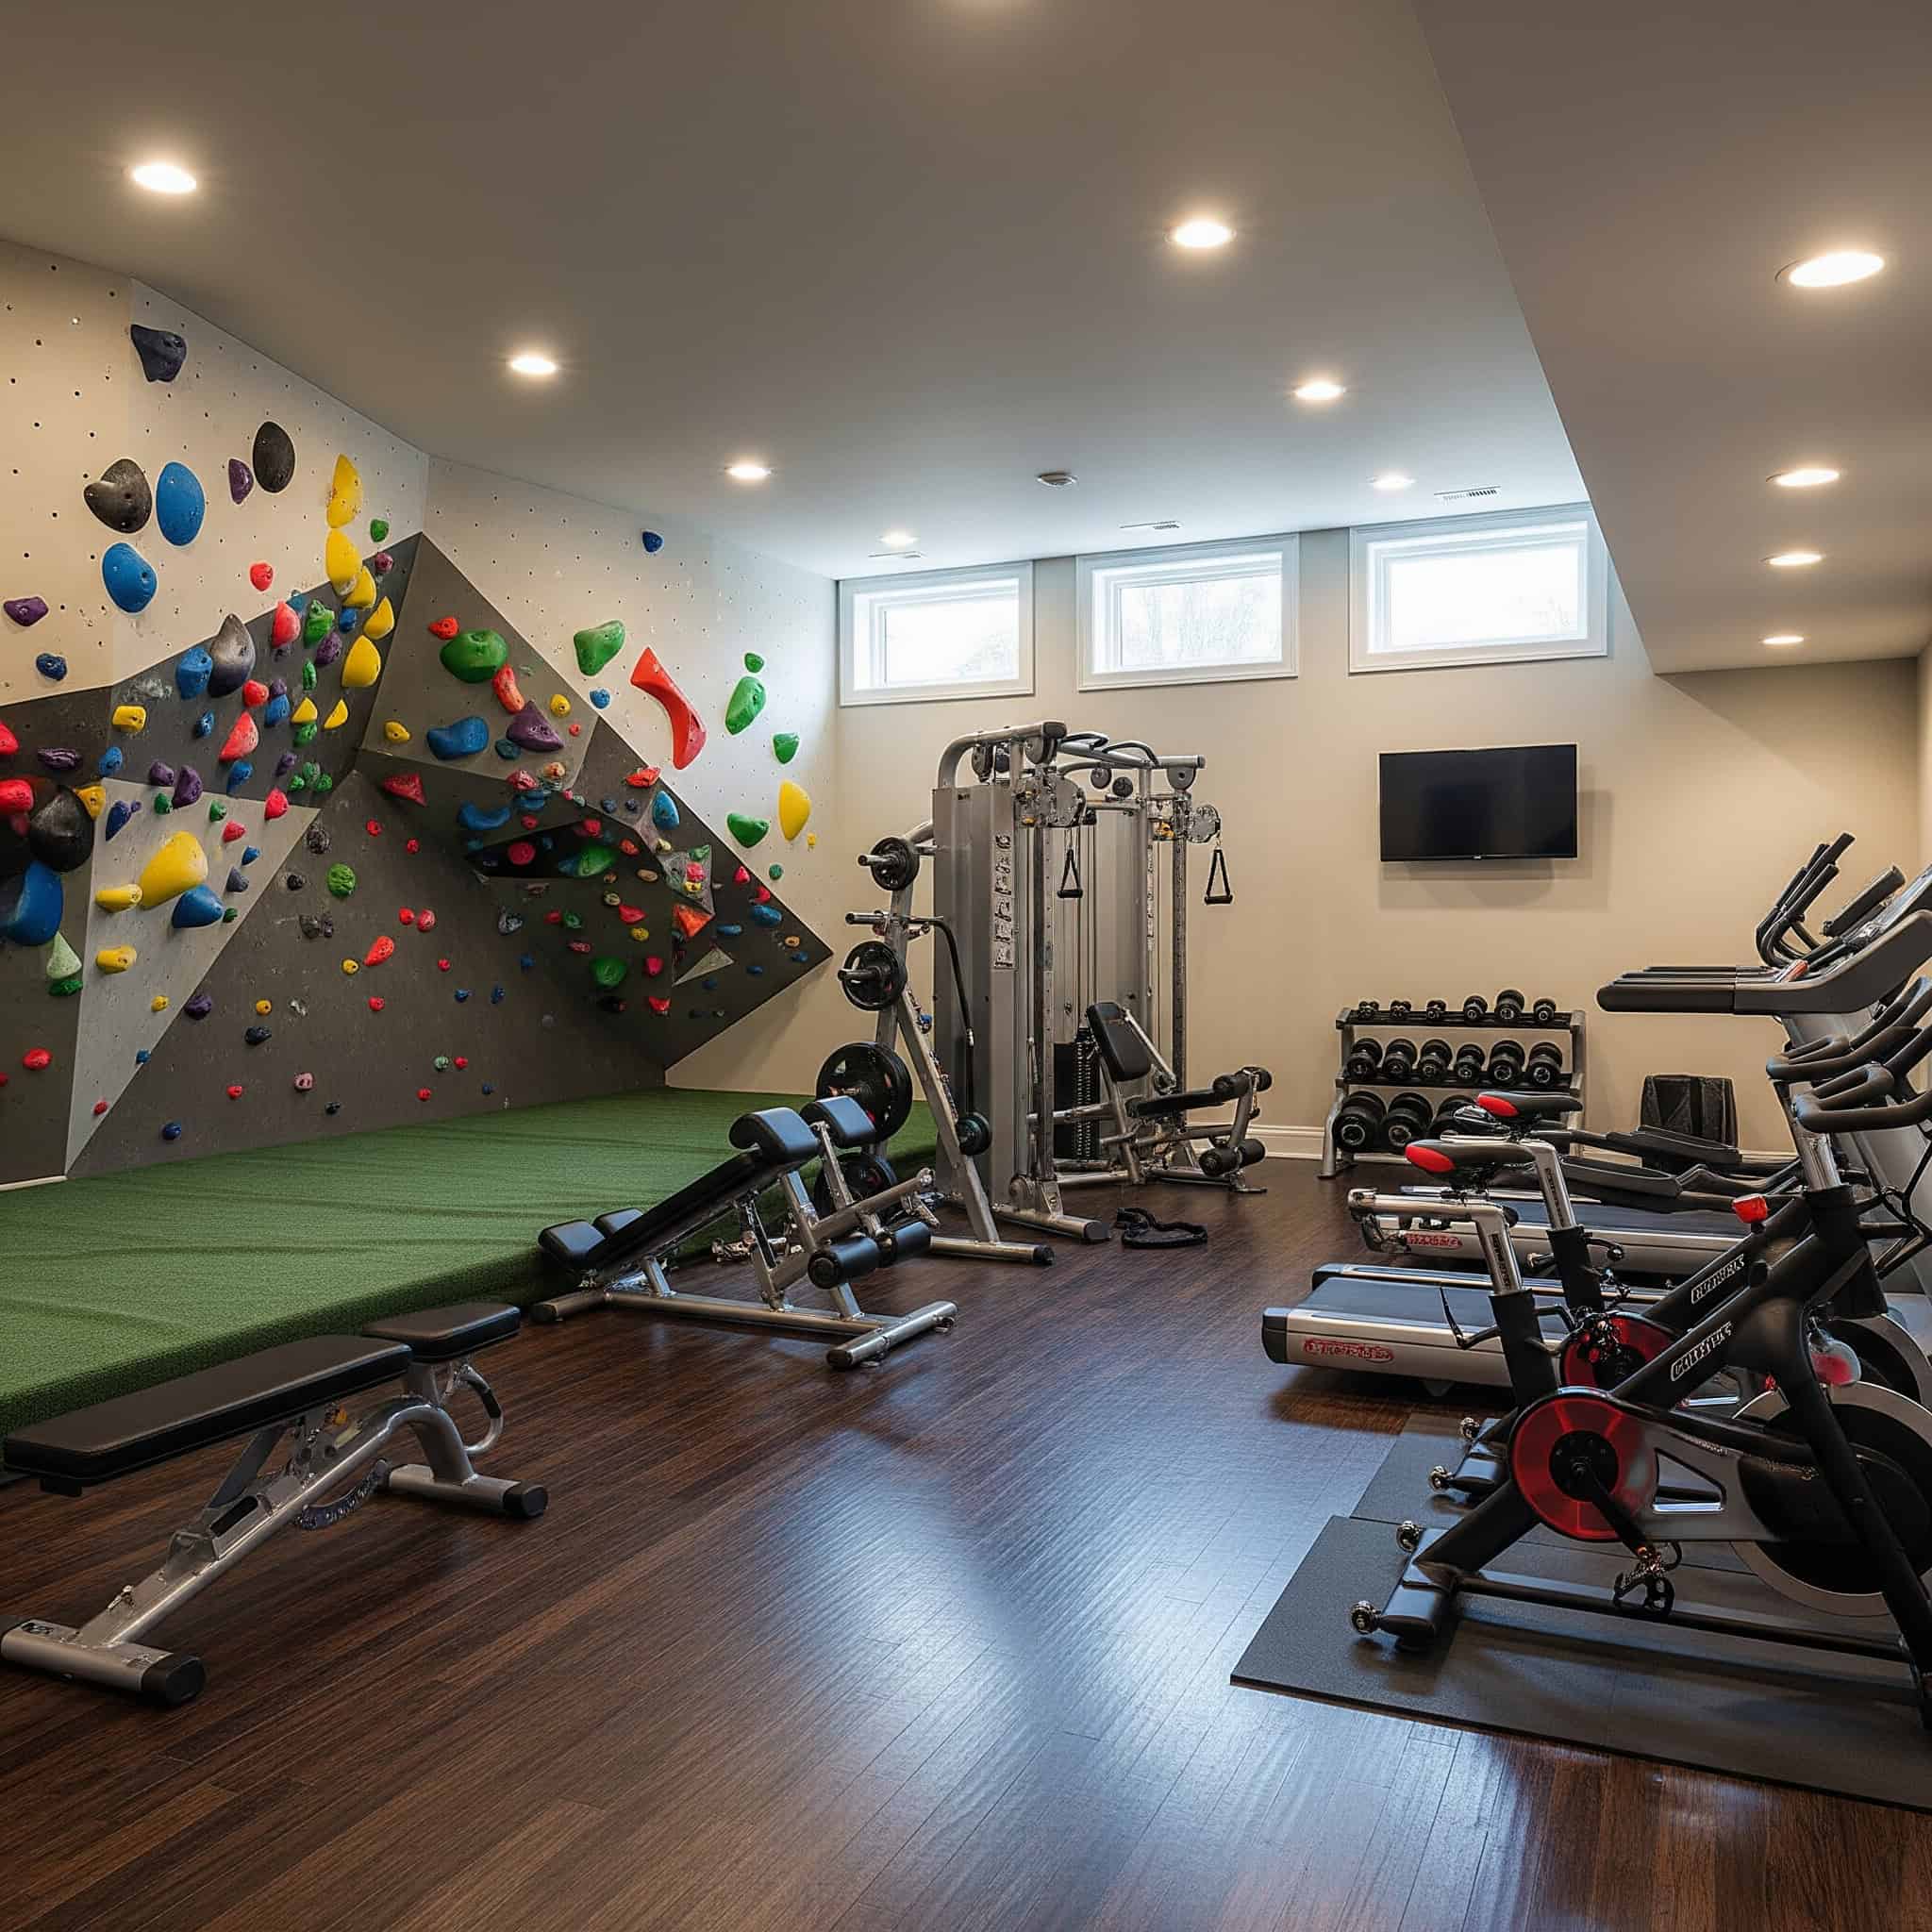
Install impact flooring with minimum 4″ thickness and fall rating appropriate for your wall height (typically 12-24″ of fall protection for home installations). Safety matting is non-negotiable for home climbing walls—I’ve used repurposed gymnastics mats to create a 6″ thick landing zone beneath my bouldering wall.
24. Boxing and Martial Arts Dojo
Create a dedicated space for combat sports training with appropriate striking equipment, floor surfaces, and safety features. This design incorporates heavy bags, speed bags, and open mat areas for shadowboxing, drills, and technique practice. Proper mounting solutions and noise dampening are essential considerations for this high-impact training style.
Mount heavy bags to ceiling joists using mounting hardware rated for dynamic loads of at least 4x the bag weight (typically 400-600 pounds capacity). This substantial safety margin accounts for the significant forces generated during striking combinations.
Install flooring with minimum 1.5″ thickness and 40-60 ILD (Indentation Load Deflection) rating to provide appropriate impact absorption for jumping and falling. This specialized flooring protects joints during high-impact training while providing stable footing for technical movements.
25. Smart Home Gym with Integrated Technology
Embrace the latest fitness technology by designing your basement around connected equipment and smart home integration. This approach incorporates interactive training systems, automated environmental controls, and seamless digital experiences. From wall-mounted smart trainers to connected cardio equipment and automated lighting, this gym style brings cutting-edge technology into your home workout experience.
Ensure minimum internet speeds of 25 Mbps download and 5 Mbps upload with less than 50ms latency for smooth operation of connected fitness equipment. These technical specifications prevent frustrating buffering or disconnections during guided workouts.
Install smart home hubs compatible with your equipment ecosystem to enable voice control and automated workout environment settings. I’ve programmed workout-specific scenes that automatically adjust lighting, temperature, and music when I activate them through voice commands or my smartphone.
How Jiffy Junk Can Help Prepare Your Space
Creating your dream basement home gym often requires clearing out years of accumulated items first. Jiffy Junk specializes in basement cleanouts, providing professional junk removal services that create the clean slate you need to begin your gym project. Their team handles everything from old furniture and stored boxes to broken equipment, leaving you with a ready-to-transform space without the hassle of DIY junk removal.

Professional junk removal services can clear basement spaces 3-5 times faster than DIY approaches, accelerating your gym project timeline. When I finally decided to convert my basement into a gym, I was amazed at how quickly the Jiffy Junk team cleared out years of accumulated storage.
Proper disposal of basement items prevents potential environmental hazards from improper handling of electronics, chemicals, or other regulated materials. Their responsible disposal practices gave me peace of mind that my unwanted items weren’t creating environmental problems.
Benefits of Professional Cleanout Services
Working with a professional junk removal service like Jiffy Junk offers several advantages when preparing your basement for a gym conversion. Their team handles all heavy lifting regardless of basement access challenges, follows eco-friendly disposal practices by prioritizing donation and recycling, and provides thorough cleanup that leaves your space ready for immediate transformation. This comprehensive approach saves you time, energy, and potential disposal headaches.
Professional cleanout services typically recover 30-40% more usable space than DIY efforts by removing items from hard-to-reach areas and addressing long-forgotten storage. I was shocked to discover how much additional floor space became available once professionals cleared out areas I had simply worked around for years.
Eco-friendly disposal practices divert up to 60% of basement items from landfills through strategic sorting and partnership with recycling and donation centers. I appreciated knowing that many of my unwanted items found new homes through Jiffy Junk’s donation partnerships rather than ending up in a landfill.
Starting with a Clean Slate
Before investing in expensive gym equipment or custom installations, creating a completely clear workspace allows for accurate measurements, proper planning, and identification of any issues that need addressing. Jiffy Junk’s efficient, white-glove service provides this foundation by removing everything from outdated furniture to stored holiday decorations, giving you a blank canvas for implementing your chosen basement gym design.
Complete cleanouts reveal potential structural or moisture issues that should be addressed before gym installation, preventing costly equipment damage. During my basement cleanout, the Jiffy Junk team identified a small water stain that I might have missed, allowing me to address the underlying issue before installing expensive gym flooring.
Professional removal services include final sweeping and surface cleaning, saving 4-6 hours of preparation time before gym installation can begin. This thorough cleanup meant I could start installing my gym equipment immediately after the cleanout was completed, without spending additional days preparing the space.
Final Thoughts
Transforming your basement into a personalized gym creates value beyond just the physical space. It removes barriers to consistent exercise, allows for customization to your specific fitness preferences, and adds potential home value. By carefully considering the factors we’ve discussed and selecting the approach that best fits your space, budget, and fitness goals, you can create a basement gym that supports your health journey for years to come. Remember that even simple setups can deliver excellent results when thoughtfully designed.
Home gyms typically deliver return on investment between 50-70% of installation costs when homes are sold, making them valuable home improvements beyond their fitness benefits. This financial upside complements the health benefits, creating a win-win investment in both your property and wellbeing.
Consistent access to home workout spaces increases exercise adherence by 74% compared to commercial gym memberships according to recent fitness industry research. I’ve personally experienced this benefit—my workout frequency tripled after creating my basement gym, simply because I removed all the barriers and excuses that previously prevented consistent exercise.
Ready to clear out your basement and create the perfect home gym? Contact Jiffy Junk today for a free consultation and take the first step toward your fitness transformation!