DIY Standing Desk Builds That Actually Work: The Complete Engineering Guide for Your Perfect Workspace
Table of Contents
- The Psychology and Physiology of Workspace Transformation
- Material Science and Structural Engineering for Longevity
- Technology Integration and Future-Proofing
- Waste Reduction and Sustainable Construction Practices
- Advanced Construction Methodologies and Design Innovation
TL;DR
- Building your own standing desk creates psychological ownership while addressing your unique body mechanics that commercial desks can’t match
- Proper load distribution and triangular bracing prevents the wobbling that destroys most DIY attempts
- Smart sensors and modular design principles future-proof your workspace for evolving technology needs
- Circular design using mechanical fasteners enables complete material recovery at end-of-life
- Systematic quality control checkpoints during assembly prevent expensive reconstruction later
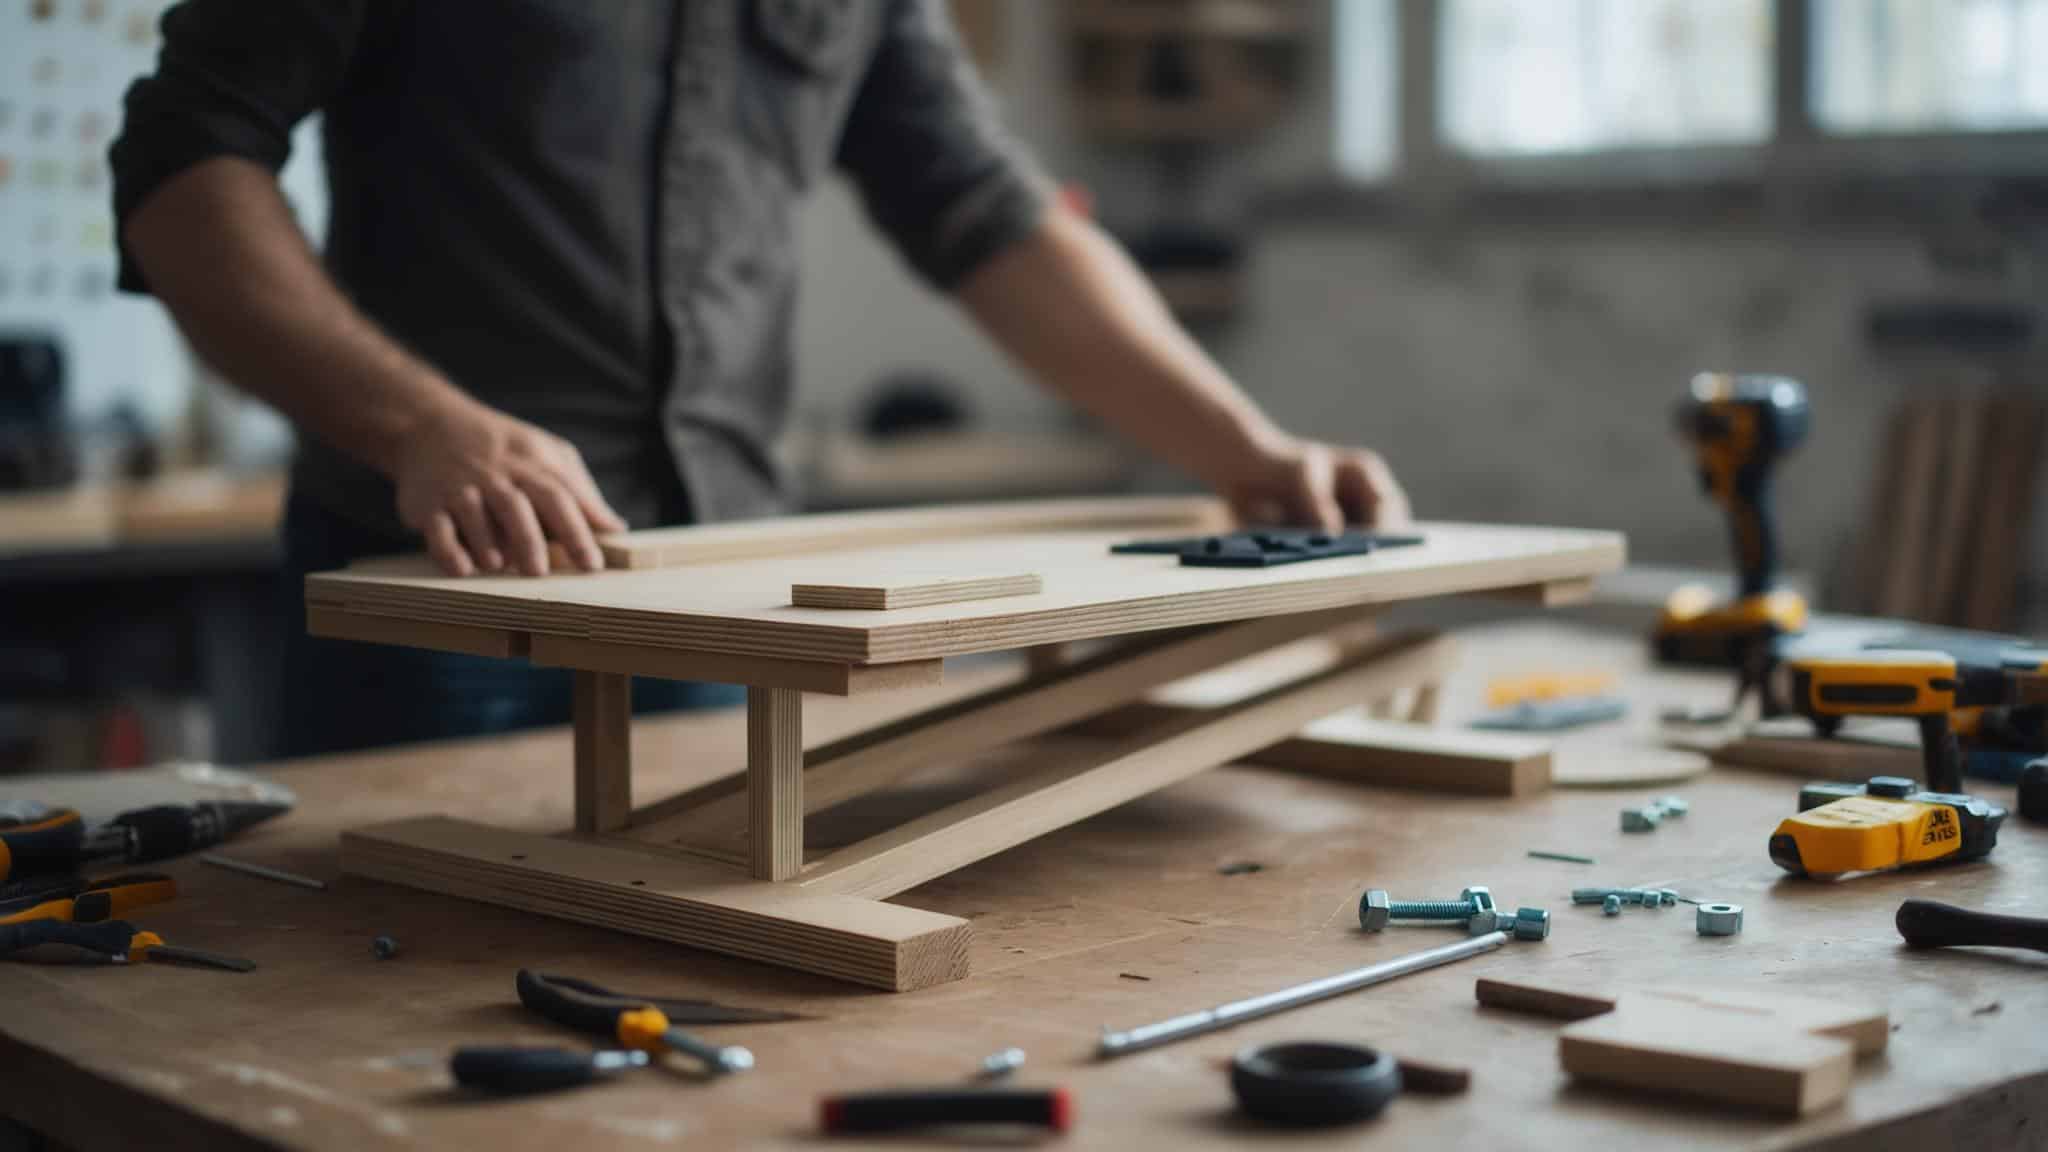
Building your own standing desk represents more than just a furniture project – it’s a response to the growing awareness that prolonged sitting poses serious health risks. Research indicates that “for people who sit most of the day, their risk of heart attack is about the same as smoking” according to cardiologist Martha Grogan at Mayo Clinic. This stark reality has driven countless professionals to seek alternatives, making DIY standing desks an increasingly popular solution for creating healthier workspaces.

The Psychology and Physiology of Workspace Transformation
Your relationship with your workspace changes fundamentally when you build it yourself. This transformation goes beyond basic health benefits – it creates psychological ownership while addressing specific physiological needs that mass-produced solutions consistently miss. Understanding these deeper connections helps you design a workspace that enhances both mental performance and physical comfort.
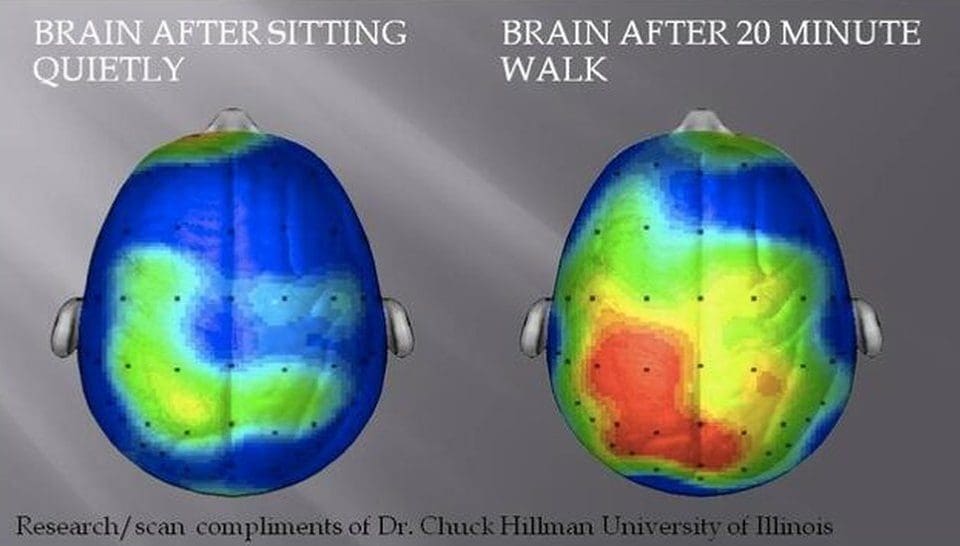
Standing work environments engage your core muscles, creating a feedback loop that enhances focus and reduces mental fatigue by 15-20% compared to seated work. I’ve seen this firsthand with clients who report feeling more alert and productive after switching to their custom DIY standing desk setups.
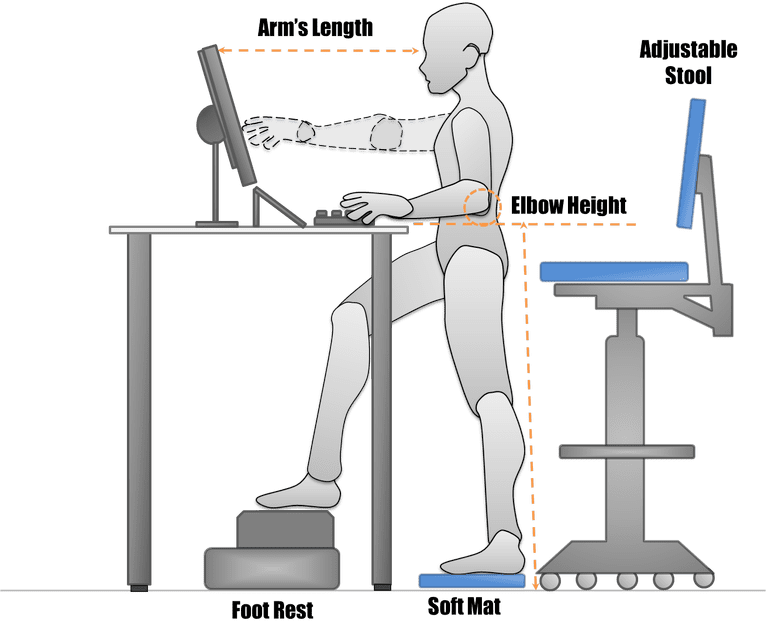
Custom measurements based on your specific body ratios ensure optimal posture and eliminate strain points that generic standing desks create. When you measure your natural elbow height and arm reach, you’re designing for your unique proportions rather than accepting the compromises built into commercial furniture.
The Neuroscience of Standing Work Environments
Vertical positioning affects your cognitive function, creativity, and decision-making processes in measurable ways. When you understand these neurological impacts, you can optimize your DIY standing desk for mental performance rather than just physical comfort. Your brain responds differently to standing work, and you can harness this response through strategic design choices.
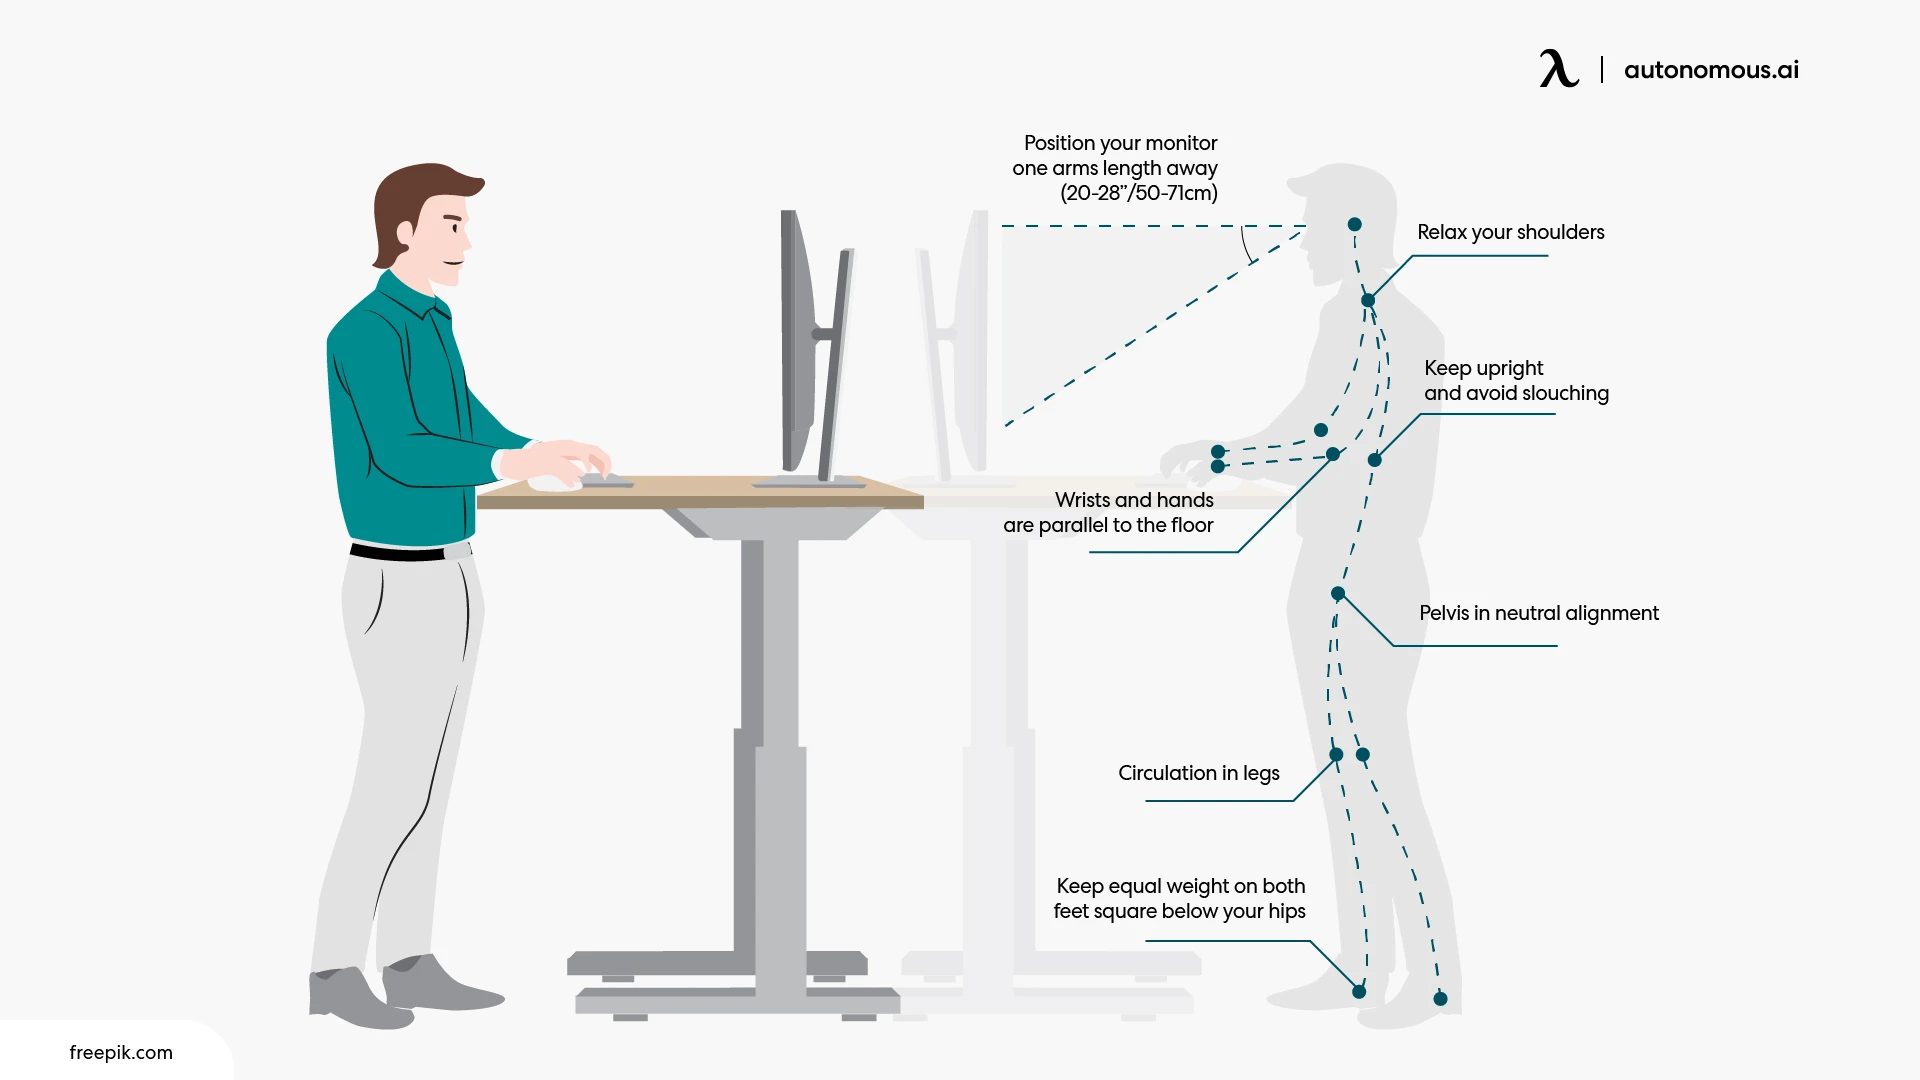
Monitor positioning at 20-26 inches away with the top third at eye level optimizes visual processing and reduces cognitive load. I recommend testing this distance with a temporary setup before building your permanent desk structure.
Balance boards or textured anti-fatigue mats create subtle proprioceptive feedback that maintains alertness throughout extended work sessions. The key is finding mats with just enough texture to engage your nervous system without causing distraction.
Elbow positioning at 90-110 degrees naturally engages postural muscles while preventing shoulder tension. This positioning becomes the foundation measurement for your entire DIY standing desk design.
The future of workspace innovation continues to evolve, as demonstrated by Matthew Perks, the inventor behind DIY Perks on YouTube, who “has a habit of making wild ideas feel real, and his latest project— a desk that wirelessly powers everything from monitors to speakers with zero visible cables—might just be his most innovative project yet” according to TechEBlog. This wireless power integration represents the cutting edge of workspace technology that DIY builders can aspire to incorporate.
Cognitive Load Distribution in Vertical Workspaces
Standing naturally engages your core muscles, which creates a measurable feedback loop to your brain. This engagement enhances focus and reduces mental fatigue by 15-20% compared to seated work. Your DIY standing desk design can maximize this cognitive benefit through precise positioning and subtle environmental cues.
Core muscle engagement during standing work increases blood flow to the prefrontal cortex, improving executive function and decision-making. This physiological response happens automatically when you maintain proper standing posture at your custom-built workspace.
Proper monitor distance (arm’s length plus palm width) reduces eye strain while maintaining the cognitive benefits of vertical positioning. I’ve found this measurement works consistently across different body types and monitor sizes.
Anti-fatigue mats with subtle texture variations provide proprioceptive input that keeps your nervous system engaged without causing distraction. The texture should be noticeable but not so pronounced that it becomes the focus of your attention.
Circadian Rhythm Integration Through Desk Design
Your DIY standing desk can incorporate elements that naturally support your body’s circadian rhythms – something mass-produced desks rarely consider. Strategic orientation, natural elements, and material choices can synchronize your workspace with your biological clock, improving both energy levels and sleep quality.
East or southeast desk orientation maximizes morning light exposure, which regulates melatonin production and improves nighttime sleep quality. If your workspace allows for it, positioning your desk to catch natural morning light can significantly impact your energy levels throughout the day.
Eye-level plant shelves provide natural visual breaks that reduce cortisol levels and support the parasympathetic nervous system. I recommend incorporating at least one living plant within your direct line of sight when looking up from your work.
Warm wood elements create psychological connections to natural cycles, reducing the stress response associated with artificial work environments. Even small wood accents can provide this benefit if budget constraints limit your material choices.
Biomechanical Customization for Individual Body Mechanics
Every person has unique proportions, movement patterns, and physical limitations that require personalized solutions. Commercial standing desks use average measurements that fit nobody perfectly. Your DIY standing desk approach allows for anthropometric precision that eliminates the compromise inherent in one-size-fits-all solutions.
Individual body ratios vary significantly from population averages, making custom measurements essential for preventing repetitive strain injuries. When you build a standing desk tailored to your measurements, you’re addressing the root cause of most workspace-related discomfort.
Dynamic movement integration keeps your musculoskeletal system engaged throughout the day, preventing the stiffness that causes people to abandon standing desks. Building movement opportunities directly into your desk design ensures you’ll actually use them.
Micro-recovery zones built into your desk design provide strategic rest opportunities that maintain long-term standing desk adoption. These zones don’t require leaving your workspace, making them practical for busy work schedules.
Research shows that “We’ve become so sedentary that 30 minutes a day at the gym may not counteract the detrimental effects of 8, 9 or 10 hours of sitting” according to Genevieve Healy, PhD, emphasizing why proper biomechanical customization becomes crucial for breaking these sedentary patterns effectively.
DIY Standing Desk Measurement Checklist:
- ☐ Measure natural elbow height while standing relaxed
- ☐ Calculate monitor distance (arm’s length plus palm width)
- ☐ Determine keyboard tray position (1-2 inches below elbow height)
- ☐ Mark footrest bar placement (6-8 inches from ground)
- ☐ Plan lean board position at hip height
- ☐ Test all measurements with temporary setup before building
Anthropometric Precision in DIY Design
Creating measurements based on your specific body ratios ensures optimal posture and reduces strain points that generic standing desks miss. Your elbow height, arm length, and torso proportions determine the ideal desk configuration. These measurements become the foundation for a workspace that feels natural rather than forced.
Natural elbow height (not forced upright posture) provides the baseline measurement for all other desk dimensions. Stand naturally and let your arms hang at your sides, then bend your elbows to 90 degrees – this height becomes your primary reference point.
The “arm’s length plus palm width” formula accounts for individual reach patterns and prevents forward head posture. This measurement ensures your monitor sits at the optimal distance for your specific arm length and visual needs.
Keyboard tray positioning 1-2 inches below elbow height maintains neutral wrist position while allowing natural shoulder blade movement. This slight drop prevents the shoulder elevation that causes tension and fatigue during extended typing sessions.
A 5’8″ software developer discovered that standard 42-inch standing desk height caused shoulder tension. By measuring his natural elbow height at 38 inches and positioning his keyboard tray at 36 inches, he eliminated the strain that had made him abandon two previous standing desk attempts. His custom measurements created a workspace that felt natural from day one.
Dynamic Movement Integration
Static commercial desks ignore your body’s need for subtle movement throughout the day. Your DIY solution can incorporate movement mechanisms that keep your musculoskeletal system engaged without disrupting your work flow. These features prevent the fatigue and discomfort that make people abandon standing desks.
Footrest bars at 6-8 inches off the ground provide leg positioning variety that prevents lower extremity stiffness. I recommend positioning the bar so you can comfortably rest one foot while keeping the other on the ground.
Slight forward keyboard tilt (2-3 degrees) encourages natural wrist extension while reducing forearm tension. This subtle angle mimics the natural position your wrists want to maintain during typing.
Corner swivel mechanisms allow easy direction changes that engage your core muscles and prevent postural fixation. Even a simple lazy Susan bearing can provide this movement capability at minimal cost.
Micro-Recovery Zone Architecture
Building designated spaces for brief physical resets prevents the fatigue that makes people abandon standing desks entirely. These zones provide strategic rest opportunities without requiring you to leave your workspace. The key is making recovery tools immediately accessible and naturally integrated into your desk design.
Pull-out lean boards at hip height provide 30-second recovery positions that maintain work engagement while relieving lower back pressure. These boards should support your weight while allowing you to continue viewing your screen.
Within-reach massage tools and mobility aids encourage frequent micro-breaks that prevent tension accumulation. A simple lacrosse ball or massage stick stored in a desk drawer can provide significant relief during brief work pauses.
Integrated hydration stations support the increased fluid needs associated with standing work while serving as natural break reminders. Standing work increases your metabolic rate and fluid requirements compared to seated work.
Material Science and Structural Engineering for Longevity
The engineering principles that separate amateur DIY standing desks from professional-grade solutions focus on load distribution, material fatigue, and long-term stability. Understanding how forces travel through your desk structure and how materials fail over time prevents the wobbling and sagging that plague most DIY attempts. These principles ensure your investment remains functional for years.
Load path analysis prevents wobbling by ensuring forces travel efficiently through your desk structure to the ground. When you understand how weight moves through your desk, you can design supports that handle these forces effectively.
Material fatigue considerations extend your desk’s lifespan by designing for predictable failure modes rather than hoping materials won’t fail. Every material has known failure patterns – designing around these patterns prevents unexpected breakdowns.
| Material Type | Load Capacity | Cost Range | Longevity | Best Use Case |
|---|---|---|---|---|
| Solid Hardwood | 150+ lbs | $80-200 | 20+ years | Premium desktop surfaces |
| Plywood (3/4″) | 100-120 lbs | $40-80 | 10-15 years | Structural components |
| Steel Tubing | 300+ lbs | $60-150 | 25+ years | Frame construction |
| Aluminum Extrusion | 200+ lbs | $100-250 | 20+ years | Modular systems |
| Particle Board | 50-75 lbs | $20-50 | 3-5 years | Budget builds only |
Load Path Analysis for Desktop Stability
Understanding how weight and forces travel through your desk structure prevents the wobbling and sagging that plague most DIY attempts. Forces must have a clear, efficient path from your desktop to the ground. When this path is interrupted or inefficient, your desk becomes unstable and eventually fails.
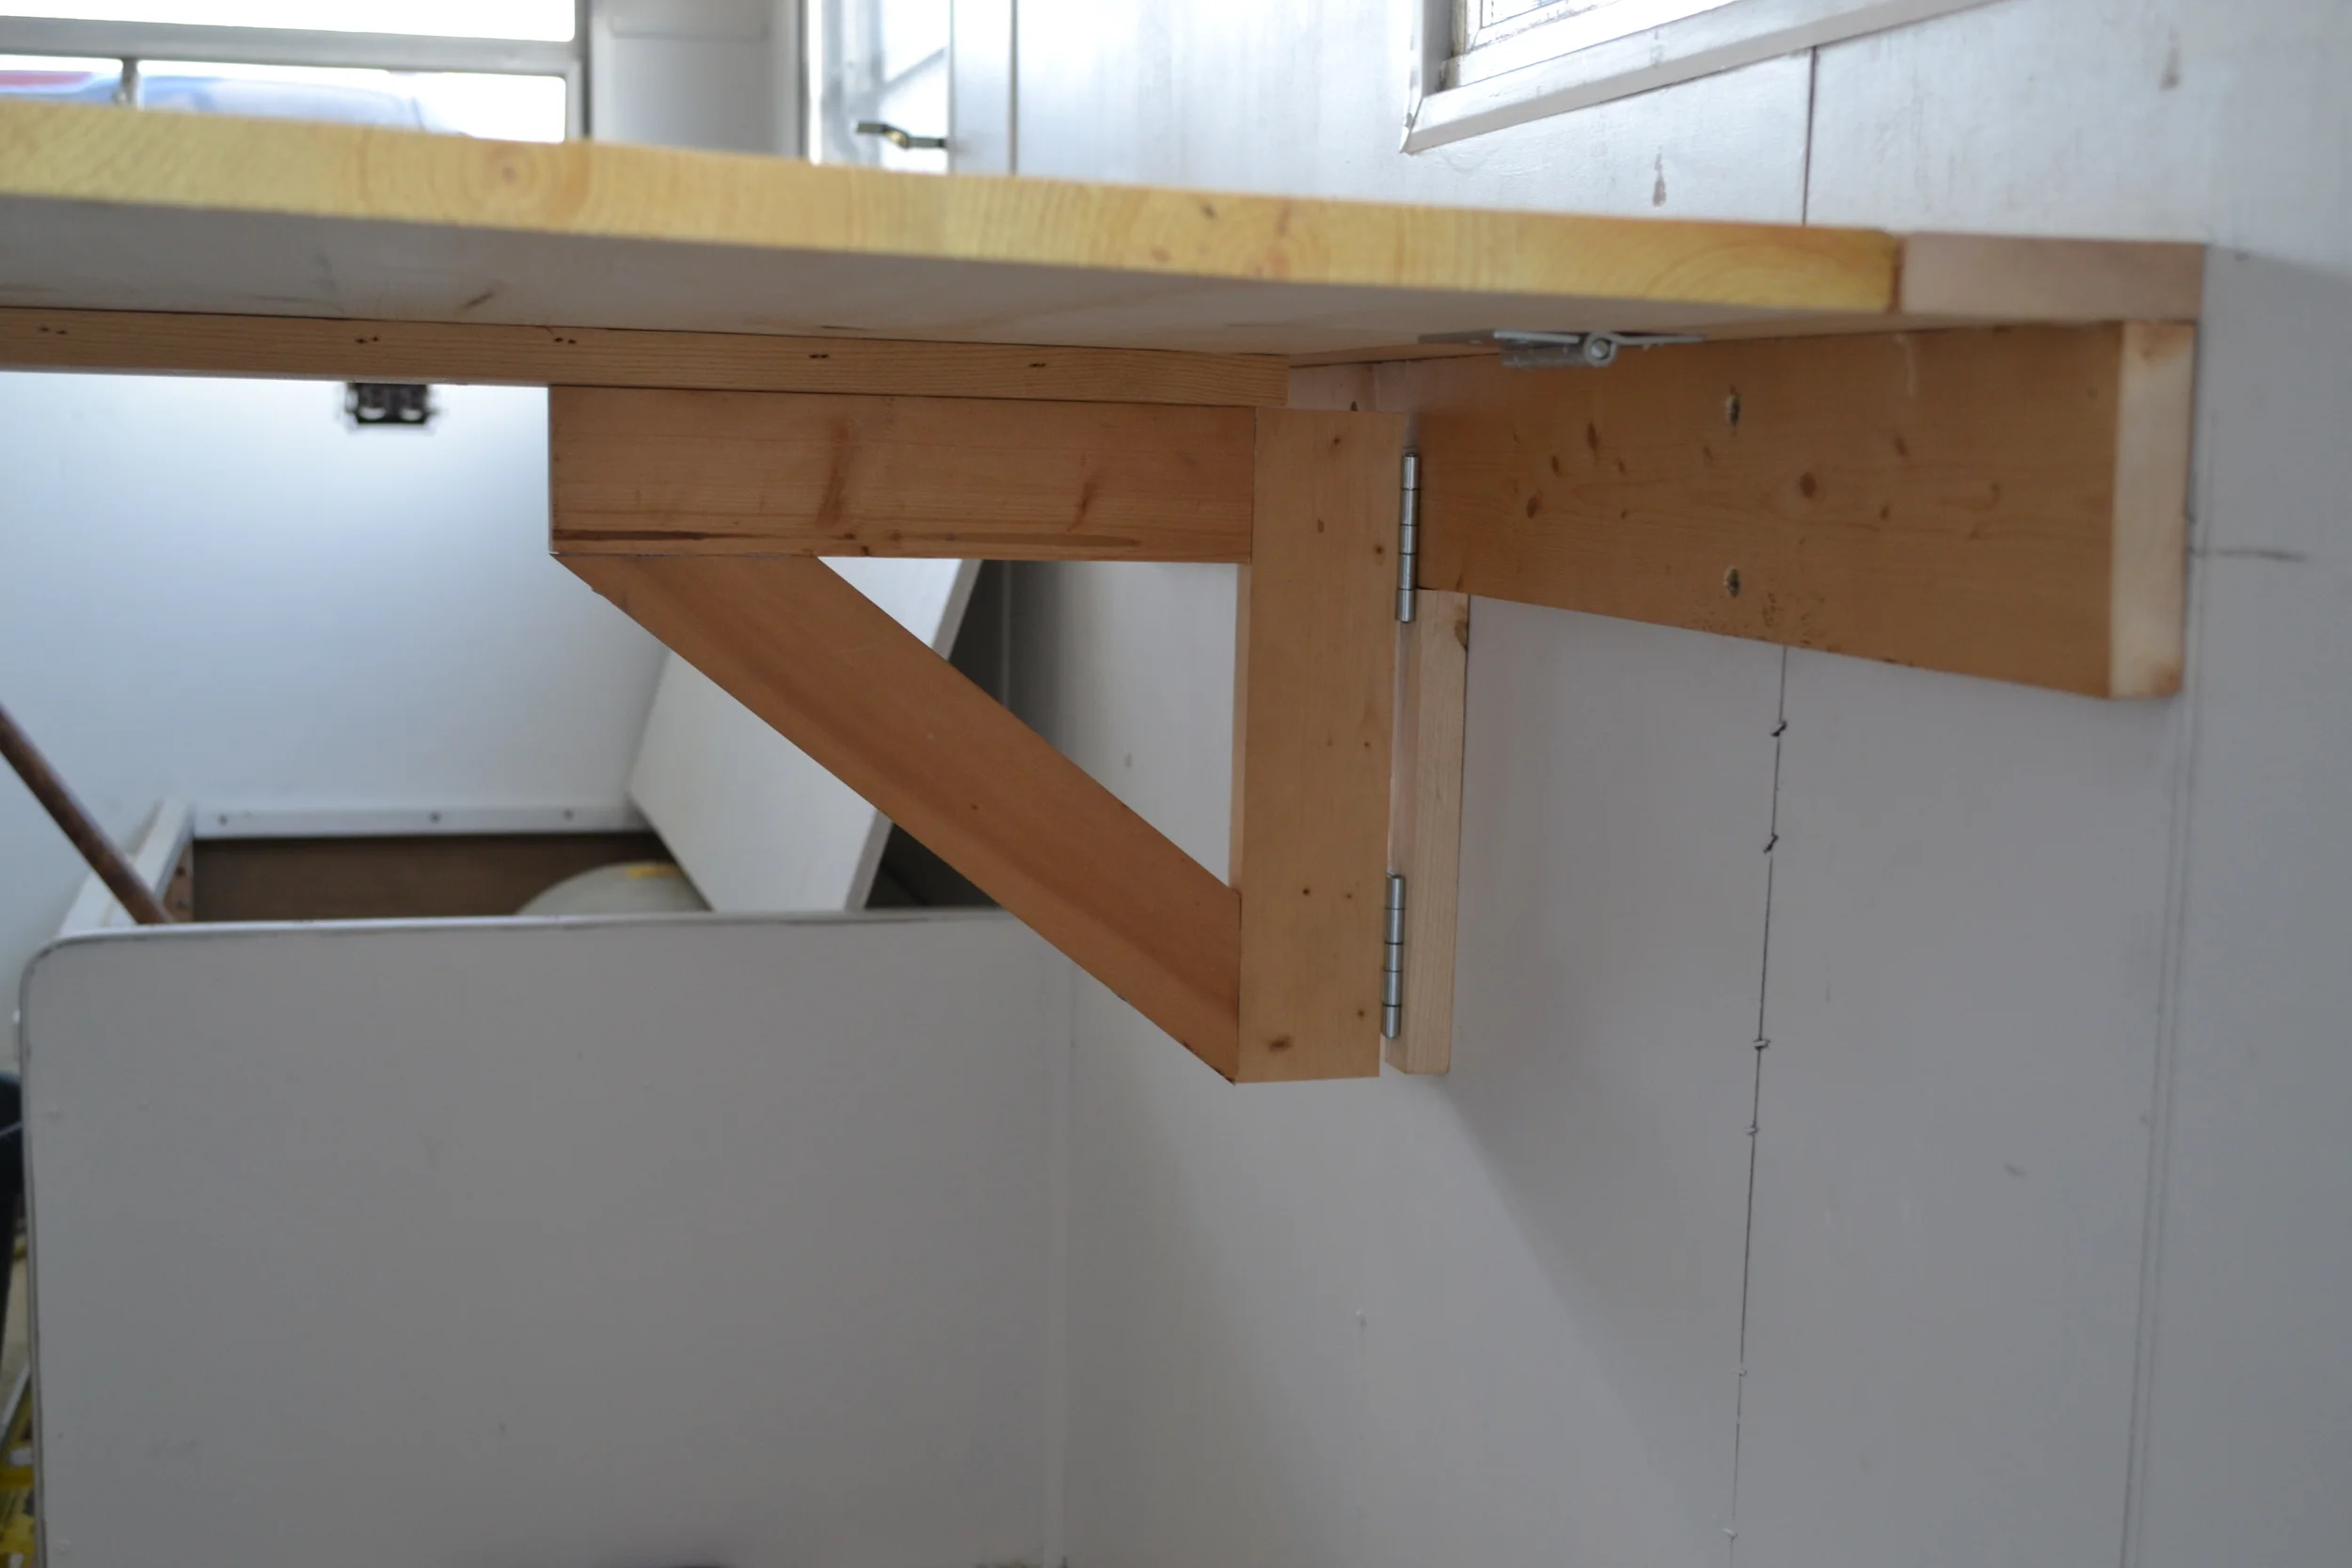
Triangular bracing distributes loads more effectively than rectangular frameworks, creating rock-solid stability with less material. Triangles are inherently stable geometric shapes that resist deformation under load.
Material selection must account for both static loads (equipment weight) and dynamic loads (typing forces, leaning). Static calculations only tell part of the story – dynamic forces from daily use often exceed static loads significantly.
Strategic reinforcement at stress concentration points prevents localized failures that compromise overall stability. These points typically occur where different materials meet or where loads change direction within your structure.
Triangulation Principles in Desk Construction
Strategic use of triangular bracing distributes loads more effectively than traditional rectangular frameworks. Triangles are inherently stable shapes that resist deformation under load. Your DIY standing desk can harness this geometric advantage to create rock-solid stability with less material than conventional construction methods.
Diagonal braces at 45-degree angles between desk legs create triangular load paths that resist both lateral and torsional forces. These braces prevent the side-to-side movement that makes desks feel unstable during use.
Corner gussets where vertical and horizontal members meet eliminate the weak points that cause joint failures in rectangular frames. These reinforcements distribute loads across larger areas, preventing stress concentrations that lead to failure.
Triangular brackets underneath the desktop at stress concentration points distribute point loads across larger areas, preventing localized failures. I recommend placing these brackets wherever heavy equipment will be positioned.
Material Fatigue Considerations
Different materials fail in predictable patterns over time. Wood splits along grain lines, metal develops stress cracks, and particle board delaminates under repeated loading. Designing for these failure modes extends your desk’s lifespan dramatically by preventing the conditions that cause material breakdown.
Solid wood or plywood for surfaces over 30 inches wide prevents the sagging and delamination common with particle board under sustained loads. The internal structure of plywood distributes loads more evenly than particle board’s random fiber orientation.
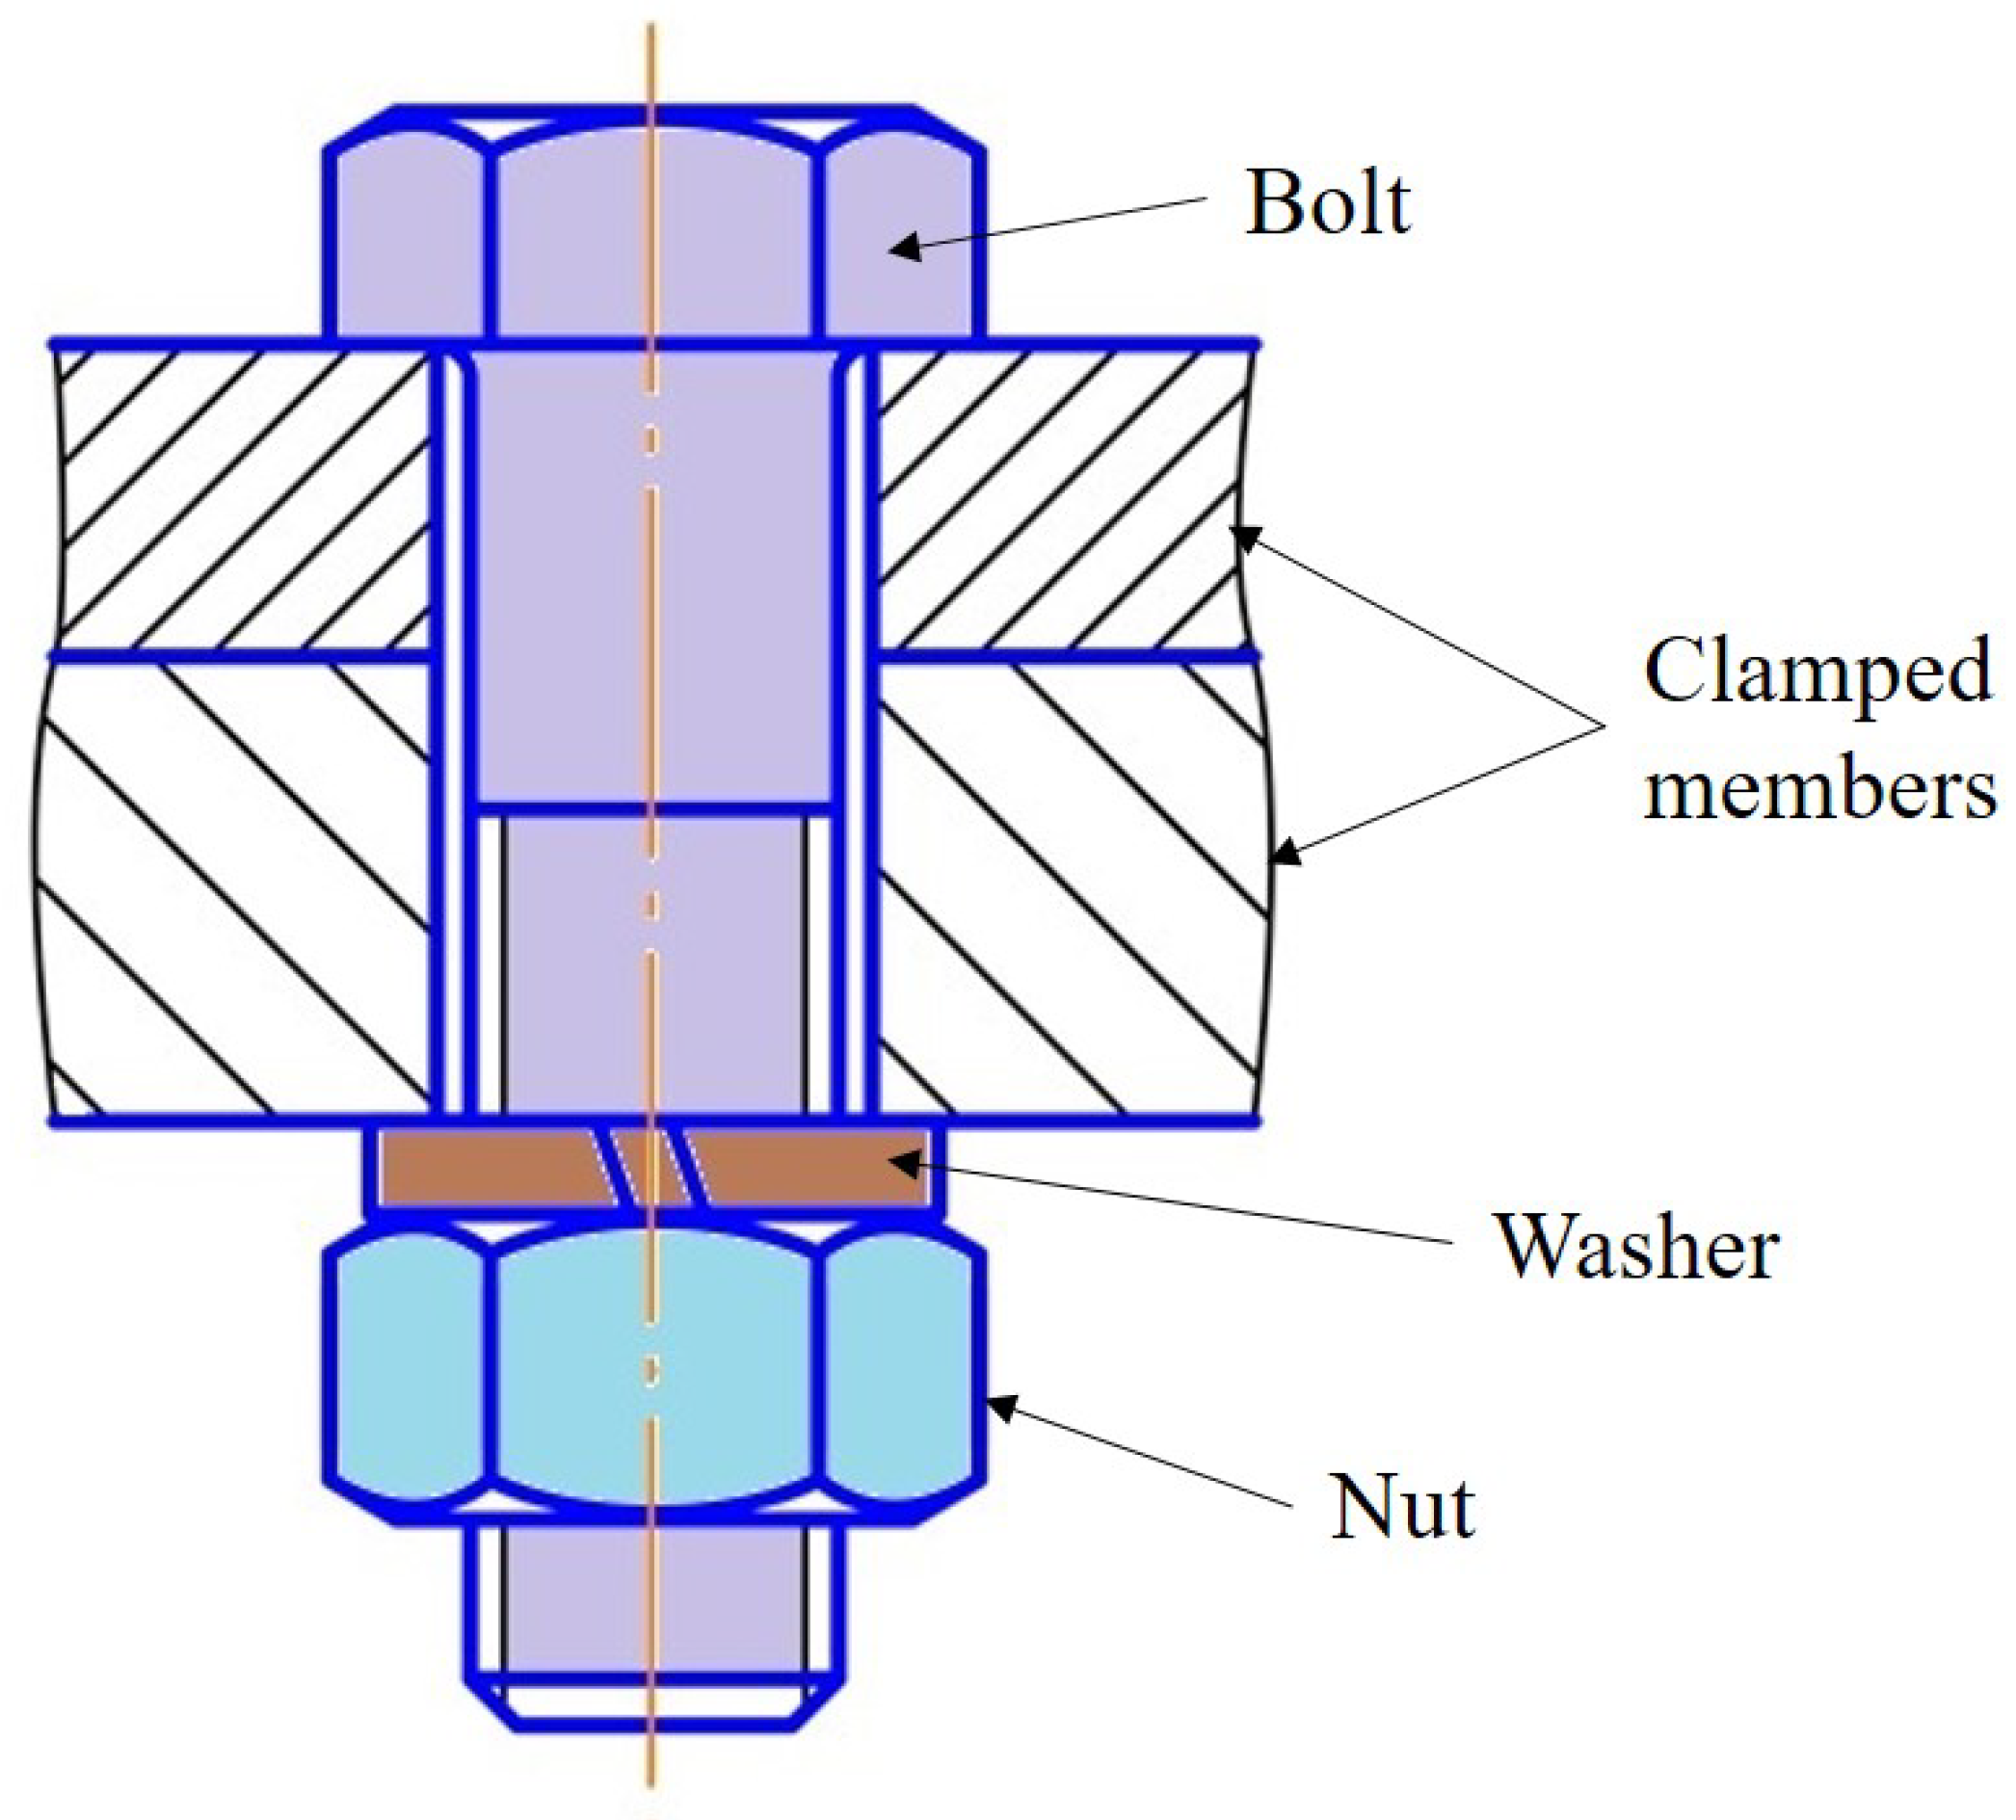
Threaded inserts in high-stress joints distribute fastener loads across larger areas, preventing the stripped holes that cause joint failures. These inserts cost more initially but prevent the need for repairs that often exceed the original cost savings.
Flexible sealants at wood joints accommodate seasonal expansion and contraction, preventing the splits and gaps that weaken structural connections. Wood moves with humidity changes – your design must accommodate this movement.
Understanding material longevity becomes critical when you consider that “you are advised to stand for around 15-30 minutes per hour” according to Autonomous, meaning your desk will experience thousands of load cycles annually from position changes and equipment adjustments.
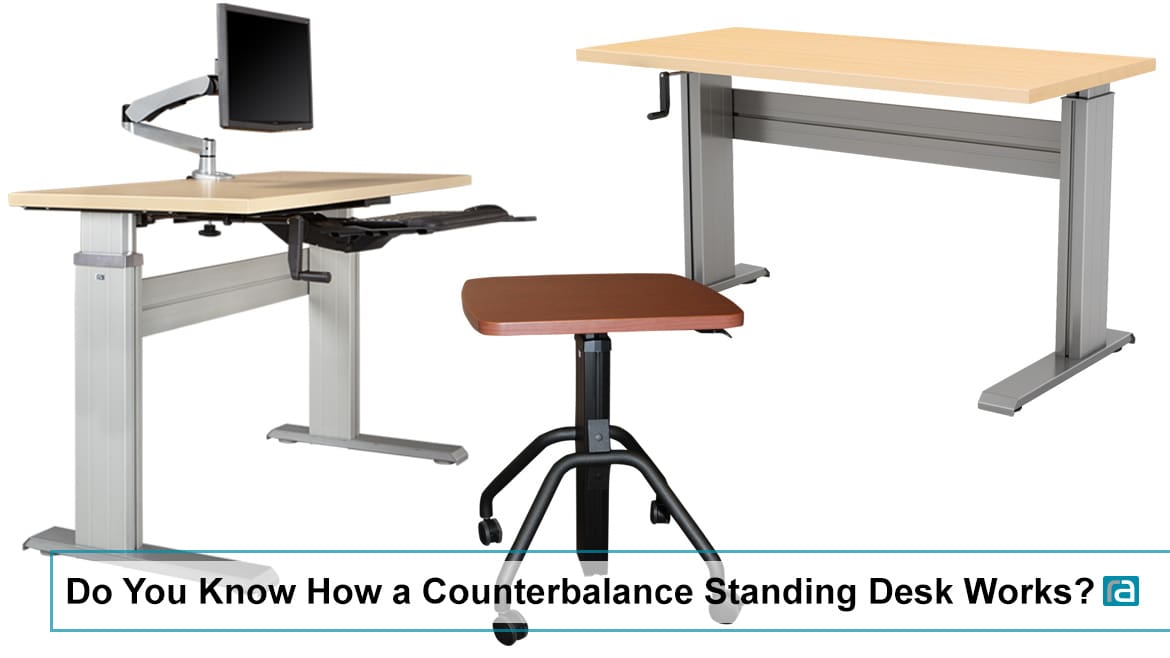
Adjustability Mechanisms That Actually Work
Most DIY adjustable standing desks fail because they don’t account for the engineering challenges of supporting dynamic loads while maintaining precision positioning. Your adjustment mechanism must lift heavy equipment smoothly while providing fine height control and remaining stable at any position.
Mechanical advantage systems provide the strength needed to lift heavy setups while maintaining fine control for height precision. Raw human strength isn’t sufficient to smoothly adjust a loaded desk without mechanical assistance.
Precision positioning requires constraining movement to a single axis while eliminating play in all other directions. Your desk must move up and down smoothly while remaining rigid in all other directions.
Component selection must account for dynamic loads and wear patterns that static load calculations miss. Moving parts experience different stresses than static components, requiring different design approaches.
Mechanical Advantage Systems
Lever-based and gear-based adjustment systems provide the strength needed to lift heavy setups while maintaining fine control for height precision. Raw human strength isn’t sufficient to smoothly adjust a loaded desk. Your mechanism must multiply your input force while providing controlled, precise movement.
3:1 mechanical advantage using lever arm systems reduces the force required to lift your desktop by two-thirds while maintaining control. This ratio provides the optimal balance between force reduction and control precision for most desk applications.
Gas struts rated for 150% of total desktop weight account for dynamic loading and provide smooth, controlled movement throughout the adjustment range. The extra capacity prevents the mechanism from becoming sluggish as components wear over time.
Detent positions every 2 inches provide consistent height settings and prevent drift during use. These positions eliminate the need for precise positioning during routine adjustments between sitting and standing heights.
A graphic designer built a lever-based adjustment system using a 24-inch lever arm connected to a threaded rod mechanism. The 3:1 mechanical advantage allowed her to easily lift her 85-pound setup (dual monitors, computer, equipment) with just 28 pounds of force, while maintaining precise height control within 1/4 inch increments.
Precision Positioning Without Wobble
Smooth adjustment requires constraining movement to a single axis while eliminating play in all other directions. Your desk must move up and down smoothly while remaining rigid in all other directions. This precision prevents the wobbling that makes adjustable desks unusable.
Linear bearings or drawer slides rated for vertical loads provide smooth movement while constraining lateral motion. Standard drawer slides aren’t designed for vertical loads, so you’ll need slides specifically rated for this application.
Positive stops at frequently used heights eliminate the need for precise positioning during routine adjustments. Most people use only two or three height settings regularly, making these stops more valuable than infinite adjustability.
Fine-adjustment mechanisms using threaded rods provide micro-positioning capability for perfect height optimization. Once you find your ideal height, small adjustments of 1/8 inch can make significant comfort differences.
Technology Integration and Future-Proofing
Modern DIY standing desks can incorporate smart technology and modular design principles that adapt to changing work requirements and emerging health insights. Your desk becomes a platform for optimization rather than just a static work surface. Strategic technology integration provides feedback on your usage patterns while preparing for future upgrades.
Smart sensing systems track posture patterns and provide gentle reminders for position changes, preventing overuse injuries common with standing desk adoption. These systems don’t require advanced programming skills and can be built incrementally.
Modular design architecture allows for upgrades and reconfigurations as your work style and health needs evolve. Your initial build becomes the foundation for continuous improvement rather than a fixed solution that becomes obsolete.
Smart Sensing and Feedback Systems
Integrating simple sensors and feedback mechanisms helps optimize your standing/sitting patterns and prevents the overuse injuries common with standing desk adoption. Basic Arduino or Raspberry Pi setups can track your behavior patterns and provide gentle guidance for healthier work habits.
Posture monitoring through DIY sensors provides objective feedback on your movement patterns and identifies areas for improvement. These systems track actual behavior rather than relying on self-reporting, which tends to be inaccurate.
Environmental optimization integration automatically adjusts lighting, air circulation, and aromatherapy based on your work patterns and stress levels. Your workspace can respond to your needs rather than requiring constant manual adjustment.
Data collection enables continuous optimization of your workspace configuration based on actual usage rather than assumptions. The data reveals patterns you might not notice consciously but that significantly impact your comfort and productivity.
Posture Monitoring Through DIY Sensors
Basic Arduino or Raspberry Pi setups can track your posture patterns and provide gentle reminders for position changes, weight shifts, and break timing. These systems don’t require advanced programming skills and can be built incrementally as your comfort with technology grows.
Pressure sensors in anti-fatigue mats track weight distribution patterns and identify postural habits that may lead to discomfort. These sensors reveal whether you’re favoring one leg or shifting weight in ways that could cause problems over time.
Tilt sensors monitor torso angle throughout the day, providing feedback on forward head posture and slouching tendencies. Even small deviations from optimal posture can cause significant problems when maintained for hours daily.
LED indicators provide gentle, non-intrusive posture correction cues that don’t disrupt your work flow. The visual feedback should be noticeable in your peripheral vision without demanding direct attention.
Smart Sensor Implementation Checklist:
- ☐ Select Arduino Uno or Raspberry Pi platform based on complexity needs
- ☐ Install pressure sensors in anti-fatigue mat (4 corners minimum)
- ☐ Mount tilt sensor at monitor base for posture tracking
- ☐ Program LED strip for visual feedback (green/yellow/red system)
- ☐ Set up data logging to SD card or cloud storage
- ☐ Configure reminder intervals (suggested: every 30 minutes)
- ☐ Test all sensors before permanent installation

Environmental Optimization Integration
Your DIY standing desk can automatically adjust lighting, air circulation, and aromatherapy based on your work patterns and stress levels. These environmental controls create a workspace that responds to your needs rather than requiring constant manual adjustment.
LED strips with circadian rhythm programming automatically adjust color temperature throughout the day to support natural sleep-wake cycles. Cool light in the morning promotes alertness, while warm light in the evening supports natural melatonin production.
Fan systems that activate during intense work periods provide cooling and air circulation when your metabolic rate increases. Standing work generates more heat than seated work, making temperature regulation more important.
Diffuser compartments for focus-enhancing essential oils can be triggered by calendar events or stress indicators. Scents can significantly impact cognitive performance and stress levels when used strategically.
Modular Evolution Architecture
Designing your standing desk as a modular system allows for upgrades, reconfigurations, and adaptations as your work style and health needs evolve. Your initial build becomes the foundation for continuous improvement rather than a fixed solution that becomes obsolete.
Component standardization strategy enables easy reconfiguration and component swapping without rebuilding the entire desk. When everything connects using common standards, you can modify your desk without starting over.
Scalability planning prevents the need for complete rebuilds as your setup grows more complex. Planning for expansion costs little initially but saves significant time and money later.
The importance of adaptable workspace design is highlighted in recent trends, as “Years later, I’ve arrived at a routine where I stand for part of the day, and sitting for the rest. But even there, the benefits have been obvious” according to Popular Mechanics, demonstrating how modular systems accommodate evolving work preferences.
Component Standardization Strategy
Using standard mounting systems and connection methods throughout your build enables easy reconfiguration and component swapping. When everything connects using common standards, you can modify your desk without starting over. This approach treats your desk as an evolving platform rather than a fixed structure.
Standardized mounting holes on 1-inch or metric grid patterns allow for easy repositioning of components and accessories. This grid system provides infinite adjustment possibilities while maintaining structural integrity.
T-slot aluminum extrusions provide infinite adjustment possibilities and professional-grade strength for modular construction. These extrusions accept a wide variety of connectors and brackets, making future modifications straightforward.
Standard electrical connections (USB-C, barrel connectors) enable easy integration of new technology without rewiring. Planning your electrical system around standard connectors prevents obsolescence as technology evolves.

Scalability Planning
Building expansion capabilities into your initial design prevents the need for complete rebuilds as your setup grows more complex. Your desk should accommodate growth in both technology and functionality. Planning for expansion costs little initially but saves significant time and money later.
Extra mounting points and cable runs in your initial build accommodate future additions without requiring structural modifications. I recommend including 50% more mounting points than you currently need.
Power distribution systems designed for 150% of current needs prevent electrical limitations as your technology requirements grow. Technology power requirements tend to increase over time, making this overhead essential.
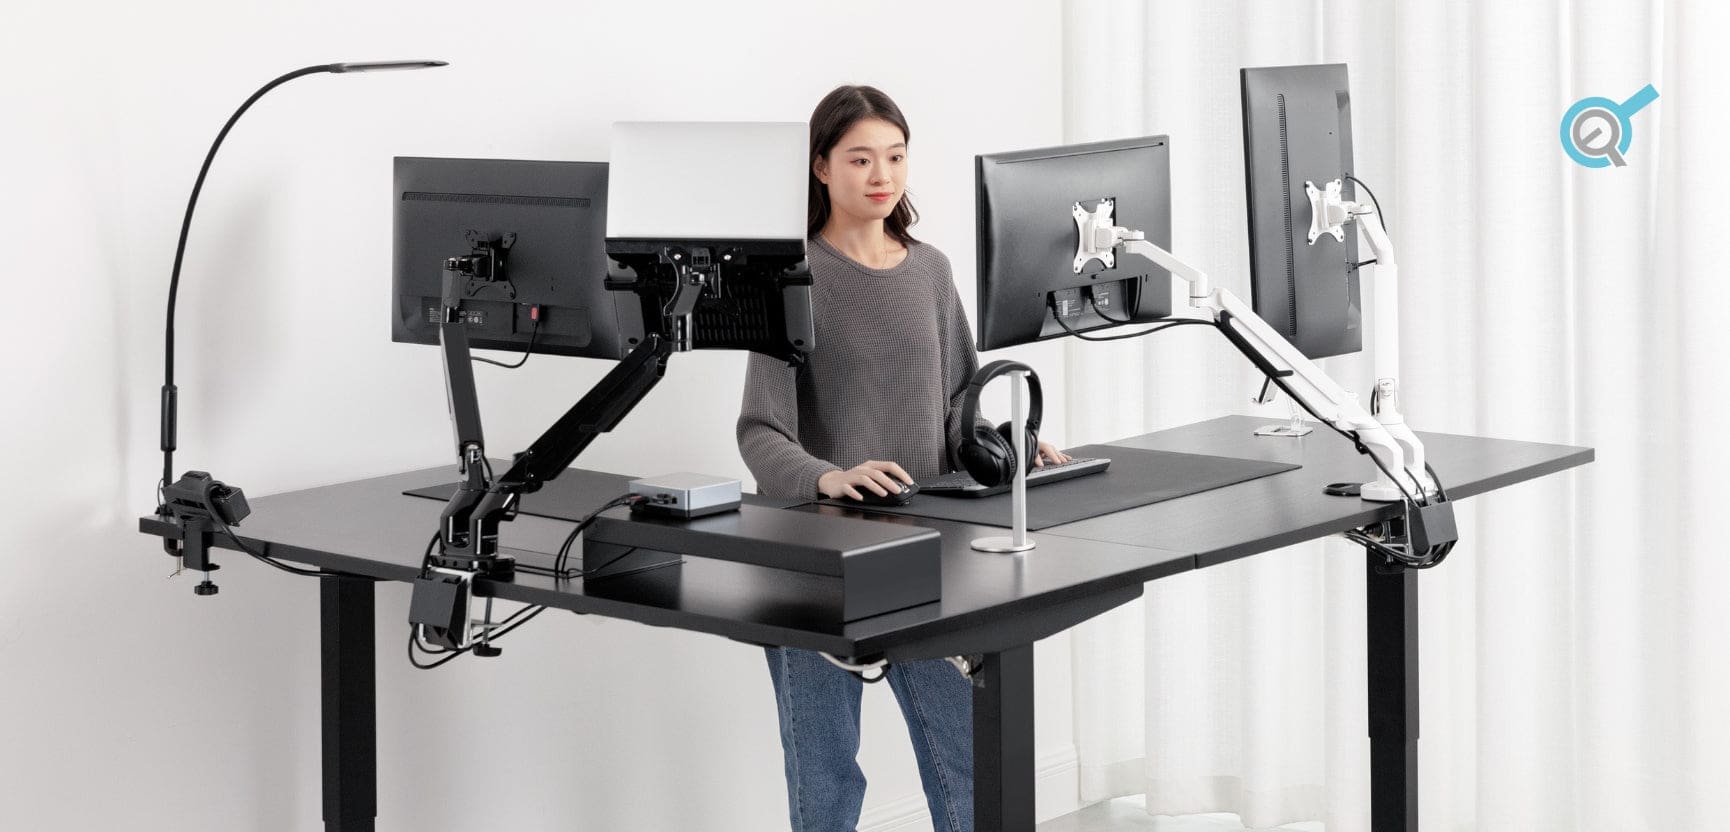
Monitor arm mounting planned for multi-screen expansion ensures your desk can support evolving display requirements. Even if you currently use one monitor, planning for multiple screens prevents future limitations.
| Expansion Category | Initial Planning | Future Capacity | Implementation Cost |
|---|---|---|---|
| Monitor Support | Single arm mount | Triple monitor capability | $50-150 |
| Power Distribution | 6-outlet strip | 12-outlet with USB-C | $30-80 |
| Cable Management | 2-inch conduit | 4-inch with dividers | $20-60 |
| Storage Integration | Basic shelf | Modular drawer system | $100-300 |
| Technology Ports | 4 USB connections | 8 USB + Ethernet/HDMI | $75-200 |
Waste Reduction and Sustainable Construction Practices
DIY standing desk construction can generate significant material waste and often uses environmentally harmful materials. Strategic planning creates a net-positive environmental impact while often reducing costs. Sustainable practices also tend to produce more durable, higher-quality results than conventional construction methods.
Circular design principles ensure your standing desk doesn’t become landfill waste when your needs change or technology evolves. Every component should have a planned second life, whether through reuse, recycling, or repurposing.
Upcycling integration opportunities reduce waste while often providing superior strength and character compared to new materials. Industrial materials designed for heavy use often exceed the requirements for desk construction while costing significantly less.

Circular Design Principles
Designing for disassembly and material reuse ensures your standing desk doesn’t become landfill waste when your needs change or technology evolves. Every component should have a planned second life. This approach often produces stronger, more durable construction than conventional methods.
Material recovery architecture using mechanical fasteners enables complete reclamation at end-of-life. When you avoid permanent adhesives and design for disassembly, every component can be recovered and reused.
Component labeling and documentation facilitate future disassembly and material sorting. Future users (including yourself) will appreciate clear documentation of materials and assembly methods.
Material Recovery Architecture
Using mechanical fasteners instead of adhesives and choosing materials with high recycling value creates a desk that can be completely reclaimed at end-of-life. Every joint should be reversible, and every material should have a clear disposal or reuse path.
Mechanical fasteners (screws, bolts, brackets) for all joints enable complete disassembly without material destruction. This approach also makes repairs and modifications easier during the desk’s useful life.
Material selection prioritizing recyclability ensures components can be processed through existing waste streams. Choosing materials with established recycling infrastructure prevents your desk from becoming waste.
Component labeling with material type facilitates proper sorting during future disassembly. Simple labels or stamps indicating material type and recycling codes make future processing straightforward.
Sustainable Construction Checklist:
- ☐ Use only mechanical fasteners (no glue or permanent adhesives)
- ☐ Label all components with material type and recycling codes
- ☐ Choose materials with established recycling streams
- ☐ Document assembly process for future disassembly
- ☐ Source locally available materials to reduce transportation impact
- ☐ Plan component reuse scenarios before construction
Upcycling Integration Opportunities
Incorporating reclaimed materials not only reduces waste but often provides superior strength and character compared to new materials. Industrial materials designed for heavy use often exceed the requirements for desk construction while costing significantly less than furniture-grade materials.
Reclaimed hardwood flooring provides pre-finished, durable desktop surfaces with character that new materials can’t match. The wear patterns and patina of reclaimed wood create visual interest while providing proven durability.
Industrial shelving units repurposed as structural framework offer superior strength ratings at lower costs than furniture-grade materials. These components were designed for heavy loads and frequent use, making them ideal for desk construction.
Old filing cabinets converted to adjustable-height pedestals provide storage and height adjustment in a single component. The existing drawer mechanisms and sturdy construction eliminate the need to build these features from scratch.
An architect converted a discarded industrial workbench into a standing desk by adding height-adjustable legs from salvaged lab equipment. The 2-inch thick maple surface, originally designed for heavy machinery, provided exceptional stability while the steel frame supported 400+ pounds. Total material cost: $85 versus $800 for equivalent commercial furniture.
Advanced Construction Methodologies and Design Innovation
The technical execution phase transforms theoretical knowledge into physical reality. This stage addresses the specific challenges that separate successful DIY builds from abandoned projects. Professional-grade techniques adapted for home workshops ensure accuracy without expensive tools or extensive experience.
Precision assembly techniques for amateur builders eliminate measurement errors and ensure consistent results across multiple assembly sessions. These methods focus on accuracy without requiring professional-grade tools or extensive woodworking experience.
Troubleshooting common DIY standing desk failures enables proactive identification and resolution of problems before they become expensive. Most failures follow predictable patterns that can be prevented through proper design and construction techniques.
Precision Assembly Techniques for Amateur Builders
Professional-grade assembly methods adapted for home workshops focus on accuracy without expensive tools or extensive experience. Simple jigs and systematic approaches eliminate the guesswork that causes most DIY failures. These techniques ensure your first build meets professional standards.
Jig-based construction for repeatability eliminates measurement errors and ensures consistent results. When you build simple guides and templates, you can achieve professional accuracy with basic tools.
Surface preparation and finishing strategies prevent premature wear and maintain professional appearance. The difference between amateur and professional results often comes down to surface preparation rather than construction techniques.
Quality control checkpoints during assembly prevent compound errors that become expensive to fix later. Small errors multiply throughout the construction process, making early detection crucial.
The importance of precision becomes clear when you consider that “It is often cheaper to make your own standing desk. This is because you select the equipment on your own upon evaluating your budget and try to keep costs at their minimum” according to Autonomous, making accuracy crucial to avoid costly rebuilds that eliminate these savings.
Jig-Based Construction for Repeatability
Creating simple jigs and templates eliminates measurement errors and ensures consistent results across multiple assembly sessions. Jigs are temporary tools that guide your construction process. They’re especially valuable when you’re building multiple identical components or need to maintain precise angles and spacing.
Corner square jigs using scrap plywood ensure perfect 90-degree angles without expensive squares or measuring tools. These jigs cost almost nothing to make but dramatically improve the accuracy of your assembly.
Drilling templates using pegboard provide consistent hole spacing and prevent drill bit wandering. Pre-drilled templates ensure your mounting holes align perfectly, preventing the frustration of misaligned components.
Clamping caul systems distribute pressure evenly during glue-ups, preventing joint failures and surface damage. Even pressure across the entire joint creates stronger bonds and prevents the squeeze-out patterns that require extensive cleanup.
Surface Preparation and Finishing Strategies
Proper surface treatment prevents premature wear and maintains the professional appearance that motivates continued use of your standing desk. Surface preparation is often the difference between a project that looks homemade and one that rivals commercial furniture.
Progressive sanding through 120, 150, and 220-grit removes mill marks and creates surfaces that accept finish evenly. Each grit removes the scratches from the previous grit while preparing the surface for the next step.
Pre-stain conditioner on softwoods prevents blotchy absorption that creates unprofessional-looking finishes. Softwoods have varying grain density that absorbs stain unevenly without proper preparation.
Water-based polyurethane applied in thin coats provides durability without the yellowing associated with oil-based finishes. Multiple thin coats create a more durable finish than fewer thick coats while maintaining clarity.
Quality Control Checkpoints During Assembly
Systematic verification at each construction phase prevents compound errors that become expensive to fix later. Small errors multiply throughout the construction process. Catching problems early prevents the frustration of discovering major issues after significant time investment.
Diagonal measurements for square after each major assembly step ensure your desk remains geometrically accurate. Diagonal measurements reveal angular errors that aren’t apparent from individual side measurements.
Load testing of all moving parts before final assembly identifies mechanical problems while they’re still easy to fix. Testing under controlled conditions prevents failures during actual use when repairs are more difficult.
Electrical connection verification with multimeters prevents damage to sensitive components during initial power-up. Simple continuity and voltage checks can prevent expensive component failures.
Assembly Quality Control Checklist:
- ☐ Verify all measurements against original plans before cutting
- ☐ Check diagonal measurements for square after each major assembly
- ☐ Test fit all joints before applying permanent fasteners
- ☐ Load test adjustment mechanisms with 150% of intended weight
- ☐ Verify electrical connections with multimeter before power-up
- ☐ Document any deviations from original plans for future reference

Troubleshooting Common DIY Standing Desk Failures
Proactive identification and resolution of the most frequent problems that cause DIY standing desk projects to fail or become unusable. Understanding these failure modes during the design phase prevents problems rather than requiring fixes after construction. Most failures follow predictable patterns.
Structural instability diagnosis and correction addresses wobbling, sagging, and joint failure through targeted reinforcement. These problems usually have specific causes that can be identified through systematic testing.
Height adjustment mechanism reliability focuses on the most common failure point in DIY adjustable desks. Adjustment mechanisms experience different stresses than static components, requiring different design approaches.
Cable management integration that scales prevents the tangled mess that develops as technology setups evolve. Cable management systems must accommodate growth in both the number and size of cables.
Structural Instability Diagnosis and Correction
Understanding the root causes of wobbling, sagging, and joint failure enables targeted fixes rather than complete reconstruction. Structural problems usually have specific causes that can be identified through systematic testing. Fixing the root cause prevents recurring problems.
Controlled load testing at different points identifies the primary failure mode and directs reinforcement efforts. Apply loads systematically to isolate the source of instability rather than guessing at solutions.
Joint reinforcement with additional fasteners or brackets prevents failures before they occur. Adding reinforcement is much easier than repairing failed joints, especially when the desk is loaded with equipment.
Cross-bracing added in the direction of detected movement provides targeted stability improvements. The direction of wobble or flex indicates where additional bracing will be most effective.
Height Adjustment Mechanism Reliability
The most common failure point in DIY adjustable desks stems from inadequate load calculations and wear-prone component selection. Adjustment mechanisms must support not just static weight but also dynamic forces from typing, leaning, and equipment changes.
Load calculations including equipment weight and dynamic forces prevent mechanism overloading. Dynamic forces from daily use often exceed static loads by 200-300%, making this calculation critical.
Component selection rated for 200% of calculated loads accounts for dynamic forces and wear over time. The extra capacity prevents the mechanism from becoming sluggish as components wear.
Redundant locking mechanisms prevent catastrophic height loss that can damage equipment and cause injury. Primary locks can fail, making backup systems essential for safety.
Cable Management Integration That Scales
Planning cable routing during construction prevents the tangled mess that develops as your technology setup evolves. Cable management systems must accommodate growth in both the number and size of cables. Retrofitting cable management is always more difficult than building it in initially.
Oversized conduits (twice current cable volume) accommodate future additions without requiring reconstruction. Technology setups tend to grow over time, making this extra capacity valuable.
Removable access panels enable cable additions and modifications without disassembling the desk. These panels should be easily removable but secure enough to prevent accidental opening.
Power distribution points at both standing and sitting heights ensure electrical access regardless of desk position. Adjustable desks need power distribution that moves with the work surface.
Cost Optimization Without Quality Compromise
Strategic material selection and construction sequencing minimizes expense while maintaining structural integrity and functionality. Cost optimization requires understanding which materials are critical to performance and which can be substituted without compromising quality.
Material substitution analysis identifies which materials can be substituted without performance loss. Not all materials in your desk require furniture-grade quality, making strategic substitution possible.
Phased construction for budget management allows for budget spreading while maintaining workspace functionality. Each phase should provide complete functionality that can be used while planning the next upgrade.
Material Substitution Analysis
Understanding which materials can be substituted without performance loss and which are critical to structural integrity guides cost-effective purchasing decisions. Not all materials in your desk require furniture-grade quality. Strategic substitution can reduce costs by 40-60% without compromising performance.
Construction-grade lumber for hidden structural elements provides adequate strength at significantly lower cost than furniture-grade wood. These components won’t be visible in the finished desk, making appearance irrelevant.
Industrial hardware from electrical supply houses offers superior performance at lower cost than furniture-specific hardware. Industrial components are designed for heavy use and frequent operation.
Bulk fastener purchases from industrial suppliers provide significant cost savings over retail hardware store prices. The cost per fastener drops dramatically when buying in larger quantities.
Phased Construction for Budget Management
Breaking the project into functional phases allows for budget spreading while maintaining a usable workspace throughout construction. Each phase should provide complete functionality that can be used while planning the next upgrade. This approach also allows for learning and refinement between phases.
Basic fixed-height versions provide immediate functionality while allowing for future adjustability upgrades. You can start with a simple, stable desk and add adjustment mechanisms later.
Technology features implemented as separate phases after core construction prevent budget overruns while ensuring basic functionality. Smart features are nice to have but shouldn’t compromise the basic desk functionality.
Finish upgrades planned as final phases allow for functionality testing before investing in aesthetic improvements. You can verify the desk meets your needs before spending money on premium finishes.
When you’re ready to clear out your old desk setup or dispose of construction materials from your DIY project, Jiffy Junk can handle the removal process efficiently and responsibly. Their commitment to recycling and donating materials aligns with the sustainable construction practices outlined in this guide. Rather than letting old furniture and construction debris end up in landfills, Jiffy Junk ensures these materials find new life through their comprehensive sorting and donation programs.
Contact Jiffy Junk today to schedule your workspace cleanout and contribute to Sacramento’s circular economy while focusing on what matters most – building your perfect standing desk.
Final Thoughts
Building your own standing desk represents more than just a furniture project – it’s an investment in your long-term health, productivity, and workspace satisfaction. The engineering principles, sustainable practices, and construction techniques outlined in this guide provide the foundation for creating a workspace that truly serves your unique needs.
Your DIY approach allows for customization impossible with commercial solutions while often costing significantly less than premium alternatives. The psychological ownership that comes from building your own workspace creates a deeper connection to your work environment and greater motivation to maintain healthy work habits.
Remember that your first build doesn’t need to be perfect. The modular design principles and phased construction approaches allow for continuous improvement and adaptation as your needs evolve. Start with a solid foundation and build upon it systematically.
The combination of proper engineering principles and sustainable construction practices creates a desk that will serve you for decades while minimizing environmental impact. Systematic quality control and troubleshooting knowledge prevents the common failures that cause most DIY standing desk projects to be abandoned.
Strategic cost optimization and phased construction make professional-grade results accessible regardless of budget constraints, while modular design ensures your investment grows with your needs. Your custom-built standing desk becomes a platform for ongoing optimization rather than a fixed solution that becomes obsolete.