
25 Stunning Loft Conversion Bedroom Ideas That Will Transform Your Attic in 2025
Table of Contents
-
Key Considerations for Loft Conversion Bedrooms
-
Maximizing Space in Dormer Loft Conversions
-
Innovative Storage Solutions
-
Lighting and Window Innovations
-
Stylish Yet Practical Design Approaches
-
Specialized Loft Bedroom Configurations
-
How Jiffy Junk Can Help With Your Loft Conversion Project
-
Final Thoughts
Key Considerations for Loft Conversion Bedrooms
I’ve been thinking about converting my dusty old attic into a beautiful loft bedroom for years, and I finally took the plunge last summer. Before you start tearing down walls and picking out paint colors, there are some critical factors you need to understand that will shape your entire project.
First things first – you’ll need a proper structural assessment. Your attic needs at least 7.5 feet of headroom at its highest point to be comfortable and meet most building codes. The floor joists must be strong enough to support bedroom loads, and you’ll need proper access points that comply with emergency egress requirements. I learned this the hard way when my initial plans had to be completely reworked because my ceiling height was just shy of requirements.
Budget planning is another huge consideration. Most loft conversion bedrooms cost between $30,000-$70,000 depending on complexity and finishes. I budgeted $45,000 for mine and ended up spending $52,000 – those custom storage solutions really add up!
|
Consideration |
Details |
Importance |
|---|---|---|
|
Structural Assessment |
Minimum 7.5ft headroom, adequate floor joists, proper access points |
Critical – affects feasibility |
|
Budget Planning |
$30,000-$70,000 typical range |
High – determines scope |
|
Building Regulations |
Fire safety, structural integrity, insulation requirements |
Mandatory – legal compliance |
|
Space Optimization |
Working with sloped ceilings, maximizing usable floor area |
High – affects functionality |
|
Natural Light |
Window placement, skylights, light tubes |
Medium – affects ambiance |
Building regulations are non-negotiable and vary by location. You’ll need to address fire safety with smoke detectors and proper escape routes. The structural integrity calculations must be spot-on, and insulation values typically need to be between R-38 and R-60 for attic spaces. My local code also required dedicated electrical circuits and GFCI protection in certain areas.
Space optimization becomes an art form when working with sloped ceilings. I found that furniture placement and room layout needed careful planning to avoid awkward spaces where the ceiling height drops too low.
When planning your loft conversion bedroom, consider how you’ll handle the resulting construction debris. Our guide on efficient and ethical garage junk removal in Austin offers valuable insights on responsibly managing renovation waste that can be applied to any home improvement project.
Maximizing Space in Dormer Loft Conversions
1. Full-Width Dormer with Window Seat
I’m absolutely in love with my full-width dormer – it completely transformed my usable floor space by creating standing height across the entire width of my loft. The built-in window seat I added isn’t just gorgeous; it’s hiding some serious storage underneath with drawers that hold all my seasonal clothing and extra bedding.
The construction wasn’t simple though. We had to make substantial structural modifications including roof alterations, new load-bearing walls, and proper waterproofing at all the roof intersections. My contractor recommended building the window seat with a minimum depth of 20 inches for comfort, and we installed heavy-duty slides rated for 75 pounds to handle all the stuff I planned to store.
2. L-Shaped Dormer Configuration
An L-shaped dormer wraps around a corner of your loft, creating a dynamic room shape with significantly more usable floor space. This setup lets you designate different functional zones within your bedroom while keeping an open, spacious feel. The unique architectural element adds character while solving the practical challenge of limited headroom.
A recent L-shaped dormer conversion in Portland transformed a cramped 200 sq ft attic into a 350 sq ft master bedroom with distinct sleeping and reading zones. The homeowners utilized the corner junction for a custom-built bookcase that serves as a partial room divider, while maintaining the open feel. The project cost $52,000 but added an estimated $85,000 to the home’s value, demonstrating the excellent return on investment these conversions can provide when thoughtfully designed.
These L-shaped configurations require complex structural engineering to ensure proper load distribution at the corner junction, often needing steel reinforcement. While they typically increase usable floor space by 30-40% compared to a standard loft conversion, they cost approximately 15-25% more due to additional roofing, windows, and structural complexity.
3. Dormer with Juliet Balcony
I’ve always dreamed of having a Juliet balcony, and adding one to my dormer loft conversion was a game-changer! Installing French doors that open to a small balcony creates an incredible indoor-outdoor connection without needing extensive exterior space. My loft room is now flooded with natural light, and I get amazing ventilation on nice days.
The glass railings maintain my views while ensuring safety, giving me the feeling of outdoor space even though I’m on the top floor. It’s become my favorite spot for morning coffee.
There are strict building codes to follow though – the railing height needs to be at least 42 inches, with gaps between balusters no larger than 4 inches. The balcony itself must support 200 pounds per square foot. My contractor was especially careful with waterproofing details at the threshold, using proper flashing, drainage planes, and a slight outward slope to prevent water from coming in during rainstorms.
4. Multi-Level Dormer Design
A split-level design within a large dormer conversion creates distinct zones for different activities. You might place your sleeping area on a slightly raised platform with a sitting area or workspace below. This approach adds architectural interest while making the most of varying ceiling heights. The level changes naturally define different functional areas without requiring walls that would make the space feel smaller.
Multi-level designs require careful planning for minimum headroom clearances—typically 7 feet for primary living areas and 6.5 feet for secondary spaces like the sleeping platform. Step heights between levels should maintain consistency (typically 7-7.5 inches) with proper lighting to prevent tripping hazards, and may require handrails if the height difference exceeds 30 inches.
5. Dormer with Integrated Dressing Area
When I redesigned my dormer loft conversion, I designated one section as a dedicated dressing area, and it’s been a total luxury! My built-in wardrobes and vanity are separated from my sleeping area by a partial wall, which helps keep my clothing and accessories organized while maintaining an open feel.
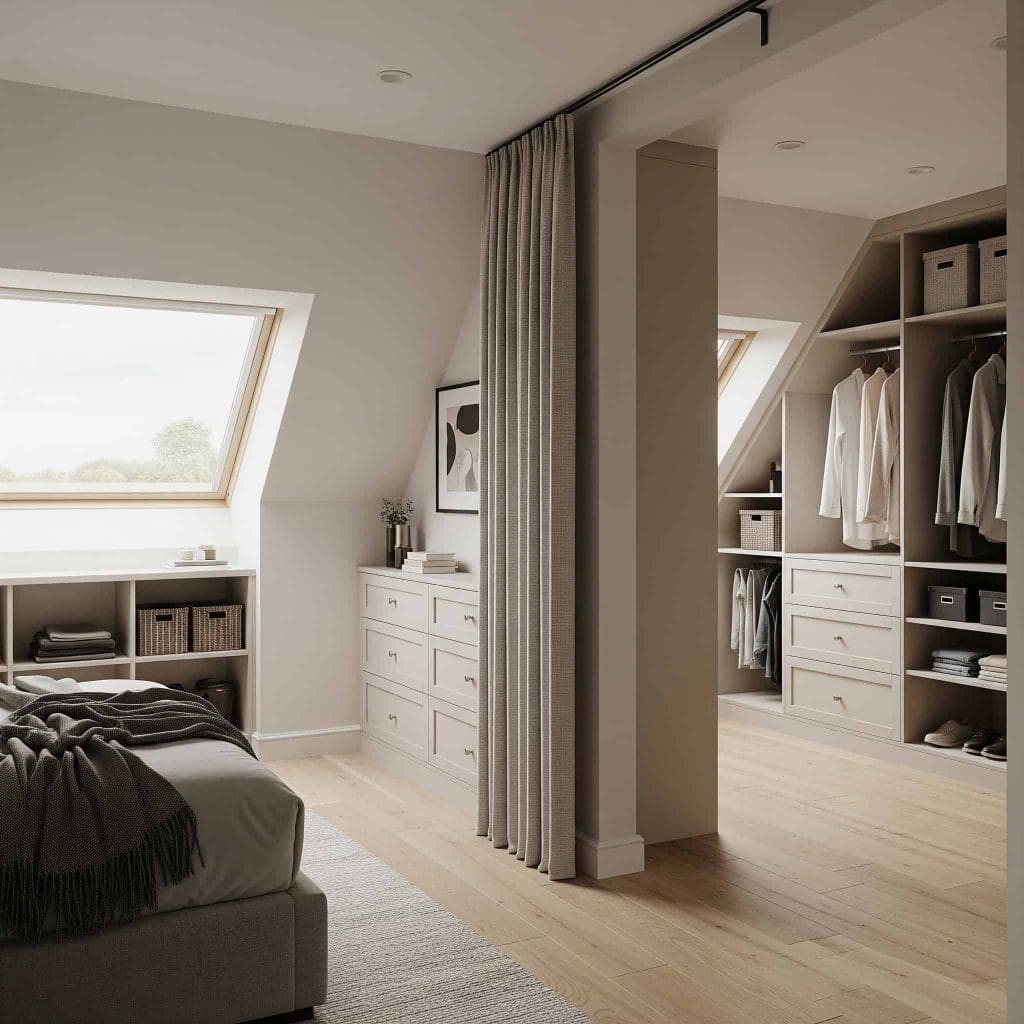
The dressing area functions best with at least 24 square feet of floor space. I installed task lighting at 75-100 lumens per square foot for proper visibility when choosing outfits and applying makeup. The partial wall we designed maintains structural integrity without full-height construction – we went with a half-wall (about 45 inches high) with open shelving above to maintain light flow while providing visual separation.
This setup keeps my bedroom feeling tidy since all my clothing stays contained in one zone, and I have a dedicated space for getting ready in the morning.
Innovative Storage Solutions
6. Under-Eaves Built-In Cabinetry
I was amazed at how much storage space we gained by installing custom cabinets that follow the exact angle of our roof slope. These built-ins transformed those awkward spaces into valuable storage for clothing, shoes, and accessories while maintaining clean visual lines in our loft conversion bedroom.
The customized approach ensures no space goes to waste, even in the most challenging corners. Our carpenter measured precisely to match the roof angles (which were about 35 degrees) and varied the depths of the cabinets based on what we planned to store.
For folded clothes, we made the cabinets 12-14 inches deep, while sections for hanging items are 22-24 inches deep. We chose sliding doors rather than swing-out options to maximize accessibility in the tight spaces under the eaves.
|
Storage Type |
Best Uses |
Design Considerations |
|---|---|---|
|
Under-Eaves Cabinetry |
Clothing, shoes, accessories |
Must match roof angles (20-45°), varying depths |
|
Bed Platform Storage |
Seasonal items, extra bedding |
500lb+ weight capacity, full-extension slides |
|
Sliding Wall Systems |
Clothing, office supplies |
Top-hung or bottom track options, lightweight panels |
|
Staircase Storage |
Books, linens, small items |
Must maintain structural integrity, soft-close features |
|
Multi-Functional Furniture |
Varies by piece |
Wall reinforcement for Murphy beds, counterbalance mechanisms |
After completing your loft room storage solutions, you may need to dispose of old furniture or materials. Our article on used furniture pickup and disposal provides helpful information on how to responsibly get rid of unwanted items from your renovation project.
7. Bed with Integrated Storage Platform
Elevating your bed on a custom platform with drawers or pull-out compartments underneath utilizes the typically unused space below your bed. This approach creates substantial hidden storage without requiring additional floor space. You’ll gain organized storage for seasonal items, extra bedding, or clothing while maintaining a clean, uncluttered bedroom design.
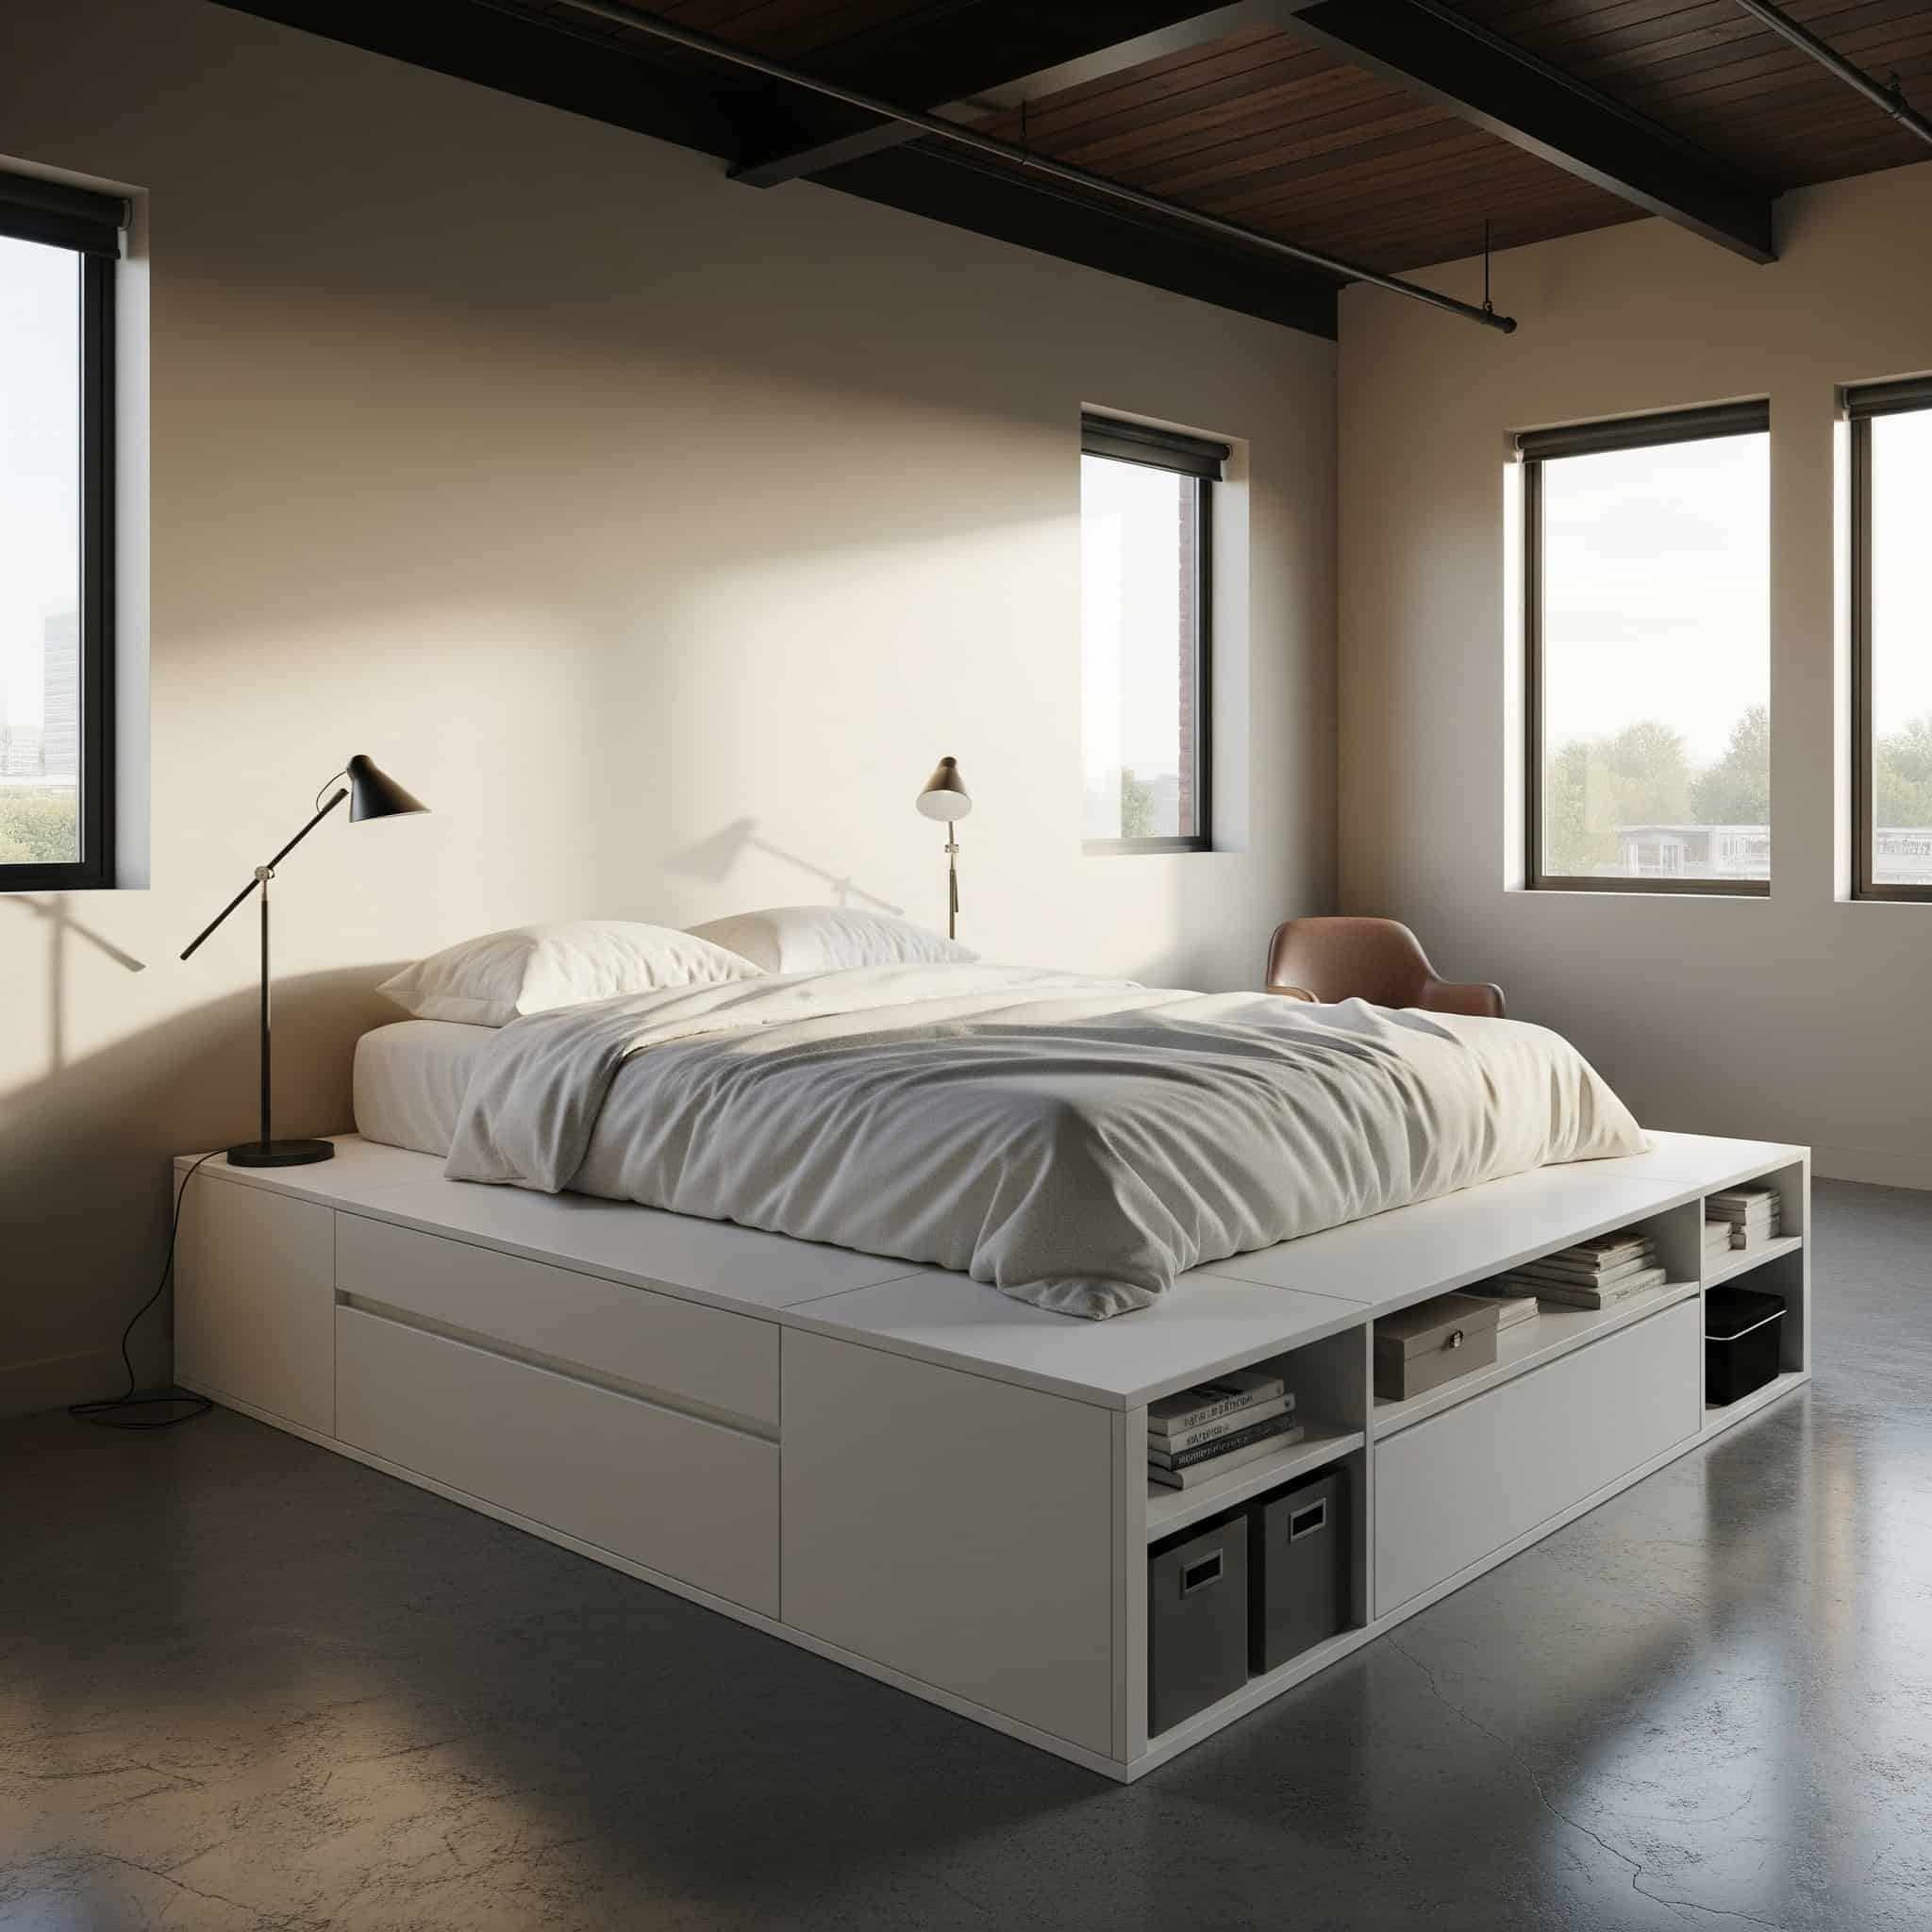
I went with this option in my own loft conversion, and the amount of storage it provides is incredible. My platform was constructed with a weight capacity of 550 pounds to support my bed and two people comfortably. The drawer systems have full-extension slides rated for 100 pounds each, which means I can fully access everything inside without having to reach blindly under the bed.
One tip from my carpenter: make your drawer depths about 6-8 inches less than the total platform depth to allow for structural framing. This ensures the platform remains sturdy while maximizing storage capacity.
8. Sliding Wall Storage System
Floor-to-ceiling sliding panels that conceal storage compartments create a clean, minimalist look when closed while providing easy access when needed. This system works particularly well in loft rooms where space is at a premium and visual clutter needs to be minimized. The sliding mechanism allows full access without requiring clearance space for swinging doors.
A Seattle homeowner maximized their 280 sq ft loft bedroom with a custom sliding wall storage system that transformed the space. Using three 7-foot wide panels that slide on a recessed ceiling track, they created a streamlined wall when closed that conceals a complete wardrobe, home office setup, and media center. The panels, made of lightweight honeycomb-core construction with walnut veneer, slide effortlessly despite their size. When open, the storage areas are fully accessible, but when closed, the room maintains a serene, uncluttered atmosphere that makes the modest space feel much larger.
These sliding systems utilize either top-hung tracks (requiring reinforced headers capable of supporting 7-10 pounds per square foot of panel) or bottom-track systems (requiring precise floor leveling). Panel materials should be lightweight yet rigid—typically hollow-core construction with high-quality veneers or laminates—to reduce strain on hardware while maintaining durability.
9. Staircase with Integrated Storage
I’m obsessed with how we designed our access staircase with drawers built into each riser! It’s such a clever way to maximize otherwise wasted space. This approach creates substantial storage without requiring any additional floor area in your loft conversion bedroom. The stairs themselves become functional furniture rather than just a means of access.
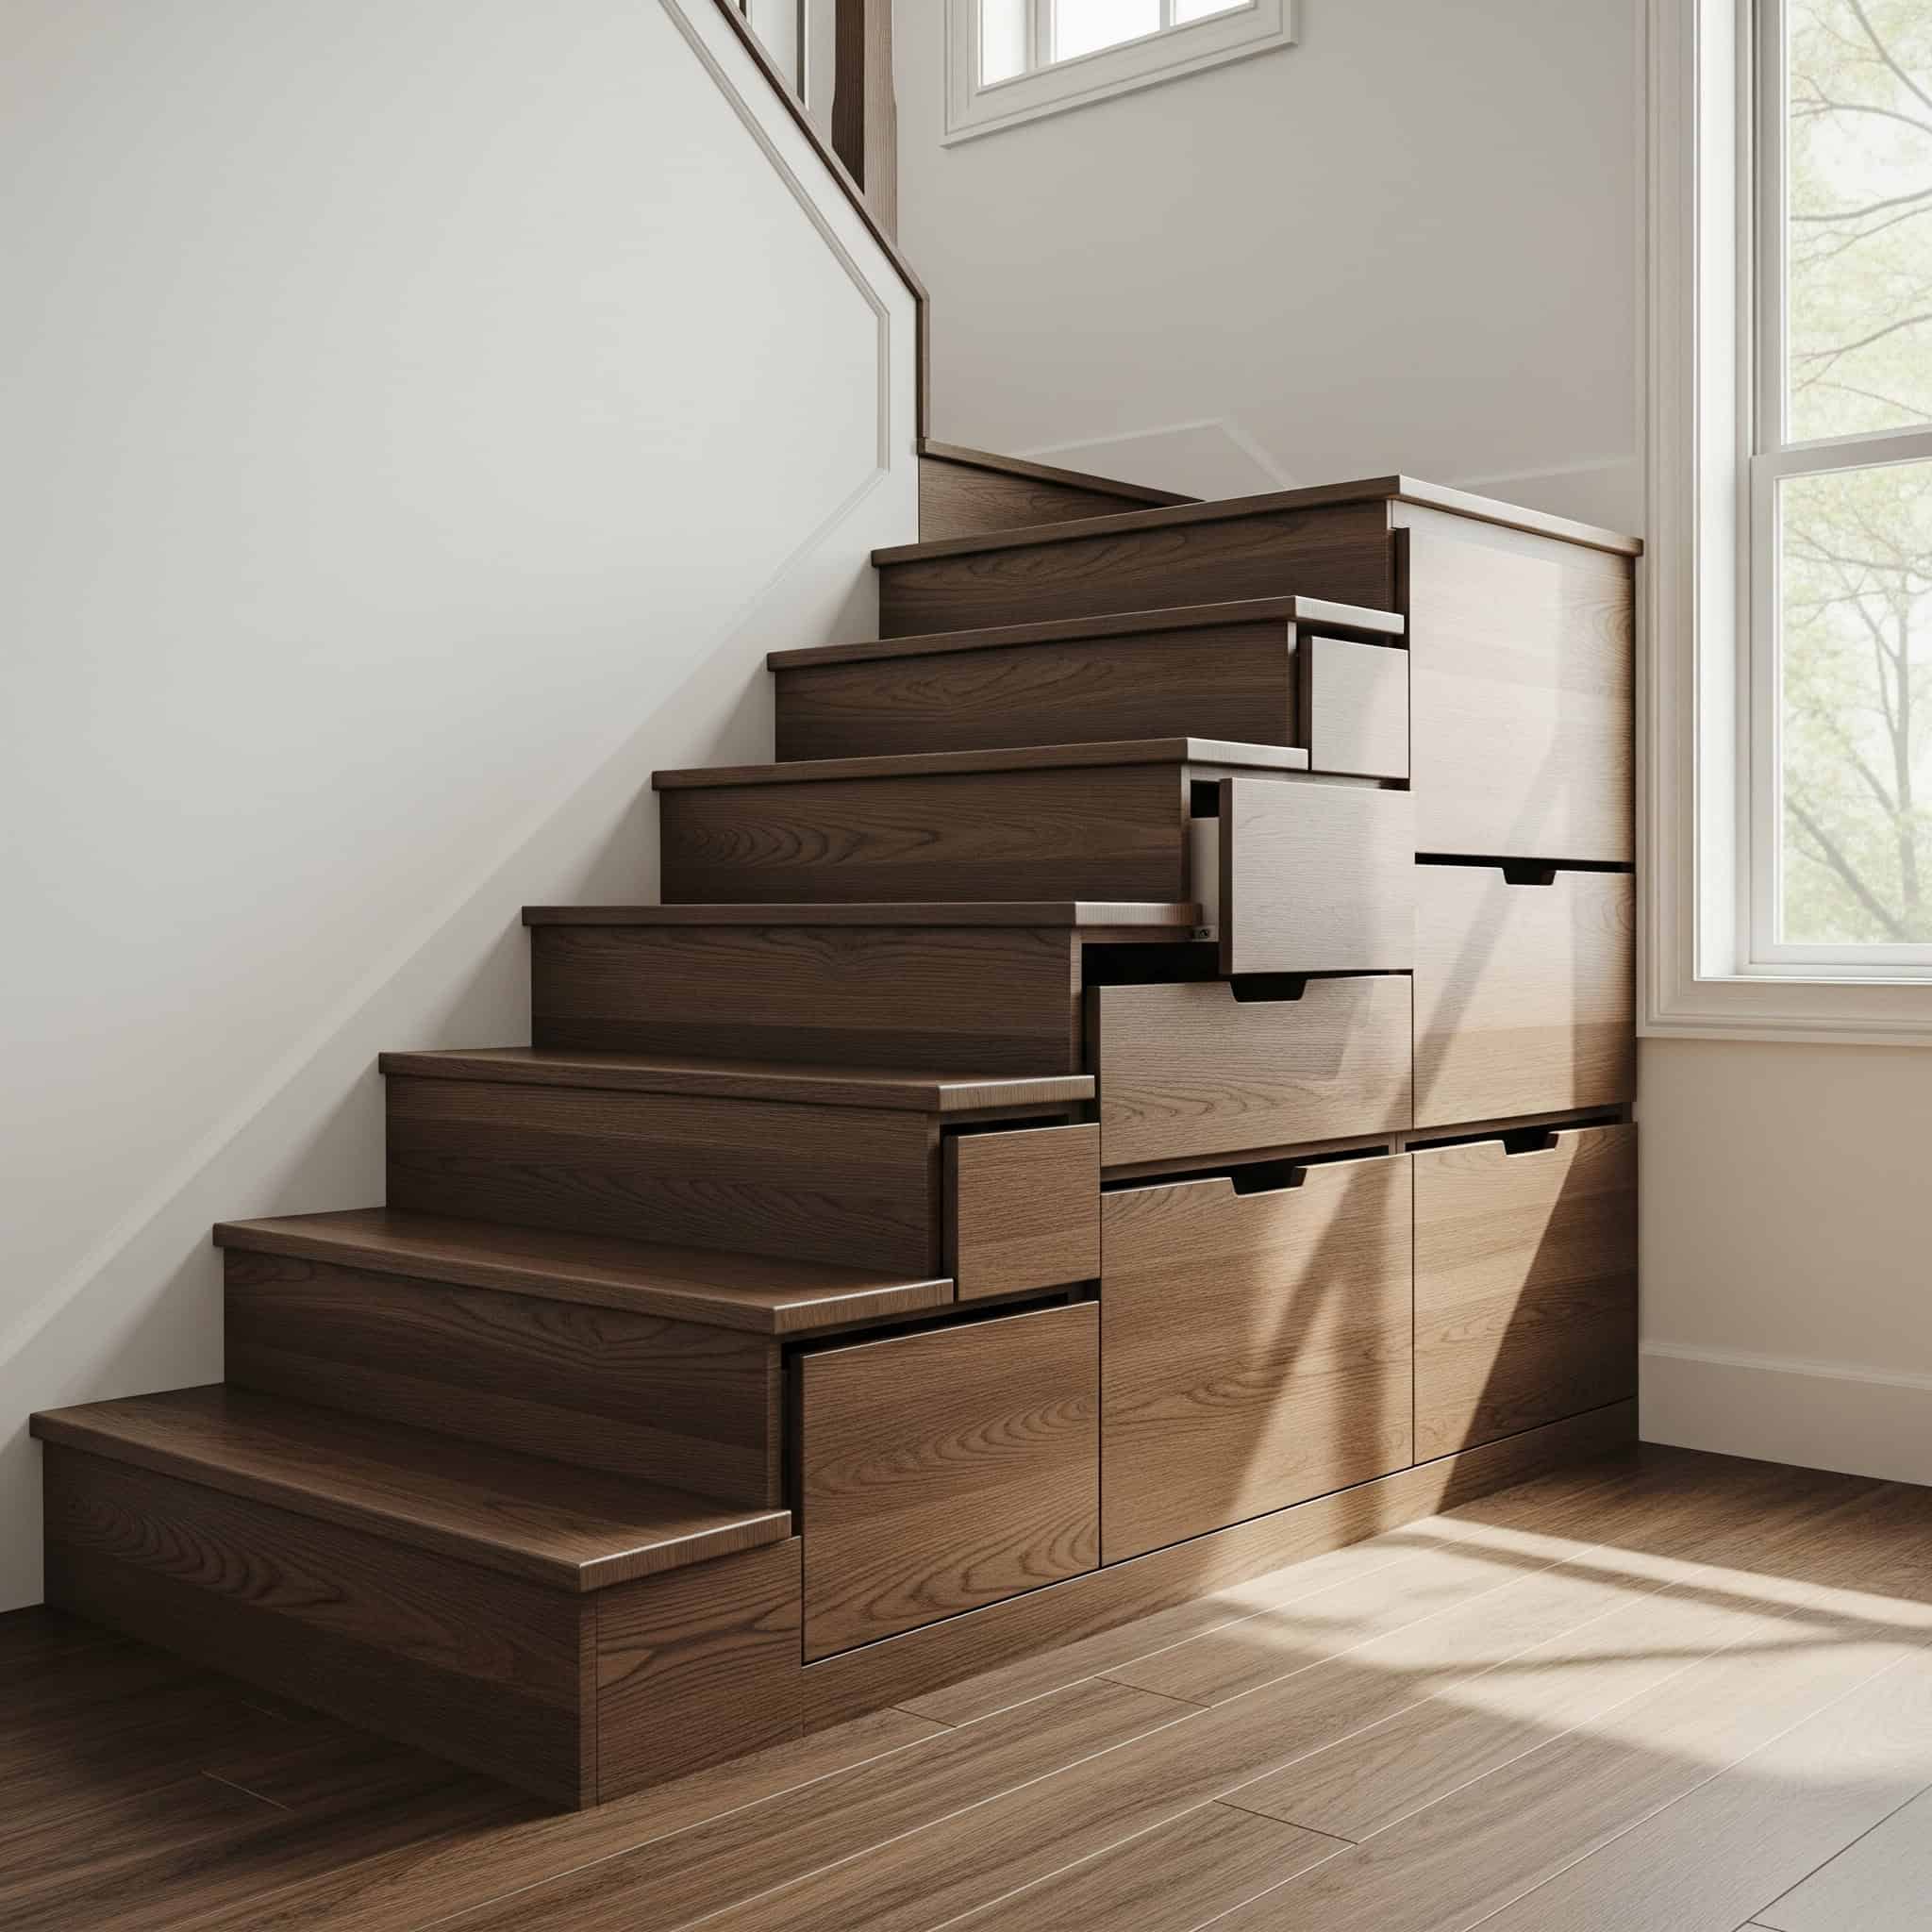
Building storage into stairs requires careful planning though. The stair-integrated storage must maintain structural integrity with proper load distribution—we needed a reinforced stringer design and heavier construction than standard stairs to ensure safety.
For the drawer mechanisms in the risers, we included soft-close features and stops to prevent accidental full extraction. The typical drawer depths are 8-10 inches, limited by the standard 10-11 inch tread depth. I use these drawers for everything from books and linens to small electronics and office supplies.
10. Multi-Functional Furniture Solutions
Incorporating a wall bed (Murphy bed) with integrated desk or shelving creates flexibility in your loft space. When the bed is folded away, you gain a functional workspace or additional living area. This approach is ideal for lofts that need to serve multiple purposes or smaller conversions where maximizing every square foot is essential.
Wall bed mechanisms require substantial wall reinforcement—typically able to support 150-200 pounds when extended—with proper anchoring into wall studs or dedicated blocking. Modern systems utilize gas pistons or counterbalance mechanisms requiring 30-40% less force to operate than traditional spring systems, with locking mechanisms that prevent accidental closure.
I went with this option in my guest loft, and it’s been a game-changer. During the day, I have a full home office, but when friends visit, it transforms into a comfortable bedroom in seconds. The gas pistons make it so easy to operate that even my elderly mother can handle it without assistance.
Lighting and Window Innovations
11. Panoramic Skylight Installation
I installed multiple skylights in a row across my loft ceiling, and wow – the difference is incredible! This feature transforms my loft room into a bright, airy retreat regardless of the time of day. I love watching the clouds drift by during the day and stargazing at night. The connection to the outdoors and changing sky conditions adds a dynamic element to my space that standard windows simply can’t provide.
Panoramic skylights require proper flashing details at all roof penetrations, with high-performance glazing to prevent heat loss and solar heat gain. We used low-E, triple-pane glass with argon fill to maintain energy efficiency. The structural modifications included reinforced rafters to compensate for the interrupted roof structure, with proper insulation details at the perimeter to prevent thermal bridging.
12. Light Tubes for Dark Corners
Tubular daylighting devices (sun tunnels) bring natural light to otherwise dark corners where traditional skylights aren’t possible. These compact systems capture daylight through a roof-mounted dome and channel it down through a reflective tube into your loft space. They provide surprising amounts of natural light with minimal structural changes to your roof.
Light tubes typically range from 10-22 inches in diameter, with highly reflective interior surfaces (98-99.7% reflectivity) that can transmit daylight up to 30 feet from roof to ceiling. Installation requires smaller roof penetrations than traditional skylights (reducing structural impact), with flexible tubing options available to navigate around obstructions in the attic space.
I installed two 14-inch light tubes in the darkest corner of my loft room, and the difference is remarkable. Even on cloudy days, these areas now have enough natural light that I rarely need to turn on electric lights during daylight hours. The installation was much simpler than adding more skylights, with less disruption to the roof structure and insulation.
Before installing light tubes or skylights in your loft conversion bedroom, you might need to clear out existing attic clutter. Check out our attic clean-out services page for professional assistance in preparing your space for renovation.
13. Smart Lighting Zones
Implementing a smart lighting system with different zones for reading, relaxation, and task lighting gives you complete control over your loft conversion bedroom’s atmosphere. Controllable via smartphone or voice commands, these systems allow you to adjust brightness and color temperature to suit different activities and times of day. The flexibility enhances both functionality and mood in your converted space.
Smart lighting systems typically operate on wireless protocols (Zigbee, Z-Wave, or WiFi), requiring a hub or bridge device that connects to your home network for remote control capabilities. Proper zoning requires circuit planning during the electrical rough-in phase, with dedicated neutrals at switch locations to support smart switches and dimmers that maintain functionality during network outages.
|
Lighting Type |
Best Application |
Technical Specifications |
|---|---|---|
|
Panoramic Skylights |
General illumination, feature element |
Low-E glass, proper flashing, reinforced structure |
|
Light Tubes |
Dark corners, bathrooms |
10-22″ diameter, 98%+ reflective interior |
|
Smart Lighting |
Zoned illumination, mood setting |
Wireless protocols (Zigbee, Z-Wave), hub connectivity |
|
LED Cove Lighting |
Ambient glow, architectural highlight |
300-600 lumens/meter, aluminum channels with diffusers |
|
Gable Windows |
Feature element, views |
Proper headers, tempered glass, thermal breaks |
14. Integrated LED Cove Lighting
Hidden LED strips along the edges where walls meet your sloped ceiling create soft, ambient light that highlights architectural features. This indirect lighting approach eliminates harsh shadows while adding a sophisticated glow to your loft room. The concealed light source creates a floating effect that makes ceilings appear higher and the space more expansive.
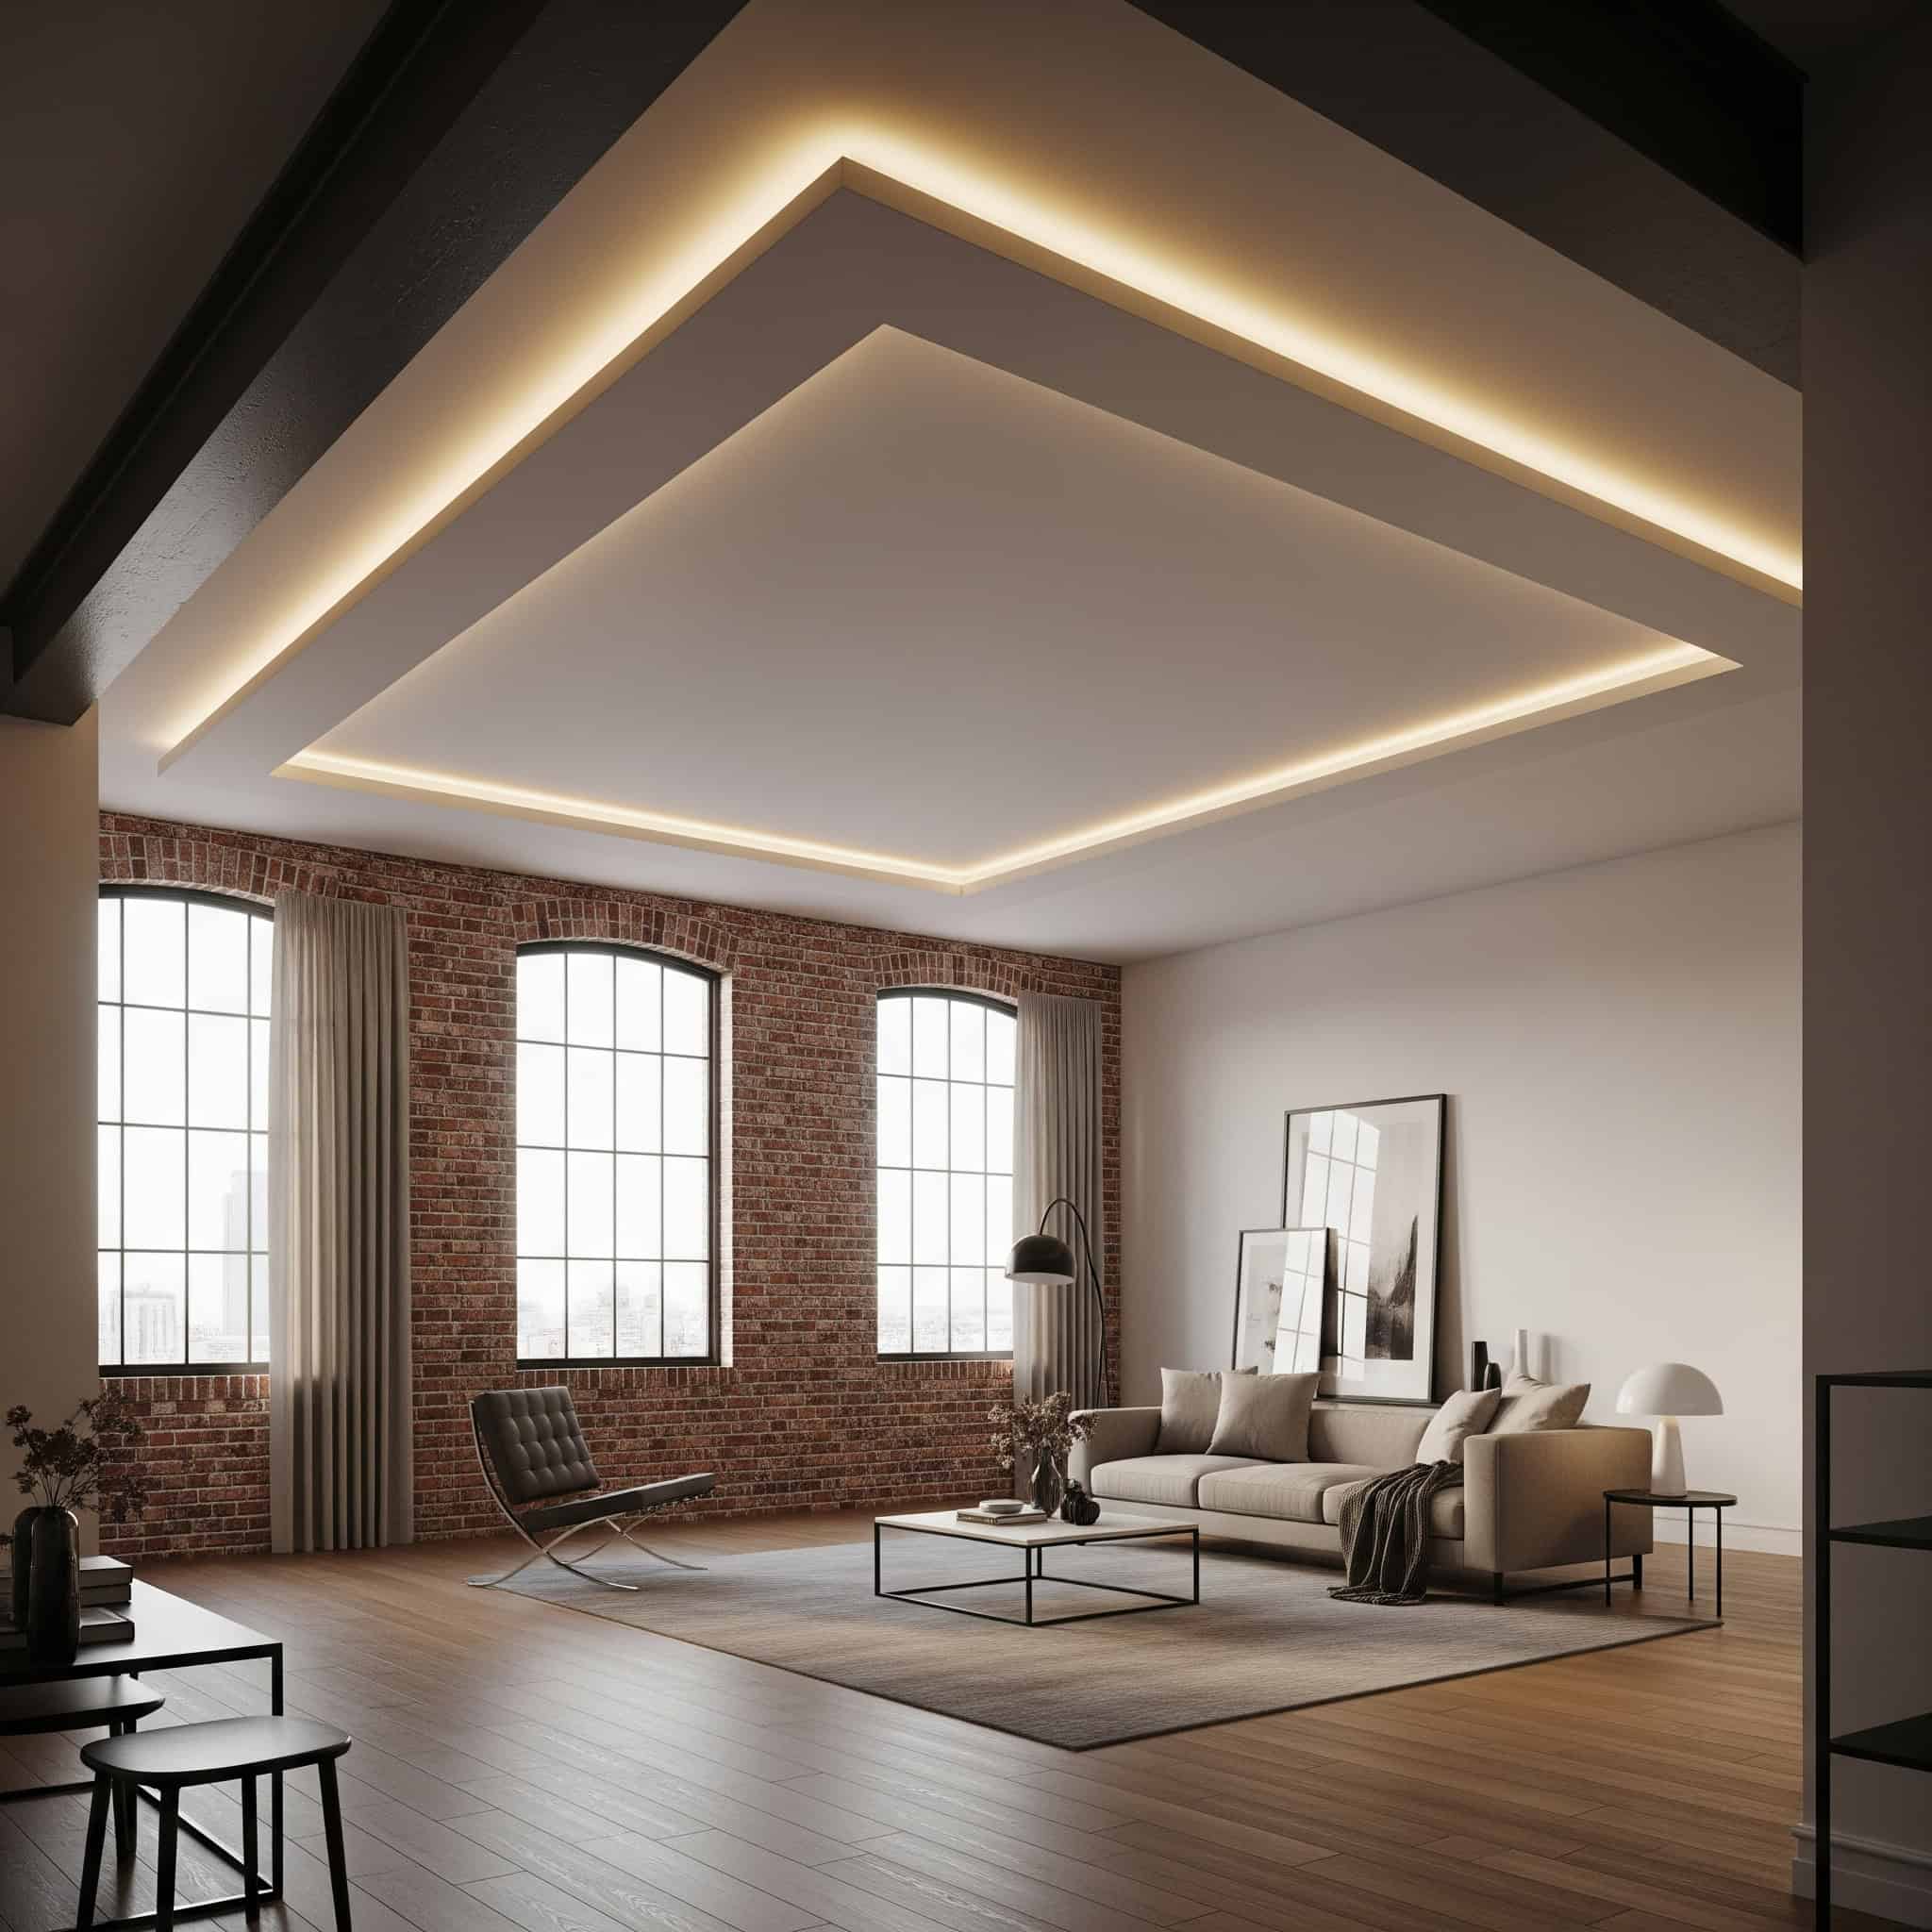
Cove lighting requires a minimum setback of 12-18 inches from the wall to ceiling junction to prevent visible “hot spots,” with LED strips typically installed at 300-600 lumens per meter. Professional installation should include aluminum channels with diffusers to prevent visible diodes and ensure even light distribution, with dimming capabilities requiring compatible drivers and often 0-10V or DALI control systems.
I added cove lighting along the junction where my sloped ceiling meets the knee wall, and it completely transformed the room’s ambiance. During the day, it’s hardly noticeable, but in the evening, it creates this gorgeous wash of light that makes the room feel both cozy and sophisticated. My electrician installed a dimmer system so I can adjust the brightness depending on my mood.
15. Gable-End Feature Window
A dramatic architectural window in the gable end of your loft creates a stunning focal point while maximizing natural light. Custom shapes that follow your roofline transform what could be a plain wall into an architectural feature. This approach often provides the best views from your loft conversion while creating a distinctive design element.
Gable windows require proper flashing integration with siding or exterior cladding, with attention to thermal breaks around frames to prevent condensation issues. Structural considerations include proper headers sized for the span (typically engineered lumber or steel for spans over 6 feet), with wind load calculations determining glass thickness and tempered requirements based on size and exposure.
Stylish Yet Practical Design Approaches
16. Scandinavian Minimalist Loft
White walls, light wood flooring, and simple furniture with clean lines create a sense of spaciousness and light in your loft bedroom. Incorporating natural textures through linens and a few carefully chosen decorative items adds warmth without clutter. This approach works particularly well with space optimization needs in loft conversions while creating a calm, restful environment.
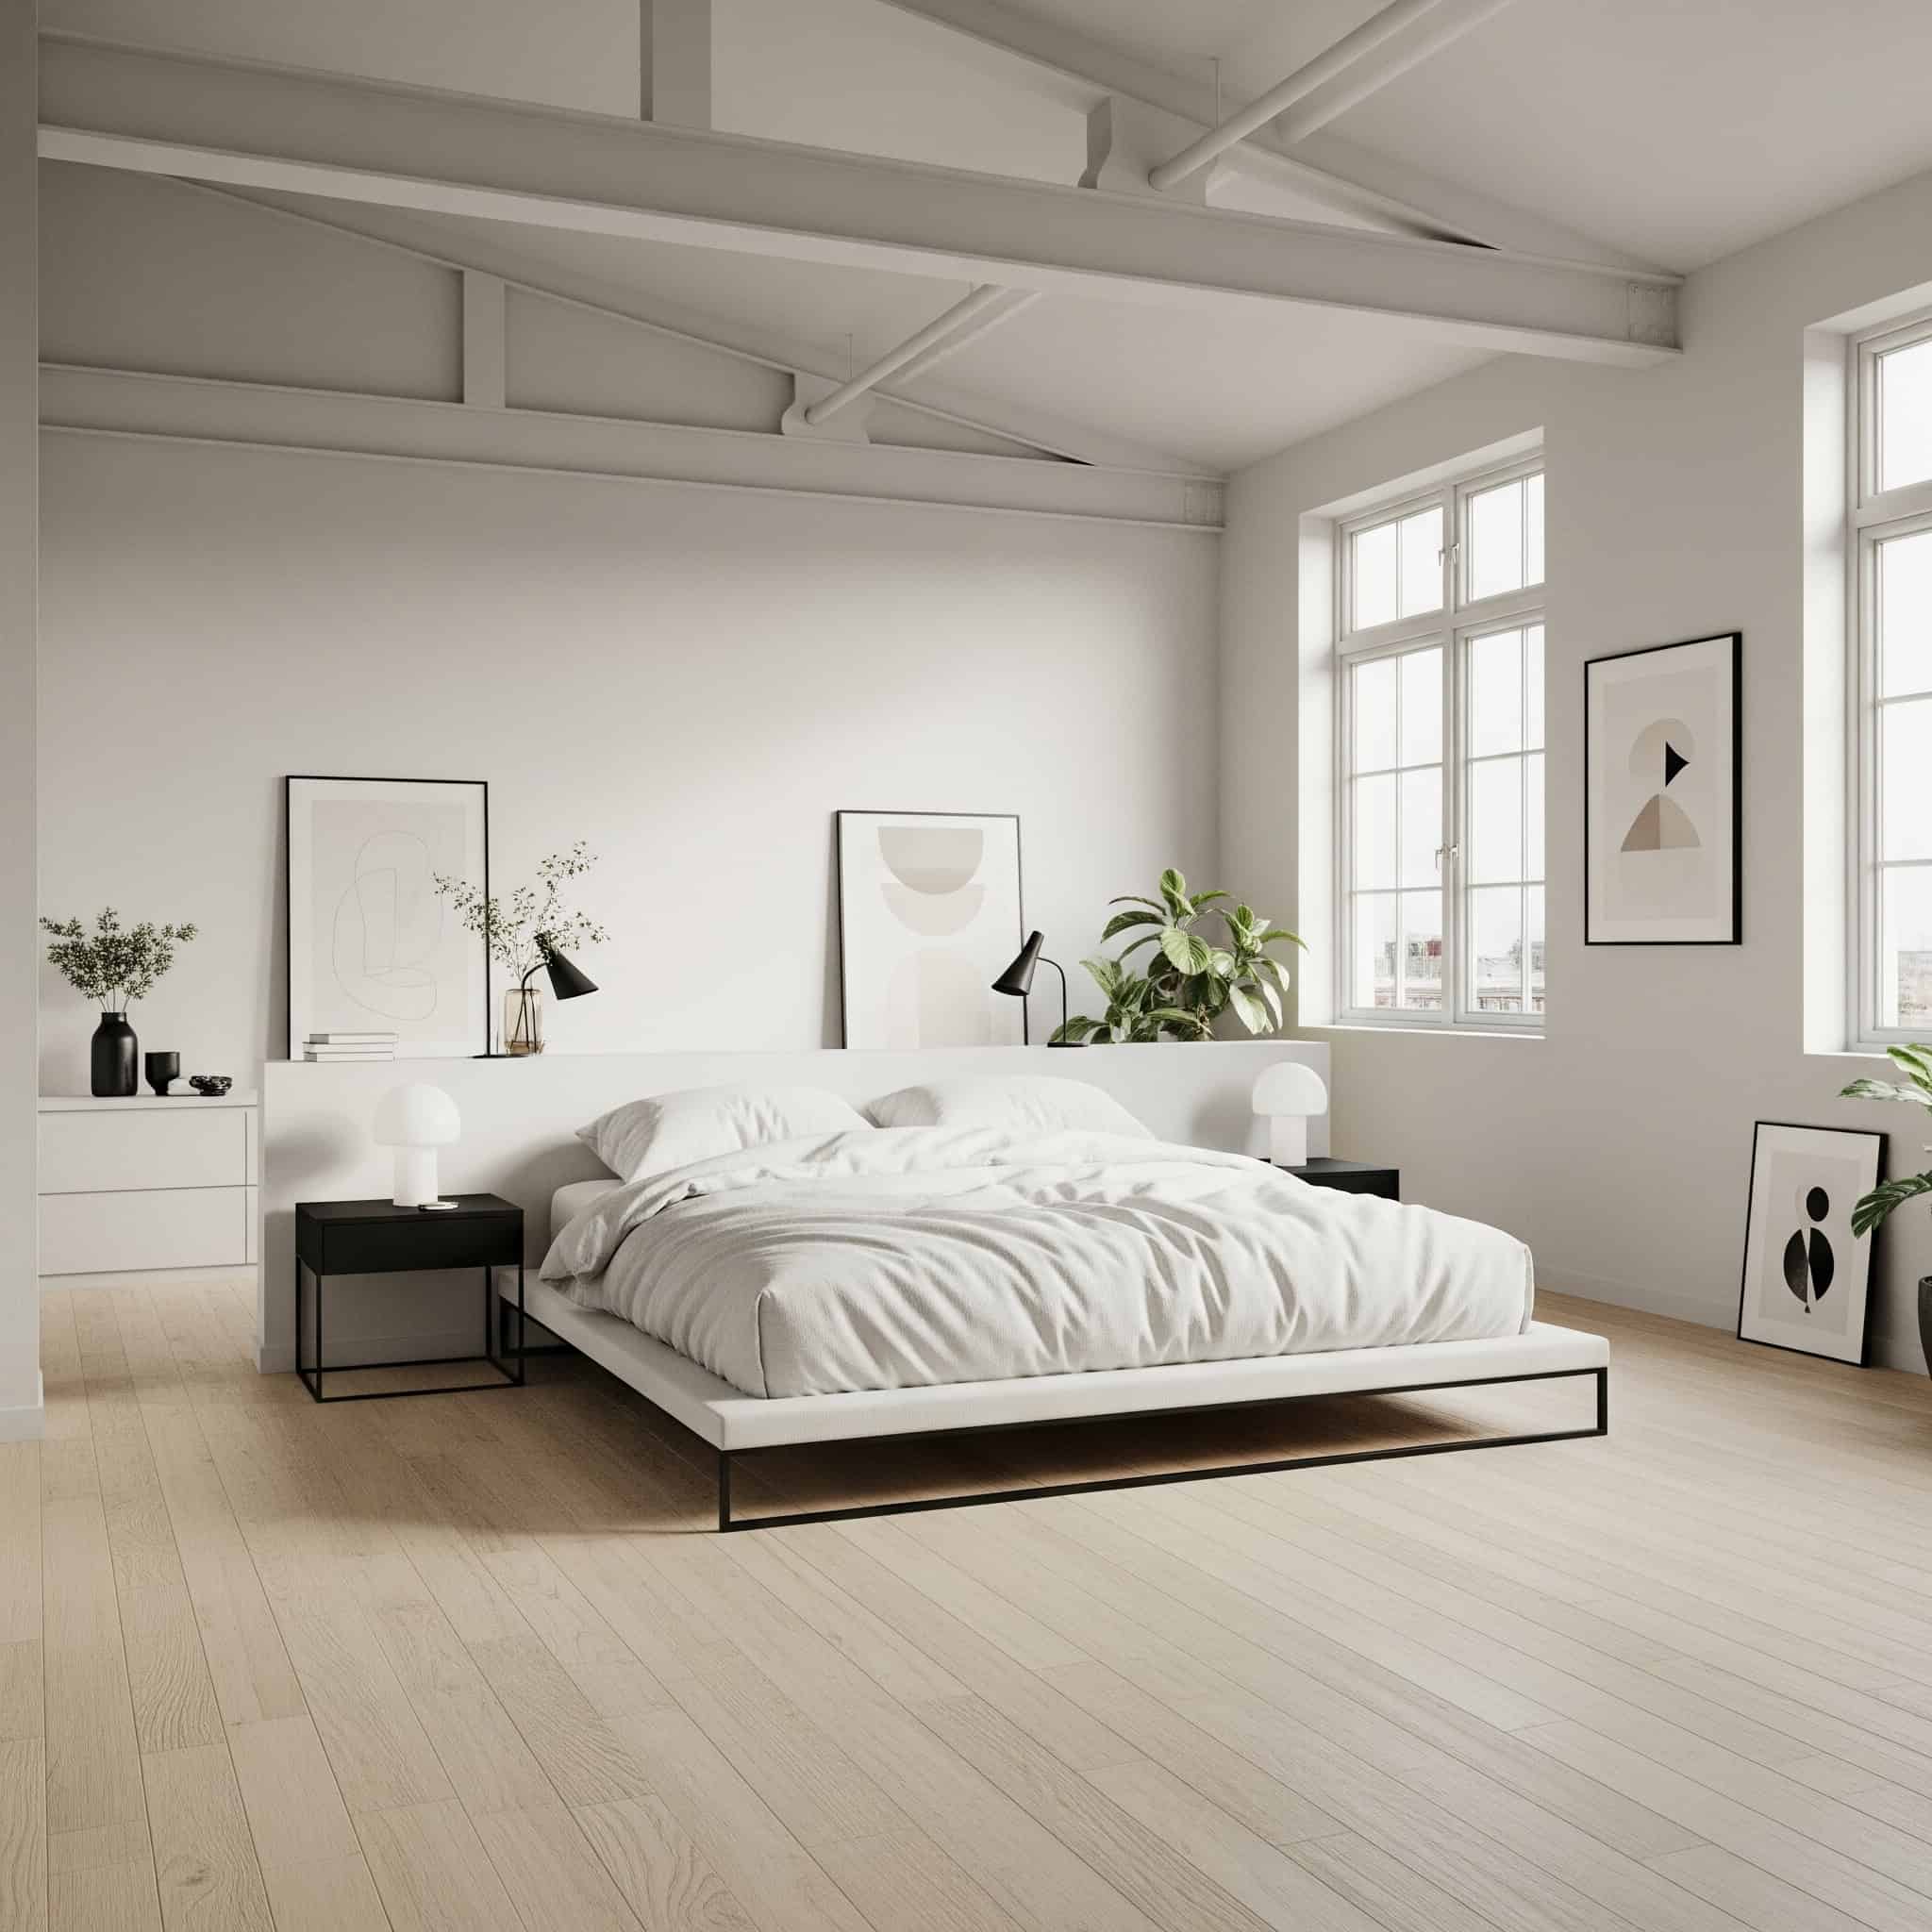
I went with this style in my own loft conversion bedroom, and it’s made the space feel twice as big! The specific white paint we used has an LRV (Light Reflectance Value) of 89%, which maximizes light reflection without creating harsh glare. This is especially important in north-facing loft rooms like mine.
For the flooring, we chose engineered white oak with a 4mm wear layer and a matte oil finish rather than high-gloss polyurethane. This maintains the authentic natural appearance while providing excellent durability for a bedroom space. The matte finish also helps hide minor scratches and dents that inevitably happen.
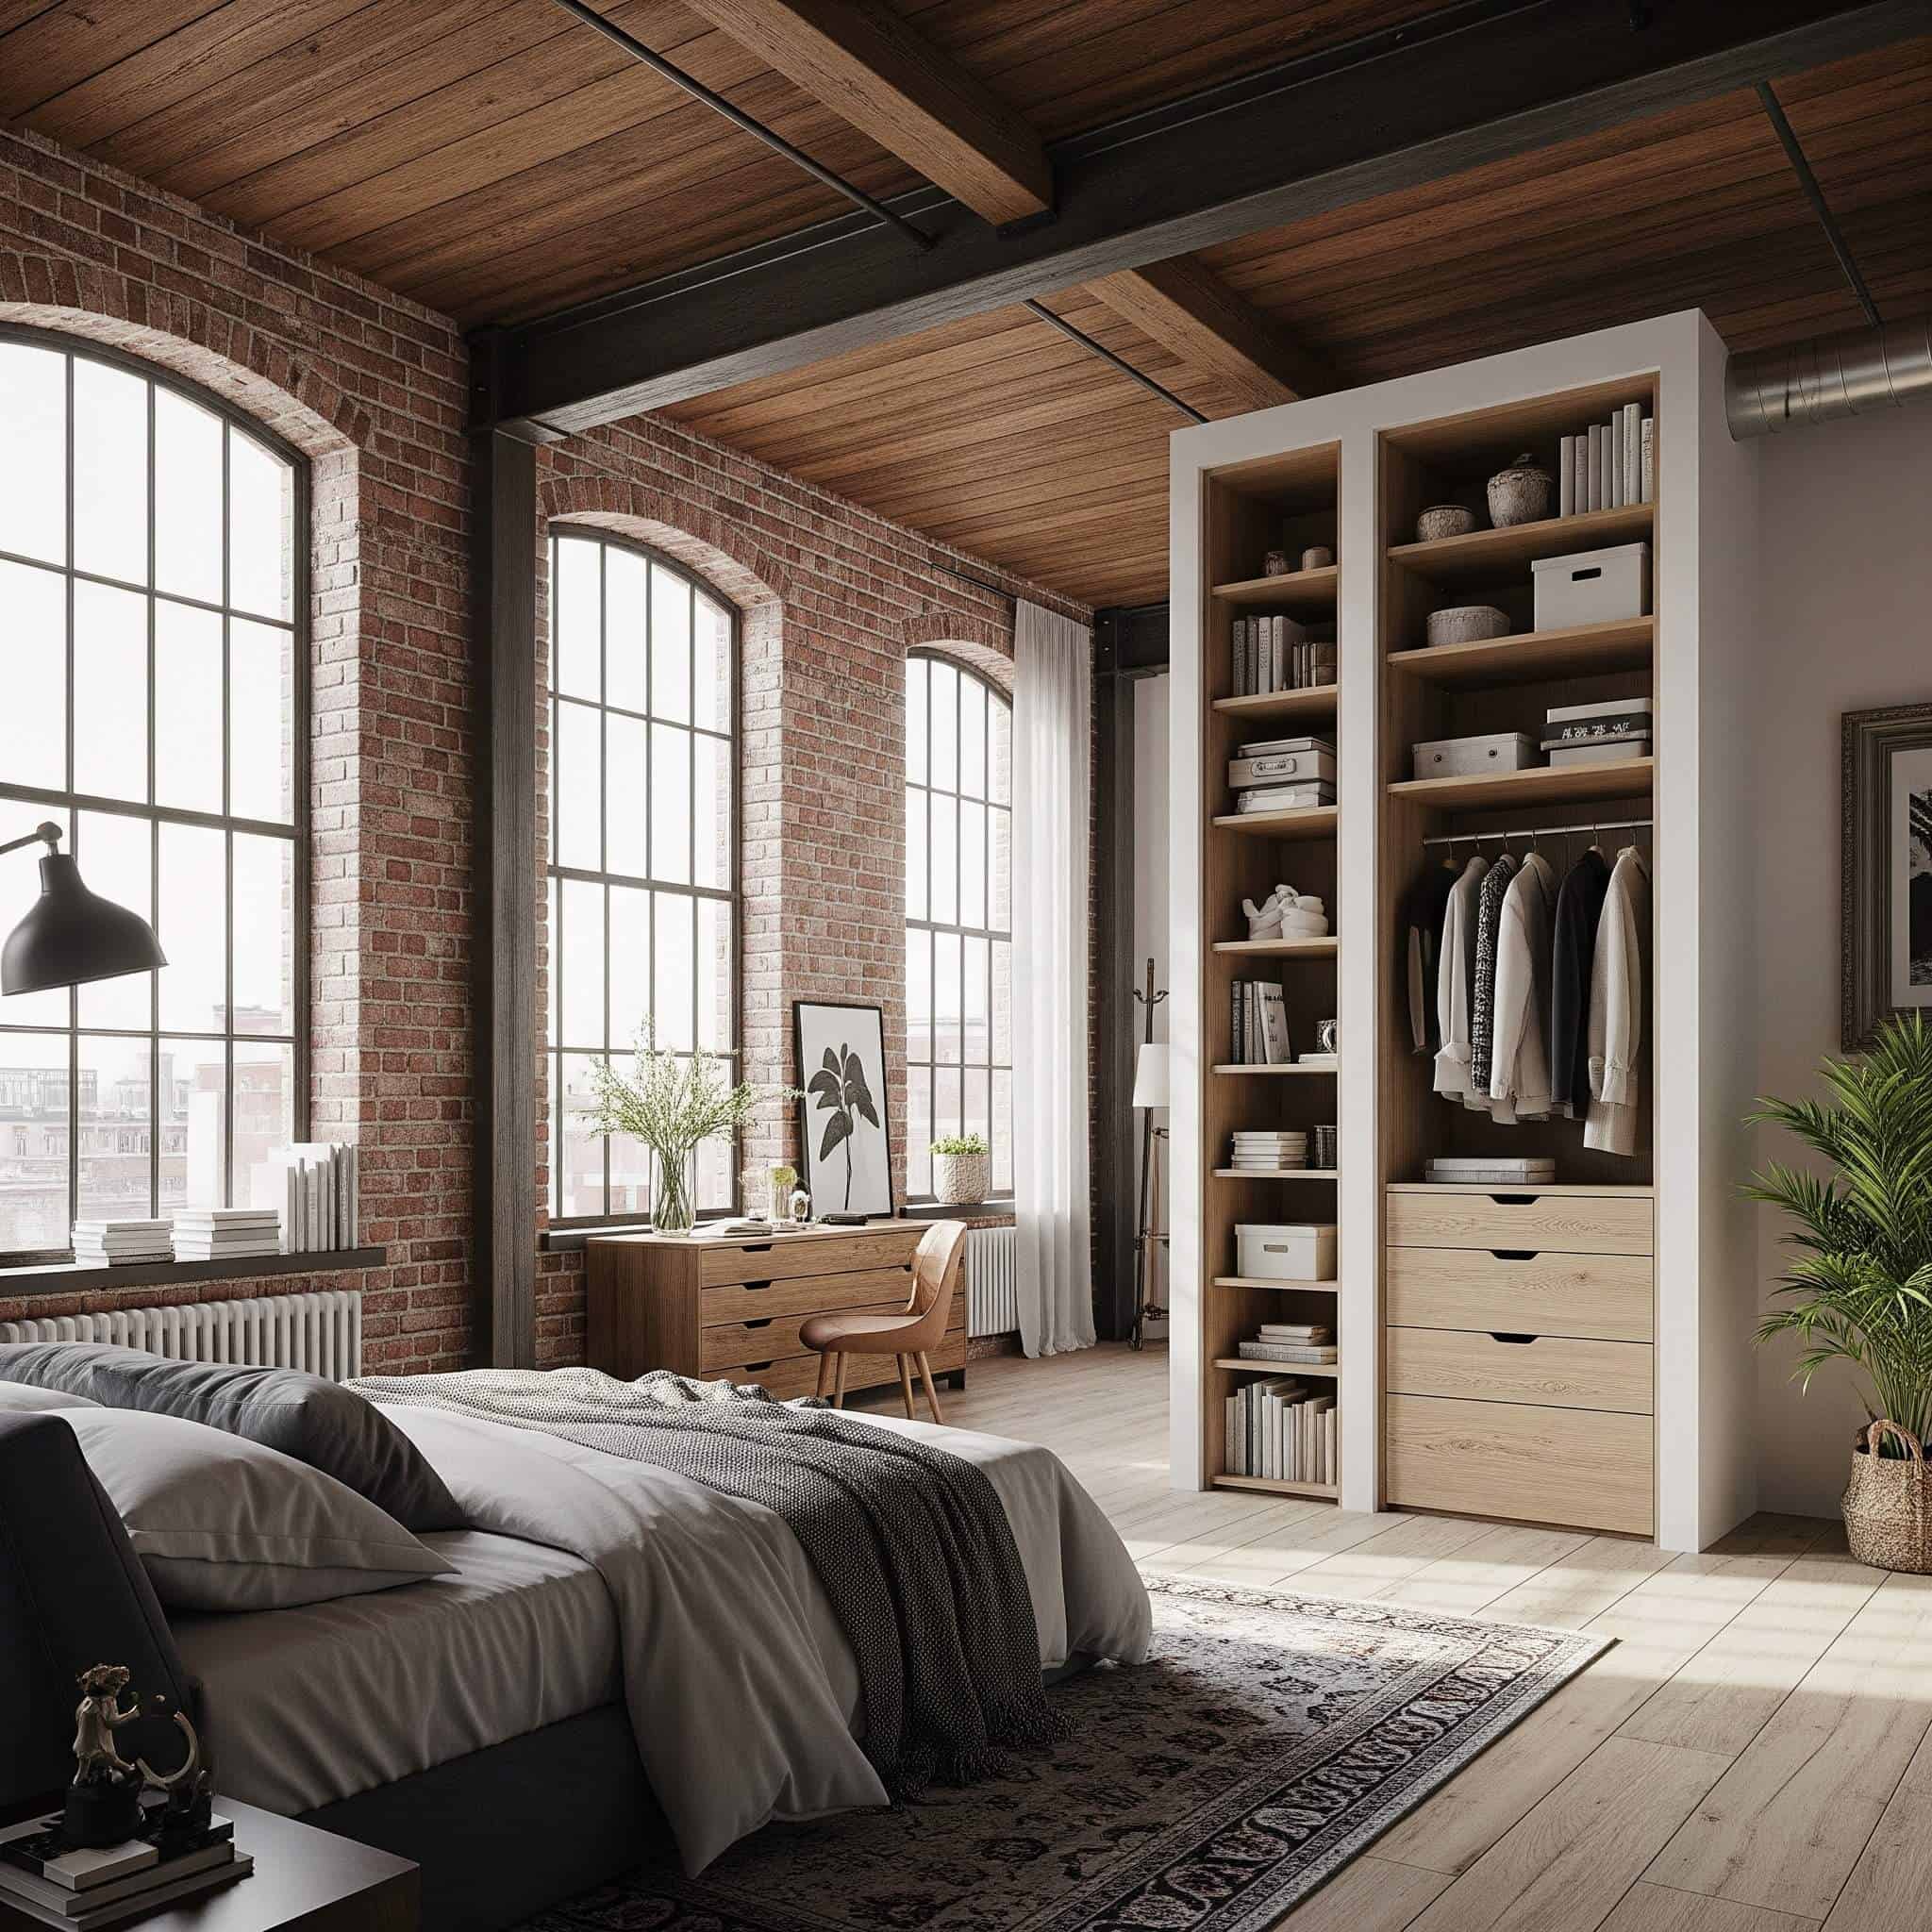
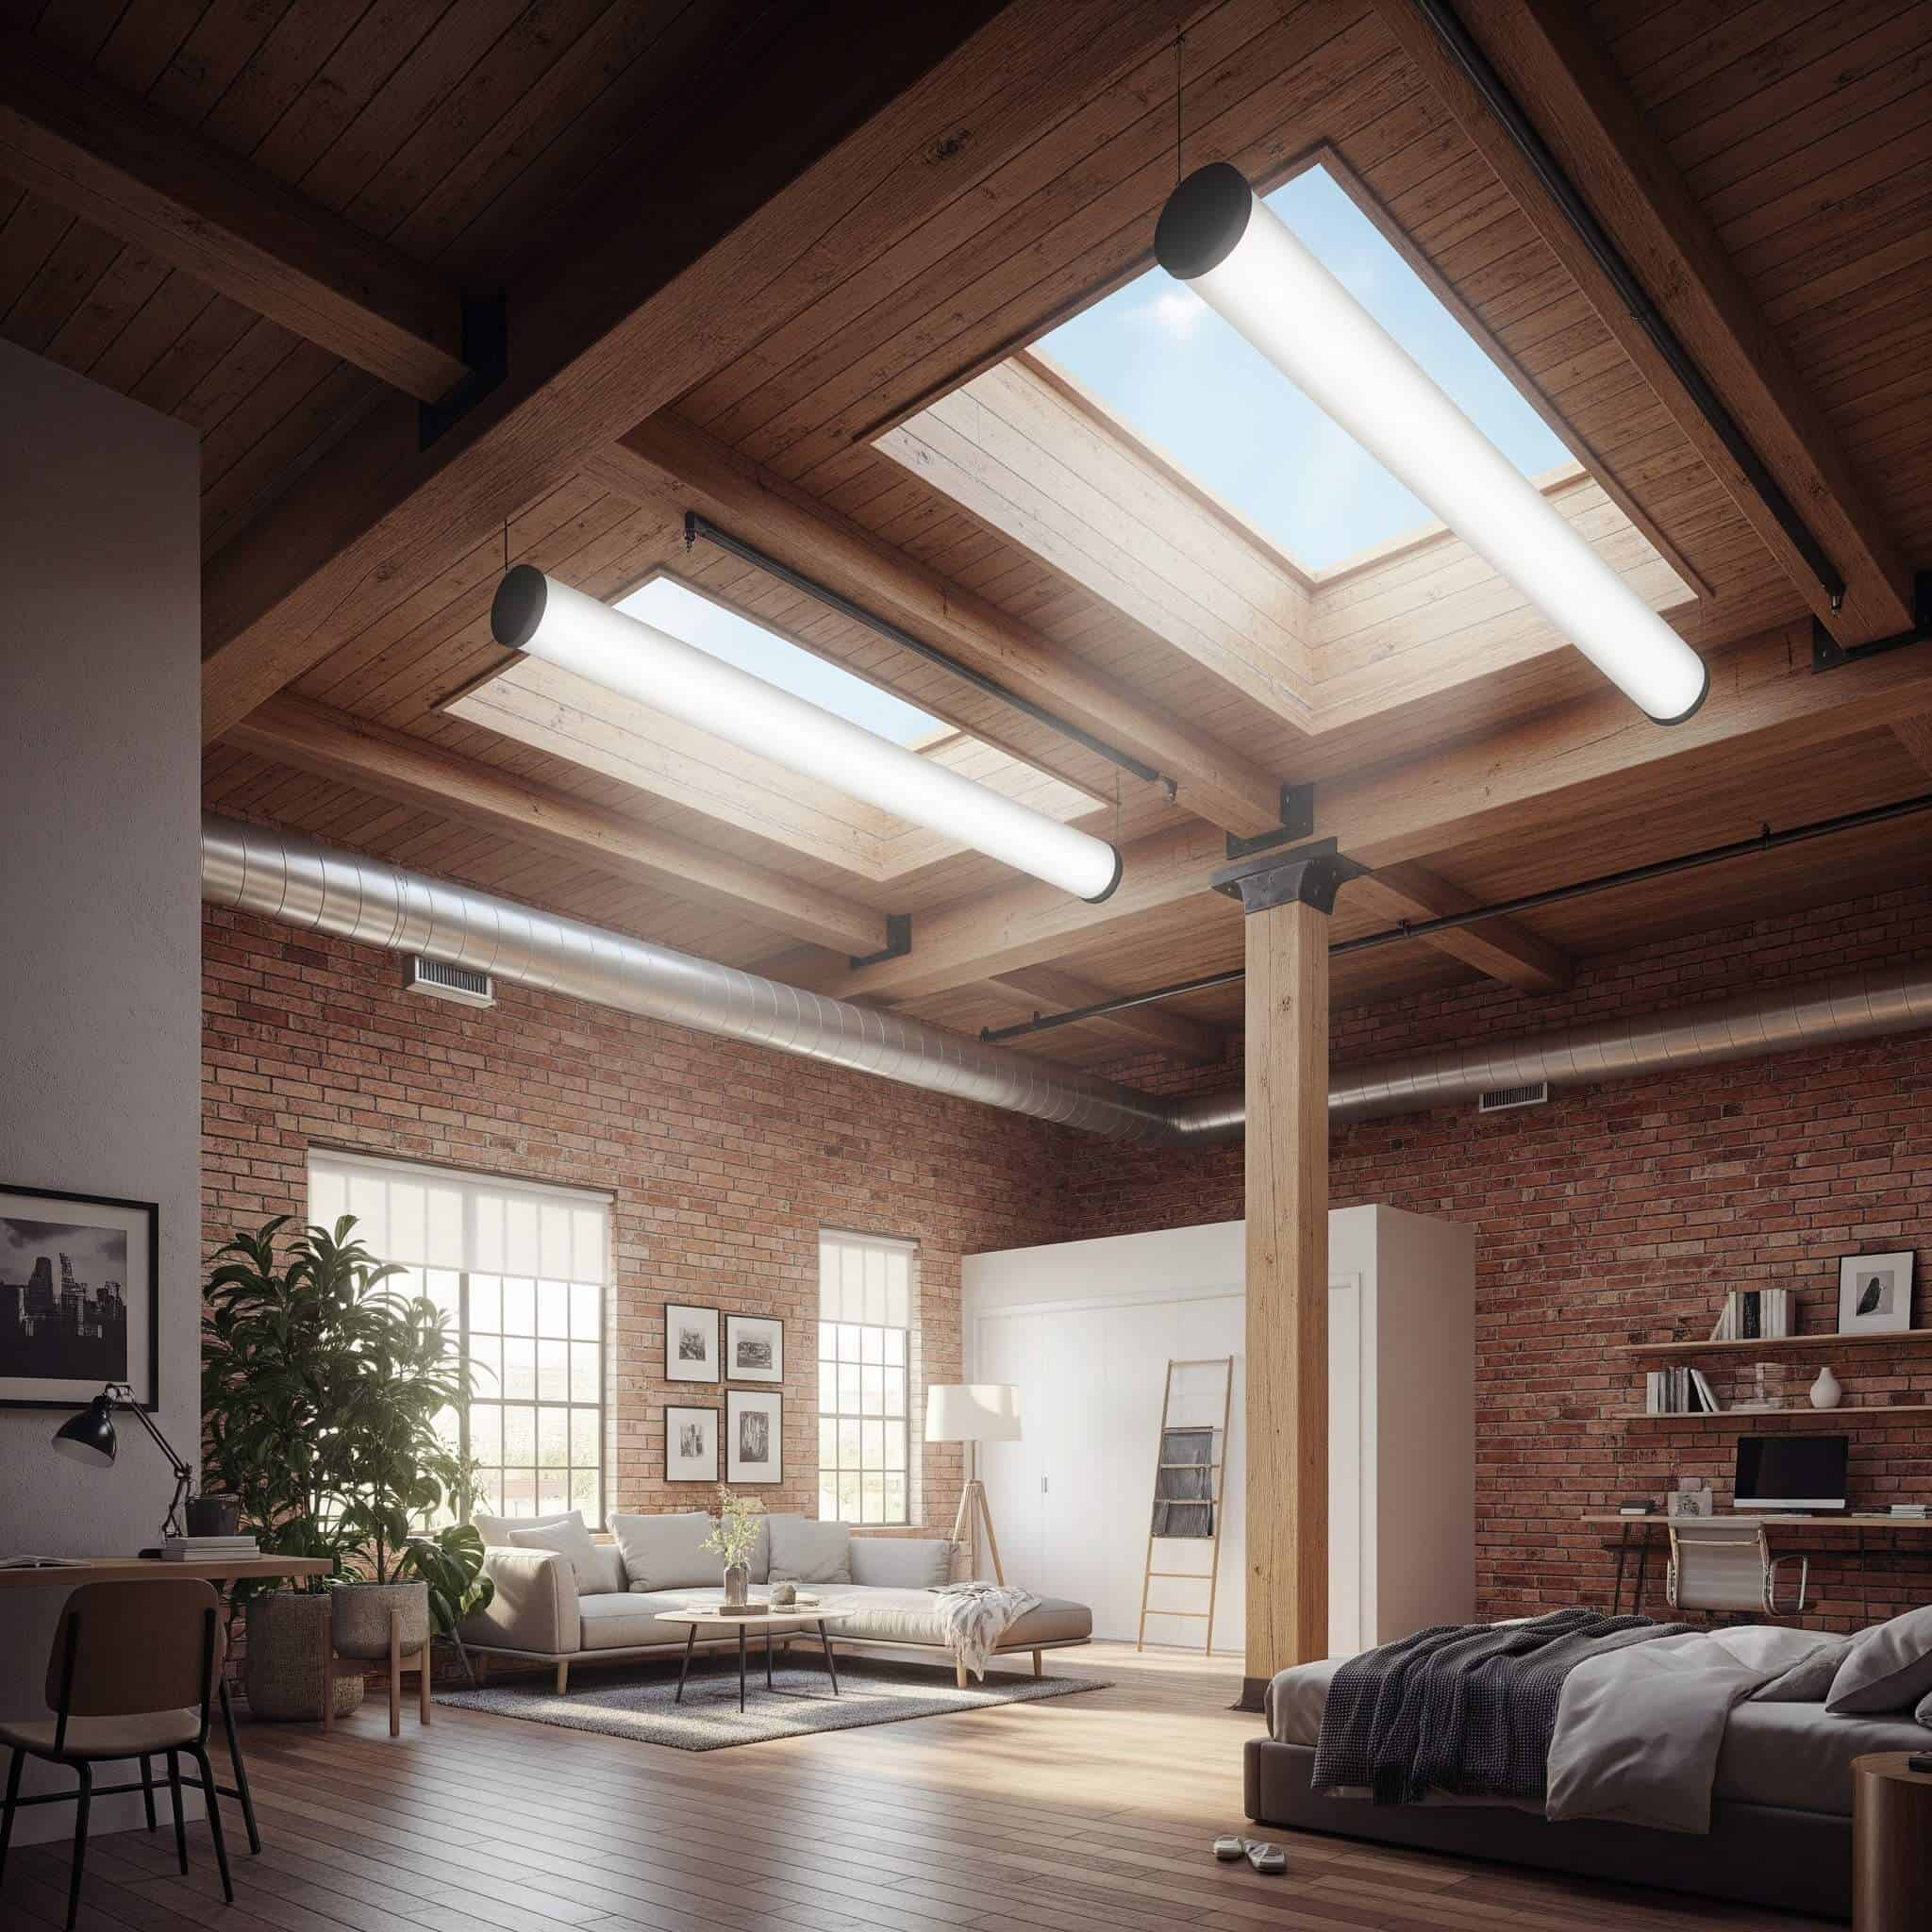
17. Industrial Chic Conversion
Exposing structural elements like beams and brickwork creates authentic character in your loft conversion bedroom. Complementing these features with metal fixtures, Edison bulbs, and vintage furniture pieces enhances the industrial aesthetic. This approach often works particularly well with older buildings, celebrating original architectural elements rather than concealing them.
Exposed structural elements require proper sealing and treatment—brick typically needs repointing with appropriate mortar mix matching original composition, while wooden beams often require insect treatment and fire-retardant application to meet building codes. Thermal considerations must be addressed when leaving structural elements exposed, often requiring spray foam insulation with intumescent coatings for fire protection or strategic placement of insulation to maintain the aesthetic while achieving required R-values.
My neighbor took this approach with his 1920s home loft conversion, and it’s stunning. They discovered beautiful original roof trusses during demolition and decided to feature them rather than cover them up. Their contractor had to apply special fire-retardant treatments to meet code requirements, but the character these elements add to the space is worth the extra effort and expense.
18. Luxury Hotel-Inspired Retreat
Creating a high-end feel with a statement headboard, quality linens, a small seating area, and carefully considered lighting transforms your loft into a luxury retreat. Using bedside pendants instead of table lamps saves space while adding sophistication. Focusing on fewer, higher-quality items rather than numerous accessories maintains the spacious feel while elevating the design.
A Boston couple transformed their modest 320 sq ft loft room into a luxury retreat by focusing on high-quality materials and thoughtful design. They invested in a custom velvet headboard that spans the entire wall behind their king bed, creating a dramatic focal point. Instead of traditional bedside tables, they installed floating nightstands with integrated wireless charging and pendant lights suspended at perfect reading height. The linens are hotel-quality 400 thread count Egyptian cotton in crisp white, complemented by a cashmere throw in deep blue. The result is a space that feels like a boutique hotel suite despite its compact footprint, proving that square footage matters less than thoughtful material selection and careful space planning.
Luxury hotel designs typically employ specific bedding layers—minimum 300 thread count cotton sheets, down or down-alternative duvets with 30-40 oz fill weight, and multiple pillow densities for proper neck support. Lighting should follow the 3-layer approach: ambient (general illumination at 20-30 lumens per square foot), task lighting at mirrors (75-100 lumens per square foot for accurate color rendering), and accent lighting in cabinetry (typically LED strips with 2700-3000K color temperature).
If you’re planning a luxury hotel-inspired loft conversion bedroom, you might want to declutter your space first. Our comprehensive decluttering guide offers practical tips to help you create a clean slate before implementing your new design.
19. Biophilic Design Integration
Incorporating natural elements with houseplants suited to your loft’s light conditions creates a calming environment. Natural materials like wood and stone, combined with a color palette inspired by nature, strengthen the connection to the outdoors. This approach has been shown to reduce stress and improve wellbeing, making your loft conversion bedroom a true sanctuary.
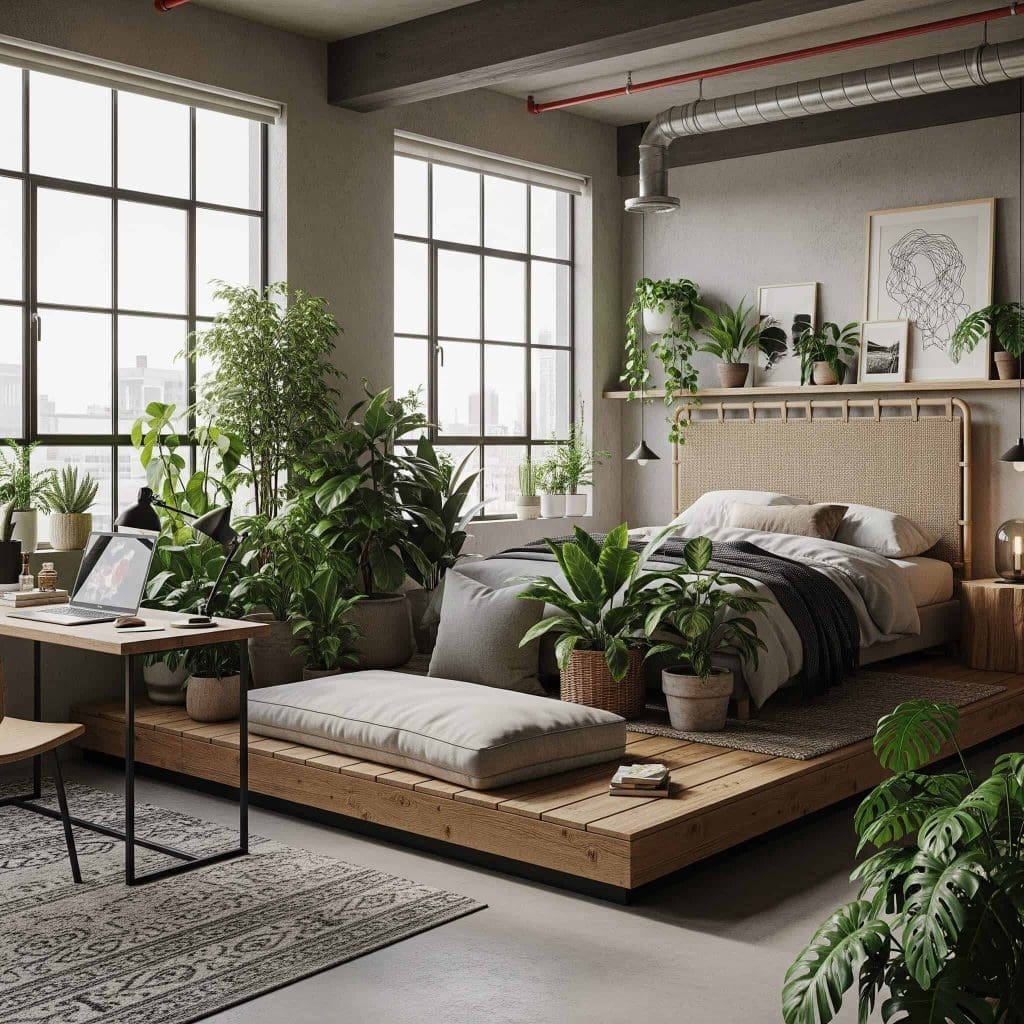
Plant selection should be based on available light levels—typically measured in foot-candles (fc) with low light plants requiring 10-15 fc, medium light 15-30 fc, and high light plants needing 30+ fc—with consideration for humidity levels typically lower in loft spaces. Material selection should prioritize VOC emissions (Volatile Organic Compounds) with specifications for formaldehyde-free wood products, zero-VOC paints, and natural fiber textiles to maintain healthy indoor air quality in the relatively contained loft environment.
I’ve incorporated this approach in my own loft bedroom, and the difference in how I feel in the space is remarkable. I measured the light levels in different areas and selected plants accordingly – snake plants and ZZ plants in lower light corners, and a fiddle leaf fig near my brightest window. I also chose formaldehyde-free plywood for my built-ins and zero-VOC paint throughout. The air quality is noticeably better, and I find I sleep more soundly in this natural environment.
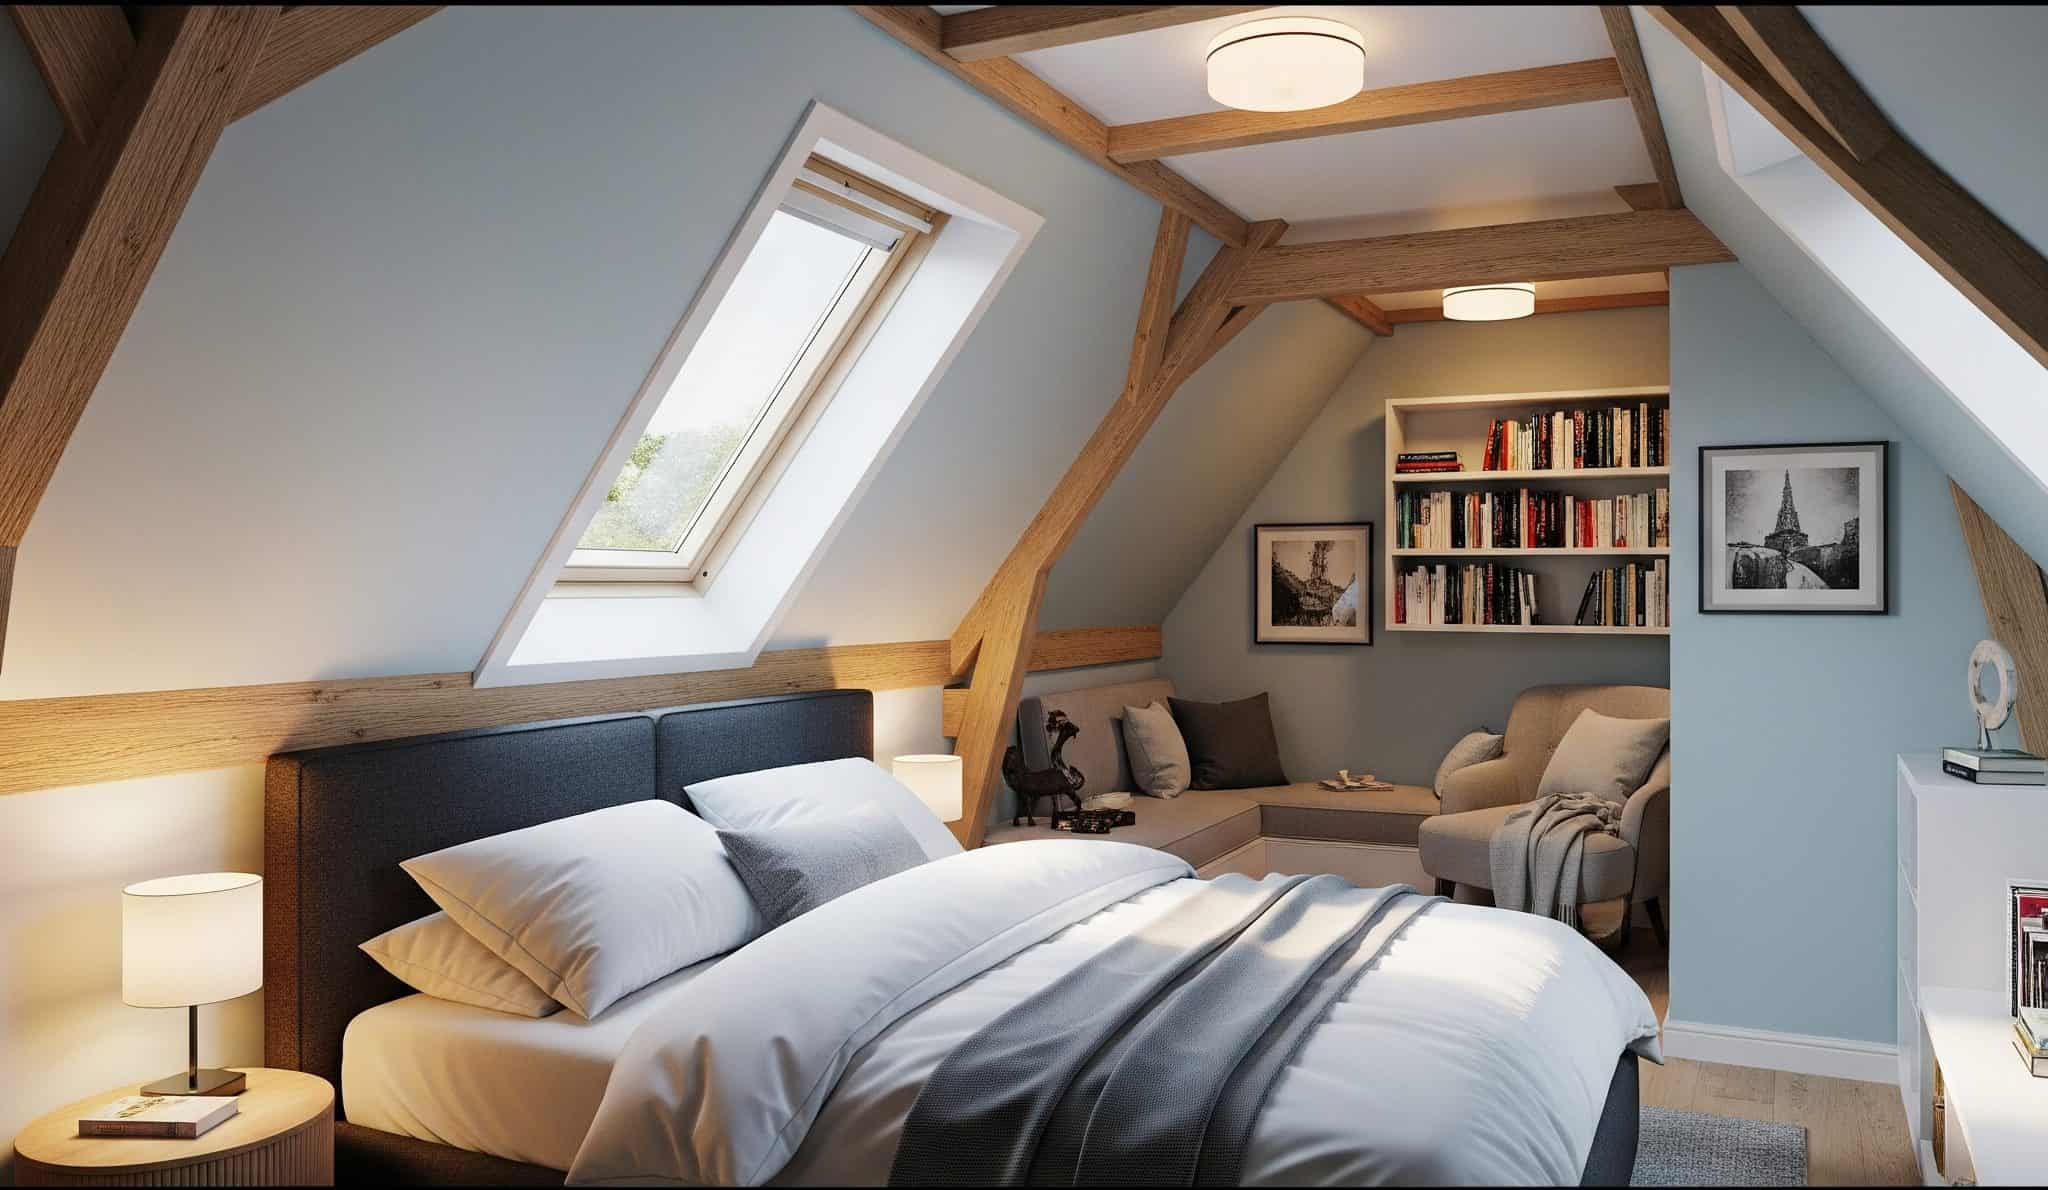
20. Modern Rustic Approach
Combining exposed wooden beams with contemporary furniture creates a balanced feel in your loft conversion bedroom. Mixing textures like rough wood, smooth surfaces, and soft textiles adds visual interest while maintaining functionality. This approach works well with existing architectural features, creating a space that feels both timeless and current.
Successful modern rustic design requires careful balance of elements—typically following the 60-30-10 rule for primary, secondary, and accent materials, with natural materials comprising at least 60% of visible surfaces. Wood element preservation often requires specialized treatments including UV-resistant finishes to prevent fading from skylight exposure, and proper humidity control (40-60% relative humidity) to prevent cracking or warping of exposed wooden elements.
My sister took this approach with her farmhouse loft conversion, and it’s absolutely gorgeous. She maintained the original rough-hewn ceiling beams but paired them with sleek, contemporary furniture and lighting. The contrast between old and new creates such visual interest! She had to install a small humidifier to maintain proper moisture levels during winter when the heating system makes the air very dry, which helps preserve the wooden elements.
Specialized Loft Bedroom Configurations
21. Loft Suite with Ensuite Bathroom
Partitioning a portion of your loft for a compact but well-appointed bathroom creates a true master suite experience. Space-saving fixtures like a walk-in shower with glass enclosure and wall-mounted toilet maximize functionality in limited square footage. While this configuration requires more extensive plumbing work, it adds significant value to your home while providing ultimate convenience.
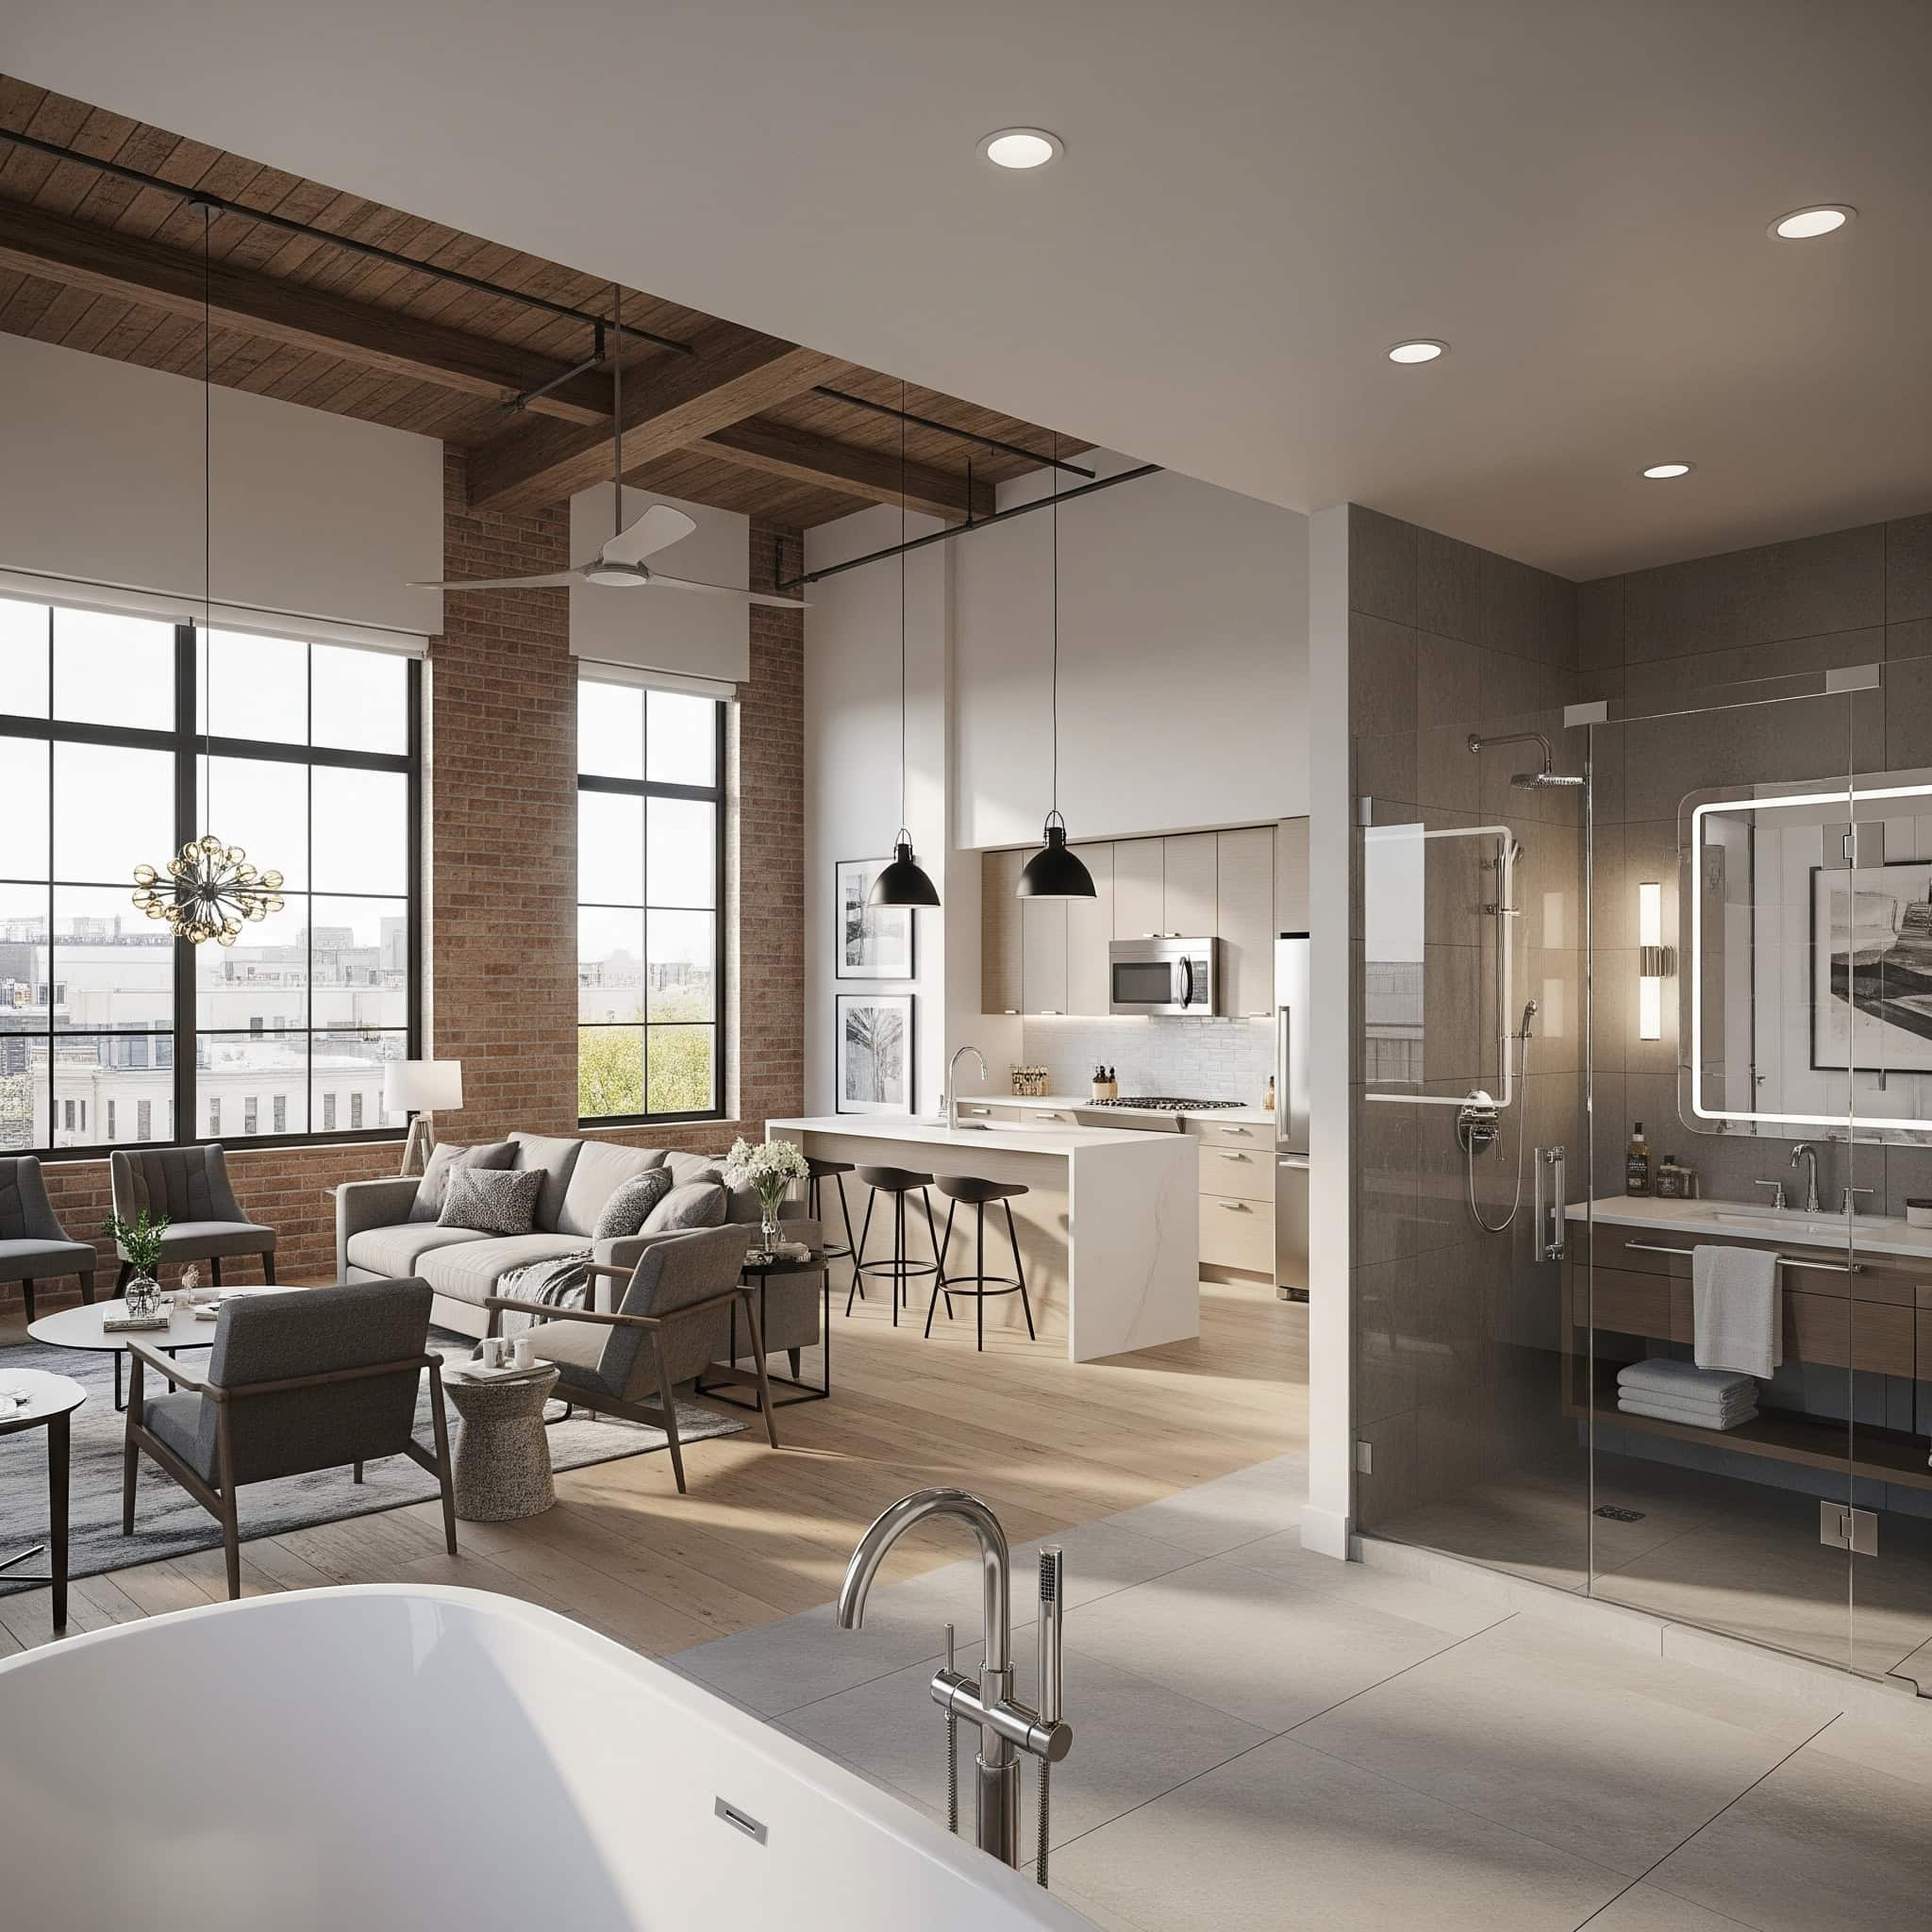
Loft bathroom installations require careful waterproofing with complete tanking systems (liquid membranes or sheet membranes) extending at least 6 inches up all walls, with particular attention to penetrations for plumbing and electrical. Ventilation must meet building code requirements (typically 8 air changes per hour) with proper ducting to exterior rather than into attic space to prevent moisture issues, often utilizing in-line fans with humidity sensors for automatic operation.
I decided to add an ensuite bathroom to my loft conversion bedroom, and while it was definitely the most complex part of the project, it’s been worth every penny. We used a complete tanking system with liquid membrane waterproofing that extends 8 inches up all walls to prevent any moisture issues. The ventilation was tricky since we needed to duct it properly to the exterior, but we found an in-line fan with a humidity sensor that automatically turns on when needed. This prevents any moisture buildup that could damage the new construction.
22. Loft Bedroom with Home Office Zone
Designating a specific area with a built-in desk and storage creates a functional work-from-home space within your loft conversion bedroom. A decorative screen or bookshelf divider provides visual separation while maintaining an open feel. This dual-purpose approach maximizes your loft’s functionality while creating distinct zones for rest and productivity.
Home office zones in bedrooms benefit from acoustic treatments to manage sound—typically requiring materials with NRC (Noise Reduction Coefficient) ratings of 0.70 or higher strategically placed to absorb sound rather than reflect it. Electrical planning should include dedicated circuits for office equipment with surge protection, adequate data connectivity (minimum Cat6 cabling or mesh WiFi systems with signal strength of -60dBm or better), and task lighting at 50-75 foot-candles at desk height.
Since I started working from home three days a week, this setup has been a lifesaver. I installed acoustic panels with an NRC rating of 0.85 on the wall behind my desk to absorb sound and prevent echoing during video calls. We also ran a dedicated electrical circuit for my office equipment with proper surge protection, and I made sure to have Cat6 cabling installed for reliable internet connectivity. The task lighting at my desk provides 65 foot-candles of illumination, which is perfect for preventing eye strain during long work sessions.
After completing your loft bedroom with home office zone, you might need help organizing your workspace. Our article on tips for how to clean out an office provides excellent strategies for creating and maintaining an efficient, clutter-free work environment.
23. Parent’s Retreat with Nursery Alcove
Creating a small, partially separated area for a crib or toddler bed within your main loft conversion bedroom provides proximity while maintaining some division of space. This configuration works well for young families, allowing nighttime parenting without full room-sharing. Sound insulation and safe access considerations make this a practical short-term solution that can be reconfigured as family needs change.
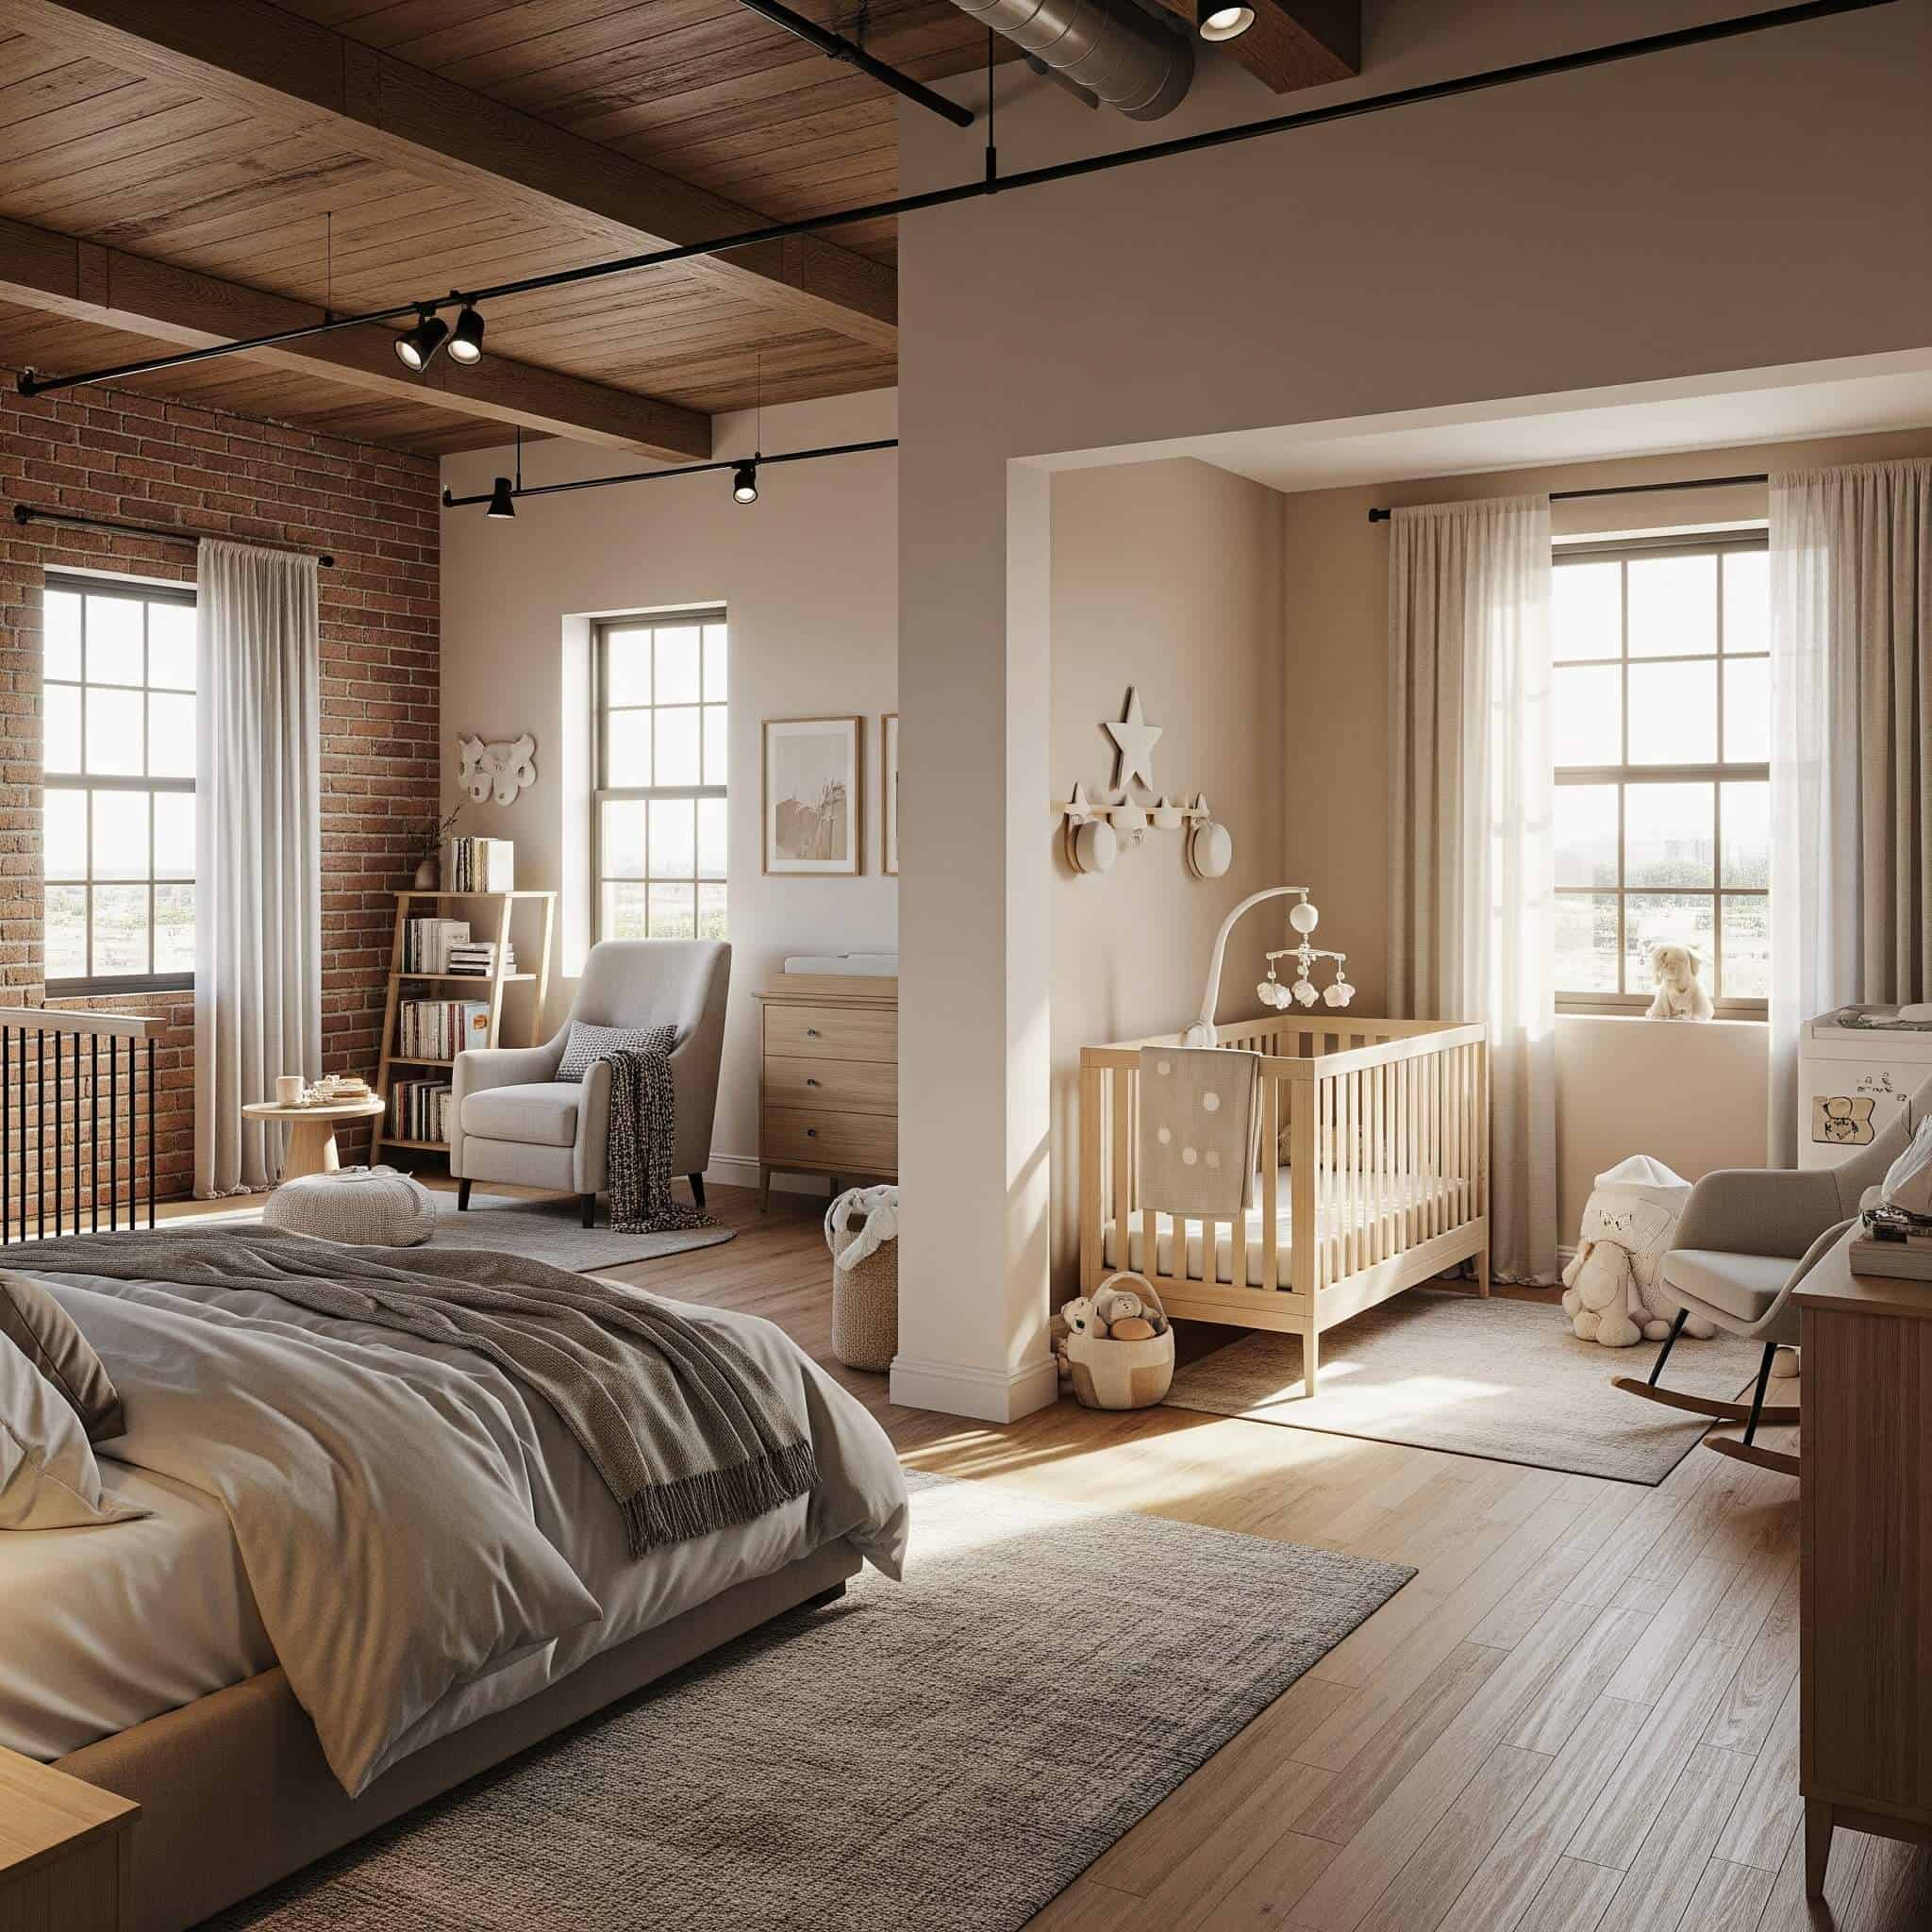
Nursery alcoves should maintain proper air circulation (minimum 5 air changes per hour) while providing sound dampening through strategic use of soft surfaces and possibly acoustic panels with NRC ratings of 0.80 or higher. Safety considerations include securing all furniture to walls or floors, cordless window treatments meeting WCMA safety standards, and maintaining clear pathways with nighttime orientation lighting at low levels (5-10 lumens) to prevent trips during nighttime care.
My friends recently converted their loft into this exact configuration for their new baby, and it’s been perfect for them. They created a small alcove for the crib using a partial wall with acoustic panels that have an NRC rating of 0.85, which helps dampen sound without completely blocking it. They installed a small ceiling fan to ensure proper air circulation, and they use cordless roman shades that meet all safety standards. The nighttime orientation lighting they added provides just enough illumination (about 7 lumens) to navigate safely for nighttime feedings without disturbing anyone’s sleep.
24. Teenage Sanctuary with Study and Social Space
Designing a multi-functional loft space with distinct zones for sleeping, studying, and socializing creates the perfect teenage retreat. Utilizing furniture that adapts to different uses maximizes flexibility while accommodating changing needs. This approach gives older children their own space while ensuring the room supports both academic success and healthy social development.
Multi-zone teenage rooms benefit from modular furniture systems with flexibility—typically requiring minimum clearances of 30 inches between functional areas and furniture pieces that serve multiple purposes through height adjustability or convertibility. Technology integration should include adequate power sources (typically 1 outlet per 6 linear feet of wall space), robust WiFi coverage (-55dBm signal strength or better), and cable management systems to prevent tripping hazards and maintain organization.
When we converted our loft for our 16-year-old daughter, we created three distinct zones that have worked beautifully. Her sleeping area has a platform bed with storage underneath, the study zone has an adjustable-height desk that can convert from sitting to standing position, and the social area has modular seating that can be rearranged for different activities. We made sure to install plenty of outlets (one every 5 feet) and a mesh WiFi extender to ensure strong signal strength throughout the space. The cable management system we put in keeps all the charging cords and electronics neatly organized and prevents any tripping hazards.
25. Loft Master Bedroom with Dressing Room
Separating your loft into a sleeping area and a dedicated dressing room creates a luxury experience. Custom storage, a central island for folding clothes, and good lighting for dressing elevate your daily routine. While this configuration requires more square footage, it provides exceptional organization for clothing and accessories while creating a truly special primary suite.
Dressing rooms function optimally with lighting at three levels: ambient (20-30 lumens per square foot), task lighting at mirrors (75-100 lumens per square foot with 90+ CRI for accurate color rendering), and accent lighting in cabinetry (typically LED strips with 2700-3000K color temperature). Storage planning should follow ergonomic principles with frequently used items between 30-60 inches from the floor, less frequently used items above 60 inches or below 30 inches, with hanging rods at 65-68 inches for full-length items and 40-42 inches for double-hung shorter items.
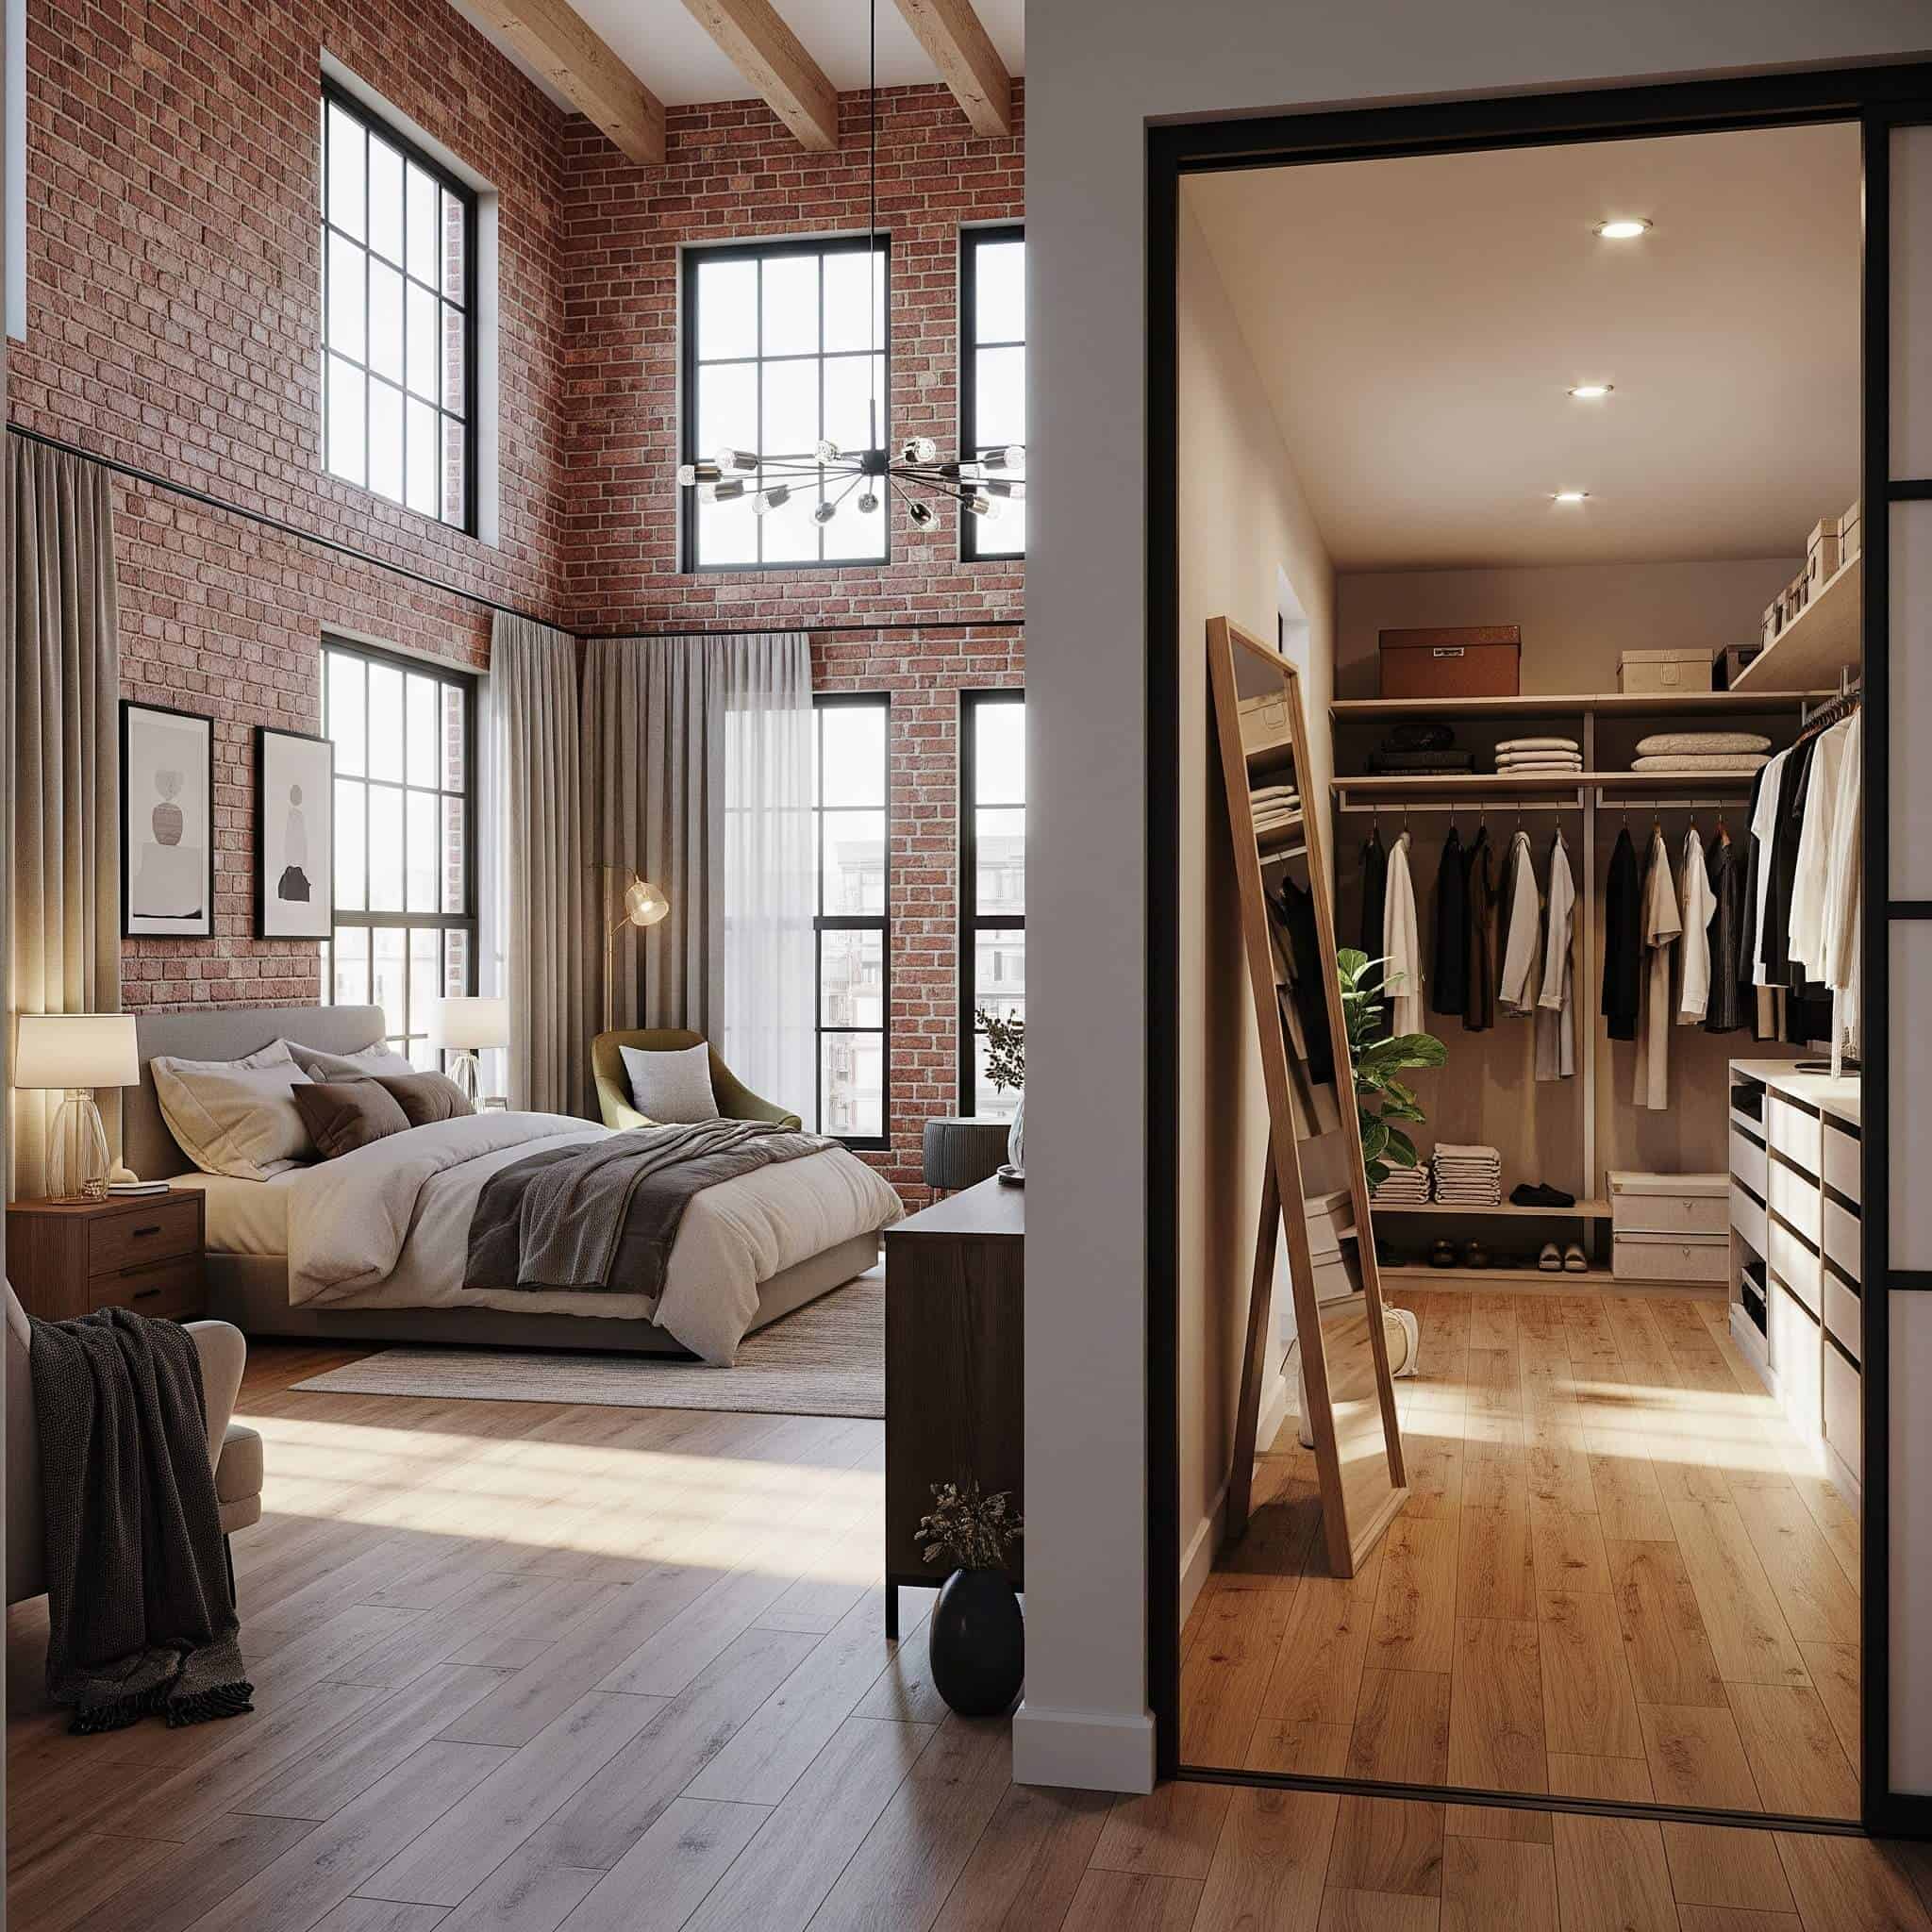
I splurged on this configuration in my own loft conversion, and it’s been worth every penny! The three-level lighting system makes a huge difference – I have ambient lighting at about 25 lumens per square foot for general illumination, task lighting at my mirror that provides 90 lumens per square foot with a CRI of 95 for perfect color rendering when choosing outfits, and LED strip lighting in my cabinetry at 2700K for a warm glow. I followed ergonomic principles for all the storage, with my everyday clothes between 30-60 inches from the floor, seasonal items stored above 60 inches, and shoes below 30 inches. The hanging rods are at 67 inches for dresses and coats, with a second rod at 42 inches for shirts and folded pants. Starting my day in this organized, well-lit space has actually made my mornings much more pleasant!
How Jiffy Junk Can Help With Your Loft Conversion Project
Transforming your attic into a beautiful loft bedroom generates significant waste during the renovation process. Jiffy Junk offers comprehensive services to manage this aspect of your project, from pre-conversion cleanout of your existing attic to construction waste removal during the process. Their eco-friendly disposal practices ensure recyclable materials are diverted from landfills whenever possible. Once your conversion is complete, they can handle post-conversion cleanup and removal of old furniture, allowing you to enjoy your new space immediately.
Professional junk removal services like Jiffy Junk typically remove 250-500 pounds of waste per average loft conversion, with specialized equipment to navigate stairs and tight spaces without damaging newly renovated areas. Construction waste sorting follows specific protocols to maximize recycling potential—typically achieving 60-80% diversion rates from landfills through separation of recyclable materials (wood, metal, cardboard) from non-recyclable construction debris.
When undertaking a loft conversion project, proper waste management is essential. For construction debris and materials from your renovation, our debris removal services provide efficient and environmentally responsible solutions to keep your project site clean and safe throughout the conversion process.
Final Thoughts
Your loft conversion represents more than just additional square footage—it’s an opportunity to create a truly personalized space that enhances your daily life. The ideas presented here offer starting points for your own creative vision. Remember that successful conversions balance aesthetic desires with practical considerations like structural requirements, natural light, storage needs, and building regulations. Working with qualified professionals while maintaining a clear vision will help you navigate the process smoothly. The end result? A beautiful, functional space that adds significant value to your home while providing years of enjoyment.
Post-completion maintenance should include annual inspection of roof intersections and flashing details around windows and dormers, as these junction points have higher potential for water infiltration over time. Energy efficiency monitoring during the first year of use helps identify any thermal performance issues, with infrared scanning during extreme temperature conditions revealing areas needing additional insulation or air sealing to optimize comfort and efficiency.
I’ve been living in my converted loft bedroom for over a year now, and I’m still discovering small ways to improve and personalize the space. Don’t rush the process – take time to understand how you’ll actually use the room and what features will make the biggest difference in your daily life. What surprised me most was how the quality of natural light changes throughout the day and seasons, so spend time in your attic at different times before finalizing window and skylight placements. Your patience and attention to detail will be rewarded with a truly special space that feels like it was always meant to be part of your home.