25 Enclosed Patio Ideas That’ll Transform Your Outdoor Space Into a Year-Round Paradise
Last winter, I was complaining to my neighbor Sarah about how I missed our patio dinners now that it was freezing outside. She just smiled and said, “Come over for coffee tomorrow – we’ll sit outside.” I thought she was crazy until I stepped into her enclosed porch. Suddenly I got it – she’d found the perfect sweet spot between cozy indoor comfort and that fresh-air feeling we all crave.

More and more people are adding patios these days – EBD Studios’ outdoor patio design statistics show that by 2023, 63.7% of new single-family homes included patios. That’s the magic of enclosed patio ideas – you’re creating a space that bridges the gap between your indoor comfort and outdoor beauty. Whether you want to extend your entertaining season, create a peaceful retreat, or simply enjoy nature without dealing with bugs and weather, these 25 enclosed patio ideas will help you design the perfect space for your home and lifestyle.
For homeowners planning major renovations, understanding furniture removal costs can help budget for clearing out existing outdoor furniture before implementing new enclosed patio designs.
Table of Contents
-
Planning Your Enclosed Patio Project
-
Screen and Glass Enclosures (Ideas 1-5)
-
Seasonal and Convertible Solutions (Ideas 6-10)
-
Climate Control and Comfort Features (Ideas 11-15)
-
Flooring and Surface Solutions (Ideas 16-20)
-
Lighting and Electrical Features (Ideas 21-23)
-
Budget-Friendly and DIY Solutions (Ideas 24-25)
-
How JiffyJunk Can Help with Your Project
-
Final Thoughts
TL;DR
Look, I’m not going to sugarcoat it – a really nice enclosed patio isn’t cheap. You could spend anywhere from “weekend project with beer money” ($3,000 for basic screens) to “this is our vacation fund for the next two years” ($50,000+ for the full luxury treatment). Most people I know end up somewhere in the middle, around $15,000-$25,000, and feel really good about what they got. Here’s the thing – what works great in Minnesota will make you miserable in Arizona, so your climate should drive everything. Most projects need permits, especially when you’re adding electrical. Screen enclosures are your most budget-friendly permanent option, while glass sunrooms give you that true year-round comfort. Just be honest with yourself about maintenance – if you’re already annoyed by cleaning your regular windows, some of these fancier systems might drive you crazy.
Planning Your Enclosed Patio Project
Here’s what I learned after talking to dozens of homeowners who’ve done this: you don’t need to go all-out on day one, but you absolutely need to get the basics right from the start. Your local climate should be your first consideration – what works in Minnesota will make you miserable in Arizona, and vice versa.
|
Climate Factor |
Hot Climate Considerations |
Cold Climate Considerations |
Moderate Climate Considerations |
|---|---|---|---|
|
Temperature Control |
Cooling systems, misting, fans |
Heating systems, insulation |
Balanced HVAC, seasonal flexibility |
|
Precipitation |
Monsoon drainage, UV protection |
Snow load capacity, ice prevention |
All-weather drainage systems |
|
Wind Patterns |
Dust protection, secure anchoring |
Wind chill barriers, storm resistance |
Variable wind protection |
|
Sun Exposure |
Shade structures, heat reflection |
Solar gain maximization, light optimization |
Adjustable sun control systems |
Let’s talk money honestly. You’re probably looking at spending anywhere from $3,000 for a simple screened enclosure to $50,000+ for a fully insulated four-season room with all the bells and whistles. Don’t forget about permits (most enclosed patios need them), ongoing utility costs if you’re adding electrical or plumbing, and maintenance expenses down the road. Trust me, these add up faster than you think.
Your intended use drives everything else. Are you planning romantic dinners for two, hosting big family gatherings, creating a home gym space, or maybe all of the above? This determines your flooring choices, furniture requirements, electrical needs, and climate control systems.
Real Example: My friend Sarah in Denver wanted year-round entertaining space. After dealing with Colorado’s crazy weather swings, she chose a hybrid screen-glass system with a mini-split HVAC unit. The south-facing glass panels capture winter solar heat while retractable screens on the east and west sides provide summer cooling. Total investment: $18,000 including permits and electrical work, and she says it was worth every penny.
The permit thing sounds intimidating, but it’s usually not as bad as you think. Most cities just want to make sure you’re not doing anything dangerous. Call your local building department – they’re usually pretty helpful and can walk you through what you actually need. You’ll also want to make sure your existing patio structure can handle the additional load.
Your enclosed patio should feel like a natural extension of your home, not an awkward add-on. Consider your rooflines, siding materials, window styles, and color schemes. A well-integrated design can actually boost your home’s value, while a poorly planned one might hurt it.
Be honest about maintenance. If you’re the type who forgets to bring in the patio cushions, maybe skip the complex retractable systems. Choose systems and materials that match your willingness and ability to maintain them over time.
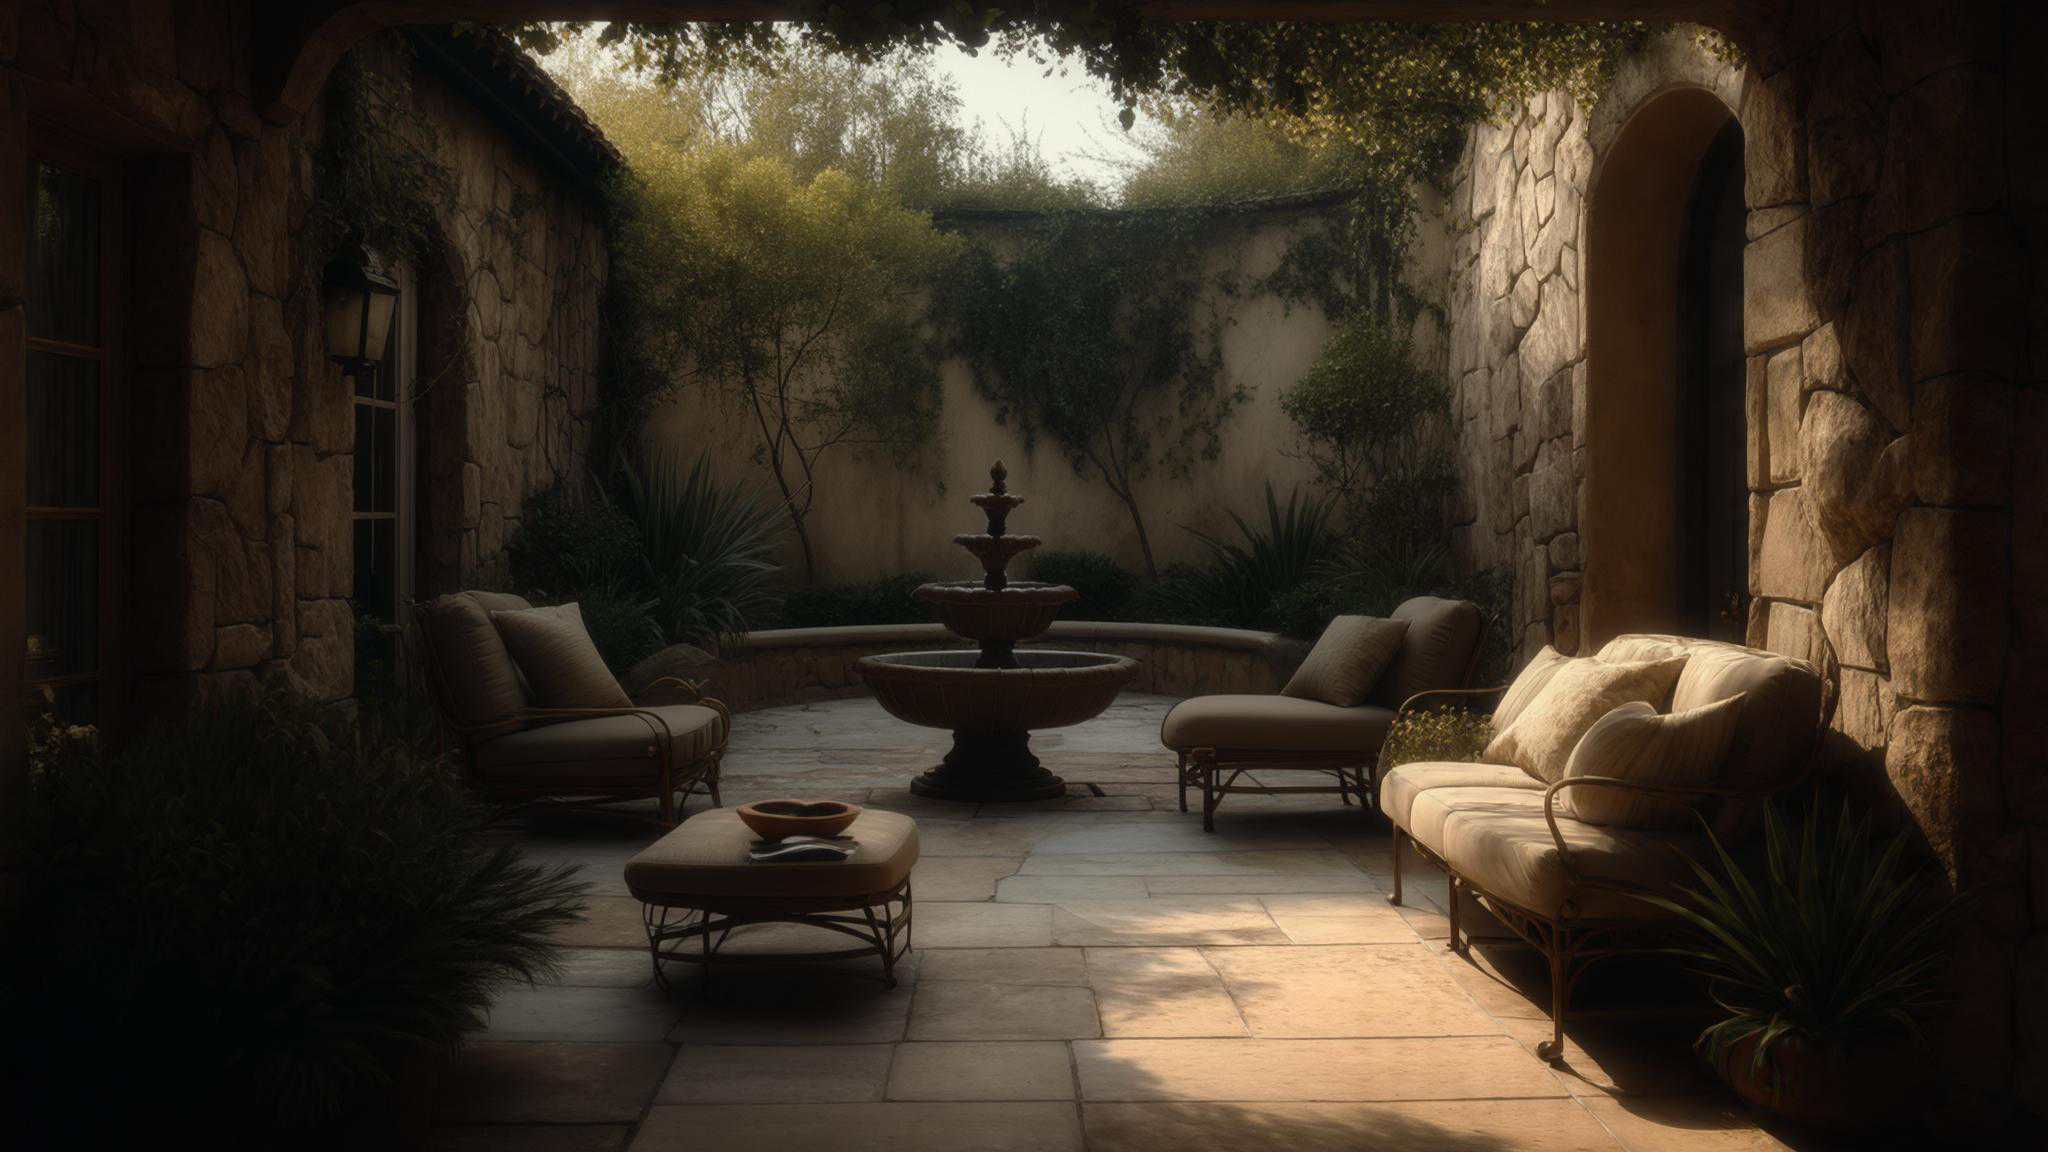
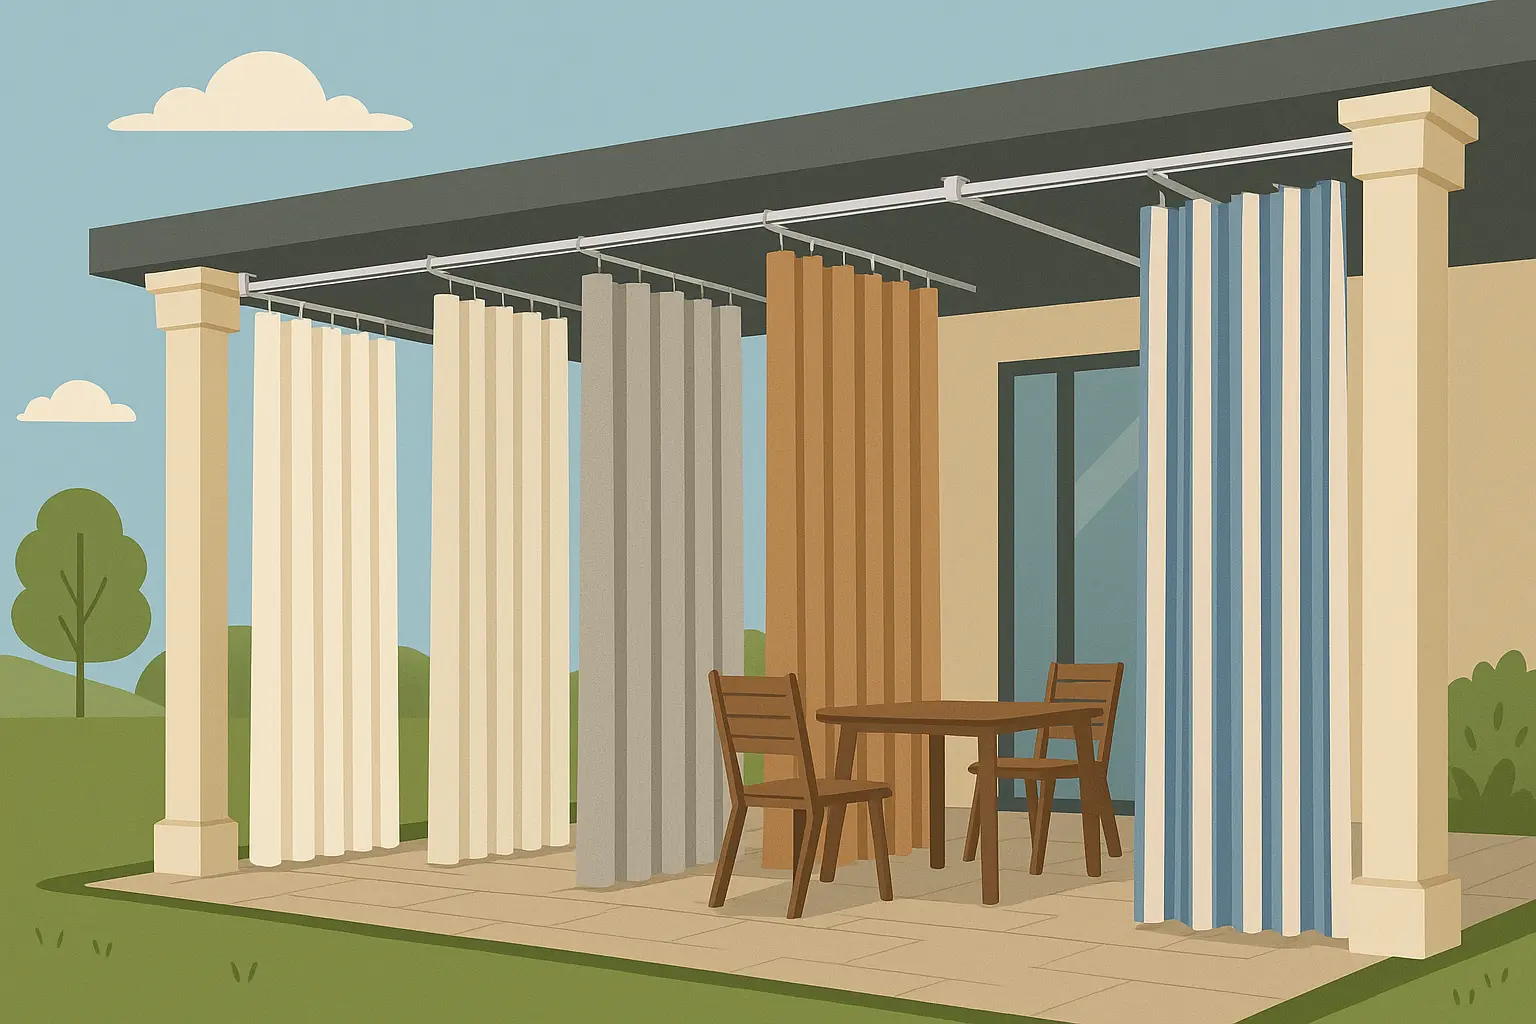
Screen and Glass Enclosures
1. Traditional Screen Porch
Converting your open patio with floor-to-ceiling screens gives you that classic enclosed porch feel while keeping the bugs out. You’ll want aluminum or vinyl frames for durability, plus a solid roof and ceiling fans for air circulation. Weather-resistant furniture is a must since you’re still dealing with temperature fluctuations.
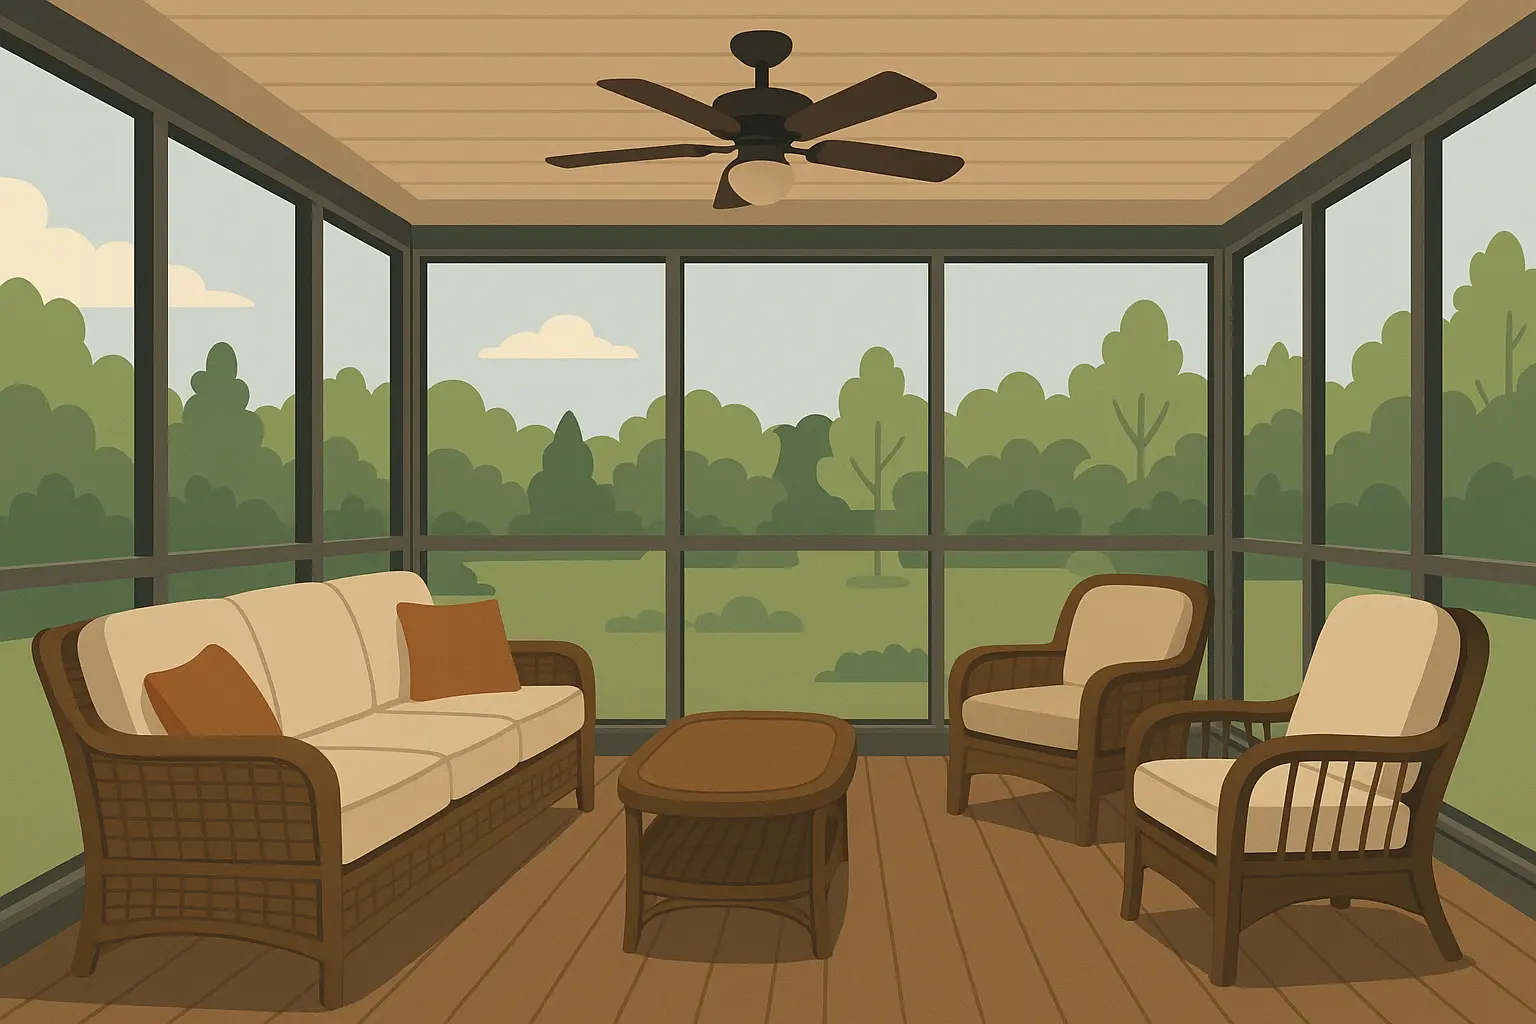
You’re probably looking at spending $3,000-$8,000, making this your most budget-friendly permanent option. You can upgrade with retractable screens for winter protection or premium insect mesh that gives you better visibility. The downside? Limited cold-weather use and you’re still at the mercy of wind and rain.
This works perfectly for mild climates where you want casual dining and relaxation space. Minimal structural changes mean faster installation, and the simple design complements most home styles. Maintenance is pretty straightforward – just occasional screen replacement when they get damaged.
Before starting your enclosed porch project, consider professional garage clean out services to clear storage areas where you’ll keep seasonal furniture and equipment.
2. Glass Sunroom Addition
Creating a fully enclosed room with large glass panels transforms your patio into genuine indoor space. You can choose three-season rooms for moderate climates or four-season rooms with full insulation, heating, cooling, and energy-efficient windows for year-round comfort.
You’re looking at $15,000-$40,000, but you’re getting a real room addition that can significantly boost your home’s value. Four-season designs give you excellent year-round protection and the versatility to use the space for any activity you’d do indoors.
This requires significant structural work and permits, but you can design it to match any architectural style. Maintenance involves regular window cleaning and HVAC system upkeep, but you’re getting maximum functionality for your investment. If you’re already annoyed by cleaning your regular windows, though, this might not be for you.
3. Retractable Glass Wall System
Floor-to-ceiling glass panels that slide or fold away completely give you the best of both worlds – full weather protection when you need it and complete outdoor experience when you don’t. Systems from NanaWall or SolarInnovations can be manually operated or motorized for ultimate convenience.
You’re looking at $20,000-$60,000 depending on size and automation level, but you get maximum flexibility for any occasion. When closed, you have excellent weather protection. When open, it’s completely unobstructed outdoor space.
Here’s what nobody tells you about these systems – they’re awesome until something goes wrong with the tracks or seals, and then you’re dealing with expensive repairs. If you’re handy and like weekend projects, you’ll probably love tinkering with these. If not, maybe consider something simpler.
4. Hybrid Screen-Glass Combination
Strategic placement of glass panels blocks prevailing winds and rain while screens maintain airflow on protected sides. This custom approach typically costs $8,000-$18,000 and gives you a good compromise for variable weather conditions.
You get moderate weather protection that’s comfortable for most activities in fair weather. The design requires moderate structural work but can be tailored to complement various architectural styles.
Maintenance combines both glass and screen upkeep, but you’re getting a balanced solution that adapts to different weather patterns throughout the year.
5. Polycarbonate Panel Enclosure
Translucent polycarbonate panels offer 90% light transmission, UV protection, and impact resistance at 30-50% less cost than glass installations. They’re available in various thicknesses and colors to match your design preferences.
The lighter weight reduces structural requirements, making installation easier and less expensive. You get good weather protection with excellent light transmission, though there’s a slight reduction in clarity compared to glass.
This works well with modern and contemporary styles and requires minimal maintenance – just occasional cleaning and inspection. It’s an excellent middle-ground option between screens and glass that won’t break the bank.
Seasonal and Convertible Solutions
6. Retractable Screen System
Motorized or manual screens that extend from hidden cassettes give you protection exactly when you need it. Brands from Phantom Screens and Screenex offer systems ranging from $500-$3,000 per opening, with options for wind sensors that automatically retract the screens during storms.

You get protection when needed and full openness when desired, with minimal structural impact since they mount to existing framework. When retracted, they’re nearly invisible and work with any architectural style.
Here’s what nobody tells you about retractable screens – they’re awesome until that one windy day when you forget to bring them in and suddenly you’re dealing with a $500 repair. Ask me how I know. The mechanical components require periodic service, but you’re getting high convenience with moderate cost.
7. Removable Winter Panels
Custom-fitted panels with insulation and weather sealing attach during cold months and store away during warm weather. You’re looking at spending $5,000-$12,000, but you get excellent seasonal adaptability.
You need mounting points but minimal structural impact, and the panels can be designed to blend seamlessly when installed. This gives you year-round functionality with seasonal adjustment and long-term flexibility.
Maintenance is low – just seasonal installation, removal, and storage. It’s a moderate investment that works well for climates with distinct seasons where you want maximum outdoor feel in summer.
8. Roll-Up Vinyl Curtains
Marine-grade vinyl curtains with reinforced edges and grommets provide wind and rain protection with easy manual or motorized operation. Clear vinyl maintains visibility while protecting from weather, with complete systems costing $1,500-$5,000.
This is your most affordable option for temporary weather protection, with minimal structural requirements since tracks mount to existing structures. The industrial aesthetic may not suit all home styles, but maintenance is low – just occasional cleaning and track lubrication.
You’re getting basic weather protection that works well for casual use and temporary shelter from sudden weather changes.
9. Sliding Panel System
Large panels slide horizontally on tracks to open or close sections of your patio. Panels can be glass, polycarbonate, or fabric-based, with track systems handling panels up to 300 pounds. You’re looking at $8,000-$20,000 depending on materials and automation.
You get excellent weather protection when closed and versatility for various activities and weather conditions. The clean lines work well with modern designs, though you need sturdy mounting points and level tracks.
Maintenance involves track cleaning and panel upkeep, but you’re getting a versatile system that adapts to changing conditions throughout the day and seasons.
10. Convertible Pergola System
Motorized louver systems from StruXure or Equinox provide rain protection with adjustable sun control, while retractable fabric systems offer full coverage when needed. These premium systems cost $12,000-$30,000 but provide excellent adaptability to changing conditions.
You get ideal conditions for entertaining and year-round enjoyment, though you need substantial mounting and potentially footings. The modern aesthetic enhances contemporary homes, but motorized components need regular service.
This is a high-end investment with premium functionality that transforms your outdoor space into a truly adaptable environment that responds to weather changes automatically.
Climate Control and Comfort Features
|
Climate Control Option |
Installation Cost |
Operating Cost |
Best Climate |
Maintenance Level |
|---|---|---|---|---|
|
Radiant Floor Heating |
$8-20/sq ft |
$0.10-0.25/sq ft/month |
Cold winters |
Low (electric) / Moderate (hydronic) |
|
Mini-Split HVAC |
$3,000-8,000 |
$50-150/month |
All climates |
Moderate |
|
Outdoor Fireplace |
$2,000-15,000 |
$20-80/month |
Cool evenings |
Moderate to High |
|
Ceiling Fan + Misting |
$800-3,000 |
$15-40/month |
Hot, dry climates |
Low |
|
Smart Climate Integration |
+$1,500-5,000 |
Variable |
All climates |
Low |
11. Radiant Floor Heating System
Installing electric or hydronic radiant heating beneath your flooring creates comfortable winter conditions that’ll make you forget you’re technically “outside.” Electric systems cost $8-$15 per square foot installed, while hydronic systems run $10-$20 per square foot but offer better efficiency for larger areas.
This works with tile, stone, or engineered flooring over concrete slabs and provides excellent cold-weather comfort. You’ll need proper subflooring and electrical or plumbing connections, but the system stays completely invisible while delivering consistent warmth.
There’s something magical about warm floors on a cold morning – it makes the whole space feel luxurious. Maintenance is low for electric systems and moderate for hydronic setups. It’s a significant upfront cost with ongoing operational expenses, but you’re getting a luxury feature that dramatically extends your season.
12. Outdoor Fireplace or Fire Feature
Installing a gas or wood-burning fireplace, fire table, or fire bowl creates both a stunning focal point and effective heat source. Gas fireplaces offer convenience and consistent heat, while wood-burning options provide authentic ambiance but need more maintenance.
Costs range from $2,000 for prefab units to $15,000+ for custom stone fireplaces. You get localized warmth that extends your outdoor season plus incredible ambiance for entertaining. The design can complement any style from rustic to contemporary.
You might need gas lines, electrical connections, and proper ventilation, plus annual inspections and cleaning. But you’re creating a natural gathering space that becomes the heart of your enclosed porch. Trust me, people gravitate toward fire like moths.
13. Ceiling Fan and Misting System
Combining outdoor-rated ceiling fans with misting systems creates effective cooling for hot climates. High-pressure misting systems can reduce ambient temperature by 15-25°F while fans circulate the cooled air throughout your space.
Combined systems cost $800-$3,000 and work excellently in hot, dry climates (less effective in humid areas). You’ll need electrical connections and water supply, and the industrial components might clash with traditional home styles.
My friend Mike in Phoenix was tired of his patio being unusable from May through September. He installed a misting system with smart controls that kicks in automatically when it hits 85 degrees. Now his kids actually want to eat dinner outside again, even in summer.
14. Mini-Split HVAC System
Installing a ductless heating and cooling system specifically for your enclosed patio gives you precise climate control for spaces 200-1,500 square feet. The indoor unit mounts on your wall or ceiling with the outdoor compressor unit placed nearby.
You’re looking at spending $3,000-$8,000 depending on capacity and features, but you get excellent year-round climate control with high efficiency. This enables comfortable use in any weather while providing zone control separate from your main house.
You’ll need electrical connections and wall penetrations, plus annual service and filter replacement. Indoor units come in various styles and colors to match your decor, and you’re getting professional-grade climate control.
15. Smart Climate Control Integration
Integrating heating, cooling, and ventilation systems with smart home technology creates automated comfort based on weather conditions, occupancy, and time of day. Smart thermostats, automated screens, and motorized vents work together seamlessly.
Smart Integration Example: My friend Mike’s Phoenix enclosed patio uses a smart system that automatically extends misting when temperatures exceed 85°F, activates ceiling fans when humidity drops below 30%, and closes retractable screens when wind speeds exceed 15 mph. The system learns his family’s usage patterns and pre-cools the space 30 minutes before typical evening use, reducing energy costs by 25%.
System integration costs $1,500-$5,000 beyond base equipment costs, but you get optimized comfort while minimizing energy use. This provides seamless comfort for any activity with premium convenience features.
You need robust electrical and networking infrastructure, and the higher complexity requires professional service. Most components can be concealed for clean aesthetics, and you’re getting cutting-edge automation that learns your preferences.
Flooring and Surface Solutions
16. Heated Tile Flooring
Installing porcelain or ceramic tile over radiant heating systems creates a luxury feel that’s both beautiful and functional. Large-format tiles minimize grout lines for elegant appearance, while porcelain tiles rated for freeze-thaw cycles prevent cracking in cold climates.
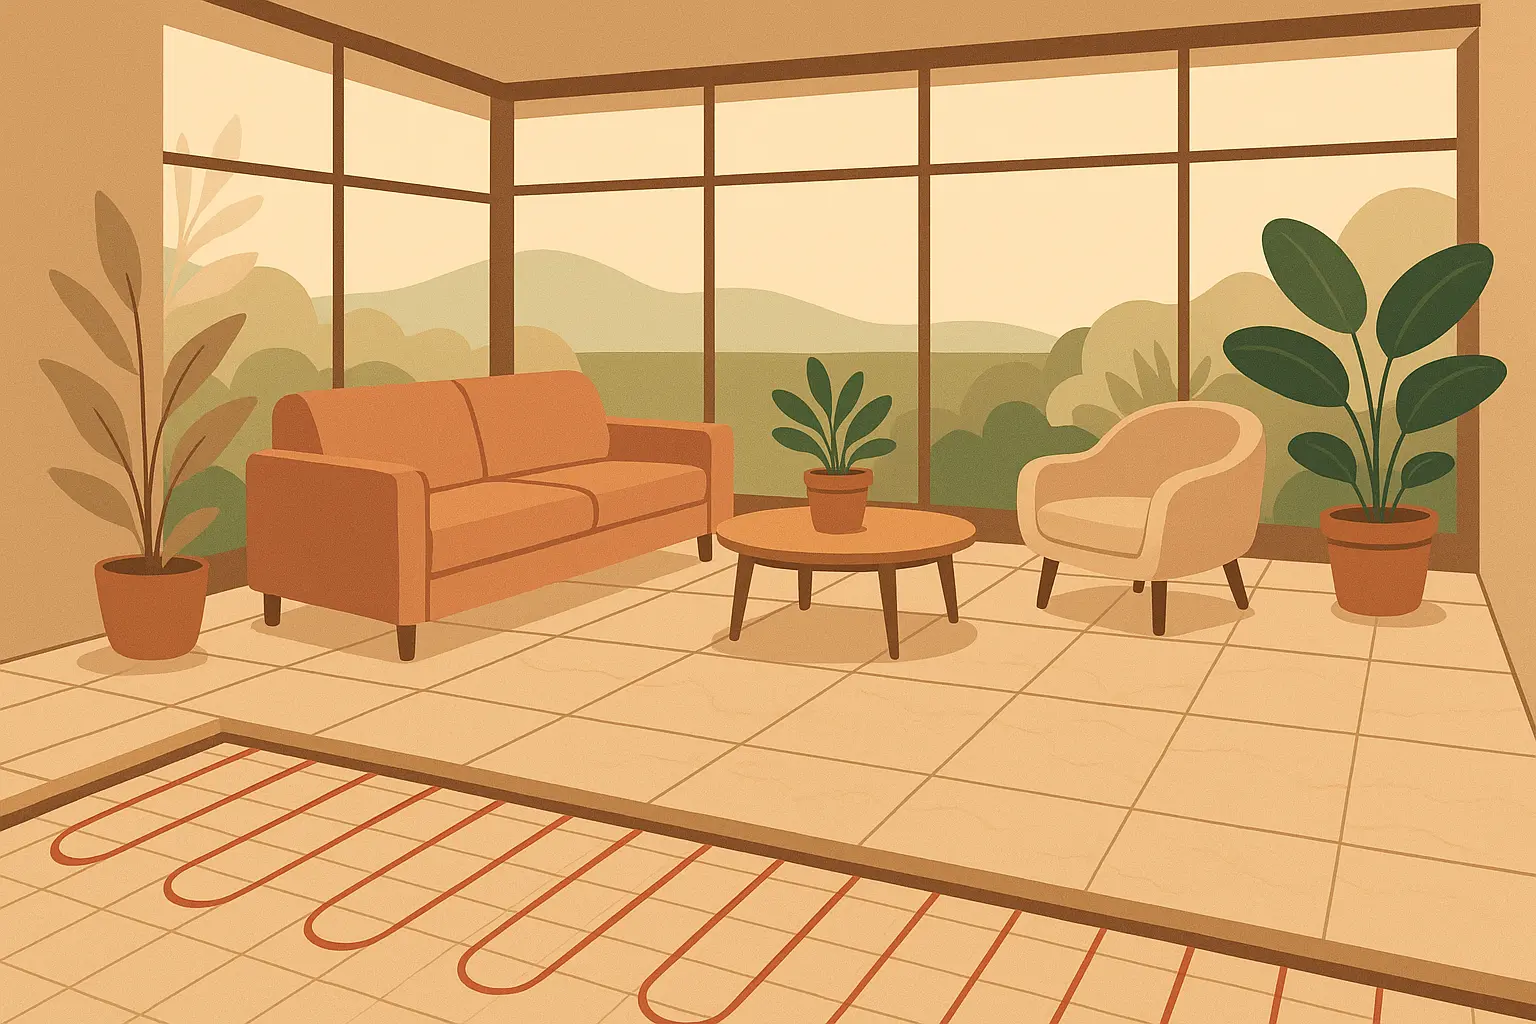
You’re looking at $15-$25 per square foot including the heating system, making this a high-end investment with excellent durability. You get comfortable barefoot surfaces that stay cool in summer heat and easy-to-clean maintenance.
You need proper substrate preparation and utility connections, but the system works with any design and offers endless pattern options. Maintenance is low – just occasional deep cleaning and grout sealing.
17. Composite Decking with Built-in Drainage
Installing composite decking boards with integrated drainage channels handles water runoff while keeping your patio surface dry. Brands from Trex RainEscape or TimberTech DrySpace create waterproof surfaces above the substructure, allowing use of space below.
This costs $8-$15 per square foot, a moderate premium over standard composite decking. You get excellent water management for all climates and immediate use after rain, plus natural wood appearance that complements most architectural styles.
You need proper slope and drainage infrastructure, but maintenance is low – just occasional cleaning and inspection. The surface stays dry for immediate use, making it perfect for unpredictable weather.
18. Stamped Concrete with Integral Color
Creating custom patterns and colors in concrete that mimics natural stone, brick, or tile gives you premium appearance at concrete prices. Integral color and stamping create durable, slip-resistant surfaces, while sealing provides stain resistance and color protection.
You’re looking at $8-$18 per square foot, making this a cost-effective way to achieve premium appearance. You get excellent durability in all climates when properly installed, plus unlimited design possibilities to match any architectural style.
You need proper base preparation and reinforcement, and maintenance involves periodic sealing and crack repair. But you’re getting a durable surface suitable for heavy furniture and traffic with custom design flexibility.
19. Luxury Vinyl Plank (LVP) Flooring
Installing waterproof LVP designed for outdoor use over properly prepared substrates gives you realistic wood appearance with excellent moisture resistance. Marine-grade LVP withstands temperature extremes and floating installation works over concrete or engineered substrates.
Costs run $6-$12 per square foot installed, making this an affordable option with realistic wood appearance. You get comfortable underfoot surfaces suitable for furniture, plus wood-look options that complement traditional and contemporary styles.
You need smooth, level substrates, and performance is best in moderate climates. Maintenance is low – regular cleaning and occasional plank replacement when damaged.
20. Natural Stone with Drainage System
Installing flagstone, slate, or travertine over proper drainage systems provides unmatched beauty and durability. Natural stone creates elegant entertaining spaces with timeless appeal, though proper drainage prevents water damage and freeze-thaw issues.
You’re looking at $15-$30 per square foot, making this a premium investment with exceptional longevity. You get excellent durability when properly installed and sealed, plus timeless appeal that enhances any architectural style.
You need substantial substrate and drainage preparation, and maintenance involves periodic sealing and joint maintenance. The surface may be rough underfoot, but you’re getting unmatched natural beauty.
Lighting and Electrical Features
21. Layered LED Lighting System
Designing multiple lighting layers including ambient, task, and accent lighting using energy-efficient LEDs transforms your enclosed porch into an evening destination. Combine recessed ceiling lights, wall sconces, strip lighting, and landscape lighting with smart controls for scene setting and dimming.
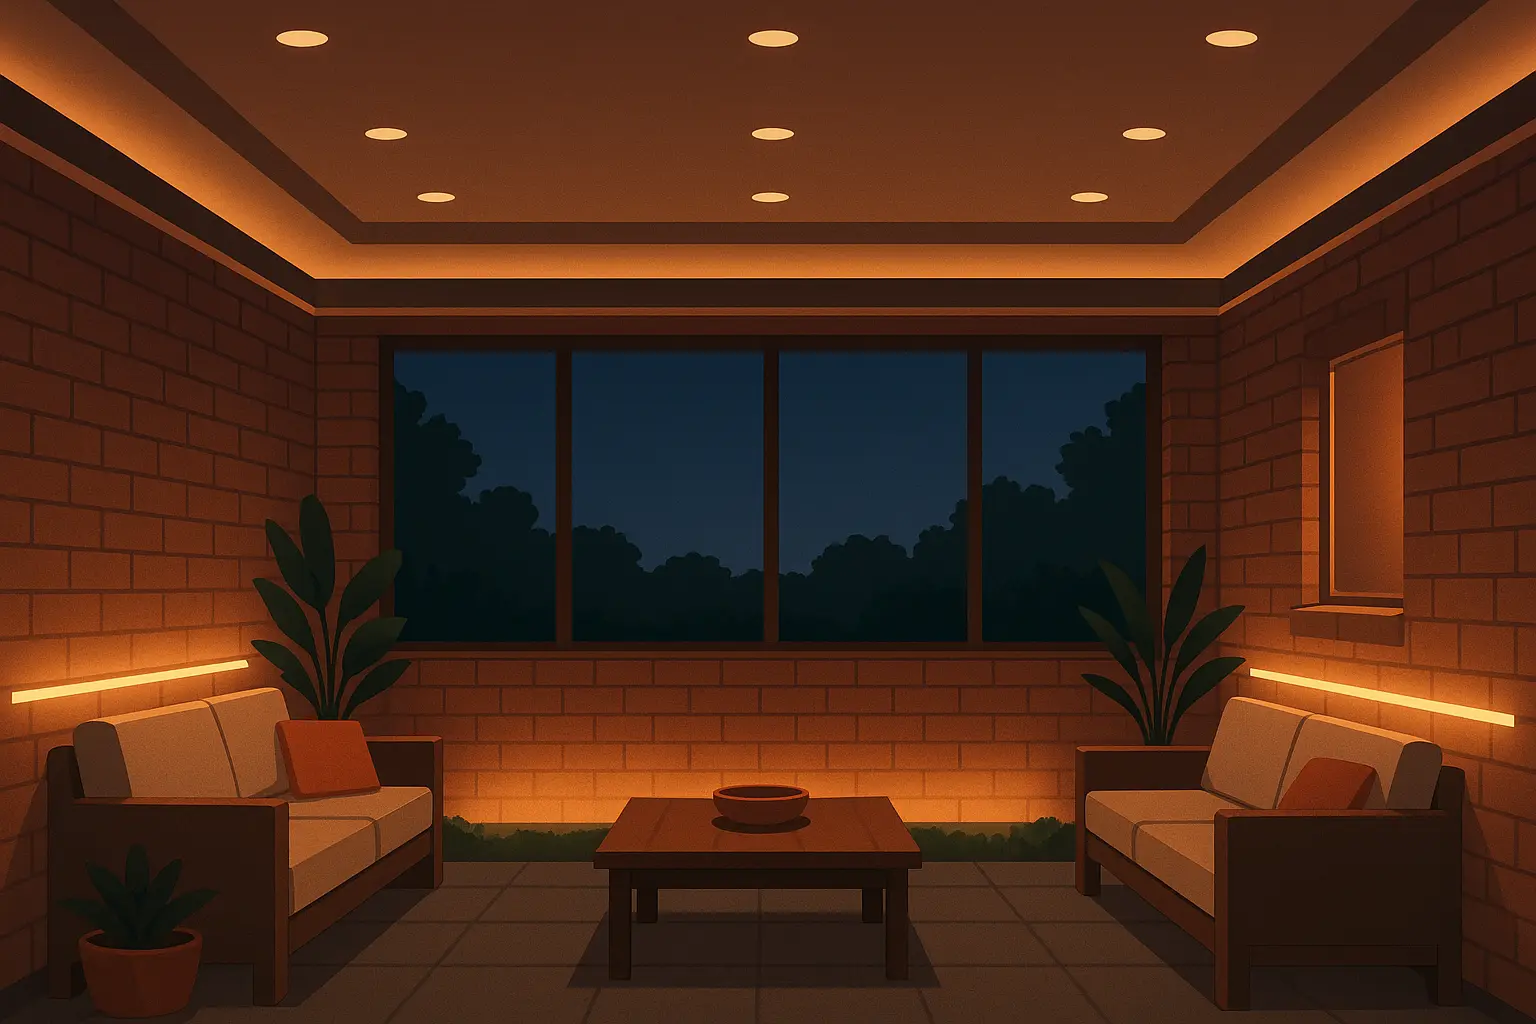
You’re looking at $2,000-$8,000 depending on complexity, but you get moderate investment with long-term energy savings. Weather-resistant fixtures extend usability into evening hours and create perfect ambiance for entertaining.
You need electrical planning and proper outdoor-rated fixtures, but the system can be integrated seamlessly with any design style. There’s something magical about the right lighting that makes evening entertaining feel special. Maintenance is low thanks to LED longevity and minimal bulb replacement needs.
22. Integrated Sound and Entertainment System
Installing weather-resistant speakers, outdoor TV mounting, and electrical outlets creates a complete entertainment center. In-ceiling or landscape speakers provide ambient sound, while weatherproof TV enclosures protect displays from the elements.
Include GFCI outlets every 6 feet and USB charging stations for convenience. You’re looking at $3,000-$12,000, giving you wide range options from basic to premium systems that transform your space into an outdoor entertainment center.
You need extensive electrical work and mounting points, but components can be concealed or integrated architecturally. Electronic components need periodic updates, but you’re creating a true outdoor living room.
When upgrading entertainment systems, consider professional TV removal services for disposing of old outdoor televisions safely and responsibly.
23. Smart Lighting and Control Systems
Integrating lighting with home automation enables smartphone control, scheduling, and energy management. Smart switches, dimmers, and fixtures connect to your home WiFi for voice control through Alexa or Google, plus automated scheduling based on sunset and sunrise.
System costs run $1,500-$5,000 beyond basic lighting, but you get premium convenience with long-term benefits. Programmable controls adapt to seasonal changes and provide effortless lighting control that enhances daily use.
You need robust electrical and network infrastructure, but smart switches are available in styles to match any decor. Hardware maintenance is low with occasional software updates, and you’re getting cutting-edge convenience.
Budget-Friendly and DIY Solutions
|
DIY Solution |
Material Cost |
Skill Level Required |
Installation Time |
Weather Protection |
|---|---|---|---|---|
|
Screen Installation Kit |
$8-15/linear ft |
Beginner-Intermediate |
1-2 weekends |
Basic (insects, light wind) |
|
Outdoor Curtain System |
$500-2,000 total |
Beginner |
1 day |
Limited (sun, light rain) |
|
Vinyl Roll-Up Panels |
$1,500-5,000 total |
Intermediate |
2-3 days |
Moderate (wind, rain) |
|
Removable Panel System |
$5,000-12,000 total |
Advanced/Professional |
1 week |
Good (seasonal protection) |
24. DIY Screen Installation Kit
Purchasing pre-made screen panels and hardware for self-installation around your existing patio structure gives you the most affordable permanent enclosure option. Companies from Screen Tight offer DIY kits with pre-cut aluminum frames and screening, including installation hardware and instructions.

Costs range from $8-$15 per linear foot of screening, making this your most budget-friendly permanent option. You get basic weather protection that’s best for mild climates, suitable for casual dining and insect protection.
This works with existing posts and framework with minimal structural impact. The simple design works with most home styles, and maintenance is low – you can handle DIY screen replacement when needed.
DIY Success Story: My neighbor Tom in Atlanta enclosed his 12×16 existing covered patio using a Screen Tight kit for $1,200 in materials. Working weekends over three weeks, he installed aluminum frames and fiberglass screening between existing posts. The project required basic tools and saved him over $4,000 compared to professional installation while providing excellent bug protection for family dinners.
25. Temporary Enclosure with Outdoor Curtains
Using weather-resistant outdoor curtains on track systems creates flexible, budget-friendly enclosure. Marine-grade fabric curtains on ceiling-mounted tracks come in clear vinyl, mesh, or solid fabric options, with DIY installation possible for most homeowners.
Complete systems cost $500-$2,000 depending on size, making this very affordable with good flexibility. You get basic wind and sun protection with temporary privacy, though weather resistance is limited.
Minimal requirements mean tracks mount to existing ceiling structures, and fabric options are available to complement any architectural style. Maintenance is low – just occasional washing and track cleaning.
How JiffyJunk Can Help with Your Enclosed Patio Project
Let’s be real – any patio renovation means dealing with a ton of stuff that’s accumulated out there. Old furniture, broken planters, that grill you haven’t used in three years. Before you can create your dream space, you need to clear out the reality of what’s there now. This is where JiffyJunk’s professional removal services become invaluable to your project’s success.
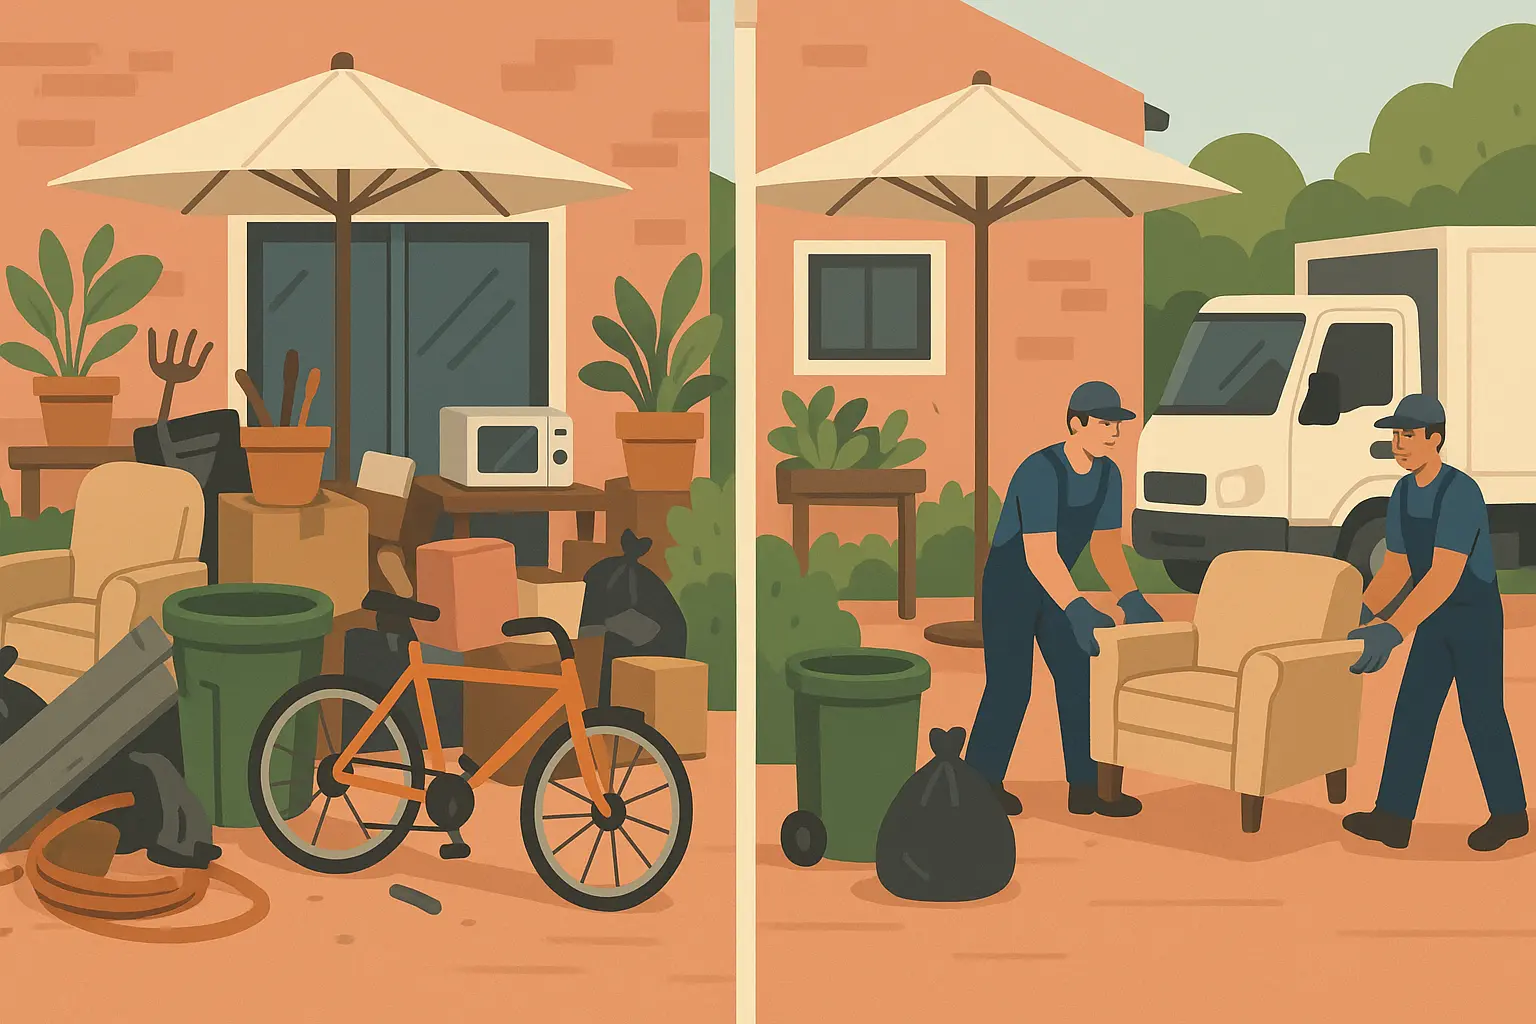
Pre-Construction Cleanup: Before installing screens, glass panels, or flooring systems, you need a clean slate. JiffyJunk’s White Glove Treatment efficiently removes old patio furniture, broken planters, stored seasonal items, construction debris, and any other obstacles cluttering your space. Their team handles everything from heavy furniture removal to electronic waste disposal, ensuring your contractor has clear access to work.
During Construction Support: Renovation projects generate significant debris – old flooring materials, packaging from new fixtures, cut lumber, and discarded materials. Rather than accumulating safety hazards, JiffyJunk provides regular pickup services to keep your workspace clean and organized throughout the project.
Post-Project Finishing: Once your enclosed patio design comes to life, you’ll likely have boxes from new furniture and fixtures, plus the need to clear out storage areas for items displaced during construction. JiffyJunk’s comprehensive service includes hauling away unwanted items and sweeping and sanitizing the area – perfect for putting finishing touches on your new outdoor living space.
Eco-Friendly Disposal: Many enclosed patio projects involve removing materials that can be recycled or donated rather than sent to landfills. JiffyJunk’s commitment to sustainable disposal means your old outdoor furniture, working appliances, and reusable building materials will be properly recycled or donated to local charities.
Stress-Free Experience: Creating an enclosed porch should be exciting, not overwhelming. By handling all cleanup and disposal logistics, JiffyJunk allows you to focus on the fun aspects of designing and enjoying your new space. Their fully licensed and insured teams provide peace of mind, while transparent pricing eliminates surprise costs from your project budget.
Whether you’re planning a simple DIY screen installation or a complex four-season room addition, starting with professional cleanout from JiffyJunk ensures your enclosed patio project begins on the right foot and ends with the clutter-free, beautiful outdoor living space you’ve always envisioned.
For major renovations, homeowners may also need debris removal to handle materials generated during enclosed patio construction.
Final Thoughts
Here’s the truth – there’s no perfect enclosed patio solution that works for everyone. But there’s probably a perfect one for YOU. Start with what bugs you most about your current outdoor space (literally bugs? Cold? Rain? Too much sun?) and work backwards from there.
Don’t let all the technical stuff scare you. At the end of the day, you’re basically asking three questions: How do I keep the bugs out? How do I stay comfortable? And how much am I willing to spend? Everything else is just details.
The key is being honest about how you’ll actually use the space and what level of maintenance you’re comfortable with. A simple screen porch might be perfect if you want bug-free summer evenings, while a fully insulated four-season room makes sense if you’re dreaming of cozy winter mornings with your coffee and garden views.
Remember that updated outdoor spaces significantly impact home value, so you’re making a smart investment in your property while creating a space for your enjoyment. Start with your must-haves, plan for your climate, and don’t forget to factor in the prep work that’ll make your project successful from day one.
There’s something magical about sipping your morning coffee while watching the rain, completely dry and comfortable. Or hosting a dinner party in December without worrying about your guests freezing. That’s what a good enclosed patio gives you – more life, lived outside. A year from now, you could be enjoying your morning coffee in your own little outdoor sanctuary, wondering why you waited so long to make it happen.
For homeowners ready to begin their transformation, professional decluttering services can help create the clean foundation needed for any enclosed patio project.