25 Stunning Retaining Wall Ideas That Will Transform Your Backyard
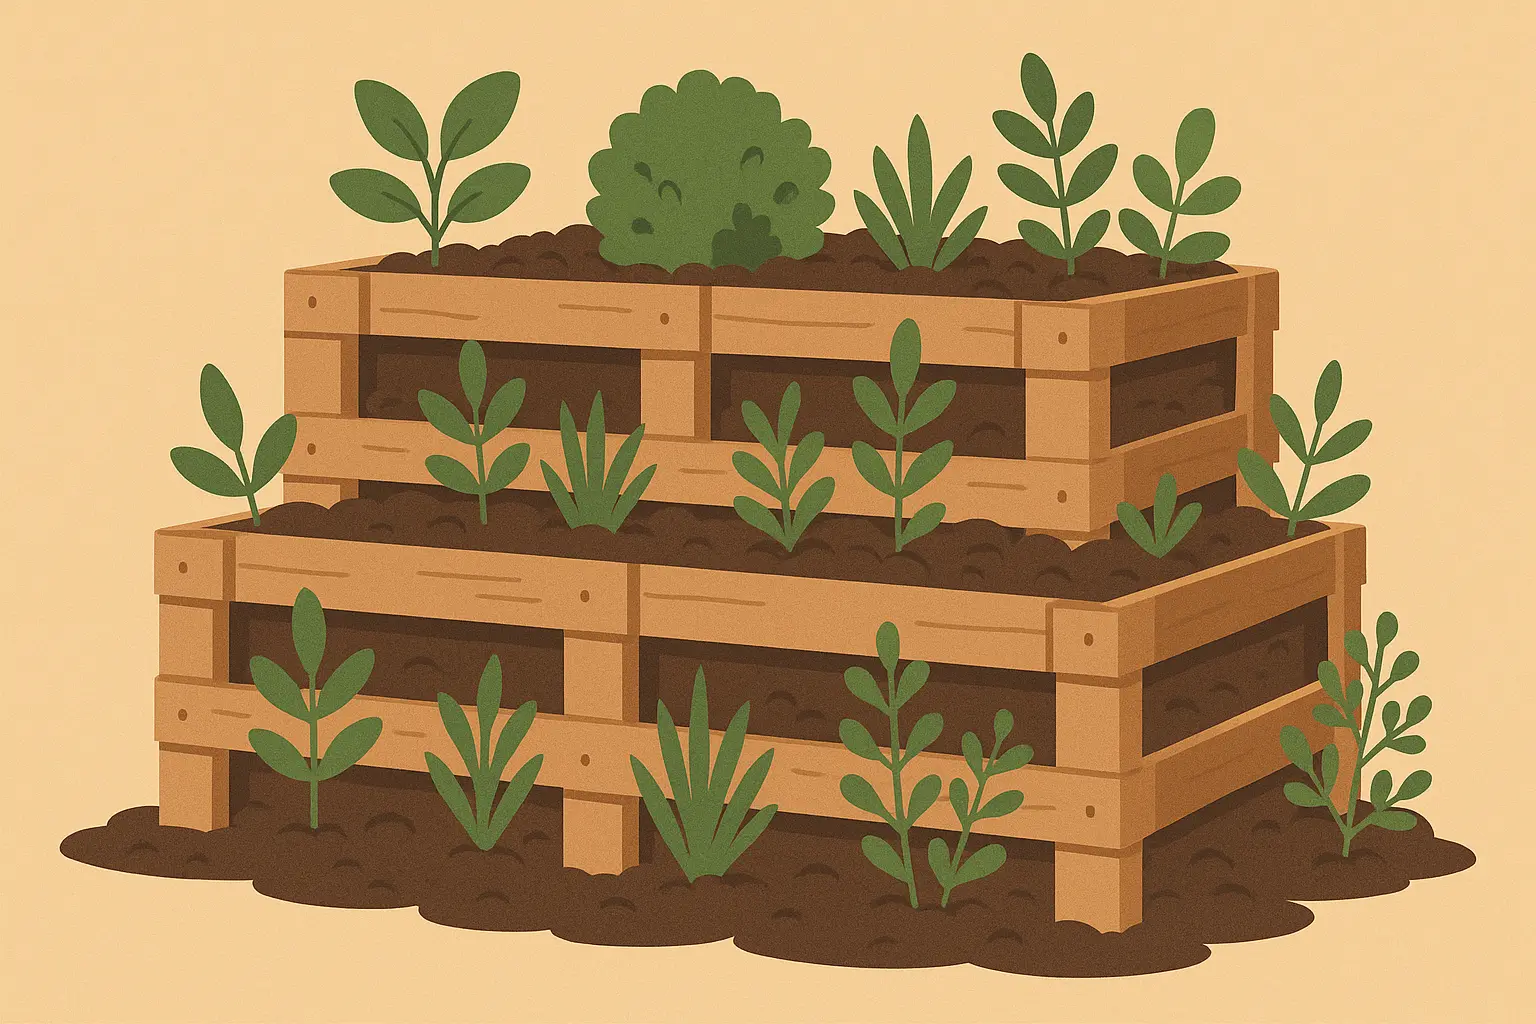
I’ll never forget standing in my backyard three years ago, watching another chunk of my hillside wash away after a heavy rain. My wife kept saying we needed to “do something about that slope,” but honestly? I had no idea where to start. Fast forward to today, and that same slope is now home to our favorite outdoor seating area and the vegetable garden that actually produces tomatoes instead of mudslides.
Here’s the thing about retaining walls – they’re not just about holding back dirt. They’re about transforming unusable space into something amazing. I’ve spent the last five years building, fixing, and helping neighbors with their own wall projects, and I can tell you that the right wall does way more than solve your erosion problems. It completely changes how you use your outdoor space.
This guide walks you through 25 real-world retaining wall solutions that actually work. I’ve organized them into six categories based on materials and budgets, from natural stone that’ll last forever to DIY options that won’t break the bank. You’ll get honest cost breakdowns, practical installation tips, and the kind of “wish someone had told me this sooner” advice that comes from making mistakes so you don’t have to.
Table of Contents
-
What You Actually Need to Know Before You Start Digging
-
25 Retaining Wall Ideas Across 6 Categories
-
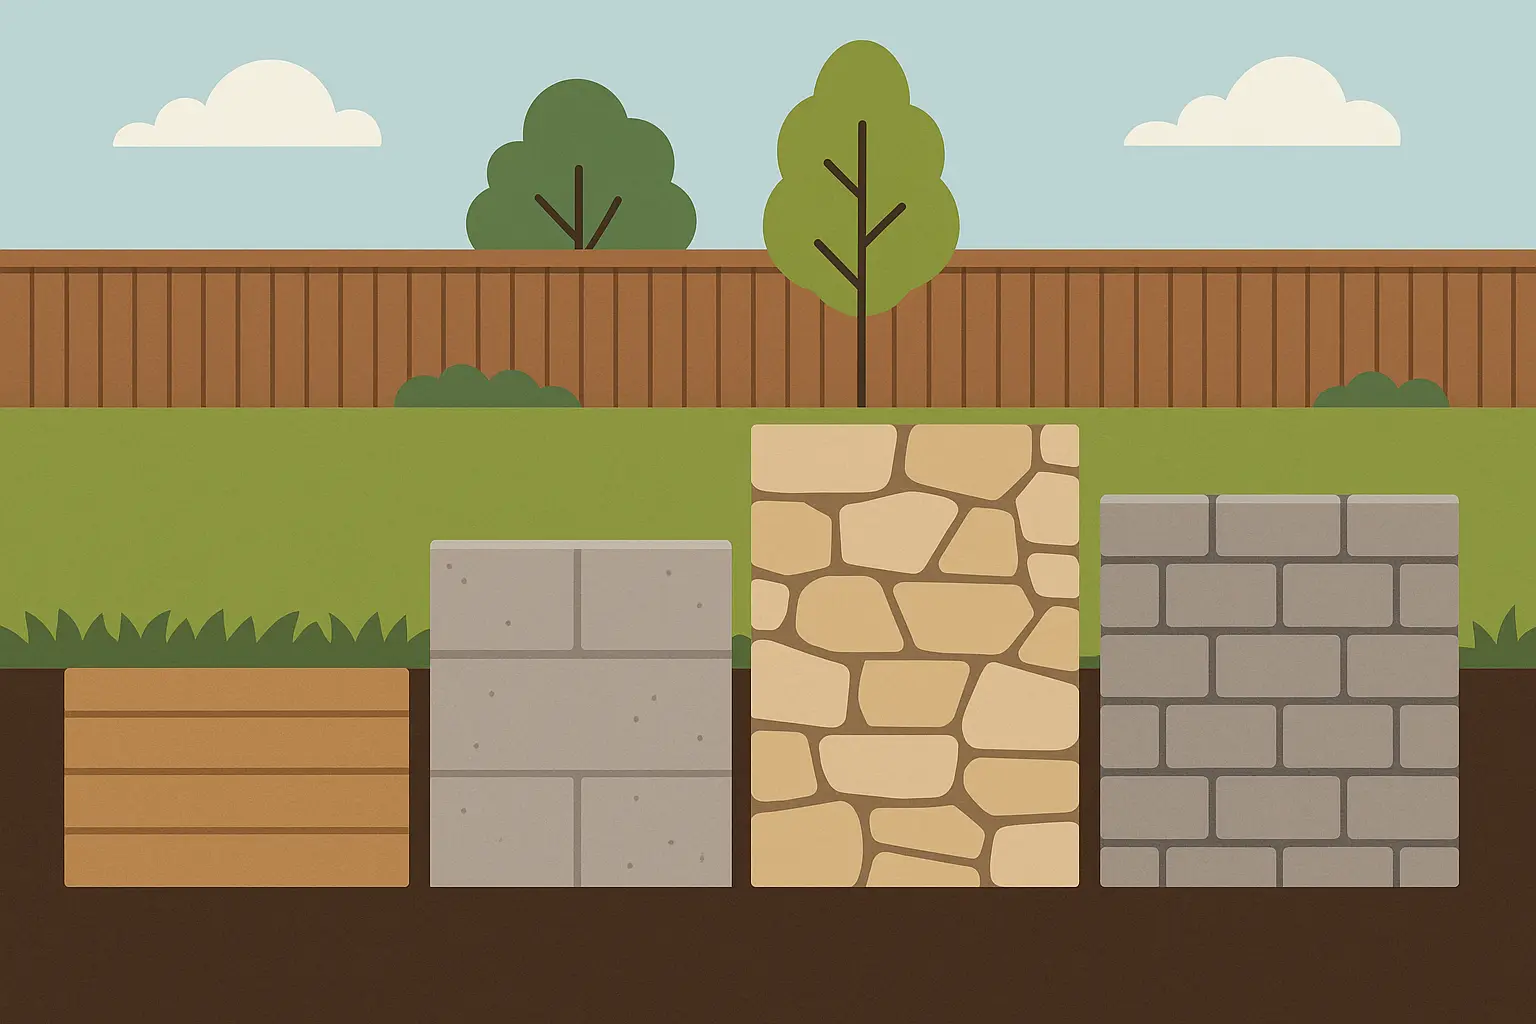
Natural Stone Walls (Traditional & Timeless)
-
Manufactured Block Systems (Engineered Solutions)
-
Timber & Wood Solutions (Warm & Natural)
-
Modern & Industrial Materials
-
Creative & Artistic Solutions
-
Budget-Friendly DIY Options
-
-
Here’s How Well These Actually Work
-
How JiffyJunk Can Support Your Retaining Wall Project
-
Final Thoughts
TL;DR
-
Retaining walls do three jobs: stop erosion, create flat space, and manage water drainage in sloped yards
-
You’ll spend anywhere from $5-200 per square foot – concrete blocks give you the best bang for your buck
-
Walls under 4 feet? You can probably handle it. Taller than that? Call a pro
-
Drainage isn’t optional – it’s the difference between success and starting over in five years
-
Natural stone looks amazing forever but costs more upfront, while manufactured blocks are reliable and reasonably priced
-
Get creative with living walls, built-in seating, and artistic designs that make your wall a landscape feature
-
Tight budget? Sandbag walls, stacked stone, and repurposed materials start around $8-18 per square foot
What You Actually Need to Know Before You Start Digging
Before you fall in love with any particular design, let’s talk about the five things that’ll make or break your project. I learned most of these the hard way, so you don’t have to.
According to Architectural Digest, retaining walls can seriously boost your property value since “flatter and uniformed surfaces are more expensive than steep ones.” I saw this firsthand when my neighbor’s basic timber retaining wall transformed their unusable hillside into a stunning terraced garden that became the envy of our entire street.
What You Actually Need to Know About Structure
Here’s the deal with wall height: Under 3 feet? You can probably handle it yourself with some research and elbow grease. Between 3-4 feet? You’re getting into serious territory but it’s still doable. Over 4 feet? Call a professional. Trust me on this one – I’ve seen too many weekend warriors bite off more than they can chew.
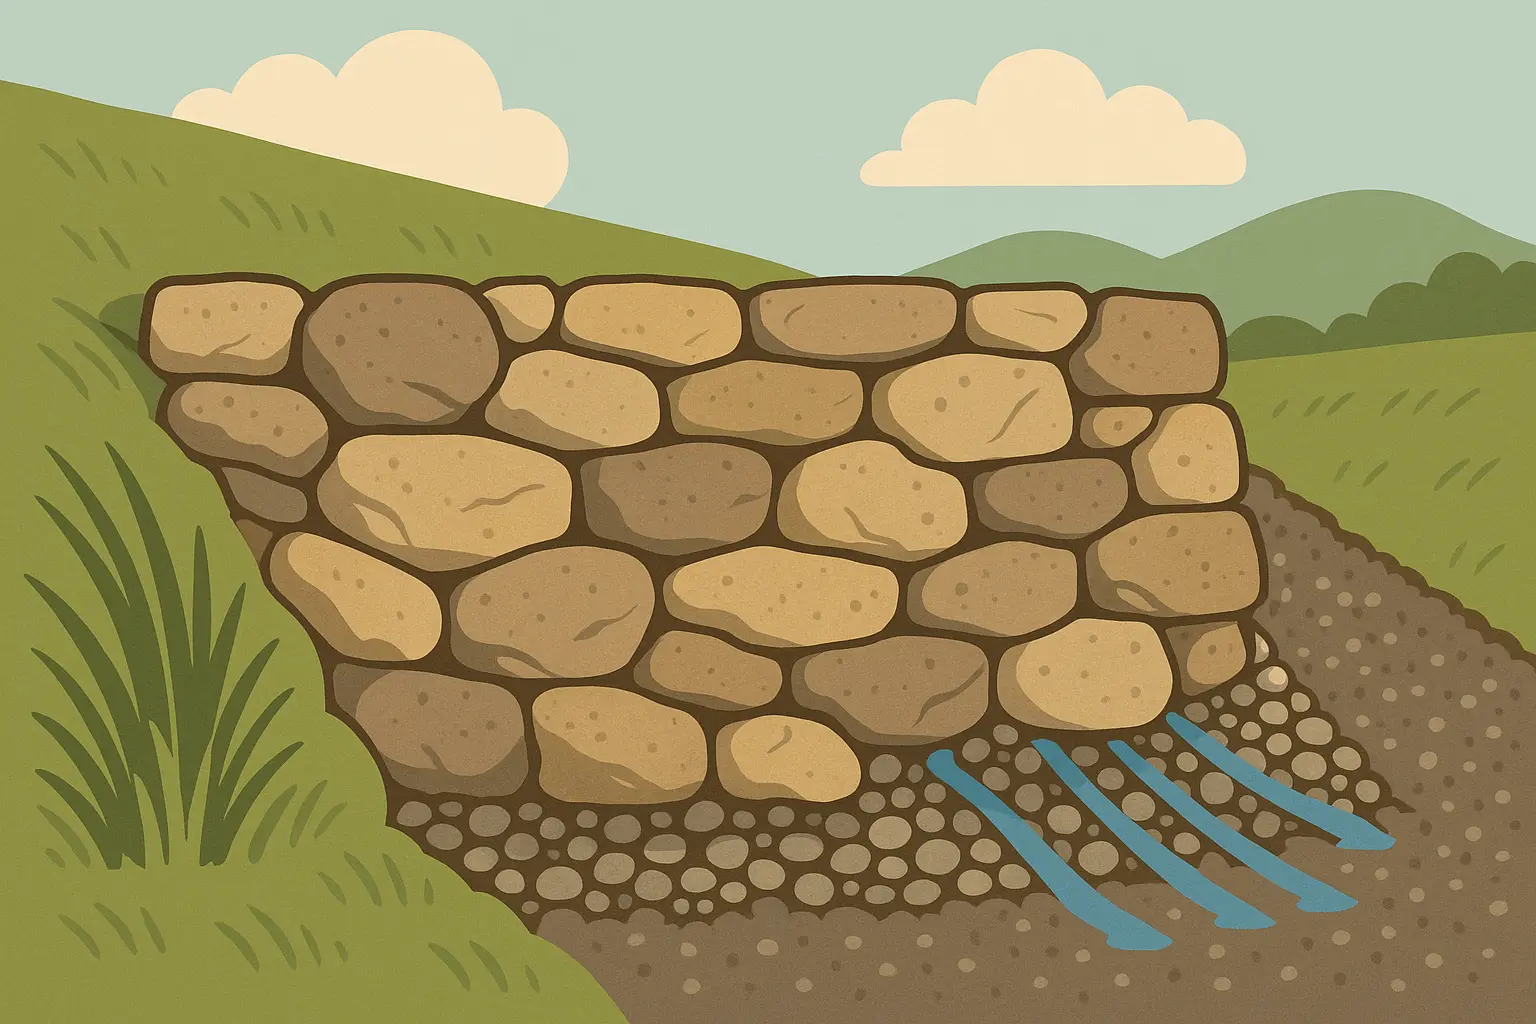
I learned the hard way that “eyeballing” the drainage isn’t good enough. My first attempt at a timber wall lasted exactly 18 months before it started leaning like the Tower of Pisa. Turns out, that gravel behind the wall isn’t optional – it’s the difference between success and having to start over. For complex projects that need professional help, consider exploring comprehensive construction debris removal services to handle excavation materials and old wall demolition safely and efficiently.
|
Wall Height |
Can You DIY It? |
Need a Permit? |
Need an Engineer? |
What Actually Works |
|---|---|---|---|---|
|
Under 2 feet |
Absolutely |
Probably not |
No |
Stone, blocks, timber |
|
2-4 feet |
If you’re handy |
Maybe |
Smart idea |
Engineered blocks, timber |
|
4-6 feet |
Probably not |
Usually |
Yes |
Concrete, steel, engineered systems |
|
Over 6 feet |
No way |
Always |
Required |
Reinforced concrete, steel |
Soil type matters way more than most people realize. Clay soils hold water and push against your wall like crazy. Sandy soils drain well but might not give you stable footing. You need to know what you’re working with before you choose materials or methods.
Your Property’s Unique Challenges
Every site is different, and yours probably has some quirk that’ll affect your project. Steep slopes need beefier solutions. Poor drainage can kill even well-built walls. And here’s something nobody tells you – can you actually get materials to your construction site without destroying your existing landscape?
My neighbor Jim tried to save money by having blocks delivered to his driveway, then wheelbarrowing them 150 feet uphill through his garden. Three destroyed flower beds and two pulled muscles later, he paid extra for a crane delivery. Sometimes the “expensive” option is actually cheaper.
Real-World Challenge: A homeowner in Seattle faced a 45-degree slope behind their home with terrible clay soil drainage. After two failed DIY timber attempts, they invested in an engineered interlocking block system with geogrid reinforcement and French drain. The $12,000 investment eliminated erosion issues and created 400 square feet of usable yard space, increasing their property value by $25,000.
Let’s Talk Money (Honestly)
When contractors quote you $50 per square foot, don’t panic. Yes, it seems expensive until you factor in the cost of doing it wrong the first time. I spent $1,200 on materials for my DIY disaster, then another $3,500 to have it done right. Math lesson learned.
Material costs are just part of the story. Installation complexity can double or triple your expenses if you need professional help. Don’t forget to factor in long-term maintenance costs – that cheap timber wall might need replacement in 10 years, while a stone wall could last generations.
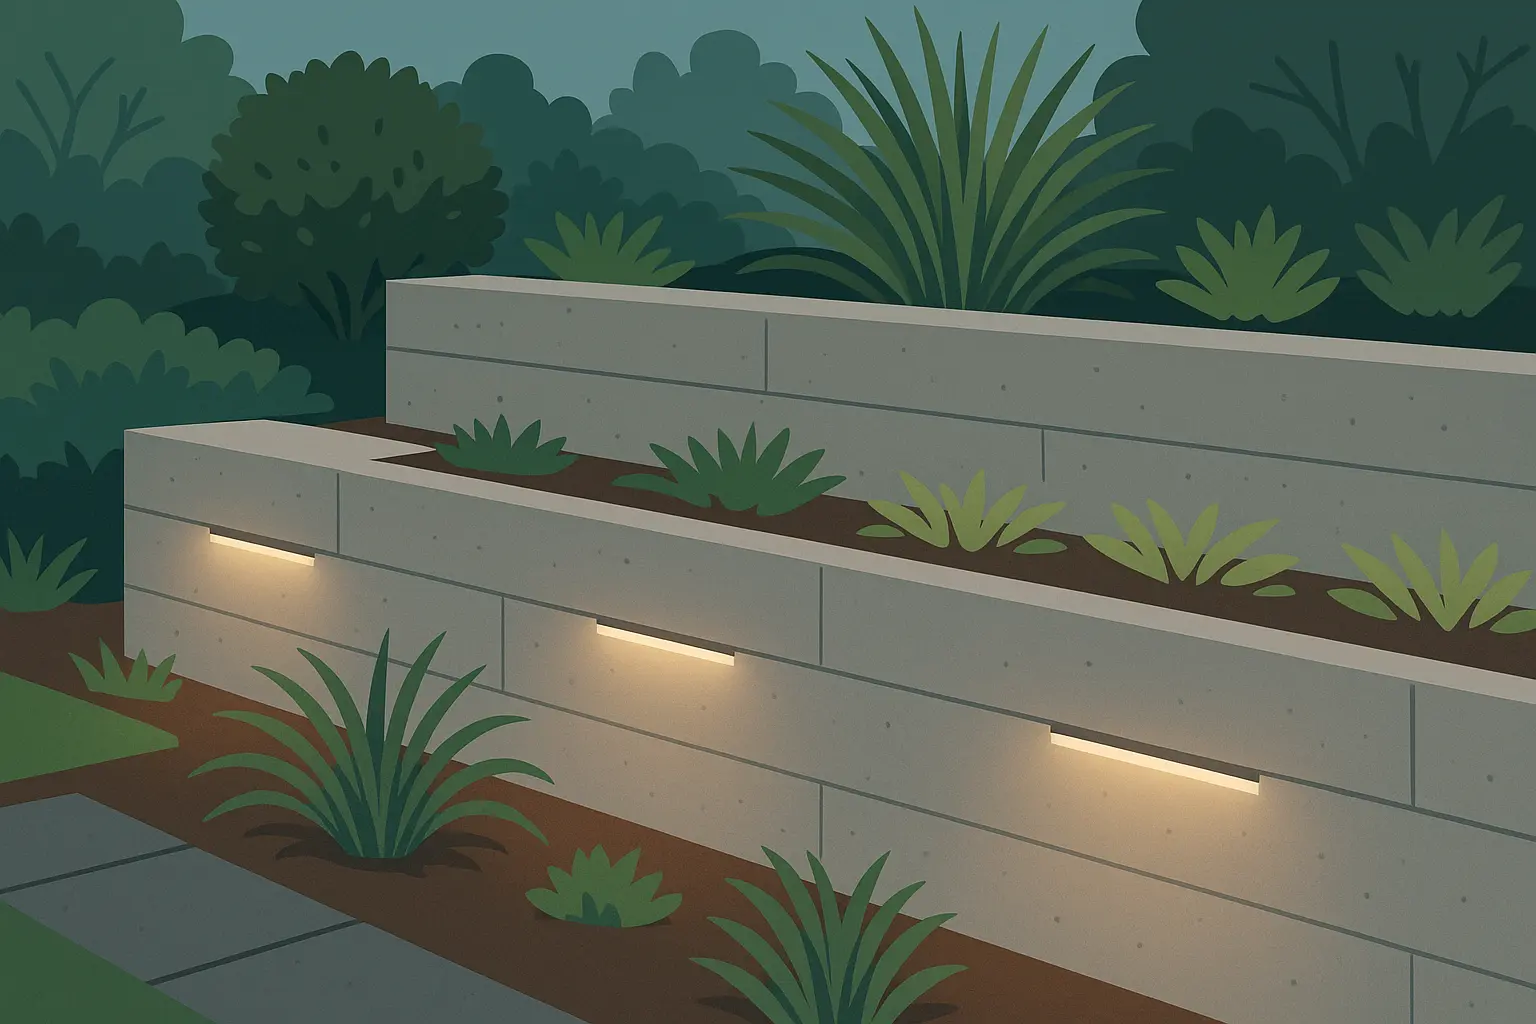
Making It Look Like It Belongs
The best retaining walls don’t look like afterthoughts. They should feel intentional and work with your home’s style and your landscape’s natural flow. Scale matters tremendously – a massive wall can overwhelm a small yard, while a tiny wall might look insignificant against a large home.
I see too many walls that solve the erosion problem but create an aesthetic disaster. Your wall should enhance your property, not make it look like a construction site that never got finished.
Weather and Climate Reality
Don’t even think about starting this project in November if you live anywhere that freezes. I made that mistake and spent three months staring at a half-finished wall covered in tarps. Spring is your friend here.
Your local climate will test your wall every year. Freeze-thaw cycles can destroy poorly chosen materials, while heavy rains can overwhelm inadequate drainage systems. Using locally available materials often reduces costs and ensures compatibility with your regional conditions.
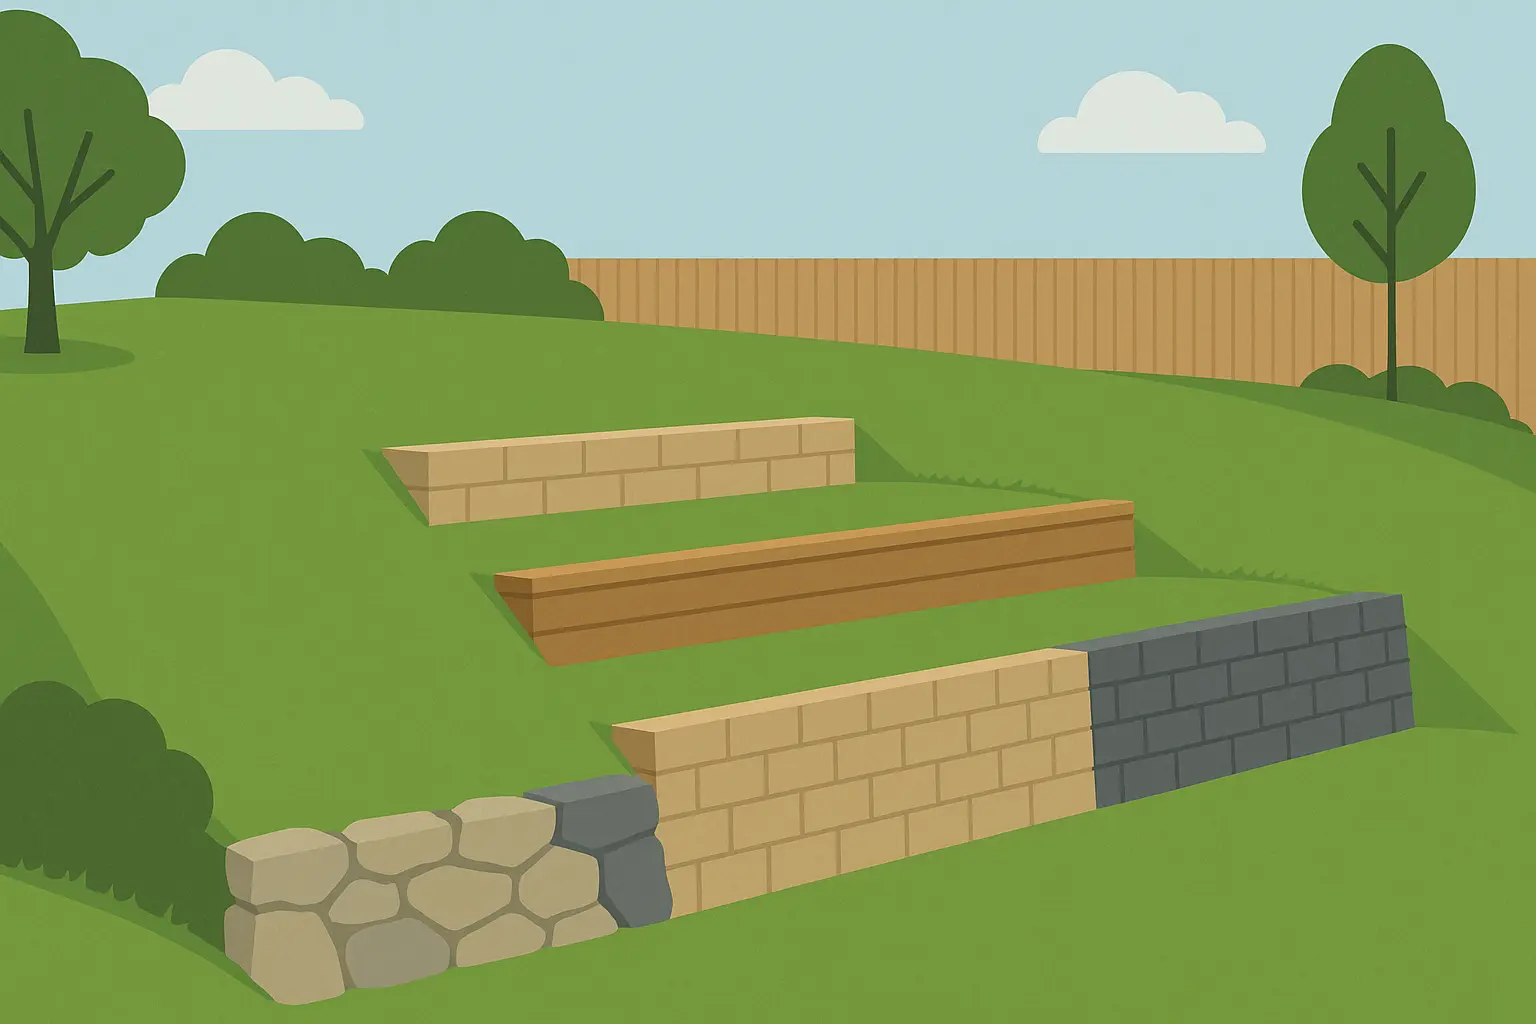
25 Retaining Wall Ideas Across 6 Categories
Here’s everything I wish someone had shown me before I started my first wall project. These 25 options cover every budget, skill level, and aesthetic preference I’ve encountered in five years of helping neighbors solve their slope problems.
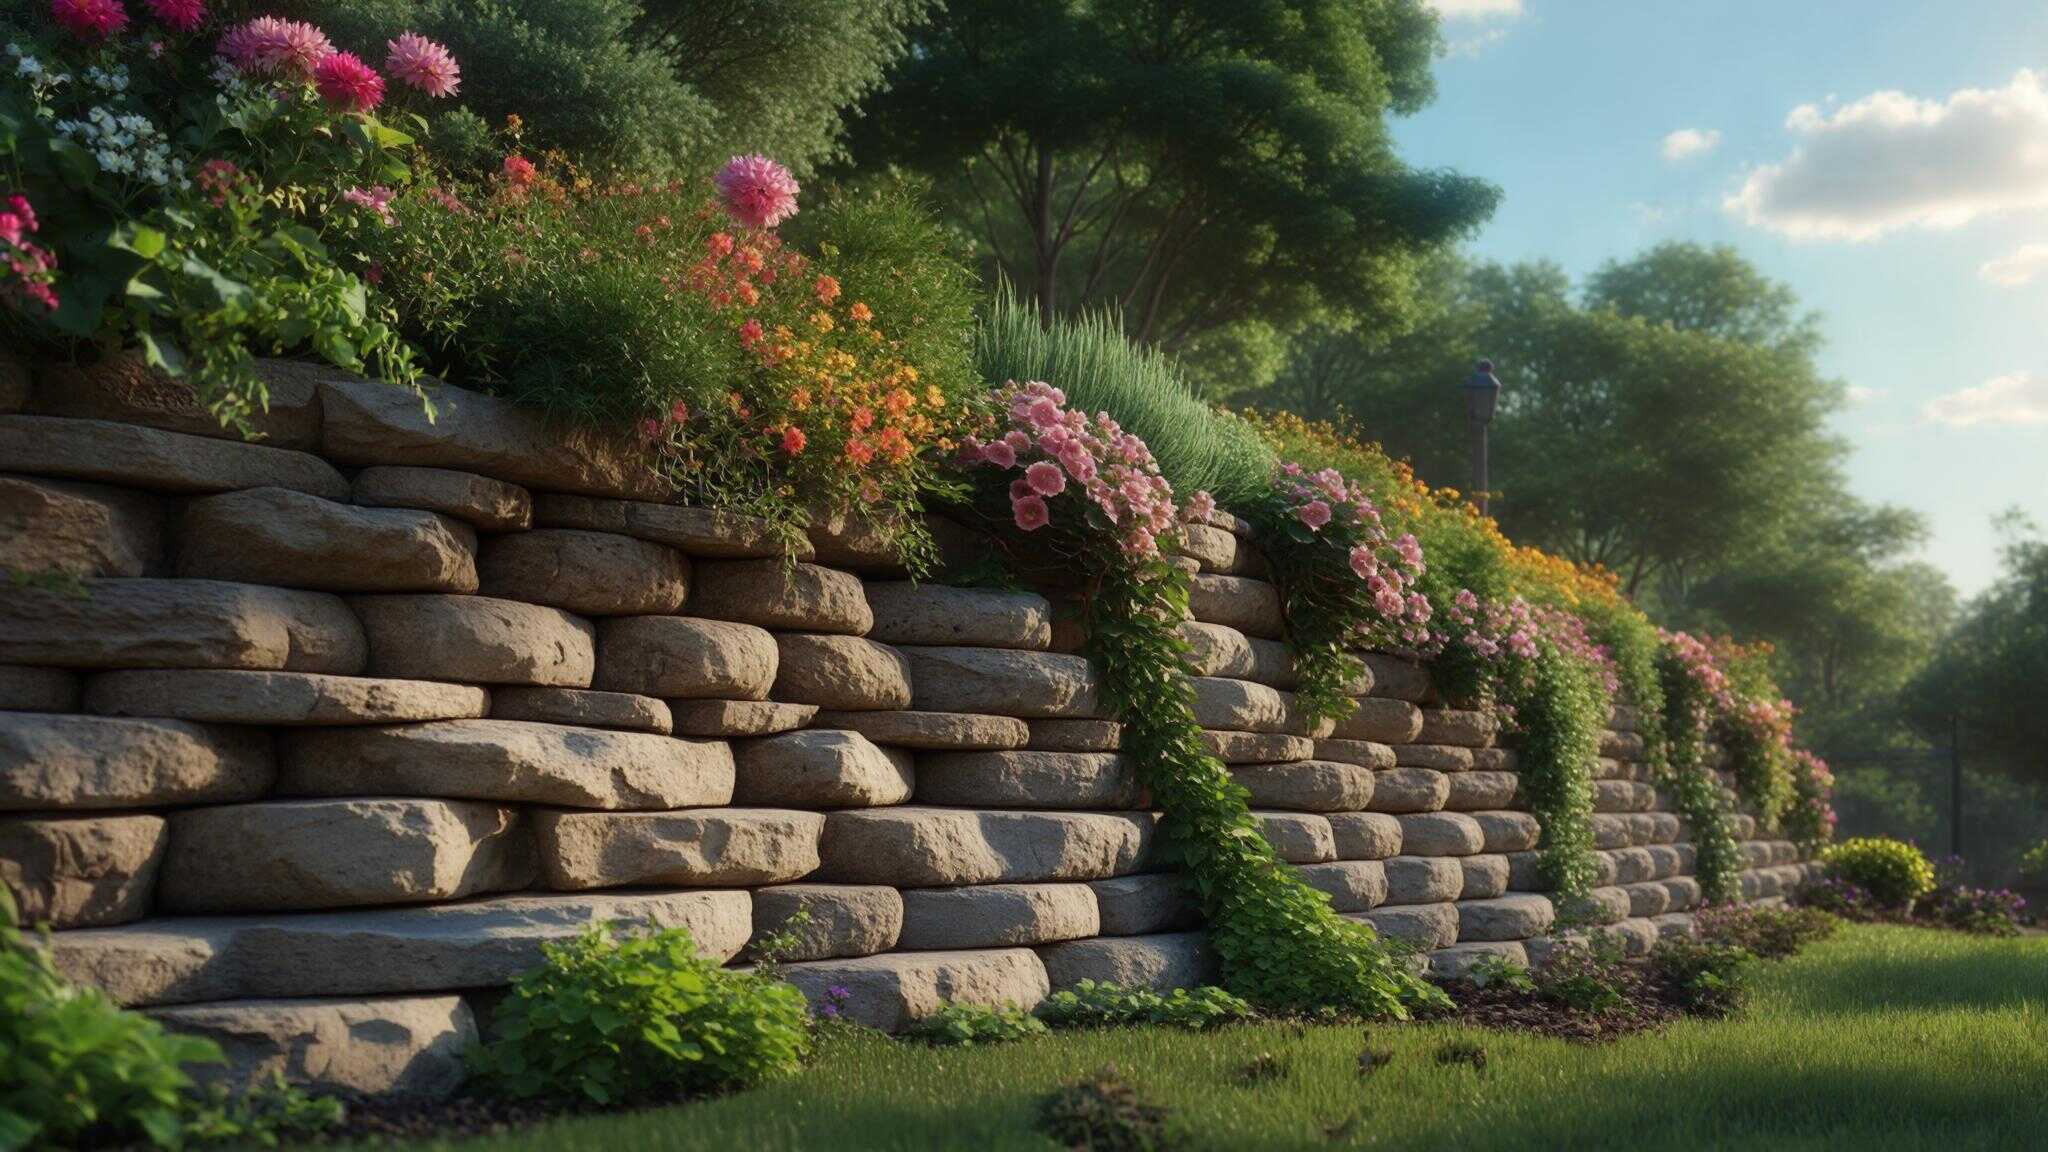
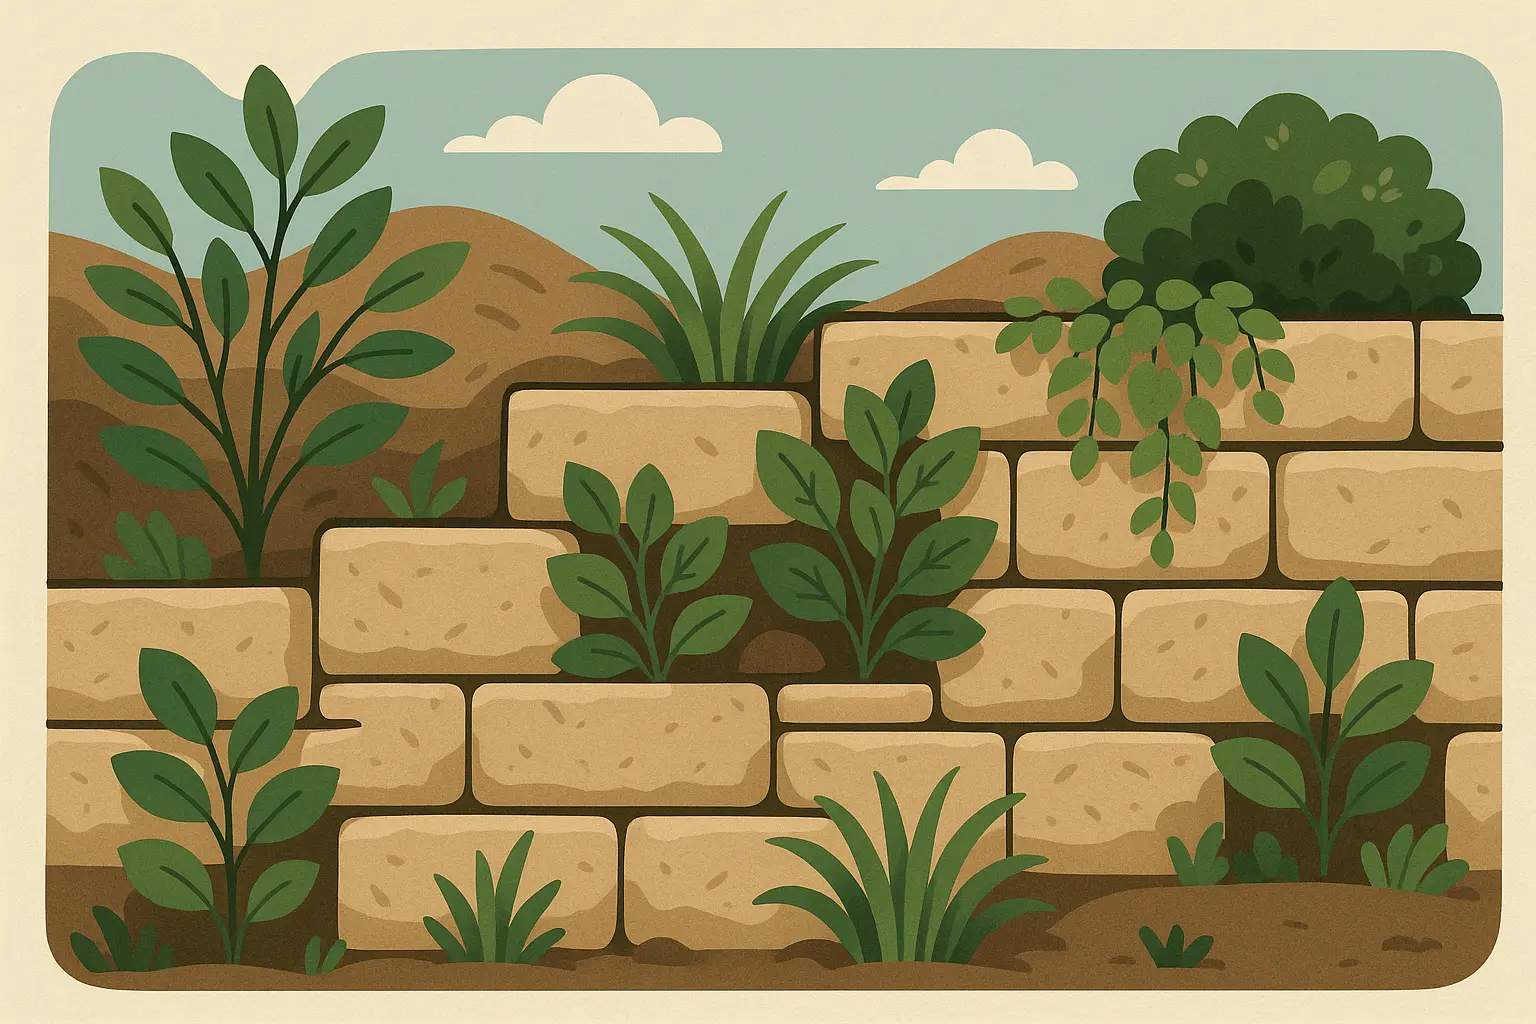
Natural Stone Walls (Traditional & Timeless)
Natural stone walls are like the classic cars of retaining walls – they never go out of style, they get better with age, and everyone admires them. But just like classic cars, they require more investment upfront and some specialized knowledge to do right.
1. Dry-Stacked Fieldstone Wall
This is probably the most satisfying DIY project you’ll ever tackle. No mortar, no concrete – just you, some stones, and gravity. It’s like doing a massive 3D puzzle that actually serves a purpose.
Connecticut fieldstone, Pennsylvania bluestone, and regional granite work beautifully for this traditional method. You’ll want stones ranging from 6-18 inches in diameter, and the key is creating that slight backward lean – about 1-2 inches per foot of height. Don’t skip the drainage gravel behind the wall; it’s what keeps everything stable long-term.
I spent three weekends last fall building a 50-foot dry stone wall using fieldstone from a local quarry. Total cost was about $800, and I got a serious workout. Plus, there’s something deeply satisfying about building something with your hands that’ll last for decades.
What You’re Really Getting:
-
Structural: Rock solid up to 4 feet if you build it right
-
Budget: Reasonable ($25-45/sq ft) if stone is available locally
-
Aesthetics: Timeless look that actually improves with age
-
Maintenance: Practically none – maybe reposition a stone every few years
2. Mortared Natural Stone Wall
Mortar changes everything about stone wall construction. You get more stability and can achieve cleaner, more precise lines, but you’re also committing to a more formal look. The process involves selecting more uniform stones, preparing proper concrete footings, and including weep holes every 6-8 feet for drainage.
This is where you really need to know what you’re doing. Once that mortar sets, you’re committed. But done right, these walls can handle serious loads and look absolutely stunning.
What You’re Really Getting:
-
Structural: Can handle walls up to 6 feet with proper engineering
-
Budget: More expensive ($40-70/sq ft) due to mortar work and skilled labor
-
Aesthetics: More formal appearance with cleaner lines
-
Maintenance: Moderate – mortar joints might need touch-ups over time
3. Boulder Retaining Wall
When you want to make a statement, nothing beats massive boulders. We’re talking 2-4 feet diameter rocks that require heavy equipment for placement. The trick is burying about one-third of each boulder’s height and fitting them together like natural puzzle pieces.
The gaps between boulders can be planted with drought-tolerant plants for added beauty. I saw one installation where they used different colored boulders to create a natural-looking gradient. It looked like it had been there for centuries.
What You’re Really Getting:
-
Structural: Incredibly stable – can handle heights up to 8 feet
-
Budget: Variable ($30-80/sq ft) depending on boulder availability
-
Aesthetics: Bold, dramatic statement piece
-
Maintenance: Almost none – maybe pull some weeds from the gaps
4. Flagstone Terracing
Flagstone terracing works beautifully for gentle slopes where you want elegance over raw power. Think bluestone, sandstone, or limestone in 2-4 inch thickness. Instead of one tall wall, you create multiple low walls (18-36 inches) with plantings between terraces. It’s sophisticated and functional.
This approach is perfect for creating garden spaces at different levels. Each terrace becomes its own microenvironment, which opens up amazing planting possibilities.
What You’re Really Getting:
-
Structural: Best for gentle slopes and decorative applications
-
Budget: Moderate to high ($35-60/sq ft) depending on stone quality
-
Aesthetics: Elegant, sophisticated appearance
-
Maintenance: Low – occasional weed control between stones
Manufactured Block Systems (Engineered Solutions)
These are the Honda Civics of retaining walls – reliable, tested, and designed by engineers who actually know what they’re doing. They might not have the romance of natural stone, but they’ll do the job without drama.
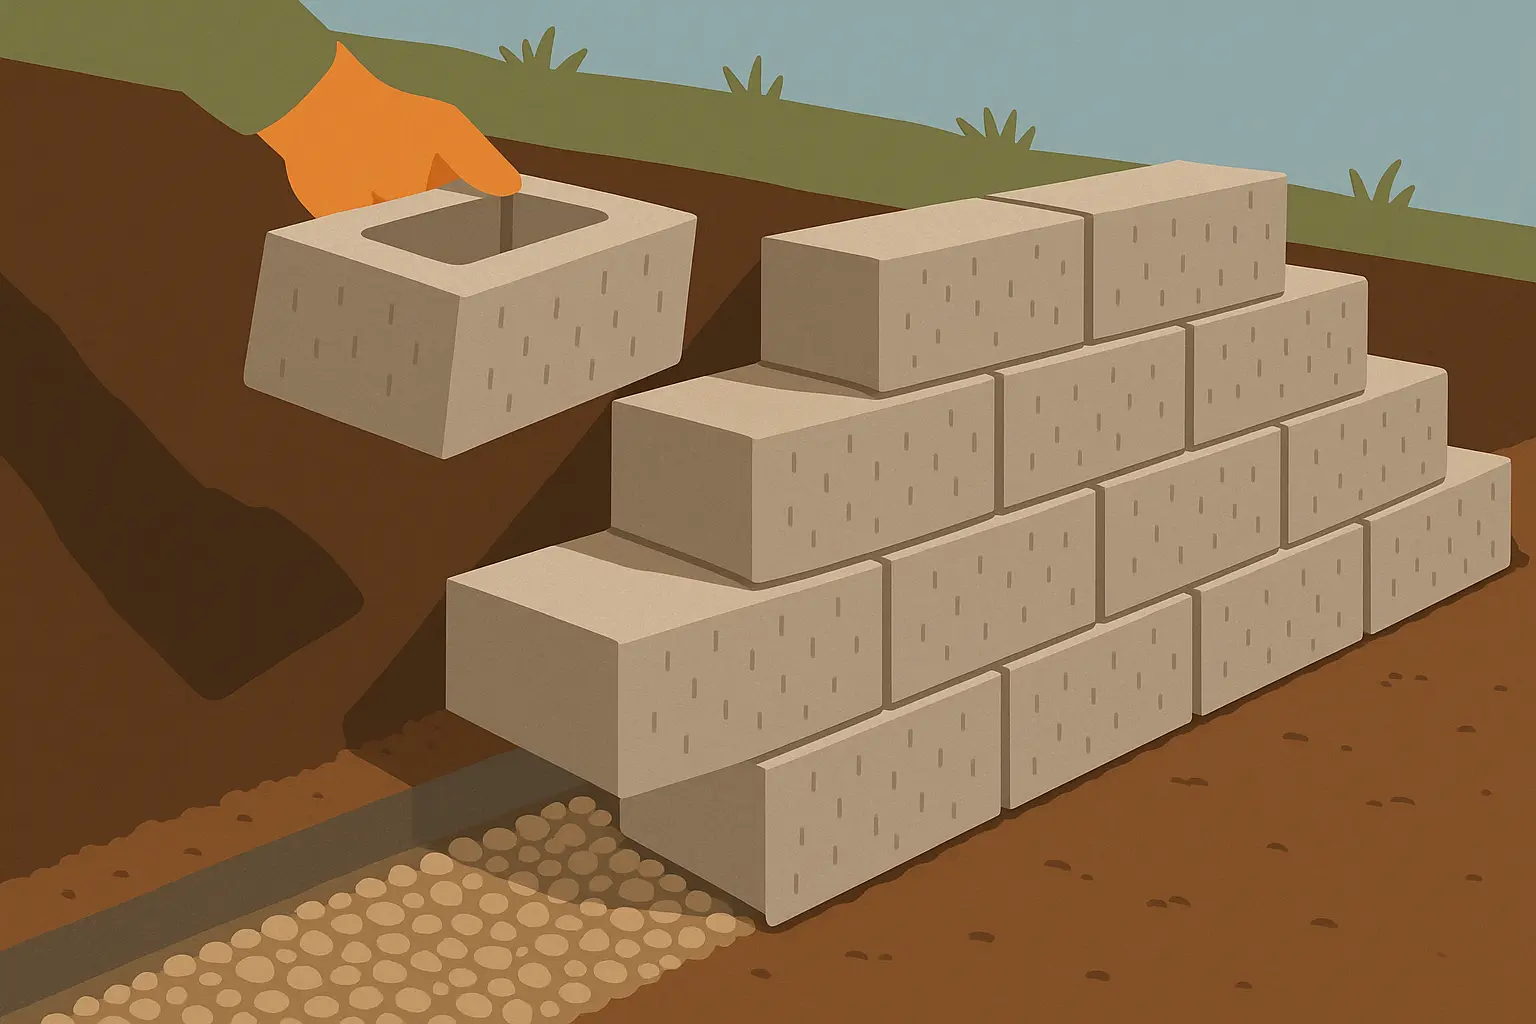
5. Interlocking Concrete Blocks
Systems from Allan Block, Versa-Lok, and Belgard have revolutionized retaining wall construction. These blocks typically weigh 40-80 pounds each and include built-in setback for stability. The hollow cores can be filled with concrete for extra strength, and geogrid reinforcement allows for impressive heights.
When planning major installations, proper construction waste disposal becomes essential for managing packaging materials, excess blocks, and excavation debris throughout your project.
DIY Success Story: A Denver homeowner used Allan Block interlocking concrete blocks to build a 150-foot curved retaining wall around their sloped driveway. Working weekends over two months, they completed the 4-foot-tall wall for $4,200 in materials. The engineered system’s built-in setback and connection points made installation straightforward, even for a first-time builder. Five years later, the wall shows no signs of settling or failure.
What You’re Really Getting:
-
Structural: Engineered for walls up to 20+ feet with proper reinforcement
-
Budget: Reasonable ($ 20-40/sq ft) with good DIY potential
-
Aesthetics: Clean, uniform look with multiple color options
-
Maintenance: Set it and forget it
6. Segmental Retaining Wall (SRW) Blocks
These smaller blocks (typically 30-50 pounds) excel at curves and corners where larger blocks would be impractical. Anchor Diamond Pro, Keystone Country Manor, and ReCon blocks often feature convincing natural stone textures while remaining manageable for DIY installation.
The lighter weight makes them perfect for situations where you can’t get heavy equipment to the site. Plus, they’re much easier on your back during installation.
What You’re Really Getting:
-
Structural: Good for walls up to 6 feet; excellent for curved applications
-
Budget: Affordable ($18-35/sq ft) with DIY-friendly installation
-
Aesthetics: Versatile – many mimic natural stone appearance
-
Maintenance: Practically maintenance-free
7. Modular Concrete Planters
These innovative systems integrate structural support with growing space. Blocks typically measure 2-4 feet wide with 12-18 inch planting depths. You’ll need proper drainage behind blocks and quality soil mix in the planting areas. Root barriers might be necessary to prevent plant damage to the structure.
This is perfect if you want your retaining wall to be a garden feature, not just a structural necessity.
What You’re Really Getting:
-
Structural: Good for walls up to 4 feet; living roots add stability
-
Budget: Moderate ($25-45/sq ft) plus ongoing plant costs
-
Aesthetics: Green, living walls that change with seasons
-
Maintenance: Moderate – you’re now a gardener, not just a homeowner
8. Precast Concrete Panels
When you need to cover a lot of ground quickly, precast panels deliver. These typically measure 6-8 feet wide and up to 12 feet tall, requiring crane placement onto prepared footings. Panels can be smooth, textured, or molded to resemble stone, with sealed joints and proper drainage systems.
This is definitely a professional installation, but the speed and consistency are unmatched for large projects.
What You’re Really Getting:
-
Structural: Excellent for tall walls; engineered for high loads
-
Budget: Moderate to high ($30-60/sq ft) due to equipment needs
-
Aesthetics: Modern, clean lines; very consistent appearance
-
Maintenance: Practically none – designed for decades of service
Timber & Wood Solutions (Warm & Natural)
Wood walls bring warmth and natural beauty to your landscape, and they’re generally the most DIY-friendly option. The trade-off is maintenance and longevity, but done right, they can last decades and look great the entire time.
9. Pressure-Treated Timber Wall
This traditional approach uses 6×6 or 8×8 treated posts and planks in straightforward construction. Set vertical posts 6-8 feet apart in concrete footings, then attach horizontal planks or timbers. Use galvanized hardware and ensure proper drainage with gravel backfill. Apply wood preservative every 3-5 years for longevity.
This is probably the most popular first retaining wall project because it’s straightforward, uses familiar materials, and doesn’t require special tools.
What You’re Really Getting:
-
Structural: Good for walls up to 6 feet with proper bracing
-
Budget: Affordable ($15-30/sq ft) with excellent DIY potential
-
Aesthetics: Warm, natural appearance that weathers gracefully
-
Maintenance: Moderate – plan on restaining every 3-5 years
10. Railroad Tie Retaining Wall
Authentic used railroad ties or new replicas create incredibly sturdy, rustic walls. These massive timbers typically measure 8.5″ x 9″ x 8.5 feet and are secured with rebar pins driven through the ties. Consider environmental concerns with creosote-treated ties, especially near edible plants.
Before starting construction, ensure you have proper demolition waste removal services lined up to handle old landscaping materials and excavated soil efficiently.
What You’re Really Getting:
-
Structural: Excellent stability due to weight; good for walls up to 5 feet
-
Budget: Very affordable ($12-25/sq ft) if ties are available locally
-
Aesthetics: Rustic, industrial character
-
Maintenance: Low – ties are built to last outdoors
11. Cedar or Redwood Plank Wall
Premium cedar or redwood planks offer natural rot resistance and beautiful grain patterns. Use 2×10 or 2×12 planks with pressure-treated posts, creating horizontal or vertical patterns. Include proper drainage and consider clear wood preservative to maintain that gorgeous natural color. This option allows for creative patterns and integrated lighting.
If you have kids who use your backyard, think twice about sharp-edged materials. My daughter managed to find the one pointy corner on our entire wall within five minutes of completion.
What You’re Really Getting:
-
Structural: Good for walls up to 4 feet with quality construction
-
Budget: Higher cost ($25-50/sq ft) due to premium lumber
-
Aesthetics: Beautiful natural wood grain and color
-
Maintenance: Moderate – benefits from annual cleaning and occasional sealing
12. Composite Lumber Wall
Composite lumber made from recycled plastic and wood fibers provides consistent dimensions and weather resistance. Installation follows traditional timber methods but with specialized fasteners. Available in multiple colors and wood grain patterns, it’s heavier than natural wood but won’t rot, split, or require staining.
What You’re Really Getting:
-
Structural: Good for walls up to 4 feet; consistent material properties
-
Budget: Higher upfront cost ($30-55/sq ft) but lower lifetime costs
-
Aesthetics: Consistent wood-like appearance; multiple color options
-
Maintenance: Very low – occasional cleaning only
Modern & Industrial Materials
These are for people who want their retaining wall to make a statement. Contemporary materials emphasize clean lines, maximum structural performance, and that “designed by an architect” look.
13. Poured Concrete Wall
Let me tell you about concrete – it’s like the Swiss Army knife of retaining walls. You can literally make it look like anything you want. My buddy Dave went full modern architect on his and had them stamp it to look like wood grain. Sounds weird, but it actually looks incredible.
The process isn’t exactly a weekend project though. You’re building forms (think of them as molds), placing steel reinforcement bars, and then the concrete truck shows up. Pro tip: concrete trucks are massive and they need access to your site. I watched one neighbor try to wheelbarrow concrete 200 feet uphill. It didn’t end well.
What You’re Really Getting:
-
Structural: This stuff will outlast your house – seriously, it’s bomb-proof
-
Budget: Plan on $35-70 per square foot, and yes, you need professionals
-
Aesthetics: Sky’s the limit – smooth, textured, colored, you name it
-
Maintenance: Set it and forget it for about 50 years
14. Steel Sheet Piling
Steel sheet piling is basically the Hulk of retaining walls. These interlocking steel sheets get driven into the ground with serious equipment – we’re talking pile drivers, not your weekend drill set.
I’ve seen these used along waterfront properties where regular walls would just wash away. The steel sheets lock together like puzzle pieces and can handle crazy loads. One contractor told me they use these for walls that need to hold back entire parking lots.
What You’re Really Getting:
-
Structural: Can handle almost anything you throw at it
-
Budget: Ouch – $50-100 per square foot, but it’s bulletproof
-
Aesthetics: Very industrial – love it or hate it
-
Maintenance: Paint it occasionally or let it rust gracefully
15. Gabion Walls
Gabion walls are like giant rock-filled cages, and they’re actually pretty cool. Think of them as nature meets construction site. You get these wire baskets (they look like oversized shopping carts) and fill them with rocks.
The genius part is they’re flexible. When the ground moves, they move with it instead of cracking like concrete. Plus, water flows right through them, so drainage is never an issue. I helped a friend build one last summer, and it was actually fun – like playing with really expensive Legos.
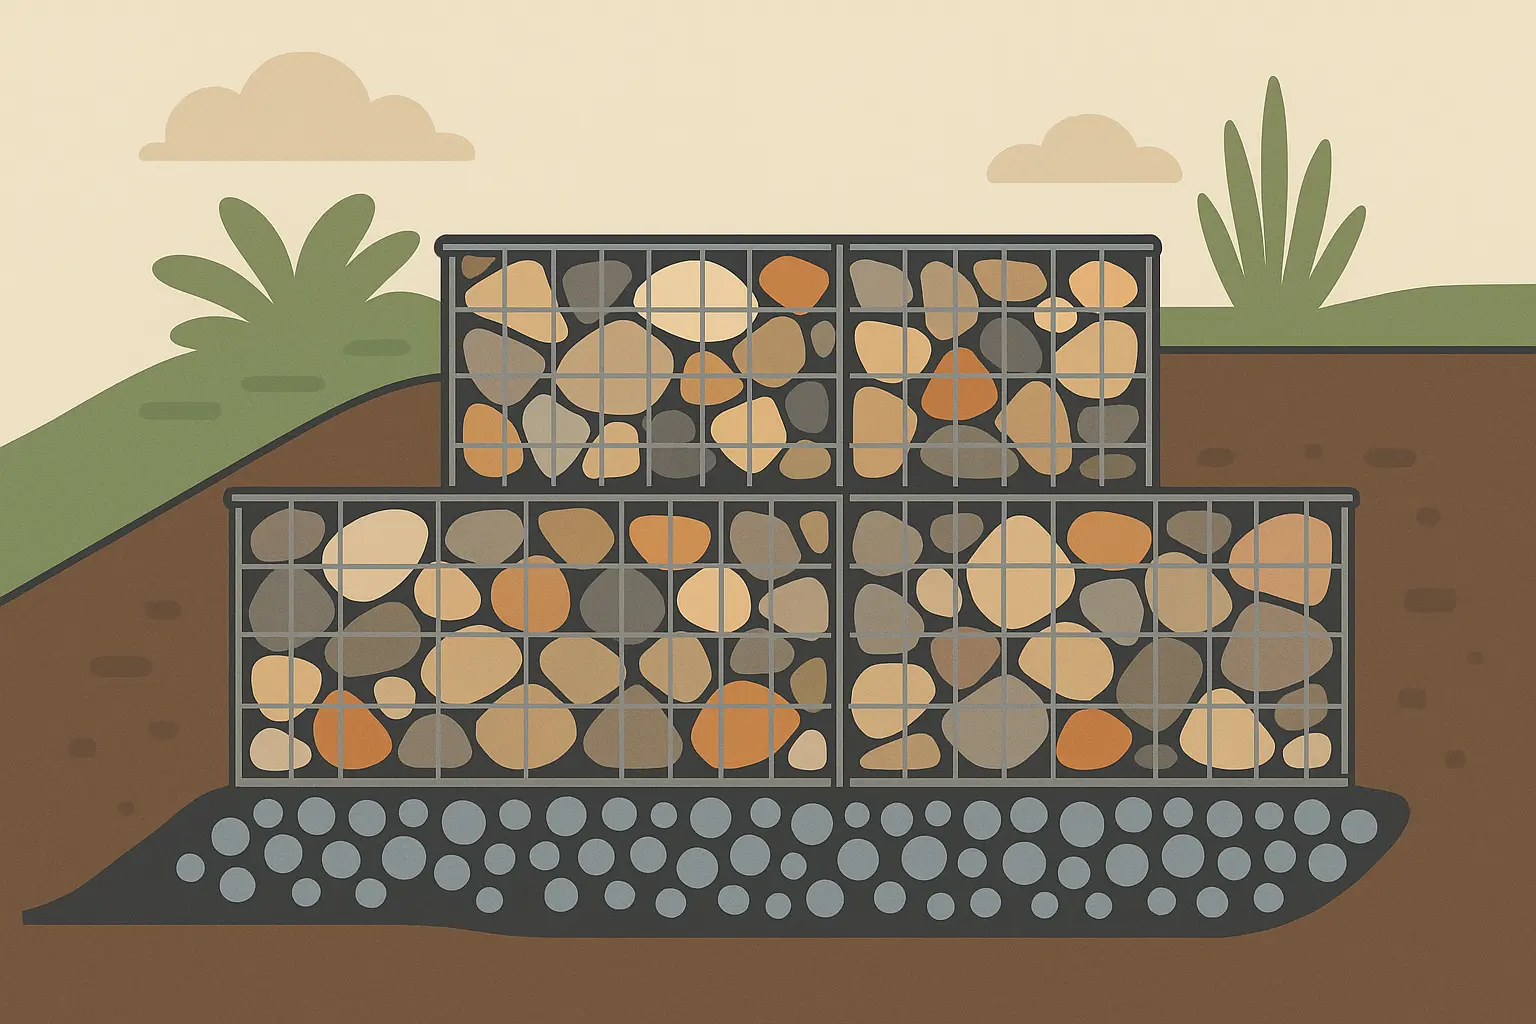
What You’re Really Getting:
-
Structural: Flexible and strong – handles ground movement like a champ
-
Budget: Middle of the road at $20-40 per square foot
-
Aesthetics: Modern industrial meets natural stone
-
Maintenance: Check the wire occasionally, maybe add rocks if they settle
16. Cor-Ten Steel Planters
Cor-Ten steel is that rusty-looking metal that’s actually designed to rust. Sounds crazy, but the rust forms a protective layer that prevents further corrosion. It’s like nature’s own paint job.
I saw an amazing installation where they used Cor-Ten steel planters as retaining walls with built-in gardens. The rust color looks incredible against green plants, and it changes throughout the seasons. Fair warning though – that rust will stain concrete and light-colored surfaces, so plan accordingly.
What You’re Really Getting:
-
Structural: Strong as steel (because it is steel)
-
Budget: Premium pricing at $45-85 per square foot
-
Aesthetics: That distinctive rust color is either perfect or completely wrong for your space
-
Maintenance: Literally designed to rust, so maintenance is minimal
Creative & Artistic Solutions
This is where retaining walls stop being just functional and start becoming art. These options prove that just because you need to hold back dirt doesn’t mean it has to be boring.
17. Living Retaining Wall (Green Wall)
Living walls are like having a vertical garden that also happens to hold back your hillside. The engineering is pretty sophisticated – you need systems that support both soil and plants while managing water and root growth.
I visited a house in Seattle where they built a living wall using modular planting systems. Two years later, it looked like something from a fairy tale – completely covered in plants, changing colors with the seasons, and attracting butterflies and hummingbirds. The homeowner said her heating bills actually went down because the wall provided extra insulation.
What You’re Really Getting:
-
Structural: Good with proper engineering, plus roots add stability
-
Budget: $30-65 per square foot, plus ongoing plant costs
-
Aesthetics: Changes with seasons, attracts wildlife, looks amazing
-
Maintenance: High – you’re now a gardener, not just a homeowner
18. Recycled Material Wall
Get creative with recycled materials – tire walls filled with compacted soil, bottle walls incorporated into concrete structures, or reclaimed brick and stone from demolished buildings. Each approach has unique construction requirements but offers environmentally conscious solutions with distinctive character.
For projects involving recycled materials, professional scrap metal pick up services can help you source and prepare materials while ensuring proper disposal of unusable components.
Creative Success Story: An artist in Portland created a stunning 200-foot retaining wall using reclaimed wine bottles set in concrete. The bottles’ bottoms face outward, creating a mosaic of greens and blues that catches sunlight beautifully. The project cost $18 per square foot in materials and took six months of weekend work, but created a neighborhood landmark that increased property values throughout the block.
What You’re Really Getting:
-
Structural: Variable – depends on materials and construction method
-
Budget: Very low to moderate ($10-35/sq ft) depending on material availability
-
Aesthetics: Unique, environmentally conscious appearance
-
Maintenance: Variable – depends on materials used
19. Artistic Stone Mosaic Wall
This is for people who want their retaining wall to be a piece of art. You’re combining different stones – fieldstone, river rock, slate, maybe some colorful local stones – into patterns or designs.
I saw one where the homeowner created a wave pattern using different colored stones. It took him two summers of weekend work, but the result was museum-quality. His secret was laying out the entire pattern on the ground first, taking photos, then building section by section.
What You’re Really Getting:
-
Structural: As good as any stone wall if built properly
-
Budget: Expensive ($50-100/sq ft) because you’re paying for artistry
-
Aesthetics: Custom artwork that’s uniquely yours
-
Maintenance: Same as any stone wall – minimal
20. Integrated Seating Wall
Why not make your retaining wall do double duty? Seating walls are typically 18-24 inches tall and wide – perfect for perching with a morning coffee or evening beer.
The trick is getting the proportions right. Too narrow and it’s uncomfortable. Too wide and it looks weird. I built mine 20 inches tall and 18 inches wide, which works perfectly for adults and kids. Added a few outdoor cushions and it became everyone’s favorite spot.
What You’re Really Getting:
-
Structural: Lower height reduces structural demands
-
Budget: Moderate ($25-50/sq ft) depending on seating features
-
Aesthetics: Creates outdoor living space, not just function
-
Maintenance: Low to moderate depending on seating materials
Budget-Friendly DIY Options
Let’s be honest – not everyone has $10,000 to spend on a retaining wall. These options prove you can solve your slope problems without breaking the bank.
|
Material |
Real Cost |
DIY Reality Check |
How Long It’ll Last |
Best For |
|---|---|---|---|---|
|
Sandbag |
$8-18/sq ft |
Easy if you don’t mind getting dirty |
5-15 years |
Emergency fixes, temporary solutions |
|
Concrete Block |
$12-25/sq ft |
Doable with some muscle and patience |
50+ years |
Permanent fixes on a budget |
|
Stacked Stone |
$15-30/sq ft |
Fun if you like puzzles |
25-50 years |
Pretty solutions for shorter walls |
|
Wooden Pallets |
$5-15/sq ft |
Super easy, great starter project |
3-8 years |
Temporary, experimental, or artistic |
|
Earthbag |
$10-20/sq ft |
Meditative but labor-intensive |
20-40 years |
Artistic curved walls |
21. Concrete Block Wall
Standard concrete blocks are the Honda Civic of retaining walls – not flashy, but reliable and affordable. These 8x8x16 inch blocks are available everywhere and designed to stack together with rebar reinforcement.
The secret sauce is in the foundation and the rebar. You need a proper concrete footing below the frost line (ask your local building department how deep that is), and steel rebar running vertically through the hollow cores. Fill those cores with concrete and you’ve got a wall that’ll outlast your mortgage.
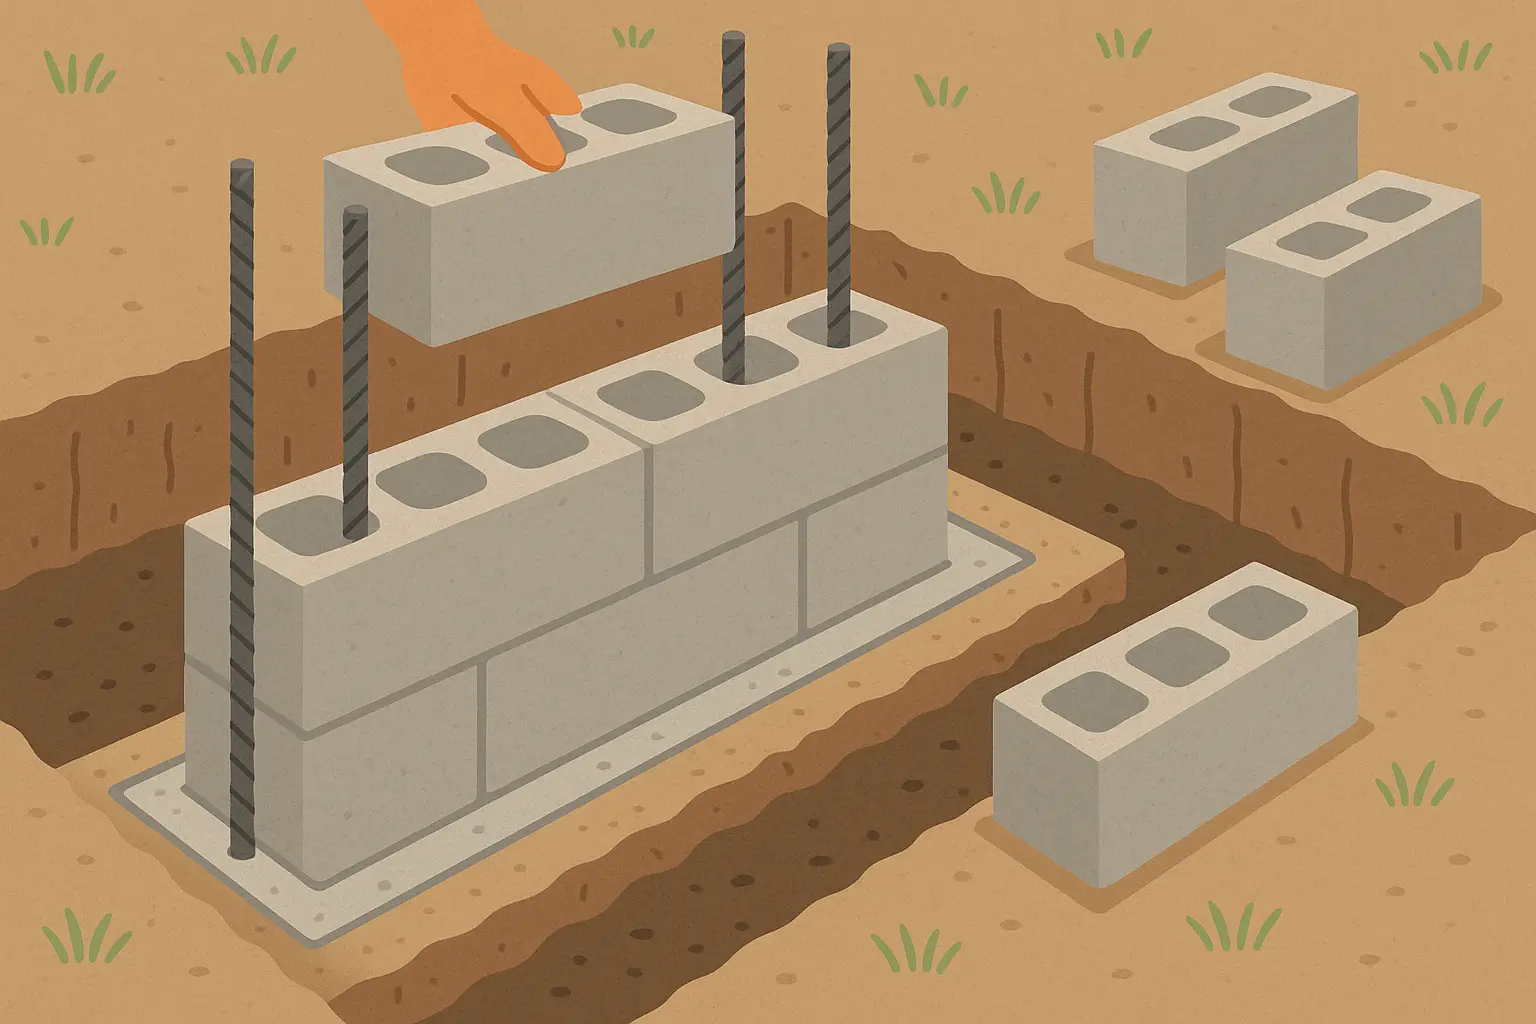
What You’re Really Getting:
-
Structural: Incredibly strong when built right – can handle tall walls
-
Budget: Hard to beat at $12-25 per square foot
-
Aesthetics: Basic, but you can dress it up
-
Maintenance: Set it and forget it
22. Sandbag Wall
Don’t laugh – sandbag walls can be incredibly effective, especially for emergency situations or temporary fixes. You use polypropylene or burlap sandbags filled with a soil-cement mixture (about 10% cement, 90% soil).
I helped a friend build one after a washout threatened his driveway. We knocked it out in a weekend using local soil and a few bags of cement. Three years later, it’s still holding strong, though we did cover it with stucco to protect the bags from UV and weather.
What You’re Really Getting:
-
Structural: Surprisingly strong for emergency or temporary use
-
Budget: Can’t get much cheaper at $8-18 per square foot
-
Aesthetics: Utilitarian unless you cover it
-
Maintenance: Bags need protection from sun and weather
23. Stacked Stone Wall (Dry-Laid)
This is probably the most satisfying DIY project you’ll ever tackle. No mortar, no concrete – just you, some stones, and gravity. It’s like doing a massive 3D puzzle that actually serves a purpose.
The trick is starting with the biggest, flattest stones at the bottom and working your way up with progressively smaller stones. Each stone should touch the two stones below it, and you want to lean the whole wall back slightly for stability.
What You’re Really Getting:
-
Structural: Surprisingly strong up to 3-4 feet if built right
-
Budget: Very affordable ($15-30/sq ft) if stone is locally available
-
Aesthetics: Natural, rustic appearance
-
Maintenance: Occasional stone repositioning
24. Wooden Pallet Wall
Use only heat-treated (HT) pallets to avoid chemical contamination. Stack pallets and fill with soil, gravel, or concrete for weight, securing with rebar pins or brackets. Can be left natural, stained, or painted. Best for temporary applications or decorative short walls.
Just remember – this is a temporary solution. Pallets aren’t engineered for structural use, and they’ll eventually rot or fall apart. But for a quick fix or an experimental project, they’re hard to beat on price.
What You’re Really Getting:
-
Structural: Limited to short walls and temporary use
-
Budget: Almost free ($5-15/sq ft) if you find free pallets
-
Aesthetics: Rustic, upcycled appearance
-
Maintenance: Plan on replacing them in 3-5 years
25. Earthbag (Superadobe) Wall
This technique uses long tubes filled with moistened soil-cement mixture, laid in courses like giant sausages, with barbed wire between layers. Can create curved, dome-like structures with excellent compressive strength. Requires proper soil mix (5-10% cement) and protection from elements but offers incredible artistic possibilities.
The process is meditative but labor-intensive. You’re essentially hand-sculpting your wall one bag at a time.
What You’re Really Getting:
-
Structural: Excellent compressive strength, great for curves
-
Budget: Very affordable ($10-20/sq ft) using local soil
-
Aesthetics: Organic, flowing shapes that look natural
-
Maintenance: Needs weather protection, but otherwise low maintenance
Here’s How Well These Actually Work
Okay, let’s cut through all the technical jargon and talk about what actually works in real life. After helping neighbors with dozens of these projects and making my own fair share of mistakes, here’s what I’ve learned about which walls actually deliver.
|
What You Really Want |
Your Best Bets |
Why They Work |
What You’ll Actually Pay |
|---|---|---|---|
|
Something That Won’t Fall Down |
Poured Concrete, Steel Piling, Good Interlocking Blocks |
Engineers designed them, not weekend warriors |
$35-100/sq ft |
|
Won’t Break the Bank |
Sandbags, Basic Concrete Block, Stacked Stone |
Simple materials, elbow grease |
$8-30/sq ft |
|
Set It and Forget It |
Interlocking Blocks, Poured Concrete, Cor-Ten Steel |
Built to last decades without babysitting |
$20-85/sq ft |
|
I Can Actually Build This |
Timber, Concrete Block, Stacked Stone |
No special skills or equipment needed |
$12-50/sq ft |
|
Looks Amazing |
Poured Concrete, Natural Stone, Artistic Stuff |
Sky’s the limit on customization |
$25-100/sq ft |
What Actually Works Long-Term
Here’s the truth: poured concrete, steel sheet piling, and quality interlocking blocks are the workhorses. They’re not always the prettiest or cheapest, but they’re the ones still standing straight after 20 years of freeze-thaw cycles and heavy rains.
I’ve seen too many “creative” solutions that looked great in year one and terrible by year five. Sometimes boring engineering beats artistic vision.
Real Budget Champions
If money’s tight, don’t despair. Sandbag walls, basic concrete blocks, and dry-stacked stone can solve your problems for $8-30 per square foot. The key is being realistic about what you’re getting and planning for eventual replacement or upgrades.
My rule of thumb: if it’s a temporary fix to stop immediate erosion, go cheap. If it’s a permanent landscape feature, spend the money upfront.
The “Set It and Forget It” Winners
Interlocking concrete blocks, poured concrete, and Cor-Ten steel are the champions here. Build them right once, and they’ll outlast your kids’ college years without needing attention.
I wish I’d understood this principle on my first wall. The $500 I “saved” on a timber wall cost me $2,000 in replacement costs five years later.
Best DIY Options (For Real People)
Timber walls, concrete blocks, and stacked stone are genuinely DIY-friendly if you’re reasonably handy and don’t mind some physical work. The key is being honest about your skill level and available time.
Pro tip: Start with a small section first. Better to discover you hate mixing concrete on a 10-foot test wall than a 100-foot commitment.
When You Want Something Beautiful
Poured concrete, natural stone, and artistic installations can create stunning results, but you’ll pay for that beauty. Budget accordingly and remember that “custom” always costs more than “standard.”
Sloped Backyard Reality Check
Terraced flagstone, segmental blocks, and timber work great for slopes, but here’s what nobody tells you: steeper slopes cost exponentially more. That 30-degree slope might need twice the engineering of a 15-degree slope.
Small Wall Solutions
For walls under 3 feet, you have tons of options. Dry-stacked stone, wooden planters, and short timber walls all work great and won’t require permits in most areas. This is where you can get creative without breaking the bank.
How JiffyJunk Can Support Your Retaining Wall Project
Let me tell you about the part of retaining wall projects that nobody warns you about: the massive amount of stuff you’ll need to get rid of. I learned this the hard way when my “simple” wall project turned my driveway into a construction debris obstacle course for three months.
Before You Start Digging
That slope you’re planning to tame probably has years of accumulated junk, old landscaping, maybe even remnants of previous failed attempts at erosion control. JiffyJunk’s pre-construction cleanup gets your site ready to work, which is way more important than you think.
I watched one neighbor spend two weekends just clearing old shrubs and random junk before he could even start measuring for his wall. Meanwhile, JiffyJunk cleared a similar site in about four hours.
The Construction Debris Reality
Here’s what you’ll actually generate during construction: mountains of excavated soil (way more than you expect), broken concrete from old walkways or previous walls, packaging materials from every delivery (blocks come wrapped in plastic, tools come in boxes), and all the “oops” materials from cutting and fitting.
I made six trips to the dump during my wall project, spending $40 each time plus gas and a full Saturday morning. JiffyJunk would have cost less and saved me from becoming the neighborhood’s least popular person (concrete dust in a pickup truck gets everywhere).
For bigger projects, their specialized concrete demolition services handle both old wall removal and proper disposal of concrete waste. Trust me, jackhammering old concrete is terrible work, and hauling the pieces away is even worse.
They Actually Sort Your Stuff
Here’s something cool: JiffyJunk doesn’t just dump everything in a lan dfill. They sort through your debris, recycle what they can, and donate reusable materials. That old brick from your demolished planter might end up in someone else’s garden project.
This matters more than you might think. I felt terrible throwing away perfectly good stone just because I had too much. Knowing it might get reused makes the whole process feel less wasteful.
The Final Cleanup
After your wall is done, you’ll have this weird mix of construction dust, scattered gravel, random tools, and that general “construction site” look that makes your beautiful new wall look unfinished.
JiffyJunk’s post-project cleanup includes sweeping, cleaning, and making your property look like professionals worked there instead of a tornado. This is especially important if you’re selling your house soon – buyers notice details like clean job sites.
Actually Cheaper Than DIY
With pricing starting around $150, JiffyJunk often costs less than doing it yourself when you factor in truck rental ($75/day), gas ($40), dump fees ($40+ per trip), and the value of your weekend time. Plus, they have the right equipment and know where everything should go.
Ready to tackle your retaining wall project the smart way? Call JiffyJunk at (844) 543-3966 or check out www.jiffyjunk.com to get your site ready for success.
Final Thoughts
After five years of building, fixing, and helping neighbors with retaining walls, here’s what I want you to remember: the best retaining wall is the one that actually gets built and works for your specific situation.
Don’t get paralyzed by all the options. Start by figuring out what you absolutely need (stop erosion? create level space? improve drainage?), then work backwards to materials and methods that fit your budget and skill level.
The Non-Negotiables:
Drainage is everything. I can’t stress this enough – more walls fail from water problems than structural issues. Don’t skip the gravel backfill, don’t forget the drain pipe, and don’t assume “it doesn’t rain that much here.”
Check your local codes before you dig. Walls over 4 feet usually need permits and engineering. Yes, it’s a hassle, but it’s cheaper than rebuilding a failed wall or dealing with liability issues.
My Personal Advice:
If this is your first retaining wall, start small. Build a 20-foot section before committing to 200 feet. You’ll learn what works, what doesn’t, and whether you actually enjoy this kind of project.
Consider hiring professionals for the foundation and drainage, then doing the visible work yourself. The foundation determines whether your wall lasts 5 years or 50 years, but nobody sees it once it’s buried.
Budget Reality:
Good walls aren’t cheap, and cheap walls usually aren’t good. But you don’t need to spend $50,000 either. A well-built concrete block wall at $20 per square foot will outperform a poorly built stone wall at $60 per square foot.
The Long View:
Think about maintenance from day one. That gorgeous timber wall looks amazing now, but are you prepared to restain it every few years? That natural stone wall costs more upfront but might outlast your grandchildren.
Your retaining wall is an investment in your property and your peace of mind. Every time it rains heavily and your wall is still standing straight while your neighbor’s is developing that telltale lean, you’ll remember why you took the time to do it right.
Whether you’re building a simple stacked stone border or an engineered concrete masterpiece, the principles are the same: proper drainage, solid foundation, appropriate materials for the job, and realistic expectations about cost and complexity.
Now stop reading about retaining walls and go build one. Your hillside isn’t getting any more stable while you’re researching.