25 Stunning Vaulted Ceiling Ideas That Will Transform Your Home Into a Showstopper
Last March, I walked into Sarah’s house expecting the same cramped living room I’d known for years. Instead, I literally stopped mid-sentence and stared at the ceiling. She’d torn out that popcorn disaster and opened it all the way up to the rafters with exposed wooden beams. Suddenly her couch didn’t look like it was swallowing the room anymore – the whole space felt like it could breathe again.
You know how some rooms just make you stop and go “wow” the second you walk in? That’s usually a vaulted ceiling doing its magic. Architectural Digest reports that these elevated spaces provide “generous space overhead” and “a sense of airy grandeur” that can transform cramped rooms into special, large-feeling areas. After talking to contractors and seeing dozens of these transformations myself, I’ve learned that vaulted ceilings offer one of the most dramatic ways to completely flip your living space’s personality.
This guide breaks down 25 ways to make your vaulted ceiling the star of the show, covering everything from budget-friendly paint tricks to major architectural features. From $1,000 paint jobs to $25,000+ renovations, you’ll find practical solutions that deliver maximum visual punch while dealing with real-world challenges like maintenance, lighting, and energy costs.
Table of Contents
-
Key Considerations Before Starting Your Vaulted Ceiling Project
-
Lighting & Illumination Solutions (Ideas 1-5)
-
Architectural Features That Make a Statement (Ideas 6-10)
-
Color & Paint Treatments for Maximum Impact (Ideas 11-15)
-
Modern & Contemporary Design Approaches (Ideas 16-20)
-
Traditional & Rustic Style Options (Ideas 21-25)
-
Performance Analysis: How Each Idea Measures Up
-
When Renovation Cleanup Becomes Overwhelming
-
Final Thoughts
TL;DR
-
Vaulted ceilings need careful planning for structural stuff – costs range from $1,000 for paint to $25,000+ for major changes
-
Lighting solutions like statement chandeliers and skylights give you the biggest wow factor, while recessed LEDs handle the practical stuff
-
Exposed beams and coffered patterns create serious drama but need professional installation and ongoing upkeep
-
Paint treatments deliver amazing transformations without breaking the bank
-
Modern designs focus on clean lines and smart home features, traditional styles emphasize crown molding and rustic materials
-
Think about maintenance access, energy costs, and echo issues when picking your approach
-
Professional junk removal becomes essential for managing all the construction mess
Key Considerations Before Starting Your Vaulted Ceiling Project
Look, I’ve seen too many homeowners jump into these projects thinking it’s just about making the ceiling taller. Then reality hits – structural issues, budget surprises, and design challenges that could’ve been avoided with proper planning. Here’s what you need to know before you start swinging sledgehammers.
Structural Requirements You Can’t Ignore
Your house’s bones determine what’s actually possible. Load-bearing stuff tops the list – those ceiling joists aren’t just hanging out up there for decoration. They’re holding up your second floor, and removing them affects your home’s structural integrity in ways that aren’t obvious until things start sagging.
I learned this lesson helping my neighbor Dave plan his vaulted ceiling project. What looked like simple ceiling removal turned into a full engineering project once we discovered those joists were supporting the entire second floor. The $1,500 we spent on engineering consultation saved us from a potential $15,000 disaster when the engineer identified a critical beam that our contractor was planning to yank out.
Building permits and inspections aren’t optional either. Most places require permits for vaulted ceiling work, especially when you’re messing with structural elements or adding skylights. The approval process takes time, but it keeps you from having bigger headaches down the road.
Cost Factors That Add Up Fast
Here’s what nobody tells you upfront – vaulted ceiling projects affect way more than just the ceiling. A typical 20×20 room conversion runs $18,000-$25,000, but that’s just the starting point. Your HVAC system wasn’t designed for all that extra air volume you’re creating, so modifications become necessary.
A contractor buddy explained how these projects create a domino effect. You can’t just focus on the ceiling – you’re potentially messing with electrical systems, insulation, heating and cooling. Everything’s connected, which is why costs spiral faster than people expect.
Insulation gets tricky too. Those angled surfaces need specialized materials and installation techniques that cost more than regular flat-ceiling insulation. Plus, proper insulation becomes crucial for energy efficiency – nobody wants to heat a cathedral.
|
Project Component |
Low-End Cost |
Mid-Range Cost |
High-End Cost |
|---|---|---|---|
|
Structural Assessment |
$500 |
$1,000 |
$2,000 |
|
Permits & Inspections |
$300 |
$800 |
$1,500 |
|
Basic Vault Creation |
$8,000 |
$15,000 |
$25,000 |
|
HVAC Modifications |
$2,000 |
$4,000 |
$8,000 |
|
Insulation Upgrade |
$1,500 |
$3,000 |
$5,000 |
|
Electrical Work |
$1,000 |
$2,500 |
$5,000 |
Design Impact on Your Living Space
Room proportions flip completely when you vault a ceiling. That sectional that looked perfectly sized before might suddenly look like dollhouse furniture. Natural light gets better, but you need to think about how the extra height affects the room’s overall vibe.
Sound behaves differently too. My cousin discovered this after vaulting their dining room – conversations became weird and echoey until they added area rugs and upholstered furniture to soak up the sound.
Here’s a real example: the Johnson family’s 14×16 living room felt cramped with 8-foot ceilings. After vaulting to 14 feet at the peak, their furniture suddenly looked tiny. They needed a bigger area rug, taller bookcases, and artwork scaled to the new space. That “minor” furniture adjustment added $3,000 they hadn’t budgeted for.
Maintenance Considerations for the Long Haul
Getting up there becomes a real pain. Cleaning, changing bulbs, fixing stuff – everything requires special equipment or calling professionals. I’ve watched friends struggle with simple tasks like swapping LED bulbs in their gorgeous vaulted spaces. What used to be a five-minute job now means dragging out extension ladders or calling someone.
Long-term upkeep goes beyond basic maintenance. Paint touch-ups, beam care, fixture repairs – everything becomes more complex and expensive when you’re working 15 feet off the ground. Think about how these factors fit your lifestyle and budget over the years.
Lighting & Illumination Solutions
Getting the lighting right makes the difference between a ceiling that feels dramatic and one that feels like a dark cave. I’ve seen beautiful vaulted ceilings completely ruined by bad lighting choices. These five approaches handle everything from statement pieces to practical illumination, each designed to work with the unique challenges of high ceilings.
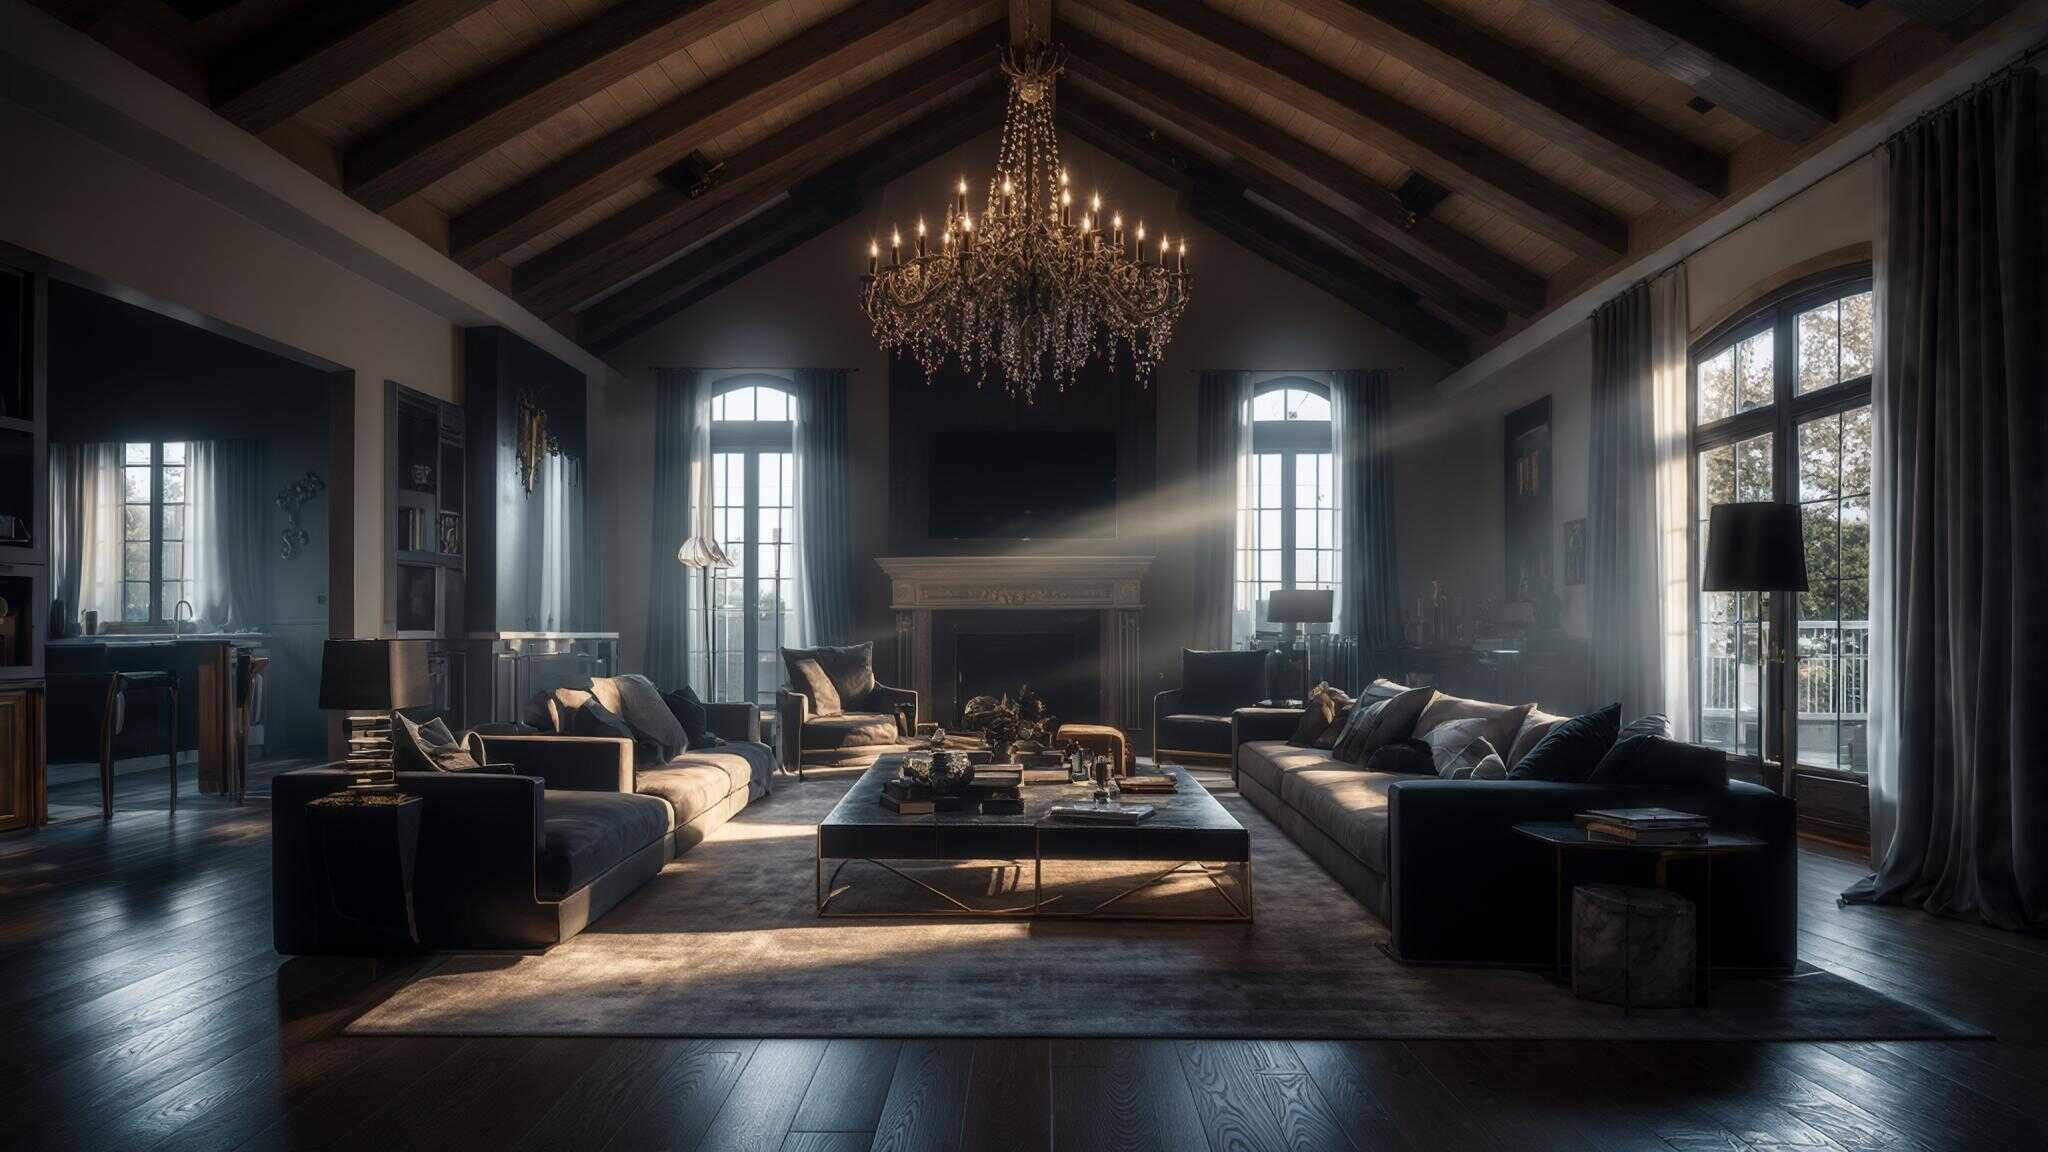
1. Statement Chandeliers That Command Attention
Big crystal chandeliers, modern geometric fixtures, rustic wagon wheel designs – these create instant focal points that make people look up the second they walk in. Position them 7-8 feet above floor level so they don’t overwhelm the room or create head-bonking hazards.
The key is matching the fixture to your ceiling’s proportions. A massive crystal chandelier works in a grand cathedral ceiling, while sleek geometric designs suit contemporary vaulted spaces. Get the scale wrong and it either disappears or dominates everything else.
Installation needs serious reinforcement. I helped install a 150-pound chandelier in my sister’s vaulted living room, and the electrical box needed complete replacement with heavy-duty mounting rated for way more than the fixture’s actual weight. Don’t mess around with this – hire professionals who know what they’re doing.
2. Recessed LED Track Systems for Flexible Illumination
Adjustable LED tracks along ceiling peaks give you lighting control that actually works. Install 3000K warm white LEDs spaced 4-6 feet apart for even coverage. Dimmer controls let you adjust for different activities – bright for cleaning, dim for movie nights.
Track systems work great in modern vaulted spaces where clean lines matter. The adjustable heads let you point light exactly where you need it, whether that’s highlighting artwork or providing reading light. As your furniture moves around or seasons change, you can redirect the light.
The flexibility factor is huge. Instead of being stuck with fixed lighting that might not work with your evolving needs, you can adapt as your space changes. This makes track systems a smart long-term investment.
3. Skylights Integration for Natural Light Maximization
Fixed skylights, operable windows, tubular skylights – they all bring natural light into vaulted spaces effectively. Install along the highest point to maximize light while keeping the structure sound. Skylights cut your daytime electricity use and create those amazing shifting light patterns throughout the day.
Operable skylights add natural ventilation, which helps manage all that extra air volume in vaulted spaces. Tubular skylights work well in smaller areas where full-size skylights aren’t practical or affordable.
The Martinez family put three 2×4 foot skylights along their kitchen’s vaulted peak. The natural light eliminated overhead lighting needs during most daylight hours, cutting their electricity bill by about $200 yearly. Plus, they got these beautiful moving light patterns on their white shiplap ceiling that change with the seasons – something they never expected but absolutely love.
4. Pendant Light Clusters for Visual Interest
Multiple pendants at varying heights (6-8 feet from floor) create layered lighting that adds depth to vaulted spaces. Use odd numbers – 3, 5, or 7 fixtures – for better visual balance. This works especially well over dining areas or kitchen islands.
Varying the heights keeps the lighting from looking flat or boring. Mix different pendant styles within the same finish family to add personality while keeping things cohesive. I’ve seen this technique work beautifully in open-concept homes where the vaulted ceiling spans multiple areas.
The clustering effect draws your eye up while providing practical task lighting below. This dual function makes pendant clusters efficient for vaulted spaces where you need both ambiance and functionality.
5. Accent Wall Lighting for Layered Illumination
LED strips behind floating shelves, wall sconces at mid-height, uplighting that highlights architectural features – these create ambiance without competing with overhead fixtures. Install at 8-10 foot height for effective layered lighting.
This approach works great for showcasing exposed beams, stone accent walls, or other architectural details. The indirect lighting creates mood while the uplighting emphasizes the ceiling’s height and angles. Accent lighting often provides that finishing touch that makes vaulted spaces feel complete.
Multiple light sources at different levels prevent the harsh shadows that single-source lighting creates in high-ceiling spaces. The layered approach adds depth and visual interest that enhances the architectural drama.
Architectural Features That Make a Statement
Bold architectural elements transform vaulted ceilings into stunning focal points that define entire rooms. I’ve watched how these features can completely flip a space’s personality – turning boring rooms into places that make people actually pause and look up. These approaches range from rustic exposed beams to fancy coffered patterns. Fair warning: they require different levels of cash and skill, but man, do they deliver that “wow factor” that makes your home feel special.
6. Exposed Wooden Beams for Rustic Elegance
Real reclaimed wood beams or good-quality fake ones add instant character that you just can’t get any other way. Cedar, oak, and pine are the crowd favorites. Size matters here – you want 6×8 inches for regular rooms, 8×10 inches if you’ve got a big space. Otherwise it looks like you stuck popsicle sticks on your ceiling.
I’ve messed around with both reclaimed and new wood beams. Reclaimed stuff has this amazing story written all over it – nail holes, weathering, character marks that took decades to develop. But here’s the catch: you’ve got to check every inch for rot, bugs, and whether it’ll actually hold up. New beams are predictable and clean, but they look… well, new.
Fake beams are the budget-friendly compromise. Modern ones are crazy realistic – I’ve fooled contractors with good polyurethane beams. Plus, they weigh way less, which your ceiling will thank you for.
7. Coffered Ceiling Patterns for Sophisticated Depth
Think fancy geometric patterns that make your ceiling look like it belongs in a mansion. Traditional square sections, rectangular designs, even octagonal patterns if you’re feeling fancy. Install them 12-18 inches deep with crown molding details, or it just looks like you glued boxes to your ceiling.
Coffered ceilings scream “I have my life together” in the best way. Perfect for dining rooms or home offices where you want to impress. I’ve noticed people automatically assume quality craftsmanship when they see well-done coffers.
But here’s the reality check: this isn’t a weekend DIY project. Each section has to line up perfectly, and the molding needs to be consistent throughout. One wonky angle and the whole thing looks amateur.
8. Shiplap or Tongue-and-Groove Paneling for Textural Appeal
Horizontal or vertical planking using 1×6 or 1×8 boards creates that textured look everyone’s obsessing over. White-painted shiplap gives you that farmhouse vibe, while natural wood goes full rustic cabin.
Installation trick: plan your board layout before you start nailing. I’ve seen too many DIY disasters where boards don’t align with ceiling angles, leaving weird triangular pieces that scream “amateur hour.”
Direction matters more than you’d think. Horizontal makes your ceiling look wider, vertical draws your eye up. Pick based on whether you want to emphasize width or height.
9. Stone or Brick Accent Walls for Dramatic Impact
Natural stone veneer, exposed brick, cultured stone panels – these create that jaw-dropping focal wall that follows your vault’s angle. But heads up: this stuff is HEAVY. Make sure your structure can handle it, or you’ll have bigger problems than design decisions.
I consulted on a project where they skipped the structural check. Six months later, cracks started appearing. $8,000 later, they had proper support AND a stone wall.
The cool thing about stone is how it changes throughout the day. Morning light hits it differently than evening light, so you get this constantly shifting texture that keeps the space interesting.
10. Decorative Trusses for Structural Beauty
Steel, wood, or composite trusses add that architectural “I meant to do that” look. King post, queen post, hammer beam – different styles for different vibes. They can actually hold weight or just look pretty.
Steel trusses work great for that industrial loft look, wood trusses complement rustic styles. Composite gives you durability without the maintenance headaches of real wood.
Scale is everything here. Too big and they overwhelm your space. Too small and they look like an afterthought. This is where professional design help actually pays for itself.
Color & Paint Treatments for Maximum Impact
Paint is your best friend when you want drama without breaking the bank. I’ve seen homeowners create absolutely stunning transformations with nothing but carefully chosen colors and some elbow grease. These approaches use color psychology and painting tricks to make your vaulted ceiling the star of the show without requiring a construction loan.
11. Gradient Color Schemes for Visual Flow
Light to dark transitions create this smooth flow that makes your ceiling look like it goes on forever. Start light at the peak, gradually get deeper toward the walls. It’s like a sunset on your ceiling, but way more sophisticated.
The blending is where most people mess up. You’ve got to work fast while the paint’s still wet, and practice on scrap first. Trust me – your ceiling is not the place to learn this technique.
Professional painters usually nail this better than DIY attempts, but you can succeed with proper prep and good blending tools. The investment in quality brushes pays off in the final look.
12. Accent Peak Highlighting for Focal Drama
Paint just the highest point in a bold color – navy, deep green, charcoal gray against neutral walls. It’s like putting a spotlight on your ceiling’s best feature.
Test your colors in different lighting first. That gorgeous navy might look like a bruise under your LED lights. I learned this the hard way in my own dining room.
This technique works especially well in modern spaces where bold color choices enhance contemporary design elements. The dramatic contrast creates visual weight at the ceiling’s highest point, balancing the room’s proportions.
13. Metallic Finish Applications for Luxury Touches
A little copper, silver, or gold on beam details or coffered sections adds that expensive look without the expensive price tag. The key word is “little” – too much metallic and you’ve got a disco ball situation.
The reflective properties amplify available light, making vaulted spaces feel brighter and more open. Strategic placement on architectural details draws attention to craftsmanship while adding glamour.
Metallic finishes are tricky to apply evenly. Unless you’re really confident with a brush, hire someone who knows what they’re doing. Bad metallic work looks worse than no metallic work.
14. Two-Tone Wall Treatments for Balanced Contrast
Paint your lower walls one color, vault sections another. White/gray, beige/navy, cream/sage green – classic combos that work. This creates zones without making your ceiling feel overwhelming.
Two-tone treatments work great in rooms where you want to emphasize the vaulted ceiling without making it dominate everything. The technique provides visual grounding while celebrating the architectural feature.
Interior designer Sarah Chen nailed this in a client’s bedroom – cream below, sage green above. The $800 paint job looked like a $5,000 renovation, and the clients said they slept better in their more peaceful space.
15. Textured Paint Techniques for Surface Interest
Venetian plaster, color washing, sponge techniques – these hide imperfections while adding character. Great for rustic or Mediterranean looks where perfect smooth walls would look wrong anyway.
Textured finishes catch light differently throughout the day, so your ceiling basically changes personality from morning to night. But they’re harder to paint over later, so commit to the look.
These techniques require practice and skill for professional results. Consider hiring experienced painters for complex textures, especially on large vaulted surfaces where consistency matters.
Modern & Contemporary Design Approaches
Contemporary vaulted ceilings are all about clean lines, smart tech, and materials that look like they came from the future. I’ve noticed modern approaches focus as much on function as looks – everything has to earn its place in the design. These approaches appeal to homeowners who want their house to feel current and forward-thinking.
16. Minimalist Clean Lines for Sophisticated Simplicity
Geometric shapes, monochromatic colors, zero clutter. The vaulted ceiling does all the talking because there’s nothing else competing for attention. Hidden LED systems keep the clean look while providing necessary light.
Here’s the catch: minimalist looks easy but requires perfect execution. Every seam, joint, and transition has to be flawless because there’s nowhere to hide mistakes. This precision demands skilled craftsmanship and quality materials.
The beauty lies in the purity of form rather than decorative stuff. When done right, minimalist vaulted ceilings create sophisticated spaces that feel timeless.
17. Industrial Steel and Concrete Elements
Exposed steel beams, concrete panels, raw materials – full urban loft vibes. But balance is key. Too much hard stuff and you’re living in a warehouse. Add warm lighting and soft furniture to make it livable.
Industrial elements celebrate the building’s structural bones rather than hiding them. This honest approach appeals to homeowners who appreciate architectural authenticity and want their vaulted ceiling to reflect the building’s true nature.
The raw materials work especially well in converted warehouses or modern new construction where the industrial aesthetic fits naturally.
18. Smart Home Integration Features
Automated lighting, voice controls, smart skylights that adjust themselves – your ceiling becomes part of your smart home system. The convenience factor is huge when you can’t reach switches 15 feet up.
Smart home features need proper planning during electrical rough-in. Work with qualified techs to ensure everything integrates properly. The wiring for smart systems is more complex than regular electrical work.
Programmable LED strips can change colors and intensity throughout the day, while automated skylights adjust based on weather and time. Voice control eliminates the need for ladders to reach high fixtures.
19. Floor-to-Ceiling Windows for Maximum Light
Massive glass panels that emphasize your ceiling height while flooding the space with light. Position windows to take advantage of views while maintaining privacy and energy efficiency.
Just remember – more glass means higher energy bills if you don’t spec high-performance glazing. The increased glass area can significantly impact heating and cooling costs in large vaulted spaces.
The dramatic height creates stunning visual impact while establishing seamless indoor-outdoor connections. This works particularly well in contemporary homes where connecting to outdoor spaces is a design priority.
20. Floating Architectural Elements
Suspended panels, floating shelves that don’t touch the ceiling – they add function while keeping clean lines. Use cable suspension or hidden brackets to achieve the floating effect.
Engineering calculations matter for suspended elements. Make sure you have proper load distribution and safety factors for all floating installations. The structural requirements can be complex, especially with dynamic loads.
When installing floating elements, proper demolition waste removal planning helps manage debris from mounting system installation.
Traditional & Rustic Style Options
Classic approaches never go out of style because they connect with architectural traditions that have worked for centuries. I’ve found that traditional vaulted ceiling designs often age the best – they still look good decades later when trendy approaches start feeling dated.
21. Cathedral Ceiling with Crown Molding for Classic Elegance
Big crown molding (6-8 inches) creates that formal, established look. Use classic profiles like ogee or cove moldings in white or wood-stained finishes. Crown molding provides visual transition between walls and ceiling while adding architectural detail.
But scale matters – too big overwhelms small rooms, too small gets lost in grand spaces. Professional design consultation helps determine appropriate sizing for your specific application.
The miter cuts for vaulted applications are complex. This is definitely professional trim carpenter territory unless you’re really skilled with angles.
22. Farmhouse Shiplap Design for Rustic Charm
White horizontal shiplap, natural wood vertical planking – authentic farmhouse appeal that feels comfortable and casual. Cover entire vault surfaces or create accent sections combined with painted drywall areas.
The key is quality installation, not just slapping boards on the ceiling. Consider the room’s proportions when choosing horizontal versus vertical orientation. Horizontal emphasizes width, while vertical draws attention to height.
The popularity of farmhouse design has made shiplap a go-to choice, but success lies in installation quality and finish work rather than simply covering surfaces with planking.
23. Rustic Log Cabin Aesthetic for Natural Beauty
Full or half-round logs with chinking details – perfect for mountain homes or rustic retreats where natural materials complement the setting. This approach creates authentic cabin atmosphere that connects with the natural environment.
Real logs require specialized knowledge about wood movement and sealing. Professional installation ensures structural integrity and weather resistance. The natural expansion and contraction requires specific construction techniques.
Synthetic log products provide the visual appeal with reduced maintenance requirements, but they lack the authentic character of real wood logs.
24. Traditional Coffered Elegance for Formal Sophistication
Deep square sections with ornate molding, painted white or rich wood tones, decorative rosettes at intersections – authentic traditional appeal. Create 2-3 foot square sections with 4-6 inch deep recesses for proper proportions.
The geometric patterns create visual rhythm while deep recesses add dramatic shadow lines that change throughout the day. Quality craftsmanship shows in the details – precise joints, consistent spacing, well-executed molding profiles.
Master-level carpentry required. The geometric precision on angled surfaces demands exceptional skill and experience with traditional millwork techniques.
25. Colonial Revival Features for Historical Authenticity
Wainscoting up angled walls, chair rails, panel details, period colors like Williamsburg blue or colonial red – authentic colonial character. This works particularly well in historical homes or new construction in traditional neighborhoods.
Research period techniques for authentic results that honor the architectural tradition. The goal is creating spaces that feel historically authentic rather than merely decorative.
Modern interpretations can incorporate contemporary conveniences while maintaining historical character. Understanding the historical context and applying traditional proportions correctly is key to success.
Performance Analysis: How Each Idea Measures Up
After looking at hundreds of projects, certain patterns emerge about which approaches work best for different situations. Here’s the real-world breakdown of what you can expect.
Structural Requirements Performance
High-impact modifications include exposed beams (#6), decorative trusses (#10), and skylights (#3). These need professional engineering assessment and may require additional structural support. The complexity involves load calculations, proper mounting systems, and potential reinforcement.
Moderate-impact options like coffered ceilings (#7, #24) and heavy chandeliers (#1) need reinforcement but typically don’t mess with load-bearing elements. These projects require careful planning but don’t usually need major structural modifications.
Low-impact solutions include paint treatments (#11-15), lighting systems (#2, #4, #5), and surface applications (#8, #22). These work with existing structure while delivering significant visual impact.
|
Design Approach |
Visual Impact |
Installation Difficulty |
Maintenance Level |
Best Room Type |
|---|---|---|---|---|
|
Statement Chandeliers |
High |
Moderate |
Low |
Living Room, Dining |
|
Exposed Beams |
Very High |
High |
Moderate |
Great Room, Kitchen |
|
Skylights |
High |
High |
Low |
Any Room |
|
Paint Treatments |
Moderate |
Low |
Low |
Bedroom, Office |
|
Coffered Ceiling |
High |
High |
Moderate |
Dining, Library |
|
Shiplap Paneling |
Moderate |
Moderate |
Low |
Kitchen, Family Room |
Cost Factor Analysis
High-cost options ($15,000+) include structural changes like exposed beams, skylights, and coffered ceilings. These require significant investment in materials, professional installation, and potential structural modifications. The complexity drives costs, but the results create substantial visual impact and potential home value increases.
Moderate-cost solutions ($5,000-$15,000) cover quality lighting systems, shiplap installation, and decorative trusses. These balance impact with affordability while still requiring professional installation for best results.
Budget-friendly approaches ($1,000-$5,000) include paint treatments, accent lighting, and surface-mounted elements. These deliver dramatic transformation at accessible price points, making them ideal for homeowners wanting maximum impact with limited budgets.
Design Impact Assessment
Maximum visual impact comes from cathedral ceilings with exposed beams (#6), skylights (#3), and statement chandeliers (#1). These create the most dramatic transformation and serve as primary focal points that define entire rooms.
Moderate impact solutions like color treatments (#11-15) and architectural details (#7, #8) enhance existing vaulted spaces effectively without overwhelming other design elements. They provide significant improvement while maintaining design balance.
Subtle enhancement options like accent lighting (#5) and floating elements (#20) add sophistication without dominating the space. These work well as supporting elements in comprehensive design schemes.
|
Maintenance Task |
Frequency |
DIY Friendly |
Professional Cost |
Special Equipment |
|---|---|---|---|---|
|
Light Bulb Replacement |
As needed |
No |
$50-100 |
Extension ladder |
|
Ceiling Cleaning |
Quarterly |
No |
$150-300 |
Professional tools |
|
Paint Touch-ups |
3-5 years |
Partially |
$200-500 |
Scaffolding |
|
Beam Maintenance |
Annually |
No |
$300-600 |
Specialized access |
|
Fixture Repair |
As needed |
No |
$100-400 |
Professional service |
Maintenance Considerations
High-maintenance features include exposed wood beams, natural stone applications, and complex lighting systems. These require regular upkeep, professional cleaning, and periodic refinishing or repairs. Factor ongoing costs into your decision-making process.
Moderate-maintenance options like painted surfaces, simple lighting fixtures, and basic architectural features need periodic attention but don’t require specialized care. Regular cleaning and occasional touch-ups maintain their appearance.
- Low-maintenance solutions include modern materials, LED lighting systems, and smooth finishes. These minimize ongoing care requirements while maintaining their appearance over time. The long-term cost savings can be substantial compared to high-maintenance alternatives.
When Renovation Cleanup Becomes Overwhelming
Vaulted ceiling projects create way more debris than people expect. You’re dealing with drywall chunks, old insulation (possibly with asbestos), displaced furniture, packaging from new fixtures – all while trying to live in your house.
I’ve watched families completely underestimate the mess factor. One project got delayed three days because the work area was too cluttered for safe access. Pre-construction clearing isn’t optional – it’s essential for worker safety and project efficiency.
Professional construction debris removal services understand the specific challenges of vaulted ceiling renovations and can handle materials safely.
Construction debris needs proper handling, especially potentially hazardous materials like old insulation. Professional removal teams know disposal regulations and have equipment to handle heavy materials safely. The peace of mind from proper hazardous material handling is worth the investment.
Post-project cleanup involves excess materials, old furniture that no longer fits the new space proportions, and general construction cleanup. After investing in your beautiful new vaulted ceiling, you want the space to shine without construction remnants killing the vibe.
When your renovation generates more waste than expected, specialized appliance disposal services can handle HVAC units and other equipment that may need replacement during vaulted ceiling installation.
JiffyJunk’s White Glove Treatment handles everything from appliance removal for HVAC units to heavy debris like old beams. Licensed, insured teams that understand renovation cleanup challenges ensure your space gets completely cleared and sanitized, providing the clean foundation your vaulted ceiling project deserves.
Ready to start your transformation? Contact JiffyJunk for a free estimate on clearing your space – we’ll handle the cleanup so you can focus on creating your dream ceiling.
Final Thoughts
Vaulted ceilings are one of those modifications that can completely transform how your home feels. The 25 ideas here cover every budget and style, from $2,000 paint jobs to $25,000+ architectural overhauls.
Success comes down to honest assessment of your structure, realistic budgeting (including ongoing maintenance), and clear vision of how the height change affects daily living. The most gorgeous vaulted ceiling won’t improve your life if it creates echo problems or energy bills that make you cringe.
Use vaulted ceilings strategically – as focal points in living rooms, dining areas, or master bedrooms rather than throughout the whole house. Whether you go rustic beams, sleek minimalist, or traditional coffered elegance, pick something that fits your home’s existing character and your family’s real-world needs.
The best vaulted ceiling is one that makes you smile every time you walk into the room, not one that makes you worry about the next repair bill.