25 Wall Paneling Ideas That Will Transform Your Home Into a Design Masterpiece
I still remember running my fingers along those raised panels in my grandmother’s Victorian dining room as a kid – something about those grooves and shadows just made the whole room feel more… important somehow. Way more interesting than the plain white walls at our house, that’s for sure.
Here’s something that blew my mind when I started researching this stuff: according to House and Garden UK, people have been doing wall paneling since the 1200s. Yeah, the 13th century! Way before Pinterest made it trendy again. Originally it was just to keep drafty castles warmer, but it didn’t take long for people to realize it looked pretty amazing too.
Look, I get it – staring at boring drywall day after day gets old fast. Whether you’ve got a tight budget (been there) or you’re ready to go all out, there’s definitely a paneling option that can make your walls actually interesting to look at. I’ve tried a bunch of these myself, made some epic mistakes along the way, and learned what actually works in real homes with real budgets.
Table of Contents
-
Planning Your Wall Paneling Project
-
Traditional and Classic Paneling Options
-
1. Raised Panel Wainscoting
-
2. Flat Panel Wainscoting
-
3. Beadboard Paneling
-
4. Board and Batten
-
5. Picture Frame Molding
-
-
Modern and Contemporary Paneling Styles
-
6. Geometric Panel Designs
-
7. Horizontal Slat Paneling
-
8. Vertical Wood Slat Walls
-
9. Minimalist Panel Systems
-
10. Mixed Material Panels
-
-
Textured and Dimensional Paneling Solutions
-
11. 3D Sculptural Panels
-
12. Rope or Cord Wrapped Panels
-
13. Fabric-Wrapped Acoustic Panels
-
14. Corrugated Metal Panels
-
15. Stone Veneer Panels
-
-
Budget-Friendly and DIY Paneling Ideas
-
16. Peel-and-Stick Panel Systems
-
17. Plywood Panel Systems
-
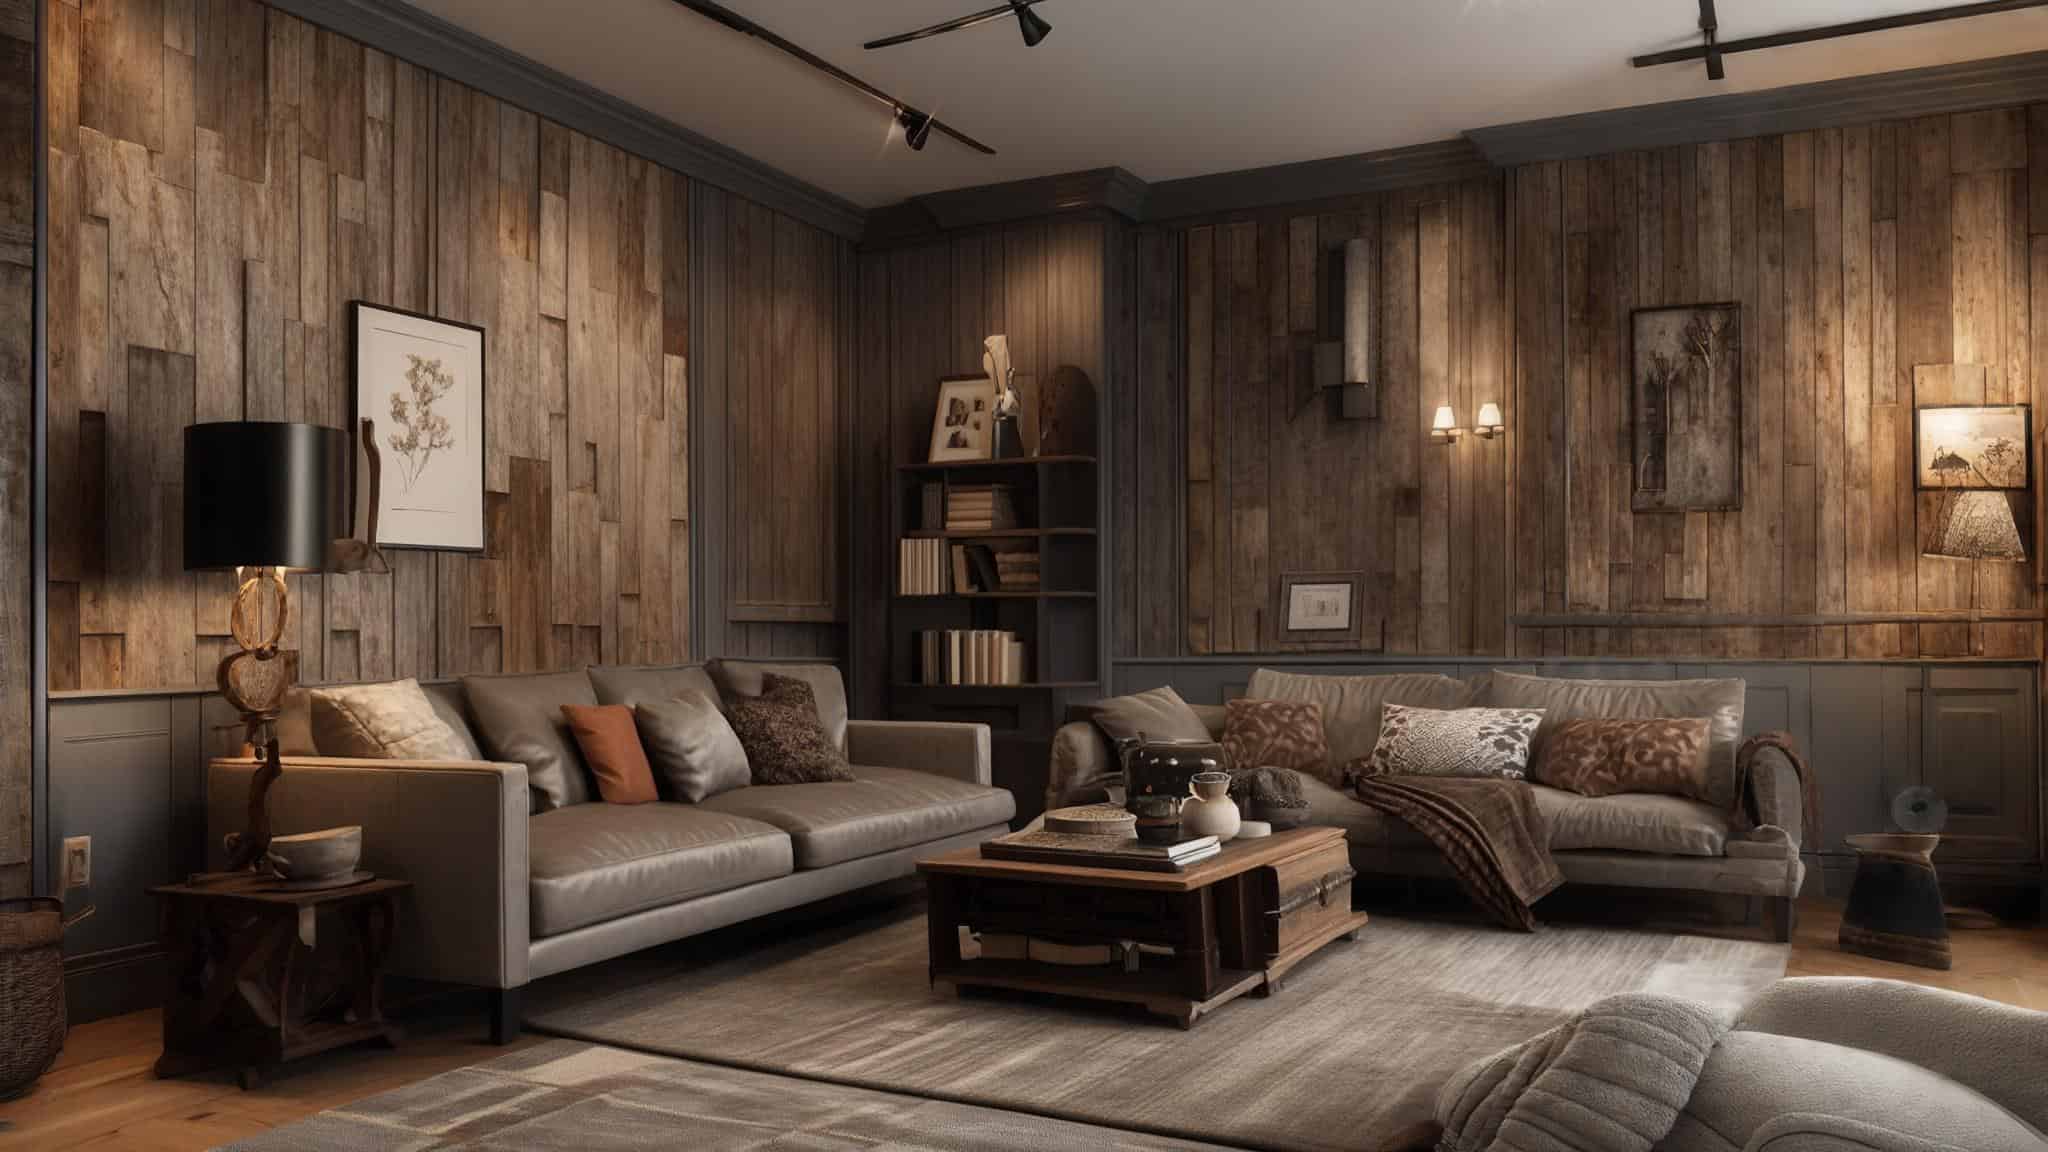
18. Reclaimed Wood Paneling
-
19. MDF Panel Solutions
-
20. Painted Faux Paneling
-
-
Specialty and Unique Paneling Concepts
-
21. Living Wall Panel Systems
-
22. Chalkboard or Whiteboard Panels
-
23. Cork Panel Systems
-
24. Mirror Panel Systems
-
25. Smart Panel Systems
-
-
Managing Your Paneling Project Cleanup
-
Final Thoughts
TL;DR
-
You’re looking at anywhere from $1 to $100+ per square foot depending on what you pick and how fancy you want to get
-
Think about how you actually use the room before falling in love with something on Pinterest – moisture and kids change everything
-
Classic stuff like wainscoting never goes out of style and won’t break the bank
-
Modern geometric patterns look incredible but honestly, they’re trickier than they appear on YouTube
-
Textured panels are gorgeous but be real about whether you want to dust them every week
-
DIY options like peel-and-stick can look surprisingly good if you’re on a tight budget
-
Some panels can literally grow plants or charge your phone (we’re living in the future, people)
-
Trust me, get help with cleanup – renovation debris is no joke and you’ll want to focus on the fun stuff
Planning Your Wall Paneling Project
Okay, let’s talk reality here. Before you fall down the Pinterest rabbit hole, you need to figure out what you’re actually dealing with. I learned this the hard way when I got obsessed with this gorgeous reclaimed wood wall and completely ignored the fact that it was going in my bathroom. Spoiler alert: wood + steam = expensive mistake.
Budget-wise, you’re looking at everything from dollar store solutions to “did I just buy a small car?” territory. I’ve seen people create stunning walls for under $200 and others drop $5,000 on a single accent wall. Both can look amazing – it just depends on what you’re going for.
Here’s the thing nobody tells you about room function – that Instagram-worthy setup might be a nightmare to live with. Take bathrooms: that beautiful natural wood paneling? It’s going to warp faster than you can say “moisture damage.” Save the fancy stuff for your living room where the biggest threat is spilled wine.
Your home’s style matters too, but don’t let it box you in completely. I’ve seen traditional homes rock modern paneling and contemporary spaces embrace classic wainscoting. Sometimes the unexpected choice is exactly what makes a space special.
Installation timeline? Be honest with yourself here. Some of these projects look way easier on YouTube than they actually are in your crooked old house with walls that haven’t been straight since 1987. When planning your project, understanding the cleanup requirements becomes crucial – proper debris management can be the difference between a smooth project and a complete disaster.
|
Planning Factor |
Real Talk |
Questions You Actually Need to Ask |
|---|---|---|
|
Budget |
$1-5/sq ft (basic but decent), $5-15/sq ft (pretty good), $15-35/sq ft (now we’re talking), $35-100+/sq ft (showing off money) |
How much can I spend without my spouse giving me the look? |
|
Room Function |
Moisture kills dreams, kids destroy everything, sound matters more than you think |
Will this survive my actual life? |
|
Installation Timeline |
DIY weekend (optimistic), 1-2 weeks (realistic), call for help (smart) |
Am I actually going to finish this project? |
|
Maintenance |
Low (wipe and go), moderate (weekend warrior), high (new hobby level) |
Do I want to marry this cleaning routine? |
Traditional and Classic Paneling Options
Classic paneling is like that little black dress of home design – it never really goes out of style, and it works in way more situations than you’d think. These are the options your great-grandmother would approve of, but they still look fresh today.
I love traditional paneling because it adds instant character without screaming “look at me!” It’s sophisticated without being stuffy, and honestly, it can make even a brand-new house feel like it has some history.
1. Raised Panel Wainscoting
This is the fancy stuff you see in old movies where rich people eat dinner and discuss their feelings. Basically, you’ve got raised squares with trim around them, and it looks expensive even when it’s not.
The raised centers create these cool shadow lines that change throughout the day as the light moves around. It’s like having subtle artwork that never gets old. Most people install it about three feet up the wall, which is perfect for protecting your walls from chair backs and general life damage.
Now, let’s talk money. You’re looking at roughly $8-25 per square foot, which sounds reasonable until you do the math for a whole room. A 12×14 dining room? That’s about $850-$2,500 just for materials. I know, I had sticker shock too.
Installation isn’t exactly beginner-friendly since everything needs to line up perfectly, but if you’re handy with a saw and have patience, it’s doable. Wood versions need dusting and the occasional touch-up, but that’s about it.
Real-World Reality Check: My friend Sarah went all-in on raised panel wainscoting for her dining room. She spent three months obsessing over wood stain samples (seriously, three months) and another two weekends installing it. The result? Gorgeous. Her dinner parties went from “come eat” to “welcome to my sophisticated dining establishment.” Sometimes the obsessing pays off.
2. Flat Panel Wainscoting
Think of this as raised panel’s chill younger sibling. You get all the classic proportions and framed look without the fussy raised centers. It’s Shaker-style, which basically means “looks good, doesn’t try too hard.”
The flat surfaces are way easier to clean than raised panels, and if you’ve got kids who like to run their hands along walls (why do they do that?), this won’t collect as much dirt in the grooves.
You’re looking at about $5-15 per square foot, which is more budget-friendly than raised panels. Installation is pretty straightforward if you can cut straight lines and use a level. The clean look works with everything from farmhouse to modern, so you’re not locking yourself into one style forever.
I installed this in my hallway because it looked classic but wasn’t going to drive me crazy with maintenance. Three years later, still happy with the choice.
3. Beadboard Paneling
Beadboard is like the golden retriever of wall paneling – friendly, classic, and works well with almost everyone. Those narrow vertical planks with little grooves between them instantly make any space feel more cottage-like and welcoming.
You can buy it in real wood (expensive but gorgeous), MDF (cheaper and paintable), or vinyl (cheapest and moisture-proof). The tongue-and-groove installation is actually pretty satisfying once you get the hang of it.
Cost-wise, you’re looking at $3-12 per square foot depending on what material you choose. It’s one of the more affordable ways to add character to a room. Just know that those grooves collect dust like nobody’s business, so factor in some extra cleaning time.
I put beadboard in my powder room and it completely changed the vibe from “generic bathroom” to “charming cottage.” Guests actually comment on it, which never happened with plain drywall.
4. Board and Batten
This is farmhouse style at its finest – wide boards with narrow strips covering the seams. It’s the kind of paneling you see in those homes that look like they should be in a magazine but somehow still feel lived-in and comfortable.
The best part about board and batten? It’s actually pretty forgiving. Your cuts don’t have to be perfect because the battens cover up any gaps. This makes it great for DIY beginners who want something that looks professional but won’t expose every tiny mistake.
You’re looking at about $4-10 per square foot, and installation is honestly pretty relaxing once you get into a rhythm. The strong vertical lines make rooms look taller, which is always a win.
My neighbor Dave tackled his mudroom with board and batten and knocked it out in two weekends. It went from looking like a storage closet to an actual entryway that makes you want to hang up your coat instead of throwing it on the floor.
5. Picture Frame Molding
This is the sneaky option – you get the look of fancy paneling without actually installing panels. Just regular molding arranged in rectangles on your existing walls. It’s like paneling’s magic trick.
The beauty is in the flexibility. Paint the frames to match your walls for subtle texture, or go bold with contrasting colors for drama. You can make the rectangles any size you want and arrange them however looks good to your eye.
At $2-6 per square foot, this is probably the cheapest way to add architectural interest to a room. Installation is beginner-friendly – if you can cut molding and use a nail gun (or even just a hammer), you can do this.
I used this trick in my bedroom when I wanted something more interesting than paint but didn’t want to commit to full paneling. It added just enough visual interest without overwhelming the space.
Modern and Contemporary Paneling Styles
Modern paneling is where things get fun and a little wild. These are the options that make people stop and say “whoa, how did you do that?” They’re bold, they’re current, and they definitely make a statement.
Fair warning though – some of these look way easier on social media than they actually are to pull off. But when done right? They can completely transform a space and make your home feel like it belongs in a design magazine.
6. Geometric Panel Designs
These are the Instagram stars of the paneling world – bold patterns using diamonds, hexagons, or abstract shapes that turn your wall into art. When done well, they’re absolutely stunning. When done poorly… well, let’s just say geometry class matters.
The thing about geometric patterns is they require serious planning and precision. One measurement off and the whole thing looks wonky. I watched my friend attempt a hexagon pattern that slowly morphed into something that looked more like a honeycomb designed by someone having a bad day.
You’re looking at $10-30 per square foot, and honestly, unless you’re really confident with measurements and patterns, this might be worth hiring out. The dramatic shadows and visual impact are incredible, but the margin for error is basically zero.
These work best as accent walls where they can be the star of the show. Put them behind a bed or sofa where they’ll be the focal point but won’t compete with everything else in the room.
7. Horizontal Slat Paneling
Clean, modern, and surprisingly versatile – horizontal slats are having a major moment right now. The key is consistent spacing and perfectly straight lines. Sounds simple, right? It’s not.
I made the rookie mistake of not checking if my walls were actually straight before installing horizontal slats. Spoiler alert: they weren’t. What should have been a clean, modern look turned into a wonky mess until my contractor friend helped me figure out furring strips to level everything out.
The horizontal lines make rooms feel wider, which is great for smaller spaces. Natural wood looks warm and organic, while painted slats can be dramatic or subtle depending on your color choice.
Budget-wise, you’re looking at $8-18 per square foot. Installation requires patience and a good level, but it’s doable for most DIYers if you take your time with the measurements.
Real-World Win: My cousin installed horizontal walnut slats behind her bed and added LED strip lighting behind every third slat. The result? A stunning accent wall that serves as both art and ambient lighting. It cost about $1,200 but completely transformed the room and eliminated the need for expensive artwork.
8. Vertical Wood Slat Walls
These are horizontal slats’ dramatic sibling – floor-to-ceiling installations that make rooms feel taller and add serious texture. You can incorporate hidden lighting between the slats for a really cool ambient effect.
The vertical orientation is great for making low ceilings feel higher, but here’s what nobody tells you: they collect dust like crazy. Every single gap between slats becomes a dust magnet, and cleaning them is like dusting a fence. Make sure you’re actually up for that level of maintenance.
Installation gets tricky when you’re dealing with full height, especially if you want integrated lighting. You’re looking at $12-25 per square foot, and unless you’re comfortable with electrical work, you’ll probably want professional help.
The dramatic effect is worth it though – these walls create incredible texture and can make a room feel like a high-end spa or modern retreat.
9. Minimalist Panel Systems
This is paneling for people who think most paneling is too busy. Large, flat panels with clean edges and hidden mounting systems create a sophisticated, uncluttered look that’s all about subtle elegance.
The catch? Perfect execution is everything. Any imperfection shows up immediately on those clean surfaces, so installation usually requires professional help. You’re looking at $15-35 per square foot, which puts this in premium territory.
The payoff is walls that look expensive and sophisticated without screaming for attention. They reflect light evenly and create a perfect backdrop for artwork or furniture without competing for attention.
Think of these as the architectural equivalent of a perfectly tailored suit – simple, elegant, and definitely not cheap.
10. Mixed Material Panels
This is where things get really creative – combining wood with metal, stone with fabric, or any other combination that strikes your fancy. When done well, the contrast creates incredible visual interest. When done poorly… it looks like you couldn’t decide what you wanted.
The complexity of coordinating different materials usually requires professional help, both for design and installation. You’re looking at $20-50+ per square foot, so this is definitely a splurge option.
But the results can be absolutely stunning – walls that feel like custom art installations. I’ve seen wood and metal combinations that completely transformed bland living rooms into sophisticated showpieces.
Just make sure all your materials play well together over time. Different expansion rates and maintenance needs can cause problems down the road if not planned properly.
Textured and Dimensional Paneling Solutions
Textured paneling is for people who want their walls to have personality – and I mean serious personality. These options are all about creating surfaces you want to touch, walls that play with light in interesting ways, and spaces that feel more like art installations than just rooms.
But here’s the reality check: textured walls are high-maintenance relationships. They look incredible, but they demand attention and care. Make sure you’re ready for that commitment before you dive in.
|
Textured Panel Type |
Best Room Applications |
Maintenance Reality Check |
What Light Does |
|---|---|---|---|
|
3D Sculptural |
Living rooms, bedrooms (accent walls only) |
Dusting with a toothbrush, basically |
Creates amazing shadows but collects dust |
|
Rope/Cord Wrapped |
Bedrooms, cozy spaces, bohemian vibes |
Absorbs everything – dust, smells, spills |
Makes rooms feel warm and cozy |
|
Fabric Acoustic |
Home theaters, offices, anywhere noise is an issue |
Professional cleaning eventually |
Absorbs sound and light |
|
Stone Veneer |
Anywhere you want to feel fancy |
Occasional sealing, otherwise easy |
Natural texture, organic shadows |
|
Corrugated Metal |
Industrial spaces, modern statements |
Wipe down and done |
Dramatic light reflection |
11. 3D Sculptural Panels
These are basically art for your walls – carved or molded patterns that create incredible texture and shadow play. They look absolutely stunning and make any room feel like a high-end gallery.
Here’s what I wish someone had told me: these things collect dust like you wouldn’t believe. Cleaning them is like dusting a sculpture with a toothbrush. Every single groove and raised area becomes a dust magnet, and you can’t just wipe them down like regular walls.
You’re looking at $15-40 per square foot, and installation can be tricky depending on the weight. Some lightweight foam options are DIY-friendly, but the heavy carved wood versions definitely need professional mounting.
They work best as accent walls in low-traffic areas where people won’t be bumping into all those delicate details. I’ve seen them look incredible behind beds or in dining rooms where they can be admired but not touched constantly.
12. Rope or Cord Wrapped Panels
This is bohemian chic at its finest – natural rope or decorative cord wrapped around backing panels to create organic, textural surfaces. They feel coastal and relaxed, perfect for creating cozy, laid-back vibes.
But let’s talk about the elephant in the room: rope absorbs everything. Dust, cooking smells, pet odors, that weird smell from when you burned dinner last month – it all gets trapped in there. And cleaning rope? Good luck with that.
The installation is actually pretty DIY-friendly at $6-15 per square foot. You’re basically wrapping rope around panels and securing it, which is more tedious than difficult. Just avoid high-moisture areas where the rope might get funky.
These work great in bedrooms or reading nooks where you want that cozy, textural feeling. Just make sure you’re okay with the maintenance reality before you commit.
13. Fabric-Wrapped Acoustic Panels
These are the multitaskers of the paneling world – they look good AND solve noise problems. Acoustic foam or fiberglass wrapped in fabric, available in any color or pattern you can imagine.
They’re perfect for home theaters, offices, or bedrooms where sound control actually matters. The fabric options are endless, so you can match any decorating style from traditional florals to modern geometrics.
Installation is pretty straightforward at $10-25 per square foot, and they’re lightweight enough for easy DIY mounting. The sound absorption makes rooms feel more intimate and comfortable, which is a nice bonus.
Maintenance involves fabric cleaning, which might mean professional services eventually. But the acoustic benefits are real – these panels can dramatically reduce echo and outside noise.
14. Corrugated Metal Panels
Industrial chic that actually works in homes – galvanized steel or aluminum panels that bring serious texture and modern edge. They’re durable, easy to clean, and create dramatic light effects.
The reflective surfaces bounce light around in interesting ways, which can either be amazing or overwhelming depending on your room and lighting situation. I’ve seen them work beautifully in modern kitchens and completely fail in cozy bedrooms.
At $4-12 per square foot, they’re relatively affordable, and installation is moderate difficulty. You need proper safety equipment and some metal-cutting skills, but it’s not rocket science.
They work best in spaces that can handle the industrial vibe – modern kitchens, home offices, or spaces where you want that loft-like feeling. Just don’t expect them to create cozy, warm atmospheres.
15. Stone Veneer Panels
Real stone texture without the weight and complexity of actual stone construction. You can get natural stone veneer (thin slices of real stone) or manufactured versions that mimic natural materials.
The natural moisture resistance makes these work anywhere, and the authentic texture creates beautiful, organic shadow play. Installation usually requires professional help due to weight and mounting requirements, with costs running $12-30 per square foot.
Maintenance is surprisingly low – occasional sealing for natural stone, but otherwise just normal cleaning. The timeless appeal works with everything from rustic to contemporary styles.
I’ve seen stone veneer transform bland living rooms into sophisticated spaces that feel much more expensive than they actually were. The natural variation in color and texture never gets boring.
Budget-Friendly and DIY Paneling Ideas
Look, not everyone has a massive renovation budget, and that’s totally fine. Some of the best-looking paneling solutions are actually the cheapest ones – you just need to get creative and be willing to put in some sweat equity.
I started with budget options when I was first learning, and honestly, some of them turned out better than the expensive stuff I tried later. Sometimes creativity beats cash every time.
When you’re tackling DIY projects, don’t forget about cleanup – professional services can handle the messy debris removal while you focus on the fun creative stuff.
16. Peel-and-Stick Panel Systems
The ultimate in “I want it done this weekend” solutions. Self-adhesive panels that go right over existing walls without tools, nails, or professional help. Perfect for renters or anyone who wants instant gratification.
The quality varies wildly – some look surprisingly convincing while others scream “fake” from across the room. But for temporary solutions or kids’ rooms where you know things will change, they’re perfect.
You’re looking at $1-5 per square foot, which is hard to beat. Installation is literally peel and stick, though getting them perfectly straight takes more patience than you’d expect. They clean easily but might need replacement eventually.
I used peel-and-stick wood-look panels in my home office as a temporary solution three years ago. They still look good and have held up way better than I expected.
17. Plywood Panel Systems
Good quality plywood can look absolutely stunning when finished properly. Baltic birch, oak, or other hardwood plywood cut to size and finished with stain or paint creates beautiful, natural texture.
The key is choosing the right grade – don’t cheap out on construction-grade plywood and expect it to look good. Spend a little more on cabinet-grade stuff and you’ll be amazed at the results.
At $3-8 per square foot, it’s affordable, and installation is straightforward for anyone comfortable with basic carpentry. The smooth surfaces take paint beautifully, and natural wood grain adds authentic character.
I used birch plywood in my son’s room and it’s held up to everything a teenager can throw at it (literally). The natural wood tone brightens the space and still looks great after five years.
|
Budget Option |
Reality Check Cost |
DIY Honesty Level |
How Long It’ll Last |
Best For |
|---|---|---|---|---|
|
Peel-and-Stick |
$1-5/sq ft |
Anyone can do this |
2-5 years |
Renters, quick fixes |
|
Plywood Panels |
$3-8/sq ft |
Need basic tool skills |
10-20 years |
Modern looks, tight budgets |
|
Reclaimed Wood |
$4-15/sq ft |
Some carpentry needed |
20+ years |
Character junkies |
|
MDF Solutions |
$2-6/sq ft |
Easy if you can cut straight |
15-25 years |
Paint lovers |
|
Painted Faux |
$0.50-2/sq ft |
Just need patience |
5-10 years |
Commitment-phobes |
18. Reclaimed Wood Paneling
This is where treasure hunting meets home improvement. Old barn wood, properly treated pallets, architectural salvage – each piece brings its own story and weathered character.
The hunt for materials can be half the fun, but make sure everything is properly treated for indoor use. Some old wood needs cleaning, sealing, or pest treatment before it’s ready for your walls.
Costs vary wildly depending on your source – $4-15 per square foot if you’re smart about sourcing. Installation requires moderate carpentry skills since you’re dealing with irregular pieces that need fitting together.
Real Success Story: My friend Mike sourced reclaimed oak from a local barn demolition for his office accent wall. After cleaning, sanding, and sealing 200 square feet of weathered planks, he created this incredible rustic backdrop that guests constantly ask about. Total cost: $800. Professional equivalent: probably $4,000+.
The weathered character and unique patina are impossible to fake, and every installation is completely one-of-a-kind.
19. MDF Panel Solutions
Medium-density fiberboard gets a bad rap, but good quality MDF can look absolutely professional when finished properly. It cuts cleanly, takes paint beautifully, and you can even route custom details into it.
The key is avoiding the cheap stuff that falls apart when it gets wet. Spend a little more on quality MDF and it’ll perform like solid wood for most applications.
At $2-6 per square foot, it’s hard to beat for painted applications. Installation is straightforward – it cuts and installs just like wood. Just avoid high-moisture areas unless it’s properly sealed.
I used MDF for picture frame molding in my dining room and routed custom profiles that look like expensive millwork. Three years later, people still ask who did the “custom trim work.”
20. Painted Faux Paneling
The ultimate budget hack – creating paneling effects with nothing but paint and painter’s tape. Tape off rectangular sections and paint them in contrasting colors or different sheens for subtle panel effects.
This is perfect for commitment-phobes who want to try paneling without actually installing anything. If you hate it, just paint over it. If you love it, you can always upgrade to real panels later.
At $0.50-2 per square foot (basically just paint costs), this is about as cheap as it gets. Installation is just careful taping and painting – anyone can do this with patience.
I tried this in my guest room as a test run before committing to real paneling. The subtle tonal variation looked surprisingly sophisticated and bought me time to figure out what I really wanted.
Specialty and Unique Paneling Concepts
This is where paneling gets weird and wonderful. These options push boundaries and turn walls into functional, interactive, or just plain amazing features that most people have never even thought of.
Some of these require serious commitment (and budgets), but they create spaces that are truly unique. Your friends will definitely have questions.
21. Living Wall Panel Systems
Living walls are basically for people who think regular houseplants are too easy. You’re committing to being a plant parent on steroids, with built-in irrigation, drainage, and enough plant care to make it a legitimate hobby.
The air purification and natural beauty are incredible when done right, but let’s be real – if you can barely keep a succulent alive, this probably isn’t for you. These systems need consistent care, proper lighting, and regular maintenance.
Installation requires professional help with plumbing and irrigation, and you’re looking at $25-60+ per square foot including plants and systems. The ongoing maintenance is significant – daily monitoring, weekly care, seasonal plant rotation.
But when they work? They’re absolutely stunning and create the most amazing natural ambiance. I’ve seen them transform sterile offices into living, breathing spaces that feel more like gardens than rooms.
22. Chalkboard or Whiteboard Panels
Functional walls that actually earn their keep. Framed chalkboard sections in kitchens for menus and shopping lists, whiteboard panels in offices for brainstorming, magnetic panels that combine writing surfaces with organization.
These work great in kitchens, offices, kids’ rooms, and mudrooms where function matters as much as form. Installation is straightforward – they mount just like regular panels.
At $3-12 per square foot, they’re reasonably priced and incredibly practical. Regular cleaning keeps them looking good, though surfaces might need resurfacing eventually.
Dark chalkboard surfaces absorb light while white surfaces reflect it, so consider how that affects your room’s overall brightness.
23. Cork Panel Systems
Natural cork brings unique organic texture plus excellent acoustic and thermal properties. It’s sustainable, naturally antimicrobial, and creates warm, cozy atmospheres that promote relaxation.
The sound absorption is real – cork panels can noticeably reduce room echo and outside noise. They also provide some insulation value, which is a nice bonus in older homes.
Installation is easy to moderate since cork is lightweight and easy to cut. You’re looking at $8-18 per square foot, and maintenance is minimal thanks to cork’s natural properties.
The warm, natural tones work beautifully in home offices, bedrooms, or anywhere you want that spa-like, natural feeling.
24. Mirror Panel Systems
Strategic mirror placement can completely transform how a space feels – making small rooms seem larger, dark areas brighter, and ordinary spaces more dramatic.
You can go with antiqued mirrors for vintage appeal, beveled panels for traditional elegance, or tinted mirrors for contemporary sophistication. The key is placement – mirrors need to reflect something worth looking at.
Installation requires careful handling and proper mounting for safety, usually professional work. Costs run $12-35 per square foot depending on the mirror type and mounting complexity.
Regular cleaning maintains the effect, and the dramatic increase in light and sense of space can make cramped areas feel surprisingly spacious.
25. Smart Panel Systems
Welcome to the future – panels with built-in LED lighting, Bluetooth speakers, wireless charging surfaces, or even digital displays that change with your mood or schedule.
These work best in modern living spaces and offices where technology integration makes daily life easier. But remember, you’re basically putting a computer on your wall. Great for impressing guests, not so great when it needs a software update at 2 AM.
Installation requires electrical and possibly network work by qualified professionals, and you’re looking at $40-100+ per square foot. Maintenance might include software updates and technical support over time.
The customizable lighting and functionality can adapt to your changing needs throughout the day, but make sure you’re ready for the complexity that comes with high-tech solutions.
Managing Your Paneling Project Cleanup
Here’s what nobody talks about in those beautiful Pinterest photos – renovation projects create a shocking amount of debris. Packaging materials, cut-offs, old materials, dust, and general construction chaos that can quickly overwhelm your space.
Professional cleanup becomes a lifesaver during major projects. Understanding construction debris removal options helps keep your project on track and your sanity intact.
JiffyJunk’s approach takes the stress out of cleanup with their white-glove treatment that protects your finished areas while handling all the messy stuff. Their eco-friendly practices mean materials get recycled properly instead of just dumped in landfills.
The transparent pricing and same-day availability means you can focus on the fun creative parts while professionals handle the cleanup headaches. Their licensed, insured teams give you peace of mind throughout the project.
For homeowners tackling garage cleanouts before converting spaces for paneling projects, professional services make the prep work way less overwhelming. Trust me, trying to DIY debris removal while managing a renovation is a recipe for burnout.
For bigger projects involving multiple rooms or extensive renovations, their nationwide coverage ensures you get the same professional service regardless of where you live. This lets you focus on bringing your design vision to life instead of worrying about where to put all the construction waste.
Final Thoughts
Wall paneling has come such a long way from those dark, stuffy rooms your grandparents had. Today’s options range from budget-friendly weekend projects to high-tech installations that would make the Jetsons jealous.
The key to success? Be honest about what you’re actually willing to live with. That gorgeous textured wall might look amazing on Instagram, but if you’re already struggling to keep up with regular housework, maybe stick with something easier to maintain.
Budget matters, but don’t let it completely limit your creativity. Some of my favorite paneling projects have been the cheapest ones where people got creative with materials and techniques. Sometimes the best solutions come from working within constraints rather than having unlimited options.
Think about how you actually use your space. A dramatic accent wall in the living room gets admired daily, while fancy paneling in a guest room might go unnoticed for months. Put your effort and budget where you’ll actually enjoy the results.
Installation reality check: be honest about your skills and available time. There’s no shame in calling for professional help, especially for complex projects. A botched DIY job often costs more to fix than just hiring someone competent from the start.
Remember that paneling is an investment in your home’s character and your daily happiness. While peel-and-stick solutions can provide quick gratification, higher-quality materials usually deliver better long-term satisfaction and value.
Most importantly, don’t let the cleanup and debris management stress you out. Professional services can handle the messy parts while you focus on the rewarding creative aspects. When you’re not worried about where to put all the construction waste, you can actually enjoy the transformation process.
Whether you go with classic wainscoting that’ll never go out of style, modern geometric patterns that make a statement, or budget-friendly DIY solutions that prove creativity beats cash – the right paneling choice can completely change how your space feels.
Just pick something you’ll actually be happy to look at for the next decade, because unlike paint, paneling isn’t something you’ll want to change every few years. With proper planning, realistic expectations, and professional support where needed, your wall paneling project can become one of the most satisfying improvements you’ll ever make to your home.