Small Kitchen Renovation Cost Secrets: What Contractors Don’t Tell You
Small kitchen renovations typically cost between $10,000 and $35,000, but understanding hidden factors can help you make smarter decisions. Recent data from Remodeling Magazine shows that homeowners often exceed their initial budgets by 23% due to overlooking critical cost drivers. I’ve renovated three small kitchens over the past decade and discovered that knowing these hidden economics completely transformed my approach to budgeting and planning.
Small kitchens have a higher cost per square foot than larger spaces because fixed costs get spread across less area. When I renovated my 90 sq ft kitchen, I was shocked to discover I was paying nearly $50 more per square foot than my neighbor with a kitchen twice the size.
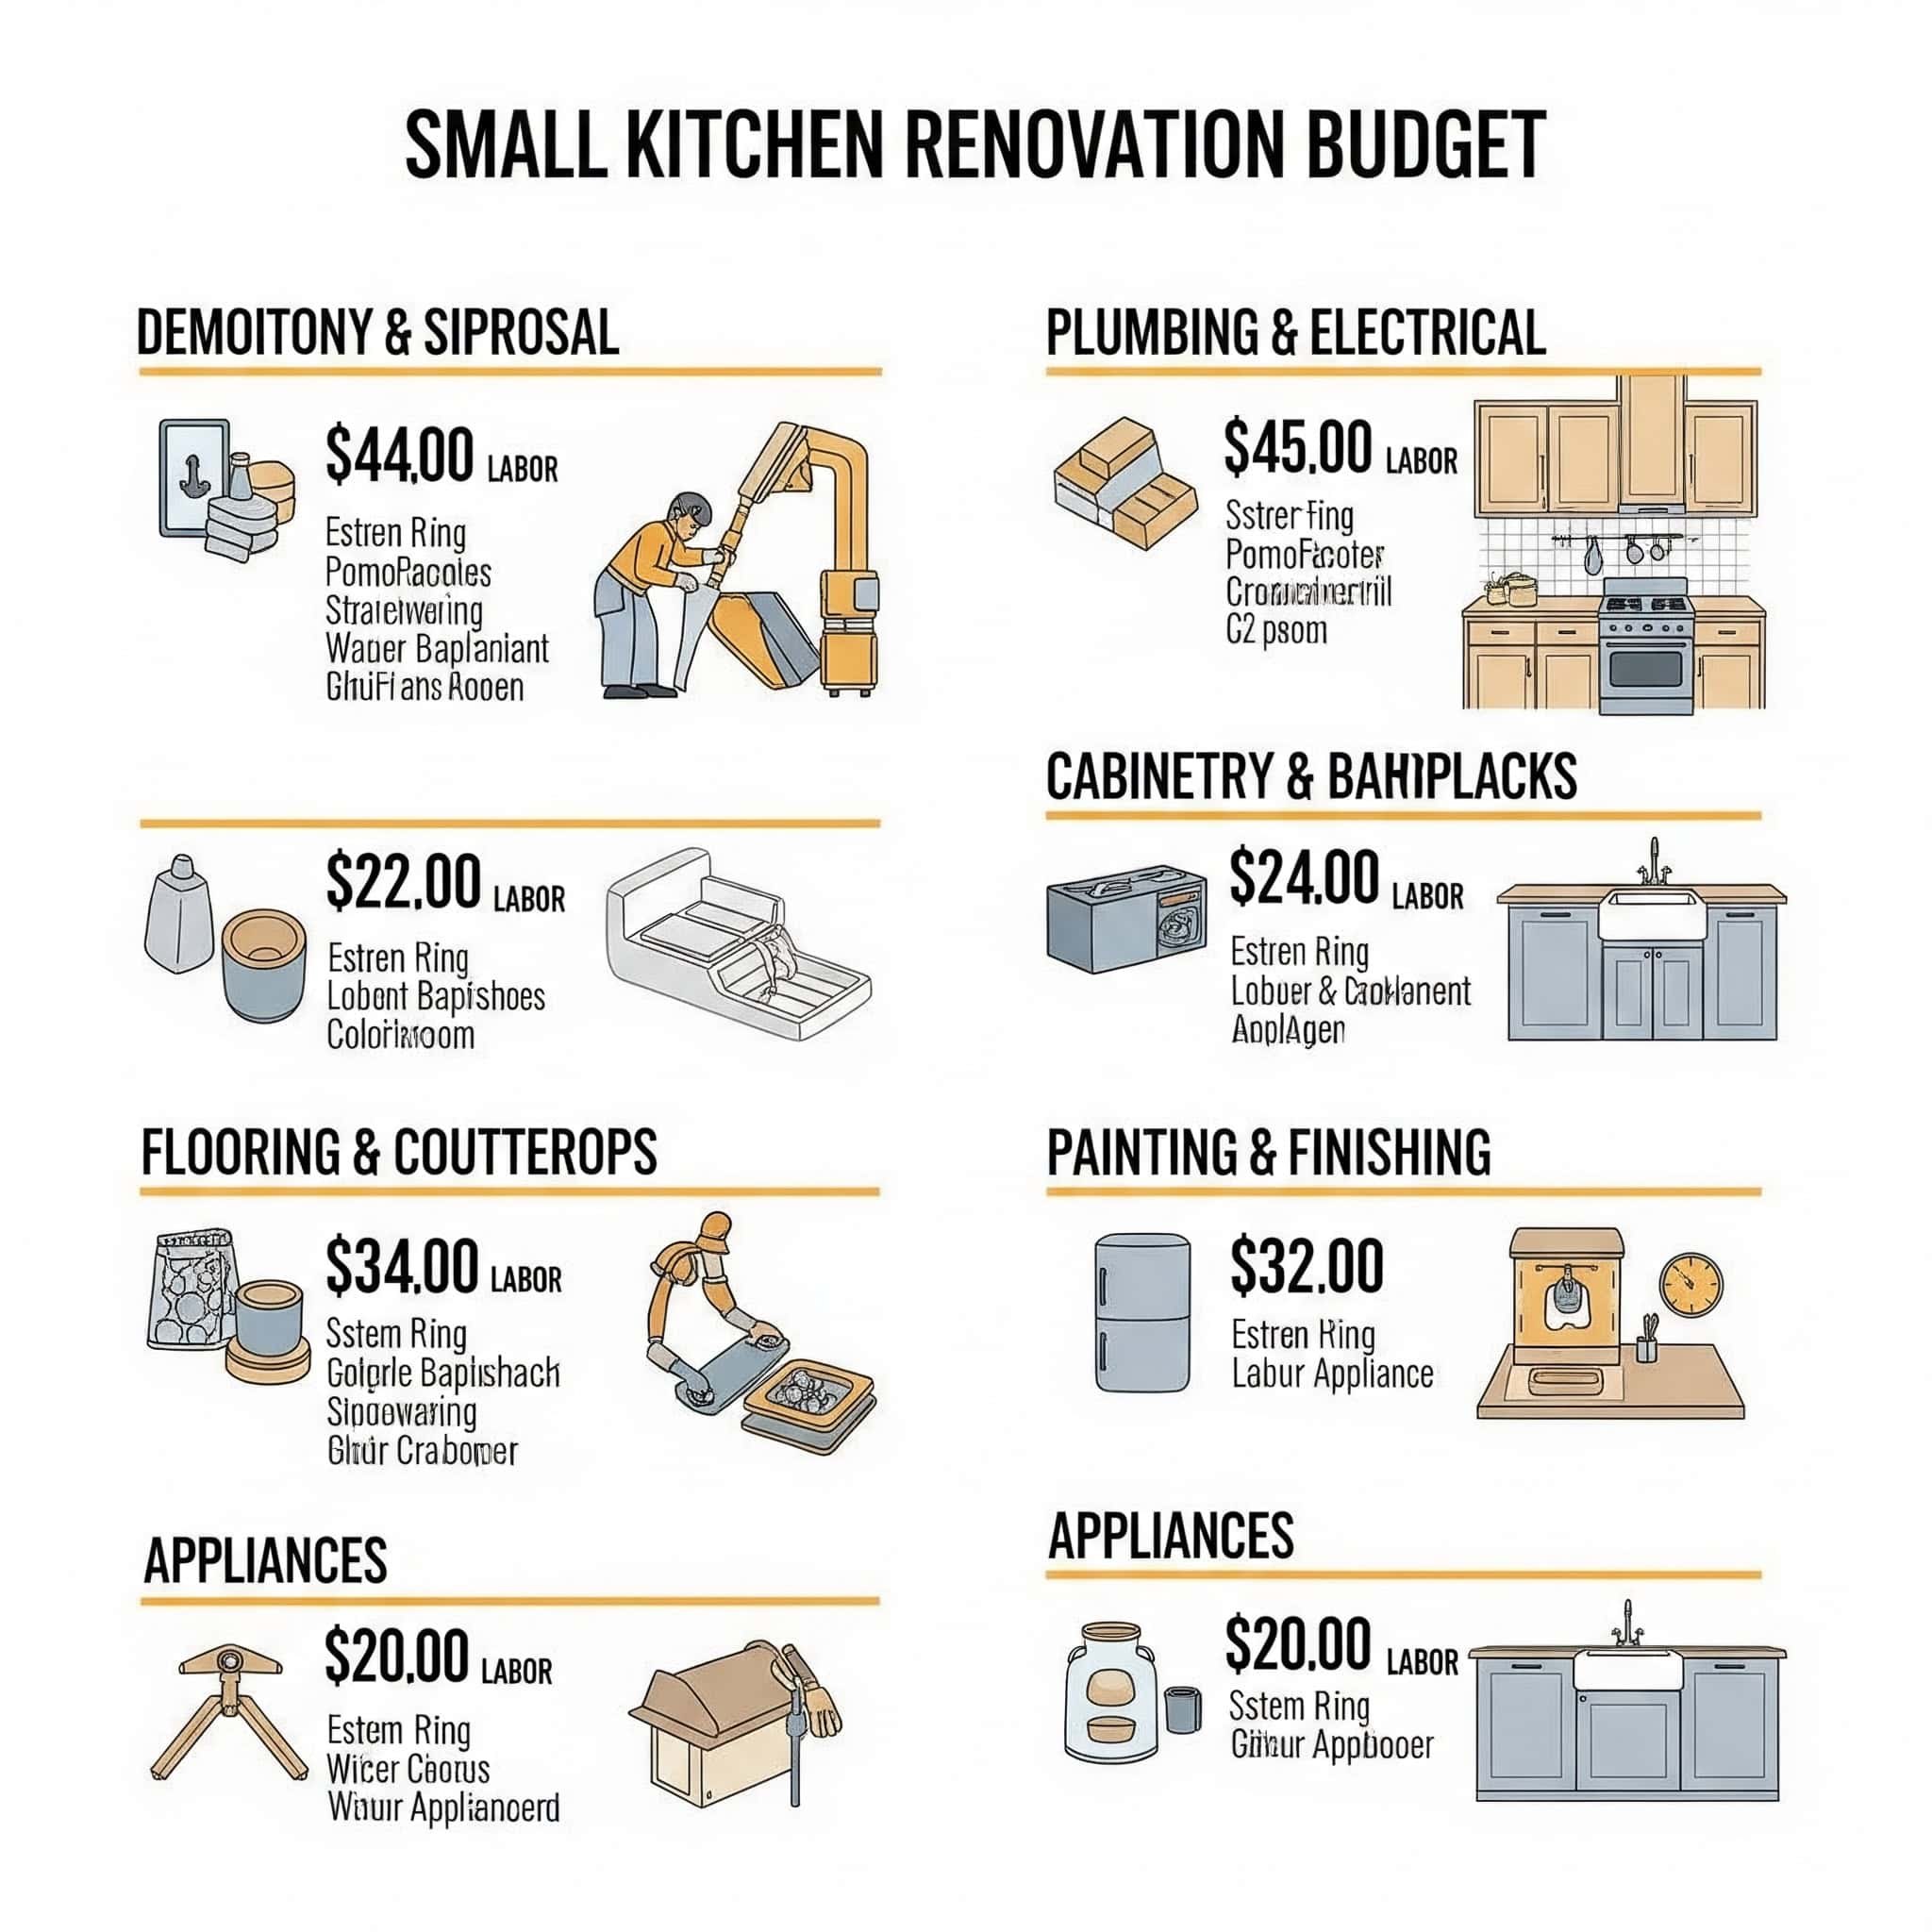
Labor typically eats up 30-35% of your budget, with materials representing another 45-50%. What contractors rarely mention upfront is that permit fees, design costs, and waste removal can add another 15-20% to your total. These “invisible” expenses caught me off guard during my first renovation.
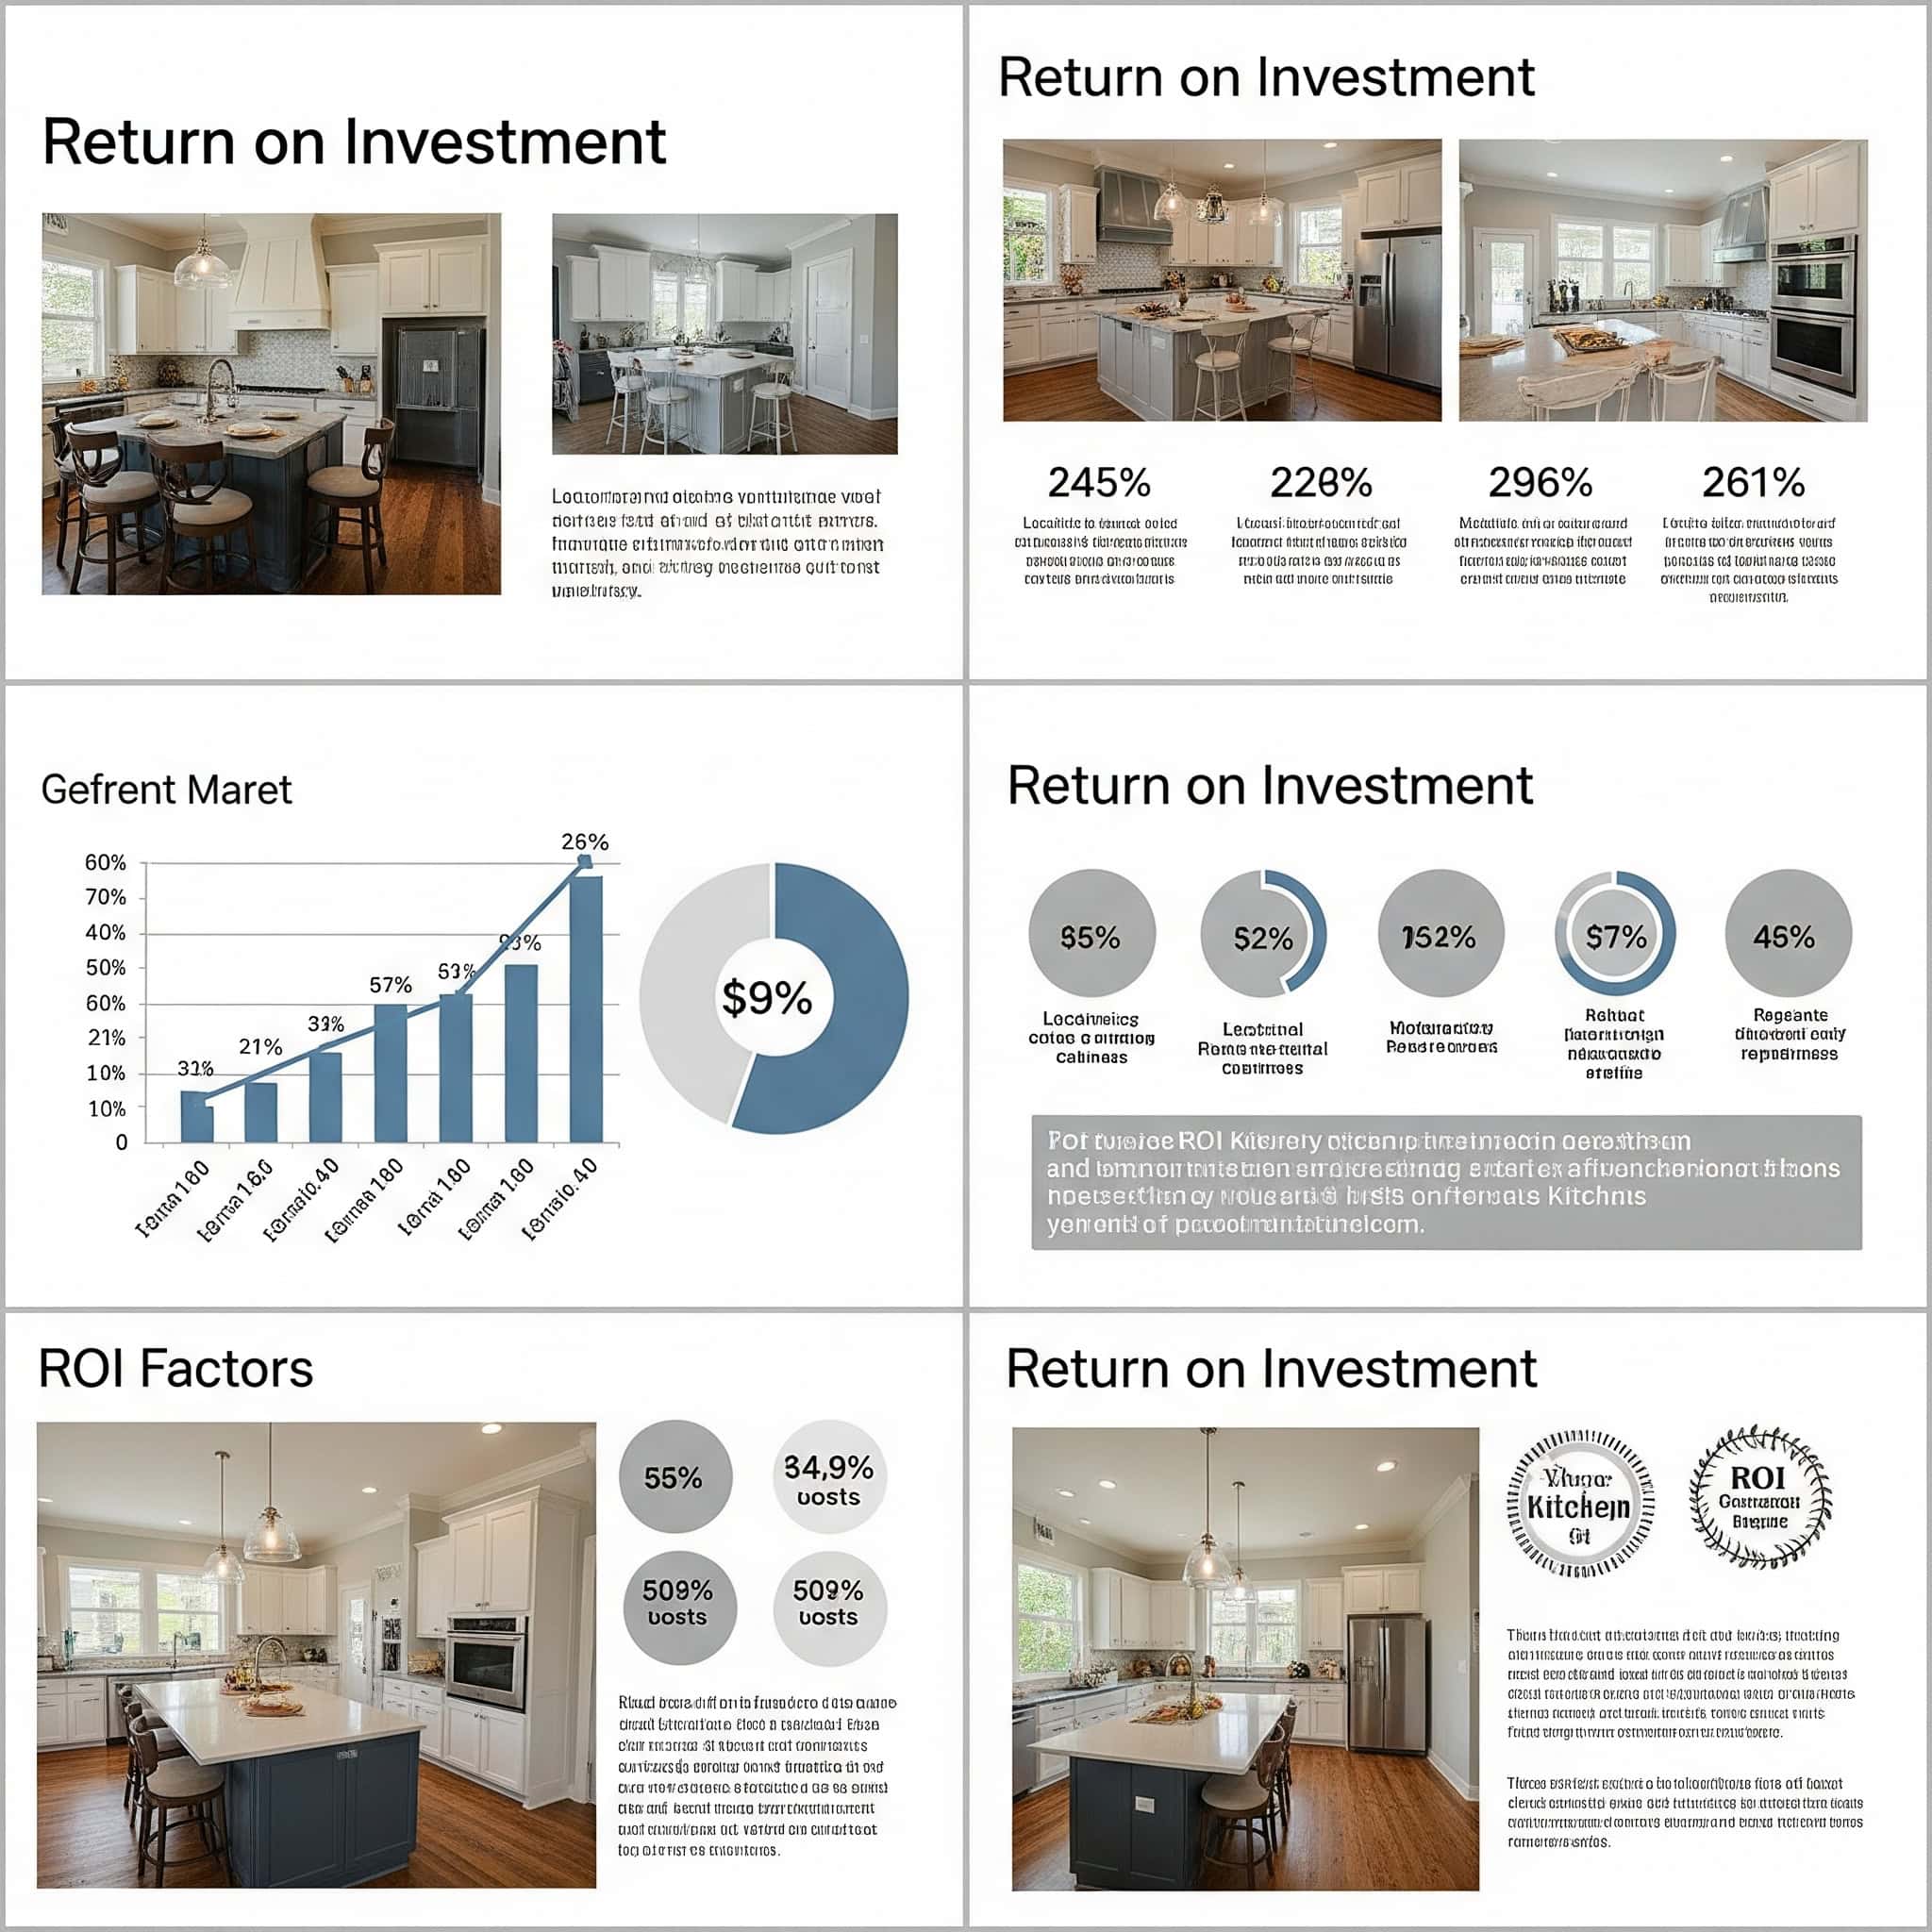
According to This Old House, small kitchen remodels typically range from $9,000 to $25,000, with a national average of $16,000. The good news? These projects offer one of the highest returns on investment, recouping up to 96.1% of their cost when you sell your home.
Table of Contents
Beyond the Basics: True Cost Drivers in Small Kitchen Renovations
The Real Math Behind Kitchen Remodel Budgeting
Hidden Costs and Savings Opportunities
Innovative Approaches to Small Kitchen Remodeling
Technology Integration in Budget-Conscious Renovations
Navigating Kitchen Remodel Financing Options
The Hidden Value of Professional Design in Small Kitchens
Beyond the Basics: True Cost Drivers in Small Kitchen Renovations
Small kitchen renovations involve more than just materials and labor costs. Understanding psychological pricing factors, seasonal fluctuations, and space-specific challenges helps you make informed decisions. These hidden cost drivers significantly impact your bottom line but are rarely discussed upfront by contractors.
Fixed costs like permits, design fees, and minimum labor charges take a bigger bite out of small kitchen budgets compared to larger projects. When I renovated my galley kitchen, these fixed costs represented nearly 25% of my total budget – a much higher percentage than my friend’s larger kitchen renovation where they accounted for just 12%.
Working in confined spaces requires specialized techniques and often extends project timelines by 15-25%. My contractor had to bring in custom-sized equipment to work in my narrow kitchen, adding both time and expense to the project.
According to Remodeling’s 2024 Cost vs. Value Report, a minor, mid-range kitchen renovation averages $27,492 nationally, while a major, mid-range renovation jumps to $79,982. These figures from Architectural Digest highlight the substantial investment even “minor” renovations represent.
The Psychology of Renovation Pricing
Contractor quotes reflect business factors beyond simple calculations. Understanding these psychological elements gives you negotiating power and helps you avoid unnecessary markups that can add thousands to your renovation costs.
Contractors typically build in a 15-25% markup on materials beyond their actual cost. I discovered this when I sourced my own cabinets directly from a manufacturer and saved over $3,000 compared to my contractor’s quote.
Quotes often include a “complexity buffer” of 10-15% for small kitchens due to space constraints. This buffer isn’t always explicitly stated but gets baked into labor estimates.
The presentation order of options significantly impacts selection, with items presented last receiving less price scrutiny from homeowners. I’ve learned to make my most expensive decisions first, when my price sensitivity is highest.
Decision Fatigue Markup
Contractors strategically present options to capitalize on decision fatigue. As you make multiple choices, your decision-making ability deteriorates, leading to less price sensitivity for later selections. Make important decisions before meeting contractors and create a prioritized list of must-haves versus nice-to-haves to combat this effect.
Research shows decision quality decreases by approximately 25% after making 10+ consecutive choices. I experienced this firsthand when selecting cabinet hardware after already making dozens of other decisions. I ended up spending $22 per pull when $8 options would have worked just as well.
High-margin items are typically presented after 7-10 previous decisions have been made. My contractor showed me the most expensive backsplash options last, when my decision-making was already compromised.
Creating a pre-prioritized decision framework reduces susceptibility to decision fatigue by 40-60%. Before my third renovation, I created a spreadsheet ranking all decisions by importance and price sensitivity, which helped me stay focused when fatigue set in.
Decision Order | Typical Homeowner Price Sensitivity | Strategic Contractor Presentation |
|---|---|---|
First 1-3 choices | High (scrutinizes costs carefully) | Basic, lower-margin items |
Middle 4-7 choices | Moderate (some price comparison) | Mid-range options with moderate margins |
Final 8+ choices | Low (decision fatigue sets in) | Premium, high-margin items and upgrades |
The “Small Kitchen Premium”
Small kitchens often cost more per square foot than larger spaces. Fixed costs spread across fewer square feet and confined working conditions requiring specialized labor create this premium. Request itemized quotes distinguishing between fixed and variable costs to identify where you’re paying this premium.
Small kitchens (under 120 sq ft) typically cost 20-30% more per square foot than kitchens over 200 sq ft. When I compared quotes with my neighbor, my 100 sq ft kitchen was quoted at $220 per square foot while her 225 sq ft kitchen was just $169 per square foot.
Fixed costs like permits, design fees, and project management represent 15-25% of small kitchen budgets. These costs remain relatively constant regardless of kitchen size, creating a disproportionate impact on smaller spaces.
Labor efficiency decreases by 15-20% in confined spaces, increasing hourly costs for the same work. My contractor explained that tasks like cabinet installation take longer in tight spaces where workers have limited room to maneuver.
A 100 sq ft kitchen renovation in Boston was initially quoted at $22,000 ($220/sq ft), while a 225 sq ft kitchen in the same neighborhood received a quote of $38,000 ($169/sq ft). The homeowner of the smaller kitchen negotiated by identifying fixed costs (permits, design fees, project management) totaling $4,500 that were disproportionately affecting their per-square-foot price. By requesting adjustments to the labor calculations for the smaller space, they reduced their final quote to $19,800.
Seasonal Cost Fluctuations
Kitchen renovation costs vary significantly throughout the year. Strategic timing can save 10-15% on your overall budget without compromising quality or materials. Understanding these seasonal patterns helps you plan your renovation for maximum cost efficiency.
Contractor availability fluctuates by 30-40% between peak and off-peak seasons. I scheduled my most recent renovation for February and had contractors competing for my business – a stark contrast to my summer renovation when I struggled to get callbacks.
Material costs typically follow predictable annual cycles based on manufacturing and shipping schedules. Cabinet prices tend to increase in spring when demand peaks, while countertop materials often cost less in January when shipping volumes are lower.
Labor rates can vary by 10-15% between high-demand and low-demand periods. My winter renovation labor costs were nearly 12% lower than identical work would have cost during the summer rush.
The January-February Sweet Spot
Contractors offer their best rates during the post-holiday lull in January and February. Planning your renovation during this period yields savings of 10-15% as contractors compete for limited work during their slow season. This timing advantage applies to both labor and material costs.
Contractor bid acceptance rates increase by 25-35% during January-February compared to spring/summer. I received responses from all five contractors I contacted in February, compared to just two of six during my June renovation inquiry.
Average labor rates decrease by 10-15% during this period due to reduced demand. My contractor offered a 12% discount on labor to secure my business during their slow season.
Project start times are typically 30-50% faster during winter months compared to peak season. My February renovation started just two weeks after signing the contract, while my summer project had a six-week wait before work could begin.
When planning your small kitchen renovation timing, consider that seasonal factors can significantly impact costs. As noted in our guide on weighing the true costs of rubbish removal prices, winter months often offer better rates for both materials and labor.
Material Price Cycles
Cabinet manufacturers, appliance companies, and countertop suppliers typically release new models in spring. Late winter becomes an ideal time to purchase previous models at clearance prices. Track price histories using tools like Camelcamelcamel for online retailers or request price trend information from local suppliers.
Major appliance manufacturers follow predictable 12-15 month product cycles with discounts of 15-30% on previous models. I saved $1,200 on my refrigerator by purchasing last year’s model just as the new ones were being released.
Cabinet pricing typically peaks in April-June when demand is highest. My January cabinet purchase saved me approximately 15% compared to the same manufacturer’s spring pricing.
Countertop material pricing fluctuates based on shipping cycles, with January typically offering 10-15% lower prices than summer months. I tracked quartz prices for six months before my renovation and found January pricing was 12% lower than June for the exact same material.
End-of-Quarter Negotiations
Many contracting companies have quarterly sales targets. The end of March, June, September, and December are excellent times to negotiate better rates as contractors try to meet goals. Time your final contract signing to coincide with these periods for potential discounts of 5-8%.
Sales quotas typically drive 5-8% price flexibility at quarter-end periods. I finalized my contract on March 28th and received a 6% discount that wasn’t available when I got the initial quote three weeks earlier.
Contract addendums and change orders receive more favorable pricing when submitted during these periods. When I needed to add under-cabinet lighting mid-project, I waited until the end of June to request the change and saved about $200.
Payment scheduling that aligns with contractor fiscal periods can yield additional 3-5% discounts. My contractor offered a 4% discount when I structured my payment schedule to help them close their books for the quarter.
The Real Math Behind Kitchen Remodel Budgeting
Traditional budgeting approaches for kitchen remodels often fail to account for critical financial factors. A more sophisticated approach incorporates opportunity costs, return on investment calculations, and inflation considerations to create a truly accurate budget that prevents costly surprises.
Traditional percentage-based budgeting methods typically underestimate actual costs by 15-25%. My first renovation went 22% over budget because I used standard industry percentages that didn’t account for my kitchen’s unique challenges.
Zero-based budgeting approaches reduce overall project costs by 10-15% through elimination of unnecessary expenses. When I switched to this method for my third renovation, I came in 8% under my initial budget while actually including more features than originally planned.
Zero-Based Renovation Budgeting
Unlike traditional percentage-based budgeting methods, zero-based budgeting requires justifying every expense from scratch. This approach leads to more intentional spending decisions and typically reduces overall project costs while improving satisfaction with the final result.
Zero-based budgeting eliminates an average of 12-18% of unnecessary expenses compared to conventional budgeting. I cut nearly $3,000 from my renovation by questioning every line item rather than accepting standard allocations.
Function-based allocation typically redirects 20-30% of budget from visual elements to functional improvements. I reallocated funds from decorative crown molding to additional drawers and pull-outs that made my kitchen more usable every day.
Implementation requires 30-40% more upfront planning time but reduces mid-project changes by 50-60%. I spent three weekends planning my zero-based budget but had only two minor change orders during construction, compared to eleven changes in my previous renovation.
According to Decorilla, the average cost of kitchen remodeling is $150 per square foot, meaning spaces between 60 and 120 square feet typically cost between $9,500 and $14,250 for materials and labor, with mid-range kitchen renovations providing an impressive return on investment of over 70%.
Function-First Allocation
Begin by identifying the primary functions your kitchen serves (cooking, entertaining, storage) and allocate your budget based on importance rather than convention. This prevents overspending on visually impressive but functionally unnecessary elements. Create a weighted scoring system for each potential renovation element based on how it serves your kitchen’s core functions.
Function-first budgeting typically redirects 15-25% of funds from purely aesthetic elements to functional improvements. I shifted $2,800 from decorative backsplash and lighting to higher-quality drawer mechanisms and a more powerful ventilation system.
Weighted scoring systems with 3-5 primary kitchen functions provide optimal decision-making frameworks. My scoring system rated each element on how it contributed to cooking efficiency, storage capacity, and entertaining functionality.
Homeowners using function-first allocation report 30-40% higher post-renovation satisfaction with daily kitchen use. Three years after my function-first renovation, I’m still appreciating the practical improvements that make cooking easier, while I barely notice the simpler backsplash that allowed for those upgrades.
The 70/30 Fixed/Flexible Rule
Set aside 70% of your budget for fixed, non-negotiable costs (structural work, plumbing, electrical) and 30% for flexible elements that can be adjusted as the project progresses. This buffer prevents the common scenario where homeowners must compromise on finishing touches due to unexpected costs earlier in the project.
Small kitchen renovations typically encounter unexpected costs representing 10-15% of the total budget. My second renovation revealed hidden water damage that added $2,100 to the project cost.
The 70/30 rule provides sufficient flexibility to absorb these costs without compromising core project elements. When we discovered electrical issues in my kitchen, I was able to cover the additional $1,500 from my flexible allocation without sacrificing essential features.
Implementation reduces mid-project stress by creating predetermined decision frameworks for potential cost overruns. Having a plan for what could be modified or eliminated if necessary gave me peace of mind throughout the renovation process.
Return on Investment Calculations
Not all kitchen improvements yield equal returns when selling your home. Understanding which elements provide the best ROI helps prioritize spending and ensures your renovation dollars go toward improvements that add the most value to your property.
Kitchen renovations typically recover 60-80% of their cost in home value, but specific elements vary widely. My real estate agent explained that in my neighborhood, high-end appliances recovered nearly 90% of their cost, while custom lighting fixtures returned less than 40%.
ROI calculations must account for both immediate value increase and depreciation over time. I opted for mid-range quartz countertops rather than high-end marble because the ROI difference didn’t justify the additional $3,200 cost.
Local market preferences can cause up to 30% variation in ROI for identical renovation elements. In my neighborhood, open shelving has a much higher ROI than in the suburbs just 10 miles away, where closed cabinetry is strongly preferred.
Micro-Market Analysis
National ROI averages don’t account for neighborhood-specific preferences. Research recently sold homes in your immediate vicinity (within 0.5 miles) to identify which kitchen features buyers in your specific micro-market value most. Contact local real estate agents for detailed information on which kitchen features helped comparable homes sell quickly.
Micro-market preferences can vary by 20-30% from national averages for specific kitchen features. In my neighborhood, gas ranges command a premium that’s nearly double the national average ROI for this feature.
Analyzing 5-10 recent sales within 0.5 miles provides statistically significant data for decision-making. I reviewed seven recent sales in my immediate area and discovered that homes with white cabinets sold for an average of $12,000 more than those with wood cabinets, despite national trends favoring wood.
Real estate agents can typically identify 3-5 kitchen features that consistently drive buyer interest in specific neighborhoods. My agent identified quartz countertops, gas cooking, and under-cabinet lighting as the three features that generated the most positive feedback during showings in my area.
Depreciation Scheduling
Different kitchen elements depreciate at different rates. Appliances may need replacement in 10-15 years, while quality cabinetry can last 30+ years. Calculate the annual depreciation cost of each element to determine if premium options truly provide better long-term value. Divide the cost difference between standard and premium cabinets by their expected lifespan difference to find the true annual cost difference.
Premium cabinets typically cost 40-60% more than standard options but last 50-100% longer. I chose to invest in higher-quality cabinets because the annual cost over their expected lifespan was actually lower than budget options that would need replacement sooner.
High-end appliances depreciate at 8-12% annually compared to 15-20% for standard models. This faster depreciation rate for standard appliances meant the premium models were actually more economical over a 10-year period, despite their higher initial cost.
Countertop materials have widely varying depreciation rates: granite at 3-5% annually versus laminate at 10-15%. This difference in longevity made granite the more economical choice for my kitchen despite costing three times more upfront.
Hidden Costs and Savings Opportunities
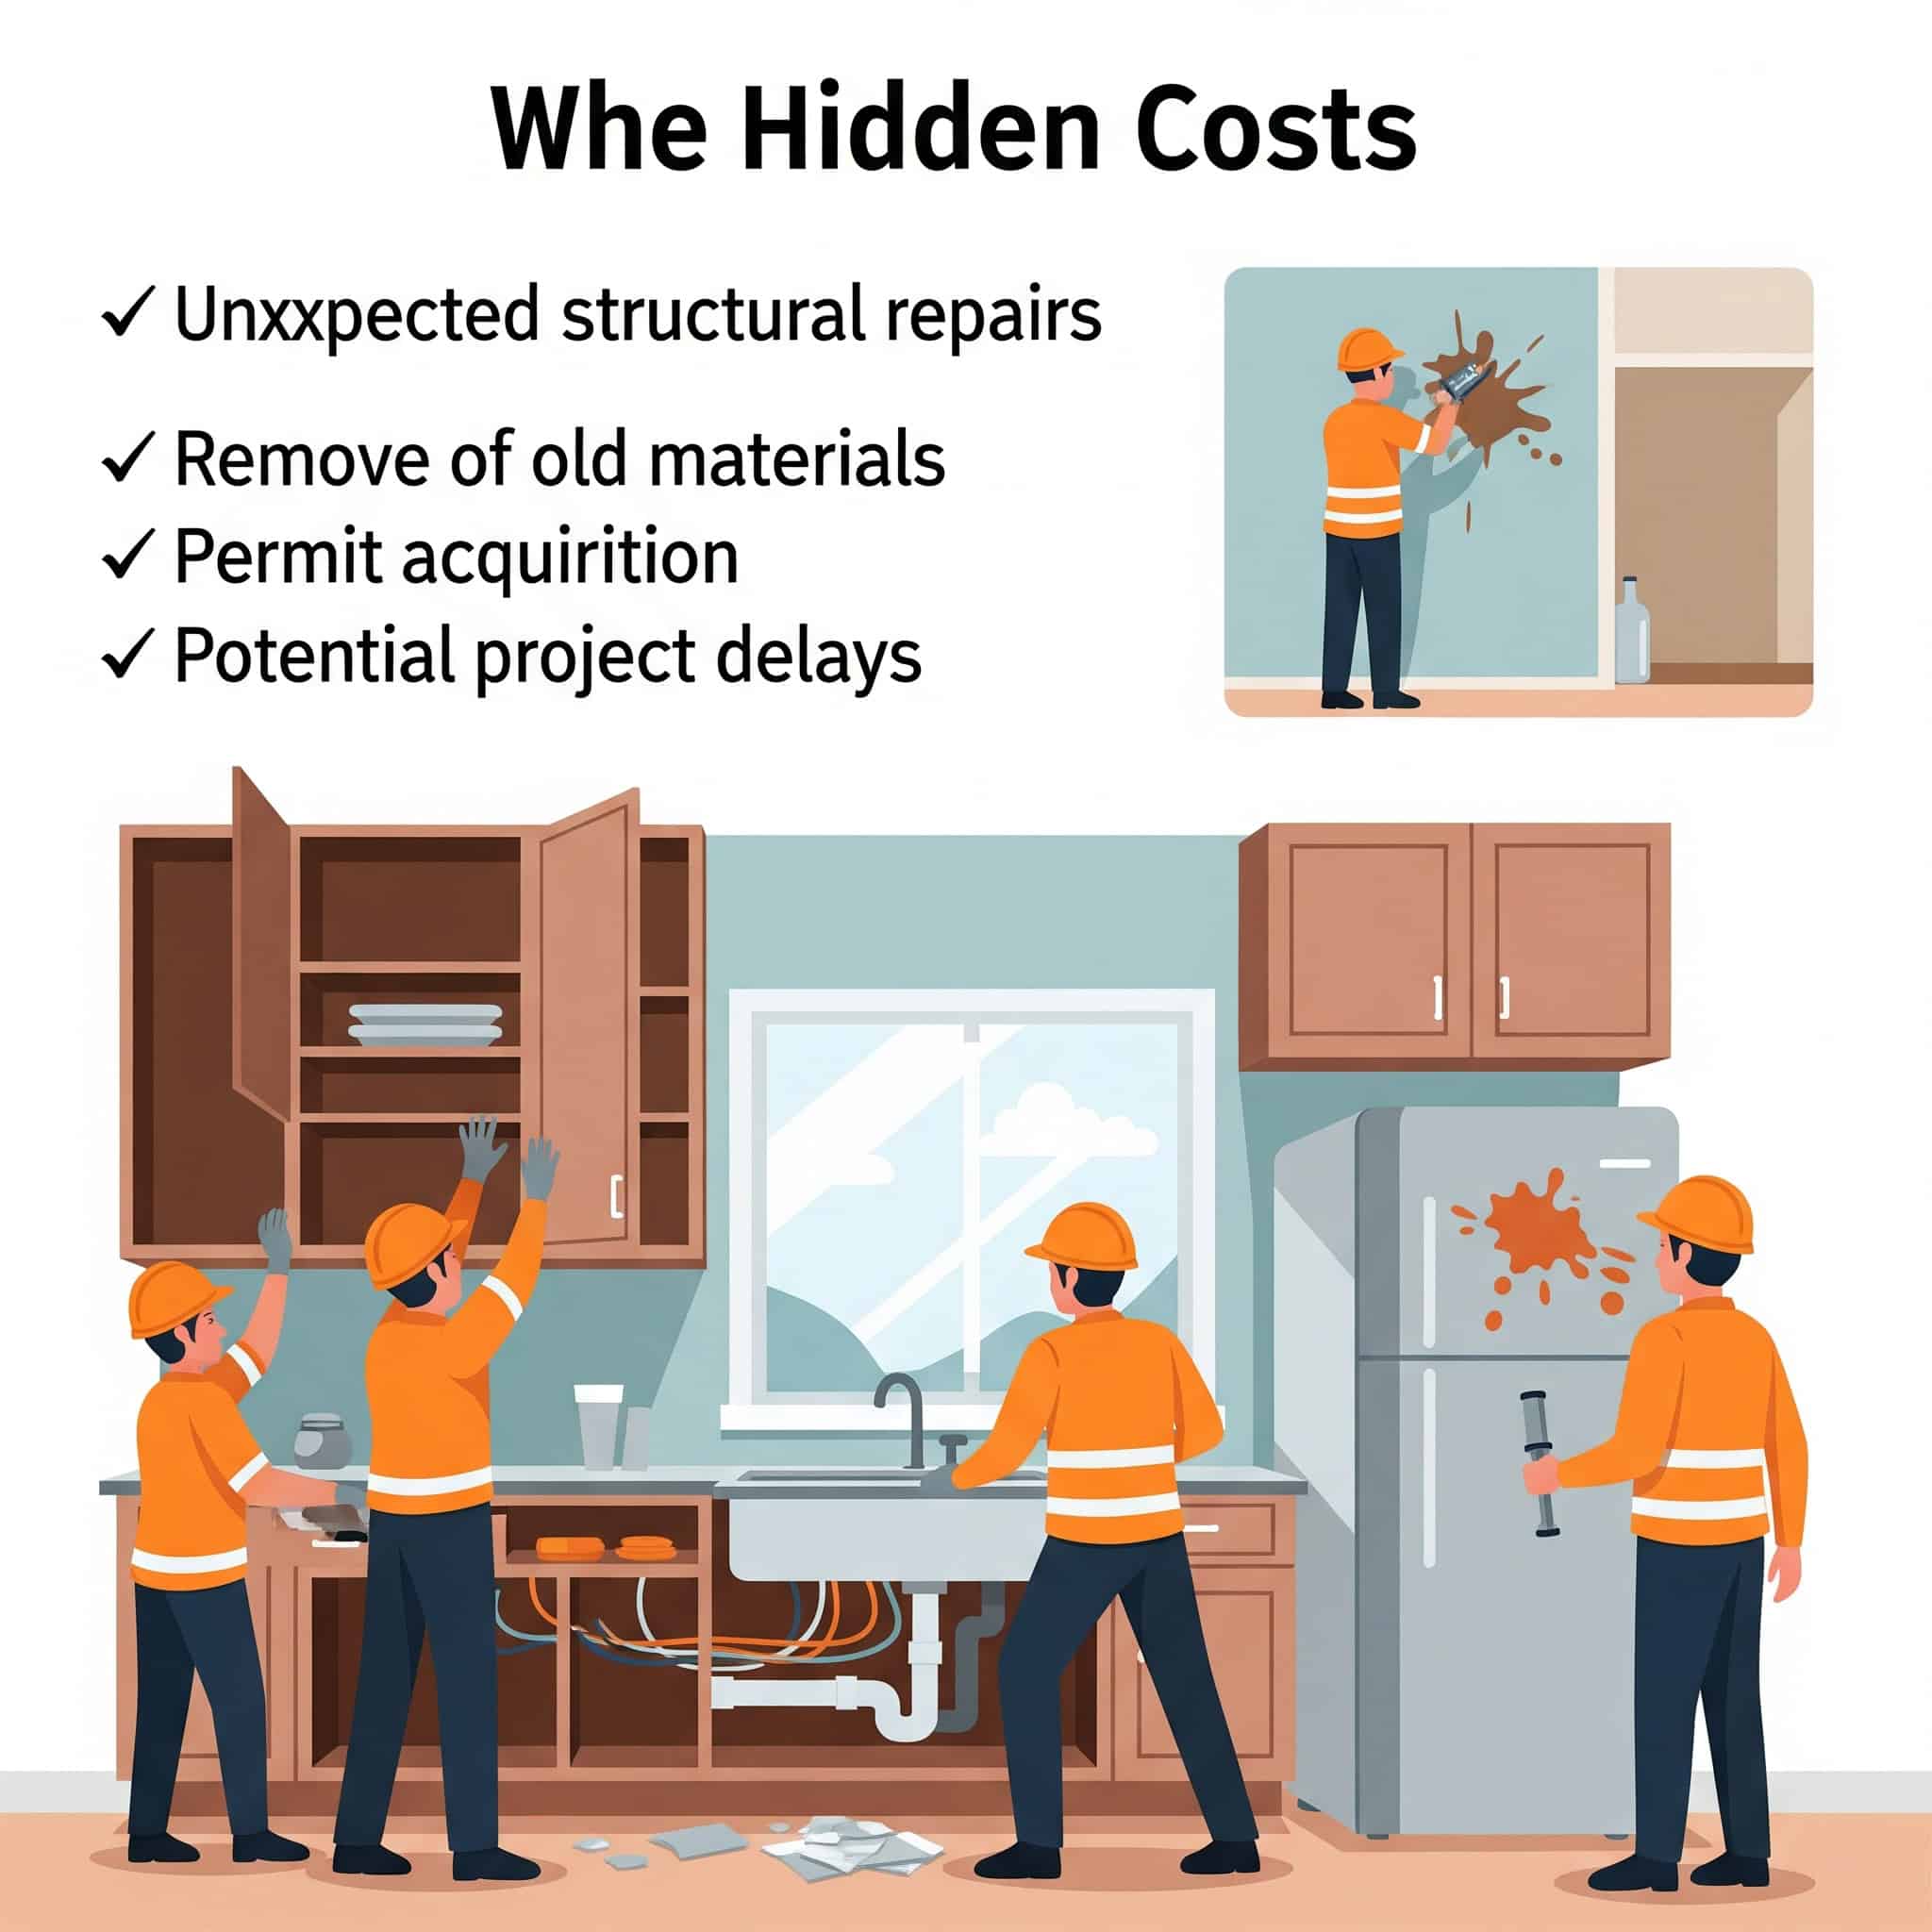
Beyond obvious expenses, kitchen renovations involve numerous hidden costs that can derail budgets. Simultaneously, there are overlooked opportunities for substantial savings that most contractors won’t proactively share with homeowners. Identifying these hidden factors helps create a more accurate budget and maximize value.
Hidden costs typically add 15-25% to small kitchen renovation budgets. My first renovation included nearly $4,000 in expenses I hadn’t anticipated, from temporary storage costs to takeout meals during construction.
Strategic approaches to waste management, supply chain, and permitting can reduce overall costs by 10-20%. By taking control of these aspects rather than defaulting to contractor-managed solutions, I saved over $3,500 on my most recent renovation.
The Demolition Equation
Demolition costs for small kitchen renovations often exceed estimates due to unforeseen complications and disposal expenses. This phase also presents unique opportunities for cost recovery through salvage and strategic waste management that can offset a significant portion of your renovation expenses.
Demolition typically represents 7-10% of small kitchen renovation budgets. My contractor initially quoted $2,200 for demolition and disposal, nearly 9% of my total budget.
Salvage value recovery can offset 5-15% of demolition costs. I sold my old granite countertops for $400 and vintage cabinet hardware for $250, reducing my effective demolition costs by nearly 30%.
Waste management strategies can reduce disposal expenses by 30-50%. By separating recyclable materials and handling disposal myself, I cut waste removal costs from $800 to $350.
Recent research from Houzz reveals kitchens remain America’s top renovation priority in 2024, with the average project cost jumping 20 percent to $24,000 in 2023.
Salvage Value Assessment
Before demolition, have your existing kitchen professionally assessed for salvageable materials. Items like hardwood cabinets, vintage hardware, and certain appliances can be sold to architectural salvage companies, potentially offsetting 5-10% of your renovation costs. Photograph all potential salvage items and submit them to multiple salvage companies for competing offers.
Hardwood cabinets in good condition typically retain 15-25% of their original value as salvage. My 1990s oak cabinets sold for $600 to a salvage company that refinished and resold them.
Vintage hardware and fixtures from pre-1970 kitchens can recover 30-50% of replacement cost. The brass pulls from my mother’s 1960s kitchen renovation sold for $18 each – nearly half the cost of new equivalent hardware.
Professional salvage assessment typically costs $150-300 but yields average returns of $500-1,500 for small kitchens. I paid $200 for an assessment that identified $1,200 worth of salvageable items I would have otherwise discarded.
When renovating your small kitchen, don’t overlook the value of your old materials. As our article on recycling electronics explains, many components of your old kitchen can be recycled or repurposed, reducing both environmental impact and renovation costs.
Waste Management Economics
Disposal costs can account for up to 5% of a small kitchen renovation budget. Rather than paying premium rates for contractor-arranged disposal, consider renting your own dumpster or hiring a specialized junk removal service. This approach typically saves 30-50% on waste management costs while ensuring proper recycling and disposal of materials.
Contractor-arranged disposal typically includes a 25-40% markup over direct rental costs. My contractor wanted $950 for waste removal, but I rented a dumpster directly for $575, saving $375.
Segregating waste streams (metal, wood, appliances) can reduce disposal costs by 20-30%. By separating recyclable metals and donating usable appliances, I reduced my waste volume by nearly a third.
Small kitchen renovations generate 3-5 cubic yards of waste on average, requiring strategic disposal planning. I was able to use a smaller, less expensive dumpster by carefully planning demolition and waste segregation.
Supply Chain Optimization
Smart management of materials procurement yields significant savings while reducing delays and quality issues. Taking control of certain aspects of the supply chain gives you more options and potentially better prices than relying entirely on your contractor’s standard suppliers.
Contractor material markups typically range from 15-25% above direct purchase prices. When I compared my contractor’s cabinet quote to the manufacturer’s direct price, I discovered a 22% markup that added over $2,000 to my project.
Supply chain disruptions affect 30-40% of kitchen renovations, causing delays of 2-6 weeks. By ordering my appliances three months in advance and storing them in my garage, I avoided the six-week backordering delay that would have extended my renovation timeline.
Direct purchasing reduces overall material costs by 10-20% but requires additional coordination. I saved nearly $4,000 by purchasing cabinets, countertops, and appliances directly, though it required more research and coordination on my part.
Direct-from-Manufacturer Purchasing
Many contractors mark up materials by 15-25%. For big-ticket items like cabinets and countertops, explore direct purchasing from manufacturers or authorized dealers. While this requires more coordination on your part, savings typically range from 10-20% on these major components. Request your contractor’s material list with specifications, then contact manufacturers directly for quotes.
Cabinet direct purchasing typically saves 15-25% compared to contractor-supplied options. I saved $2,800 by purchasing my cabinets directly from the manufacturer using the same specifications my contractor provided.
Countertop materials purchased directly save 10-20% on average. By working directly with a stone yard rather than through my contractor, I saved $650 on my quartz countertops.
Manufacturer-direct purchases often include better warranty terms than contractor-supplied materials. My direct-purchase cabinets came with a 10-year warranty versus the 5-year warranty offered through my contractor.
A homeowner in Chicago saved $4,200 on their small kitchen renovation by purchasing cabinets directly from a manufacturer. After getting the specifications from their contractor (who initially quoted $14,500 for cabinets including installation), they contacted three cabinet manufacturers directly and received quotes ranging from $9,800 to $11,300 for identical specifications. They selected the $10,300 option and negotiated with their contractor to adjust the installation-only fee to $1,200, resulting in $3,000 savings on materials plus avoiding the contractor’s 20% markup that would have added another $1,200.
Floor Model and Scratch-and-Dent Strategies
Appliance retailers regularly discount floor models, discontinued items, and slightly damaged units by 15-40%. These minor imperfections often won’t be visible once installed in your kitchen. Visit appliance outlets quarterly to track inventory, as these items are rarely advertised online but represent significant savings opportunities.
Floor models typically sell for 15-25% below retail price while carrying full warranties. I purchased a floor model dishwasher for $680 that normally retailed for $899, saving $219 while still getting the full manufacturer’s warranty.
Scratch-and-dent appliances with damage on sides or backs (that won’t be visible after installation) sell for 25-40% below retail. My refrigerator had a small dent on the side that would be against a wall – invisible in my kitchen but worth a $450 discount.
Discontinued models offer 20-35% savings with identical functionality to current models. I bought last year’s range model for $1,200 instead of the current year’s $1,650 version, despite the only difference being a slightly redesigned control panel.
Permit and Inspection Intelligence
Navigating the regulatory aspects of kitchen renovations prevents costly delays and rework while potentially unlocking rebates and incentives. Strategic planning around permits and inspections saves both time and money while ensuring your renovation meets all code requirements.
Permit-related delays affect 25-35% of kitchen renovations. My neighbor’s renovation was halted for three weeks due to permit issues that could have been addressed before construction began.
Pre-planning for inspections reduces failed inspections by 60-70%. By understanding inspection requirements in advance, I passed all inspections on the first attempt, avoiding costly rework and delays.
Energy efficiency certifications can qualify for rebates covering 5-15% of applicable costs. I received $750 in utility company rebates for my energy-efficient appliances and LED lighting – money my contractor never mentioned was available.
Pre-Renovation Inspection Strategy
Before finalizing plans, invest in a pre-renovation inspection by a licensed home inspector ($300-500) to identify potential code issues that could trigger mandatory upgrades once permits are pulled. This proactive approach prevents the common scenario where mid-renovation discoveries force expensive changes to electrical systems, plumbing, or ventilation.
Pre-renovation inspections identify an average of 3-5 potential code issues in homes over 20 years old. My inspection revealed outdated wiring that would have failed electrical inspection if discovered mid-renovation.
Mid-project code compliance issues typically add 5-15% to renovation costs. By addressing electrical issues before construction began, I saved approximately $1,200 compared to making changes after walls were opened.
Electrical systems in homes built before 1990 have a 40-60% chance of requiring updates during kitchen renovations. My 1985 home needed a dedicated circuit for the microwave and updated GFCI outlets – requirements I was able to budget for in advance thanks to my pre-renovation inspection.
Energy Efficiency Rebate Maximization
Many utility companies and local governments offer rebates for energy-efficient appliances and systems that contractors rarely mention. Research available programs before purchasing and ensure installations meet specific requirements for certification. These rebates can offset 5-15% of appliance costs and sometimes provide tax benefits as well.
Local utility rebates typically range from $50-500 per qualifying appliance or system. I received $150 for my refrigerator, $100 for my dishwasher, and $200 for my induction cooktop through local utility rebates.
Energy-efficient lighting upgrades can qualify for rebates covering 30-50% of fixture costs. My LED under-cabinet lighting qualified for a $175 rebate that reduced the effective cost by nearly 40%.
Documentation requirements must be addressed before installation to qualify for most rebate programs. I almost missed out on $325 in rebates because I didn’t know I needed pre-installation documentation – fortunately, my contractor was able to provide the necessary information before it was too late.
Innovative Approaches to Small Kitchen Remodeling
Breaking away from conventional renovation approaches yields both cost savings and superior results in small kitchen spaces. These alternative methods challenge traditional contractor practices while delivering more personalized and efficient outcomes tailored to your specific needs and budget constraints.
Innovative approaches can reduce overall renovation costs by 15-30%. By questioning conventional wisdom and exploring alternative methods, I cut my renovation budget by 22% while actually improving the final result.
Alternative methods typically increase functionality by 20-30% compared to conventional renovations in small spaces. My phased renovation approach allowed me to customize each element based on how I actually used the previous components, resulting in a much more functional final kitchen.
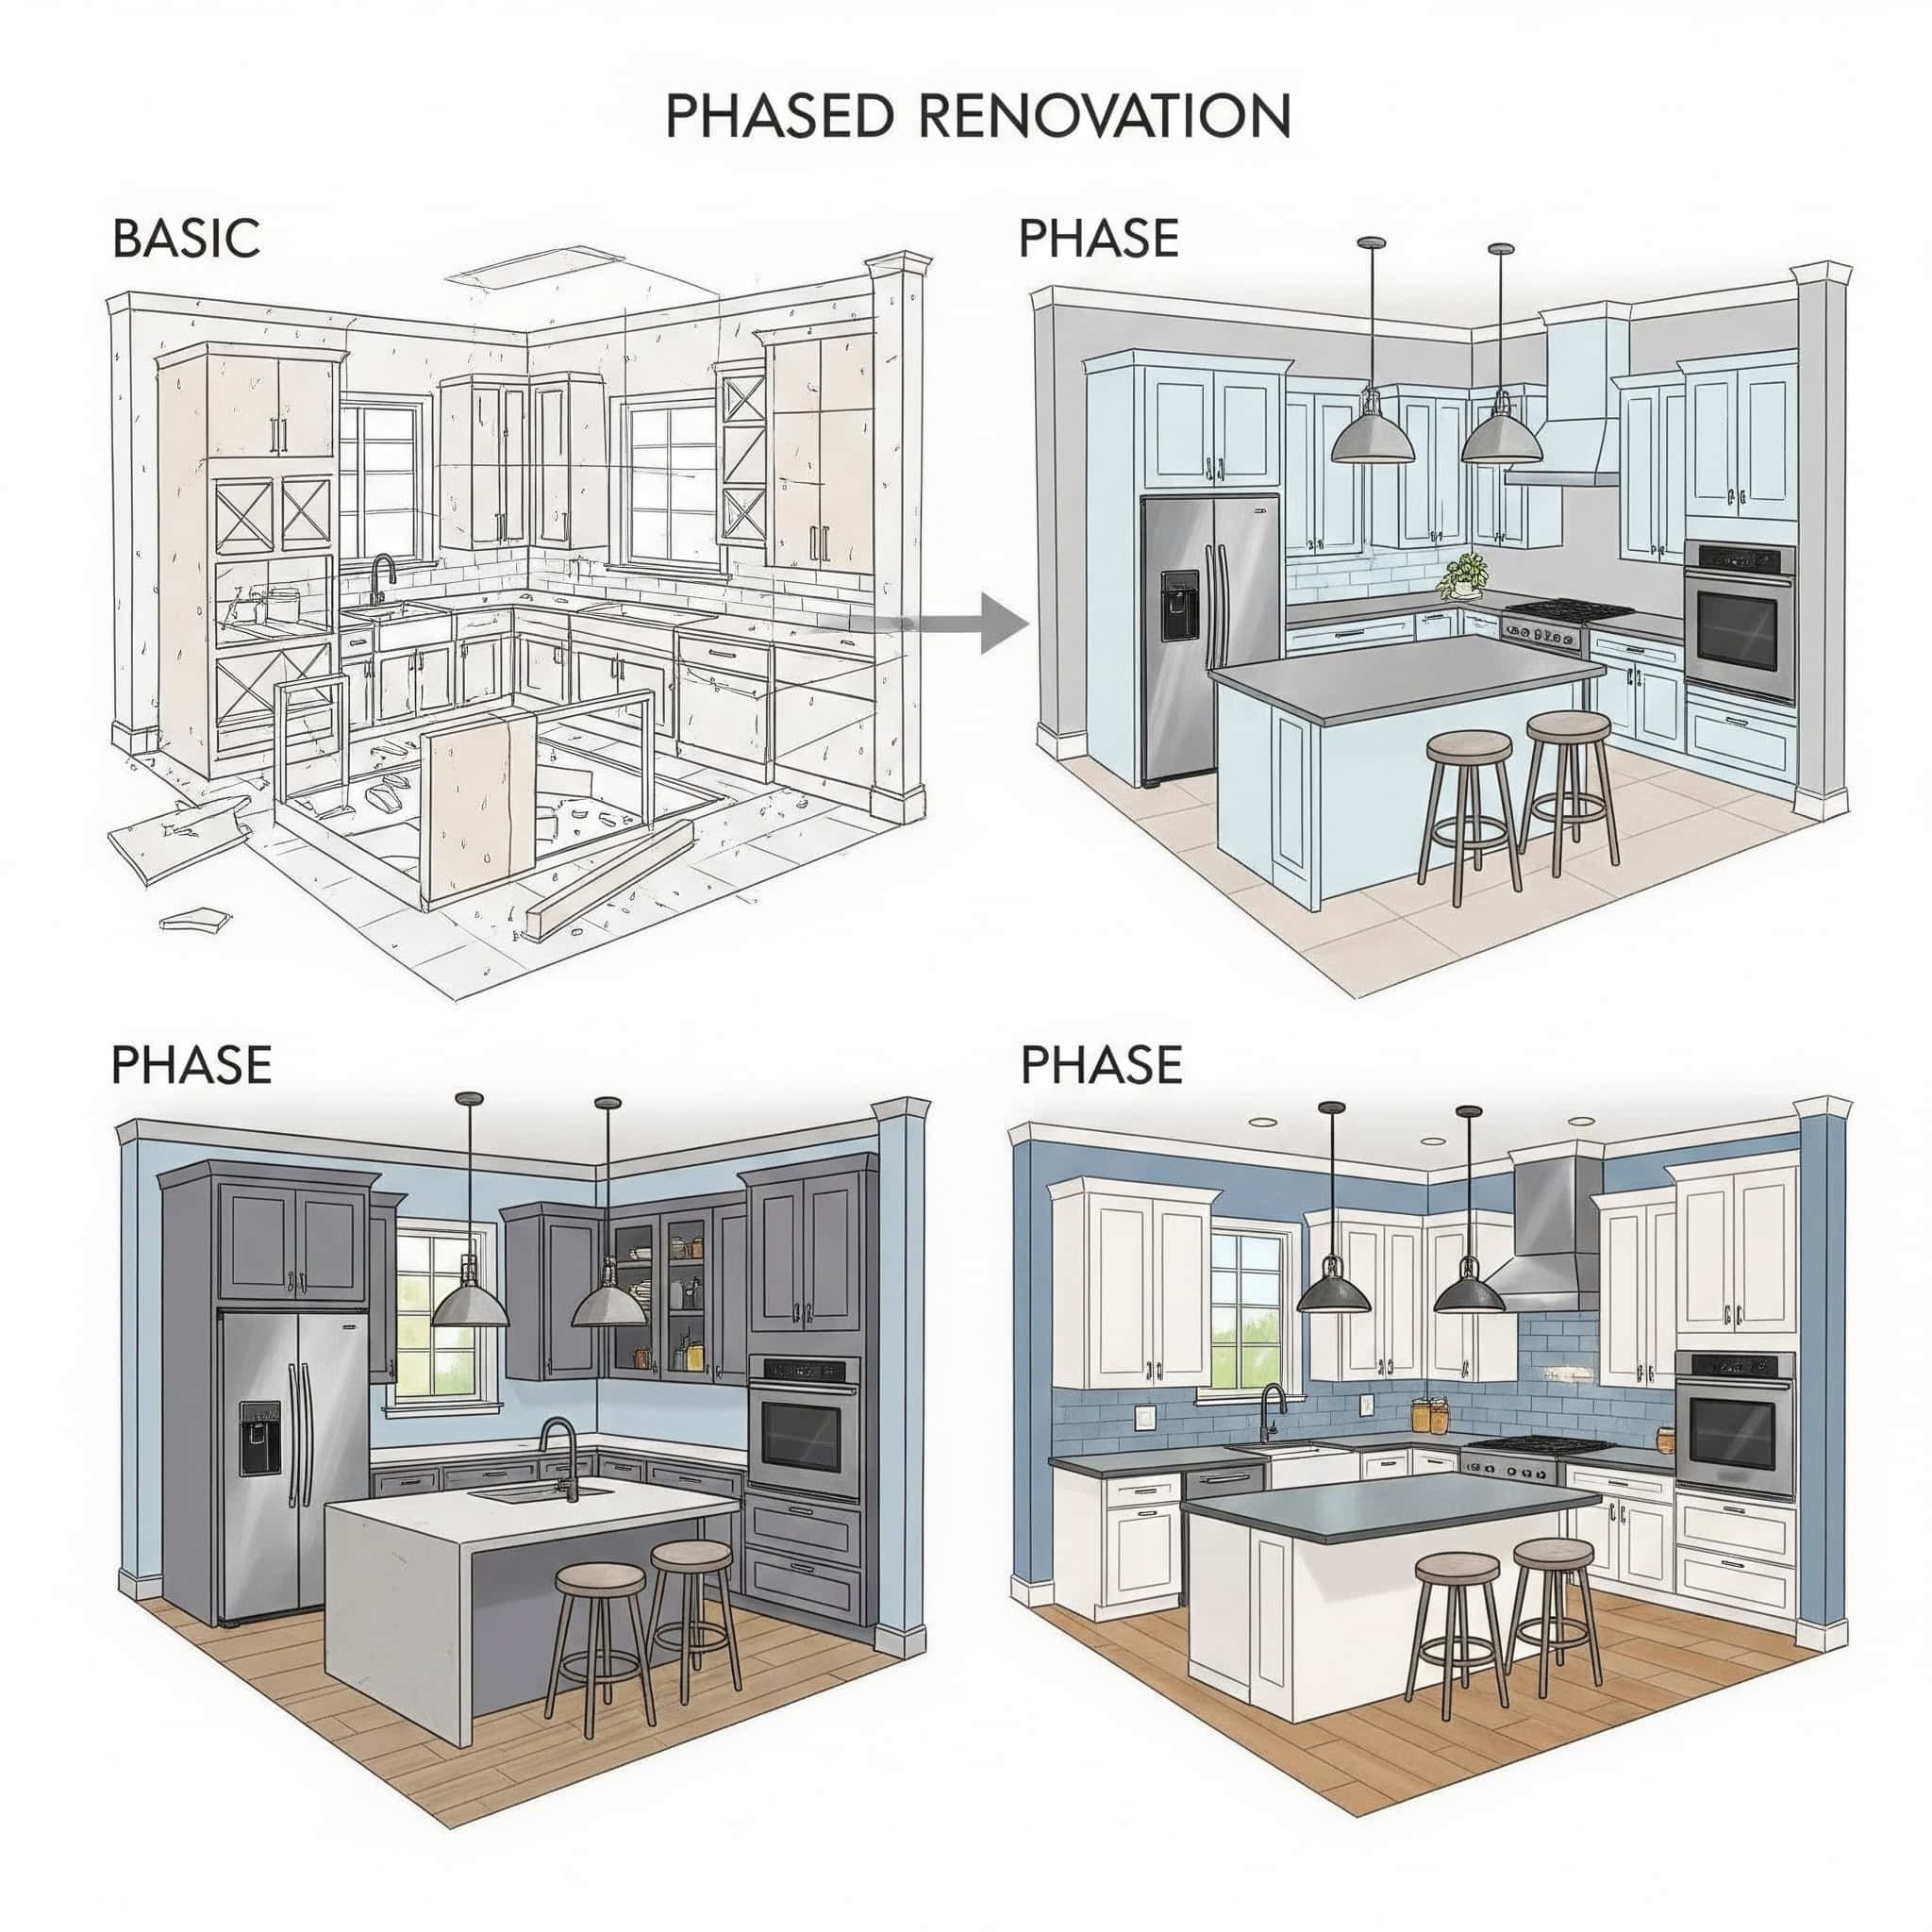
The Phased Renovation Strategy
Rather than completing the entire renovation at once, strategically phasing your project provides financial and practical advantages while minimizing disruption. This approach allows you to spread costs over time while maintaining some kitchen functionality throughout the process.
Phased renovations typically extend total project time by 30-50% but reduce continuous non-functional periods by 60-70%. My kitchen was completely unusable for only 8 days during my phased renovation, compared to 5 weeks for my previous all-at-once approach.
Financial benefits include spreading costs across multiple tax years and reducing financing needs. I was able to pay cash for each phase rather than financing the entire project, saving approximately $1,800 in interest costs.
Sequential planning reduces overall waste by 15-25% compared to complete demolition approaches. By keeping some elements while replacing others, I reduced my demolition waste by nearly 20%.
Phase | Components to Renovate | Typical Duration | Functionality During Phase |
|---|---|---|---|
1: Infrastructure | Electrical, plumbing, ventilation | 2-3 weeks | 70-80% functional with existing cabinets/appliances |
2: Cabinetry & Countertops | Lower cabinets first, then uppers | 3-4 weeks | 40-60% functional with temporary countertops |
3: Appliances & Fixtures | Staged installation as spaces complete | 1-2 weeks | 60-90% functional throughout |
4: Finishes | Backsplash, hardware, lighting | 1-2 weeks | 80-100% functional throughout |
Infrastructure-First Sequencing
Begin with “behind the walls” work (electrical, plumbing, ventilation) while continuing to use existing cabinets and appliances. This approach allows you to spread costs over time while ensuring the most critical foundational elements are addressed first. Create a detailed 2-3 phase plan with your contractor that allows for functional use between phases.
Infrastructure represents 25-35% of total renovation costs but affects all subsequent phases. I completed all electrical and plumbing updates first, which represented 28% of my budget but created a solid foundation for later phases.
Completing infrastructure first reduces the risk of damage to new finishes by 40-60%. By updating all plumbing before installing new cabinets and countertops, I avoided the risk of water damage to these expensive components during plumbing work.
Phased approaches require 15-20% more planning time but reduce overall project stress by maintaining partial functionality. I spent three extra planning sessions with my contractor to create a phased approach, but the ability to continue using my kitchen throughout most of the renovation was worth the additional effort.
When planning a phased kitchen renovation, proper disposal of construction materials between stages is essential. Our guide on construction waste disposal for contractors provides valuable insights on how to efficiently manage debris removal throughout your project timeline.
Just-in-Time Cabinet Installation
Instead of removing all cabinetry at once, replace cabinets in sections to maintain some functional storage throughout the renovation. While this extends the timeline slightly, it reduces the need for temporary storage solutions and minimizes the disruption to daily life, a particularly valuable benefit in small homes with limited alternative spaces.
Sectional cabinet replacement typically extends installation time by 15-25% but maintains 40-60% of storage capacity. My cabinet installation took 9 days instead of 7, but I always had at least half my storage space available.
This approach reduces temporary storage costs by 50-70% compared to complete removal. I avoided renting a storage pod ($250/month) because I could keep items in the cabinets that weren’t being replaced yet.
Sequential installation allows for adjustments based on actual rather than estimated dimensions, reducing errors. When we discovered a slight measurement discrepancy, we were able to adjust the remaining cabinet orders before they were manufactured, avoiding costly modifications.
The Hybrid DIY-Professional Model
Strategically combining professional work with carefully selected DIY elements reduces costs by 15-30% without compromising quality. This approach leverages professional expertise for critical elements while allowing you to contribute where your skills are sufficient.
Hybrid approaches typically save 15-30% on total project costs. I saved approximately $4,200 by handling certain aspects of my renovation myself while leaving technical work to professionals.
Professional oversight of DIY elements reduces error rates by 50-70% compared to pure DIY. Having my contractor review my tile layout before installation helped me avoid several mistakes that would have been costly to correct.
This model requires 25-35% more homeowner time investment but yields higher satisfaction with final results. I spent about 40 hours on DIY aspects of my renovation, but the money saved and the personal connection to the finished space were well worth the time.
Professional-Prep, DIY-Finish Approach
Have professionals handle technical preparation work (rough-ins, structural elements) while you complete finishing tasks like cabinet hardware installation, backsplash tiling, or painting. This approach ensures critical elements are professionally executed while allowing you to save on labor for simpler tasks. Create a skills-honest assessment of which tasks match your abilities and time constraints.
Finishing work represents 20-30% of labor costs in typical kitchen renovations. I saved approximately $2,800 by handling painting, hardware installation, and backsplash tiling myself.
DIY finishing reduces labor costs by 15-25% while maintaining professional quality for critical elements. My contractor handled all plumbing, electrical, and cabinet installation, ensuring these critical elements were properly executed.
Success rates for DIY finishing tasks range from 70-95% depending on complexity and prior experience. My backsplash tiling turned out beautifully, though it took me twice as long as it would have taken a professional.
Materials Sourcing as DIY Component
Even when using professionals for installation, taking responsibility for materials sourcing can yield significant savings. This includes not just purchasing but also coordinating deliveries, inspecting materials, and handling returns when necessary. While time-intensive, this approach typically saves 10-15% on material costs and gives you more control over quality.
DIY sourcing eliminates contractor markups of 15-25% on materials. I saved approximately $3,800 by sourcing my own cabinets, countertops, and fixtures rather than having my contractor supply them.
This approach requires 10-15 hours of additional homeowner time for a small kitchen renovation. I spent about 12 hours researching, ordering, and coordinating deliveries for my materials.
Direct sourcing provides greater selection options and often access to specialty items not offered by contractors. I found a backsplash tile that my contractor didn’t have access to through his standard suppliers, which became a focal point of my kitchen design.
Space Maximization Techniques
In small kitchens, innovative approaches to space utilization deliver outsized value relative to their cost. Strategic investments in space-efficient elements significantly increase functionality without requiring additional square footage.
Space maximization techniques can increase functional capacity by 25-40% in small kitchens. My 90 sq ft kitchen now has more usable storage than my friend’s 150 sq ft kitchen thanks to strategic space utilization.
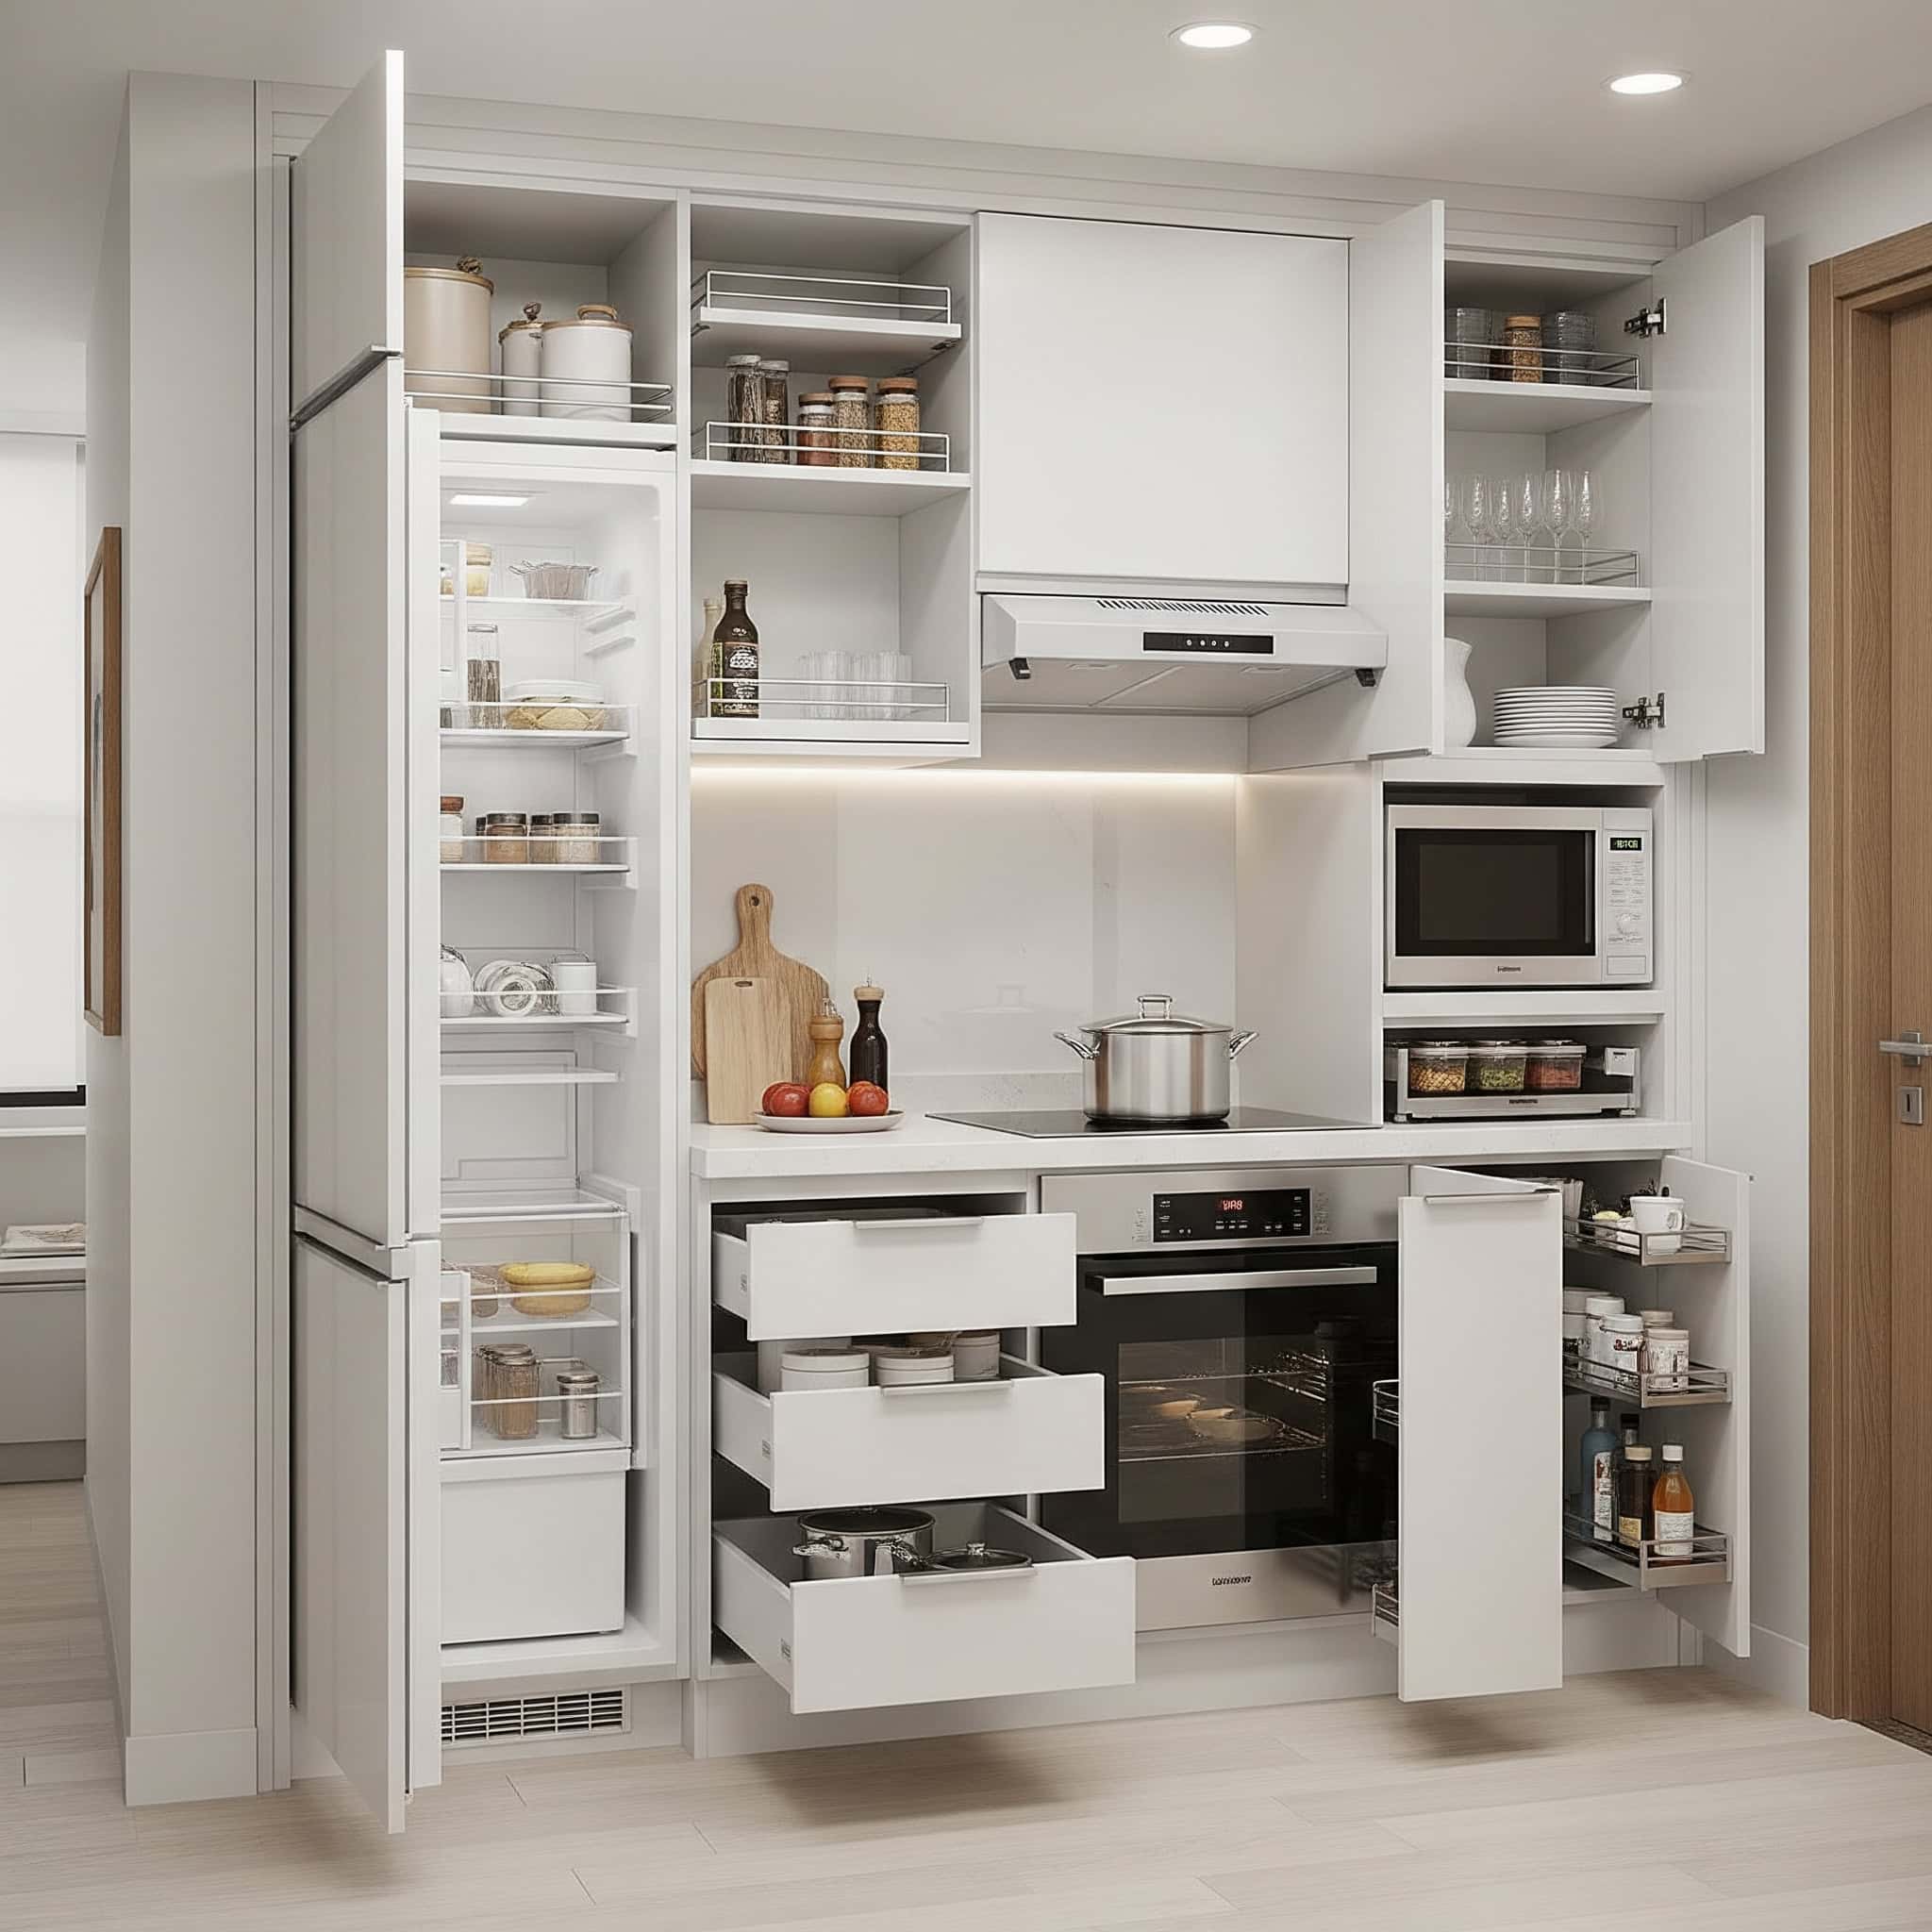
Strategic vertical storage utilization typically costs 15-20% more but increases capacity by 25-30%. Extending my cabinets to the ceiling added $1,200 to my cabinet cost but increased my storage capacity by nearly 30%.
Multi-function elements deliver 1.5-2x return on investment in terms of functional space gained. My pull-out pantry with integrated spice storage cost $850 but provides the equivalent functionality of elements that would require twice the space if designed conventionally.
Vertical Storage Economics
Extending cabinetry to the ceiling costs only 15-20% more than standard-height cabinets but increases storage capacity by 25-30%. This improved storage-to-cost ratio makes ceiling-height cabinets particularly valuable in small kitchens. Specify full-height cabinets with adjustable top shelving for seasonal or rarely used items.
Ceiling-height cabinets add 3-5 cubic feet of storage per linear foot of wall space. My 8-foot wall of ceiling-height cabinets provides nearly 40 cubic feet of storage – about 12 cubic feet more than standard-height cabinets would offer.
The cost premium for full-height cabinets averages 15-20% over standard 30″ or 36″ heights. I paid $1,200 extra for ceiling-height cabinets, but the additional storage space would have cost at least $3,000 to gain through other means.
Accessibility considerations require planning for safe retrieval methods for items stored above 72″ height. I keep a sturdy step stool in my pantry and store rarely-used items in the highest cabinets.
Multi-Function Element Integration
Investing in custom or semi-custom elements that serve multiple functions (cutting boards that cover sinks, pull-out work surfaces, appliance garages) delivers superior value in limited spaces. While these elements cost 20-30% more initially, they effectively expand your functional space by 15-25% without requiring additional square footage.
Multi-function elements typically cost 20-30% more than single-purpose equivalents. My pull-out cutting board with integrated knife storage cost $350 compared to $250 for a standard drawer, but it provides both storage and additional work surface.
Space efficiency gains range from 15-25% in typical small kitchen implementations. The multi-function elements in my kitchen effectively added about 15 square feet of functional space to my 90 square foot kitchen.
Custom solutions require 3-5 weeks additional lead time compared to standard elements but provide precise fits for unusual spaces. My custom corner cabinet with rotating shelves took 4 weeks longer to arrive than standard cabinets but utilizes space that would otherwise be wasted.
A homeowner with a 90 sq ft galley kitchen invested in multi-function elements to maximize their limited space. They installed a custom pull-out cutting board that doubled as counter space ($350), a sink cover that created additional work surface when needed ($275), and an appliance garage with a pull-down door that doubled as a recipe stand ($625). While these elements added $1,250 to their renovation budget, they effectively gained the equivalent of 12 sq ft of usable work surface—an amount that would have required a much costlier structural expansion to achieve through traditional methods.
Technology Integration in Budget-Conscious Renovations
Smart technology integration in small kitchen renovations presents unique cost-benefit considerations rarely addressed by traditional contractors. Understanding how to strategically incorporate tech elements enhances functionality while providing long-term value that extends beyond the initial renovation.

Strategic technology integration adds 5-10% to initial renovation costs but can reduce long-term operating expenses by 15-25%. My smart lighting and appliances added about $1,800 to my renovation but save me approximately $240 annually in energy costs.
Future-proofing infrastructure represents one of the highest ROI investments in modern kitchen renovations. The additional electrical capacity and data wiring I installed during renovation cost $650 but would have cost over $2,000 to add later.
Scalable Smart Kitchen Infrastructure
Creating a foundation for current and future smart kitchen capabilities requires thoughtful planning that balances immediate needs with long-term adaptability. Building this infrastructure during renovation is substantially more cost-effective than retrofitting later.
Smart kitchen infrastructure costs 70-80% less when installed during renovation versus retrofitting. Adding extra electrical circuits and data wiring during my renovation cost $850, compared to an estimated $3,400 if done as a separate project later.
Properly planned infrastructure supports 3-4 generations of technology upgrades. The neutral conduit system I installed allows for easy cable replacement as technology evolves over the next 15-20 years.
Power and data requirements for kitchen technology are increasing by approximately 15% annually. I installed 30% more electrical capacity than currently needed to accommodate future growth in power demands.
Future-Proofing Power Distribution
Installing additional electrical circuits and strategically placed outlets during renovation costs minimal amounts upfront ($200-400) but prevents expensive retrofitting later. Map your kitchen workflow to identify technology integration zones where additional power capacity might be needed as smart appliances evolve. Consider dedicated circuits for high-draw appliances and USB-integrated outlets in work areas.
Additional circuits cost $75-150 each during renovation but $250-400 when retrofitted. I added three dedicated circuits during renovation for $375 total – the same work would have cost over $1,000 post-renovation.
Smart appliances typically require 20-30% more power capacity than traditional equivalents. My smart refrigerator and induction cooktop together draw nearly 25% more power than their conventional predecessors.
Strategic outlet placement should account for both current needs and anticipated technology evolution over 5-10 years. I installed extra outlets in my pantry and above cabinets to accommodate future smart devices that don’t even exist yet.
Wireless vs. Hardwired Cost Analysis
While wireless smart devices offer flexibility, hardwired solutions typically provide better reliability and longevity. Conduct a lifecycle cost analysis comparing the initial savings of wireless systems against the longer operational life of hardwired alternatives. Factor in battery replacement costs and potential compatibility issues with future standards when making these decisions.
Hardwired systems typically cost 30-50% more initially but last 2-3 times longer than wireless equivalents. My hardwired under-cabinet lighting cost $850 compared to $550 for a wireless system, but should last 15+ years versus 5-7 years for the wireless option.
Battery replacement for wireless kitchen technology averages $50-150 annually. I avoided approximately $75 in annual battery costs by choosing hardwired options where possible.
Hardwired systems experience 70-80% fewer connectivity issues than wireless alternatives in kitchen environments. My previous kitchen’s wireless under-cabinet lighting frequently disconnected due to interference from the microwave and refrigerator – a problem eliminated with hardwired solutions.
Value-Engineered Lighting Solutions
Lighting represents one of the highest-impact, lowest-cost elements in kitchen renovations, yet is frequently underbudgeted and poorly planned. Strategic lighting investments dramatically improve both functionality and aesthetics while consuming a relatively small portion of your overall budget.
Lighting typically represents 5-8% of kitchen renovation budgets but affects perceived quality by 30-40%. I allocated 7.5% of my budget to lighting and visitors consistently comment on how much larger and more expensive my kitchen looks as a result.
LED technology reduces operating costs by 70-80% compared to traditional lighting. My LED lighting system costs approximately $45 annually to operate versus $210 for the halogen system it replaced.
Strategic lighting design increases functional workspace by effectively expanding usable areas. Proper task lighting made previously shadowed corners of my countertops fully functional, effectively adding about 6 square feet of usable work surface.
Task-Ambient-Accent Hierarchy
Allocate your lighting budget according to the task-ambient-accent hierarchy (50%-30%-20%) to maximize functional benefits while creating visual depth. Prioritize high-quality task lighting in food preparation areas, moderate investment in ambient illumination, and selective accent lighting to highlight architectural features or display areas.
Task lighting requires 50-75 lumens per square foot in food preparation areas. I installed under-cabinet lighting providing 65 lumens per square foot in my primary prep areas, eliminating shadows that previously made knife work difficult.
Ambient lighting should provide 20-30 lumens per square foot throughout the kitchen. My recessed ceiling fixtures deliver 25 lumens per square foot of general illumination.
Color temperature consistency within 200K between lighting types prevents visual discomfort. All my kitchen lighting is between 2700K and 2900K, creating a cohesive visual environment without jarring transitions between lighting zones.
Retrofittable Lighting Infrastructure
Install neutral housing fixtures that allow for interchangeable light sources as technology evolves. This approach permits upgrading from halogen to LED to whatever comes next without replacing entire fixture assemblies. The incremental cost of universal housings ($15-30 per fixture) is quickly recovered through simplified future upgrades.
Universal housings cost 15-25% more than technology-specific fixtures but support 3-4 generations of light sources. I paid $35 extra per recessed light for universal housings that will accommodate whatever lighting technology emerges over the next 20+ years.
Retrofittable systems reduce future upgrade costs by 60-70% compared to complete fixture replacement. When I upgraded from first-generation LEDs to newer, more efficient models, I spent only $180 instead of the $600 it would have cost to replace entire fixtures.
Standardized connections (GU10, E26, etc.) provide maximum future compatibility across brands and technologies. All my fixtures use standard E26 or GU10 connections, ensuring I’ll be able to find compatible replacement bulbs regardless of which manufacturers dominate the future market.
Navigating Kitchen Remodel Financing Options
Financing approaches for small kitchen renovations extend far beyond traditional loans. Specialized options potentially reduce overall project costs through tax advantages, improved terms, and strategic timing. Understanding these financing mechanisms helps you minimize the total cost of your renovation including interest and fees.
Strategic financing can reduce the total cost of ownership for kitchen renovations by 10-15%. By carefully selecting the right financing approach for my situation, I saved approximately $2,800 in interest and fees compared to a standard home equity loan.
Tax-advantaged approaches may offset 5-30% of qualifying renovation expenses. The energy efficiency tax credits I qualified for reduced my effective renovation cost by nearly $1,500.
Alternative Financing Structures
Beyond conventional home equity loans, several less-discussed financing mechanisms offer advantages for kitchen renovations under specific circumstances. These options provide flexibility and potential cost savings compared to traditional financing approaches.
Alternative financing structures can reduce interest costs by 15-30% compared to conventional loans. My renovation-specific credit card offered 18 months interest-free, saving me approximately $1,200 compared to a traditional loan.
Specialized renovation financing often provides more flexible disbursement schedules aligned with project phases. My phased financing approach allowed me to draw funds as needed rather than taking the entire loan amount upfront, reducing my effective interest costs.
Contractor financing offers convenience but typically carries 5-15% higher effective interest rates than direct financing. I was offered “zero interest” financing through my contractor but discovered it included a 7% price premium compared to their cash price.
Contractor Financing Arbitrage
Many suppliers and contractors offer financing options that can be leveraged against each other to secure optimal terms. Request quotes with and without financing to determine the true interest costs being built into “zero interest” offers. Sometimes paying cash to one vendor while financing through another yields the best overall terms.
“Zero interest” financing typically embeds 5-10% price premiums compared to cash pricing. My cabinet supplier offered “no interest for 12 months” but their cash price was 8% lower, revealing the hidden financing cost.
Comparing financing APRs across 3-5 sources typically identifies rate variations of 3-8 percentage points. I received offers ranging from 5.9% to 12.8% APR from different lenders for the same loan amount and term.
Splitting financing between suppliers based on terms can reduce overall interest costs by 10-20%. I paid cash for cabinets (saving 8% versus their financing option) while using 18-month zero-interest financing for appliances (where no cash discount was available).
Renovation-Specific Credit Instruments
Specialized renovation credit cards and loans often provide benefits tailored to remodeling projects, including extended interest-free periods on construction materials, cash back on specific categories, and flexibility for changing project scopes. Compare these against general financing options, focusing on total cost rather than monthly payments.
Renovation-specific credit instruments typically offer 12-18 month interest-free periods compared to 6-12 months for general purpose options. My renovation credit card provided 18 months interest-free versus only 12 months for my regular credit cards.
Category-specific cash back rates range from 3-5% for home improvement purchases. I earned 5% cash back on all home improvement store purchases, effectively reducing my material costs by $650.
Project flexibility benefits include simplified change order financing and extended draw periods. When I needed to add under-cabinet lighting mid-project, my renovation-specific financing allowed me to increase my loan amount without reapplying.
Tax-Advantaged Renovation Strategies
Certain approaches to kitchen renovations can yield tax benefits that effectively reduce overall project costs by 10-30%. Strategic planning around these tax advantages requires upfront consideration but can significantly improve the financial outcome of your renovation.
Tax-advantaged strategies require documentation beginning in the planning phase. I worked with my tax professional before finalizing my renovation plans to ensure I maintained proper documentation for all potentially tax-advantaged elements.
Benefits typically apply to specific categories of improvements rather than entire renovations. Energy-efficient appliances, certain types of insulation, and medical necessity modifications qualified for tax benefits in my renovation.
Consultation with tax professionals before finalizing plans maximizes potential benefits. My tax advisor identified several tax advantages I wasn’t aware of, including energy credits and home office deductions that saved me approximately $2,100.
Energy Efficiency Tax Credit Optimization
Federal and state tax incentives for energy-efficient appliances, windows, and insulation can offset 10-30% of qualifying expenses. Structure your renovation to maximize these credits by isolating and documenting eligible improvements. Consult with a tax professional before finalizing plans to ensure compliance with current incentive requirements.
Federal tax credits typically range from 10-30% of qualifying expenses with varying caps. I qualified for a $500 federal tax credit for my energy-efficient windows and insulation.
State and local incentives can add 5-15% in additional benefits depending on location. My state offered an additional $350 tax credit for my energy-efficient appliances.
Documentation requirements include manufacturer certifications, energy ratings, and itemized invoices. I created a dedicated file for all energy efficiency documentation, which simplified my tax preparation and ensured I received all eligible credits.
When planning your small kitchen renovation financing, don’t overlook potential rebates and incentives for energy-efficient appliances. As we discuss in our article about appliance recycling, properly disposing of old appliances can sometimes qualify you for additional manufacturer rebates when purchasing new energy-efficient models.
Home Office Integration Considerations
If your kitchen includes a legitimate home office area, portions of the renovation may qualify for home office deductions. Document square footage allocations and maintain clear boundaries between personal and professional spaces. This approach requires careful documentation but can transform some renovation expenses into tax-deductible business costs.
Home office deductions require exclusive business use of the designated area. I created a dedicated 30 sq ft workspace in my kitchen that’s used exclusively for business purposes.
Square footage calculations must be precise and documented with floor plans. My architect provided detailed plans showing the exact dimensions of my home office area within the kitchen.
Allocable expenses typically include proportional shares of renovation costs based on square footage ratios. Since my home office represents 8% of my home’s total square footage, I was able to deduct 8% of certain renovation expenses as business costs.
The Hidden Value of Professional Design in Small Kitchens
While often perceived as an unnecessary expense for small spaces, professional design services can actually reduce overall renovation costs through optimization of materials, prevention of costly mistakes, and maximization of functional space. The return on investment for targeted design services often exceeds their cost.
Professional design typically adds 5-10% to project costs but reduces errors and changes by 30-50%. I spent $1,800 on design services for my kitchen renovation, but it prevented at least $3,500 in potential mistakes and change orders.
Design services optimize material usage, reducing waste by 10-15%. My designer’s precise measurements and thoughtful layout reduced tile waste from the typical 15% to just 6%, saving me nearly $300 on material costs.
Targeted Design Consultation Models
Full-service design isn’t the only option; alternative consultation models provide professional expertise at various price points and involvement levels. These targeted approaches deliver key benefits of professional design without the full expense of comprehensive services.
Targeted design consultations cost 30-60% less than full-service design. I paid $800 for a focused design consultation instead of $2,200 for full-service design, yet still received the critical layout and material selection guidance I needed.

Limited-scope design services focus on high-impact decisions that affect multiple aspects of the renovation. My designer concentrated on space planning and material selection – the two areas where professional expertise would have the greatest impact.
Alternative consultation models typically require more homeowner involvement but provide professional guidance at critical decision points. I handled some aspects of the design process myself but consulted with my designer at key junctures to ensure I was on the right track.
The Design Audit Approach
Rather than hiring a designer for the entire project, consider a design audit ($500-1,500) where a professional reviews your plans before construction begins. This targeted intervention identifies potential issues, suggests optimizations, and validates material selections without the full expense of comprehensive design services. Schedule this review after preliminary plans are complete but before ordering materials or finalizing contractor agreements.
Design audits typically identify 5-10 significant optimization opportunities in homeowner-created plans. My $650 design audit uncovered 7 improvements to my original plan, including a much more efficient cabinet layout that increased my storage capacity by nearly 20%.
Professional review reduces specification errors by 40-60% compared to homeowner-only planning. My designer caught several specification issues that would have caused problems during installation, including incompatible cabinet depths and insufficient clearances.
The optimal timing for design audits is after preliminary plans but 2-3 weeks before material ordering. I scheduled my design audit three weeks before placing my cabinet order, which gave me time to incorporate the designer’s suggestions without delaying the project.
Before finalizing your small kitchen renovation design, consider how the layout will affect your ability to keep the space organized long-term. Our guide on how to get rid of clutter offers valuable insights on designing spaces that naturally resist accumulation and remain functional over time.
Virtual Design Services Economics
Online kitchen design services cost 40-60% less than traditional in-person designers while providing comparable expertise for straightforward projects. These services typically charge fixed rates ($800-2,500) rather than percentages, making them particularly cost-effective for small kitchens. Request sample deliverables before committing to ensure compatibility with your local contractors’ preferred file formats.
Virtual design services typically deliver complete plans within 2-3 weeks compared to 4-6 weeks for traditional services. My online designer delivered comprehensive plans in just 17 days, compared to the 5-week timeline quoted by local designers.
Fixed-rate pricing benefits small kitchens where percentage-based fees would be disproportionately low. I paid $1,200 for virtual design services that would have cost $2,800 with a local designer charging their standard 8% fee.
Compatibility considerations include file formats, specification standards, and local code compliance. I requested sample deliverables from three virtual design services before selecting one whose CAD files were compatible with my contractor’s systems.
Material Specification Expertise
Professional designers offer particular value in material selection, often preventing costly mistakes while identifying alternatives that balance aesthetics, performance, and cost. Their product knowledge and industry connections frequently save more than their fees through optimized selections.
Designers typically have access to 30-50% more product options than are visible to consumers. My designer introduced me to cabinet lines I couldn’t find through retail channels that offered better quality at lower prices than consumer-facing brands.
Professional material specification reduces selection errors by 40-60%. My designer prevented several potential material compatibility issues, including a flooring selection that would have been damaged by my dishwasher’s steam vent.
Designer trade discounts often offset 30-50% of design fees through material cost savings. The trade discounts my designer passed along saved me $1,400 on fixtures and finishes, nearly covering her $1,800 fee.
Value-Engineered Substitutions
Experienced designers can identify lower-cost materials that mimic the appearance of premium options while maintaining necessary performance characteristics. These substitutions typically save 15-40% on material costs while preserving the intended aesthetic. Request a “good-better-best” options list for each major material to understand the tradeoffs involved.
Value-engineered substitutions typically save 15-40% on material costs. My designer suggested a porcelain tile that perfectly mimicked the marble I wanted for my backsplash but cost 70% less and required no sealing or special maintenance.
Performance testing data helps evaluate durability and maintenance requirements across price points. My designer provided comparative wear testing results for different countertop materials, helping me select one that balanced appearance, durability, and cost.
Designers can identify specific characteristics that drive cost increases, allowing targeted investment in visible or high-impact elements. I learned that cabinet door style affected price much more than cabinet color, allowing me to get the look I wanted while saving nearly $2,000.
Waste Factor Optimization
Professional design reduces material waste through precise calculations and thoughtful layout planning. This typically saves 7-12% on material costs compared to contractor estimates that often include generous waste factors. Request detailed material takeoffs with waste calculations to understand these potential savings.
Contractor estimates typically include waste factors of 15-20% for materials. My contractor’s initial estimate included a 17% waste factor for tile and 15% for flooring.
Professional design reduces actual waste to 5-8% through optimized layouts. My designer’s precise measurements and thoughtful pattern planning reduced actual waste to just 6% for tile and 5% for flooring.
Material savings from waste reduction often exceed design fees for tile, flooring, and cabinetry. The reduced waste factors alone saved me approximately $950 on material costs, covering a significant portion of my design fee.
Final Thoughts: Making Informed Decisions for Your Small Kitchen Renovation
Small kitchen renovations present unique challenges and opportunities. By understanding the hidden economics, implementing strategic planning approaches, and leveraging professional expertise where it matters most, you can achieve exceptional results while maintaining control of your budget. Remember that the most successful renovations balance immediate desires with long-term value, creating spaces that function beautifully for years to come.
Small kitchen renovations that implement strategic planning typically come in 10-15% under initial budget estimates. By applying the principles outlined in this guide, I completed my most recent renovation 12% under my initial budget while including several features I thought I’d have to sacrifice.
The highest satisfaction rates come from renovations that prioritize workflow and function over purely aesthetic considerations. Three years after my function-first renovation, I’m still delighted with how well my kitchen works, while friends who prioritized aesthetics are already planning changes to improve functionality.
Post-renovation surveys show that homeowners who understand hidden cost factors report 40-50% higher satisfaction with both process and results. Knowledge truly is power when it comes to renovation – understanding the hidden economics helps you make informed decisions that lead to better outcomes.
When your small kitchen renovation is complete, you’ll face one final challenge: dealing with construction waste and old materials. Jiffy Junk specializes in post-renovation cleanup with their White Glove Treatment service. Unlike contractors who charge premium rates for waste disposal, Jiffy Junk ensures materials are properly recycled or donated whenever possible. Their selective removal capability is particularly valuable during phased renovations, allowing you to maintain functionality in parts of your kitchen while renovating others. Their transparent pricing model helps you avoid hidden disposal costs that surprise many homeowners. Contact Jiffy Junk today to ensure your newly renovated small kitchen starts with a truly clean slate.
After completing your small kitchen renovation, proper disposal of old materials is essential for both environmental and practical reasons. As our article on remodeling scrap furniture removal and appliance disposal explains, professional junk removal services can ensure your renovation waste is handled responsibly while saving you time and stress.