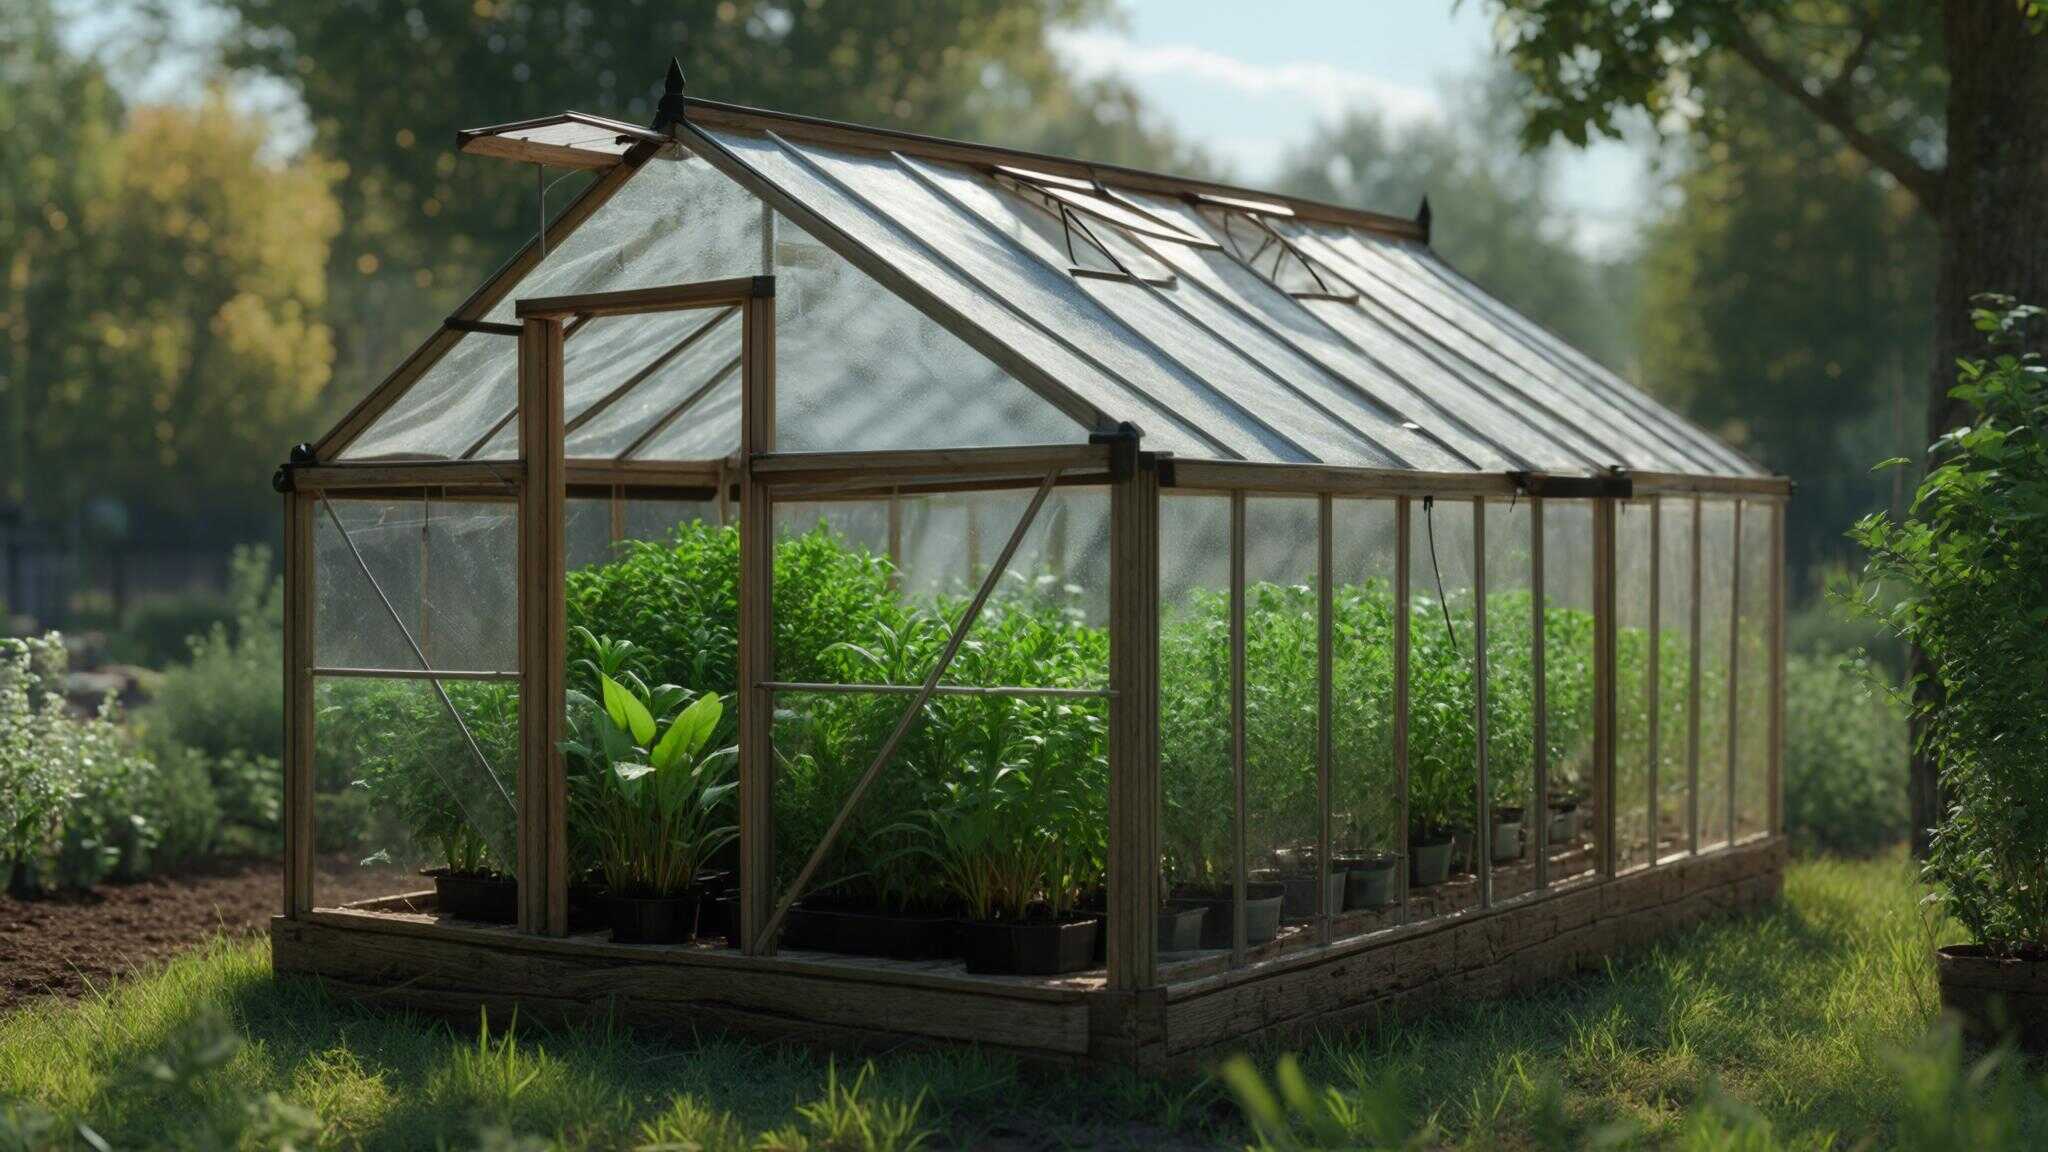
DIY Greenhouse Engineering: The Hidden Science Behind Maximum Growing Success
A greenhouse costs $1,000-$30,000 and takes 2-4 weeks to build, but understanding the engineering principles behind successful structures can mean the difference between a greenhouse that struggles for a few seasons and one that produces abundantly for decades. The hidden science lies in creating integrated systems that work with natural forces rather than against them.
Table of Contents
-
Microclimate Engineering for Maximum Yield
-
Foundation and Structural Longevity Secrets
-
Advanced Covering Material Science
-
Site Integration and Permaculture Principles
-
Automation and Smart Systems Integration
-
Material Sourcing and Cost Optimization
-
How Jiffy Junk Supports Your DIY Greenhouse Journey
-
Final Thoughts
TL;DR
-
Thermal mass systems and passive ventilation eliminate expensive heating and cooling equipment while maintaining optimal growing conditions
-
Proper foundation design with thermal breaks and deep footings prevents the structural failures that destroy most amateur greenhouses within five years
-
Strategic covering material selection affects light spectrum, condensation patterns, and plant yields more than total light transmission
-
Integrating your greenhouse with existing property systems reduces operating costs while maximizing productivity through waste heat recovery and rainwater collection
-
Smart monitoring systems prevent crop losses by responding to environmental changes faster than human observation
-
Reclaimed materials and bulk purchasing cooperatives can reduce construction costs by 40-60% while providing superior quality components
Microclimate Engineering for Maximum Yield
Creating controlled environmental zones within your diy greenhouse requires understanding how air currents, humidity pockets, and thermal mass interact to optimize growing conditions. This engineering approach goes beyond basic heat retention to establish self-regulating systems that maintain ideal temperatures and moisture levels without constant manual adjustment.
Temperature differentials of 15-20°F can be maintained through strategic thermal mass placement without electrical heating systems. I’ve seen diy greenhouse builders achieve remarkable results by positioning water barrels and concrete slabs to capture and release heat naturally throughout daily cycles.
Natural convection patterns eliminate expensive ventilation equipment while preventing humidity buildup that causes plant diseases. When you design your diy greenhouse with proper airflow channels, the structure essentially ventilates itself based on temperature changes. Humidity gradient management allows cultivation of plants with different moisture requirements within the same structure, maximizing your growing diversity without building multiple greenhouse designs.

Thermal Mass Integration Strategy
Strategic placement of thermal mass materials stores and releases heat throughout daily temperature cycles, providing natural temperature regulation that most DIY builders overlook. This approach focuses on heat banking rather than insulation alone, creating stable growing environments that respond automatically to temperature fluctuations.
Heat storage capacity depends on material density and surface area exposure to direct sunlight during peak heating hours. When I build a greenhouse, I calculate the thermal mass needed based on the interior volume and expected temperature swings. Release timing occurs naturally during temperature drops, maintaining warmth during critical nighttime periods when plants are most vulnerable.
The key to successful thermal mass integration in any diy greenhouse lies in understanding that different materials store and release heat at different rates. Water holds heat longer than concrete, while stone provides steady, moderate heat release throughout the night.
Water Wall Systems
Dark-colored water containers positioned along north-facing walls create natural temperature regulation systems that maintain significant temperature differentials without electricity. These systems absorb excess heat during warm periods and release stored thermal energy when temperatures drop, stabilizing the growing environment automatically.
Water’s high specific heat capacity stores approximately four times more thermal energy per pound than concrete or stone materials. This makes water walls incredibly efficient for diy greenhouse temperature control. Dark container colors maximize solar heat absorption while north-wall placement prevents overheating during peak summer conditions.
System capacity scales directly with water volume, allowing customization based on greenhouse size and local climate conditions. A Manitoba greenhouse builder used black rain barrels filled with water inside their homemade greenhouse, finding that “The barrels heat up from the sun and generate both warmth and humidity in your greenhouse” during shoulder seasons, maintaining temperatures 10-15°C warmer than outside even on cold winter days when the sun is shining.
Concrete Floor Heat Banking
Pouring concrete slabs with embedded dark aggregates transforms your greenhouse floor into a massive heat battery that releases warmth during cool nights. This thermal mass system provides consistent ground-level heating that benefits root systems while contributing to overall temperature stability.
Slab thickness of 4-6 inches provides optimal thermal mass without excessive material costs or structural complications. When building a greenhouse, I recommend incorporating dark aggregate materials to increase heat absorption capacity while maintaining structural integrity of the concrete matrix. Ground-level heat release creates beneficial root zone warming that extends growing seasons and improves plant establishment rates.
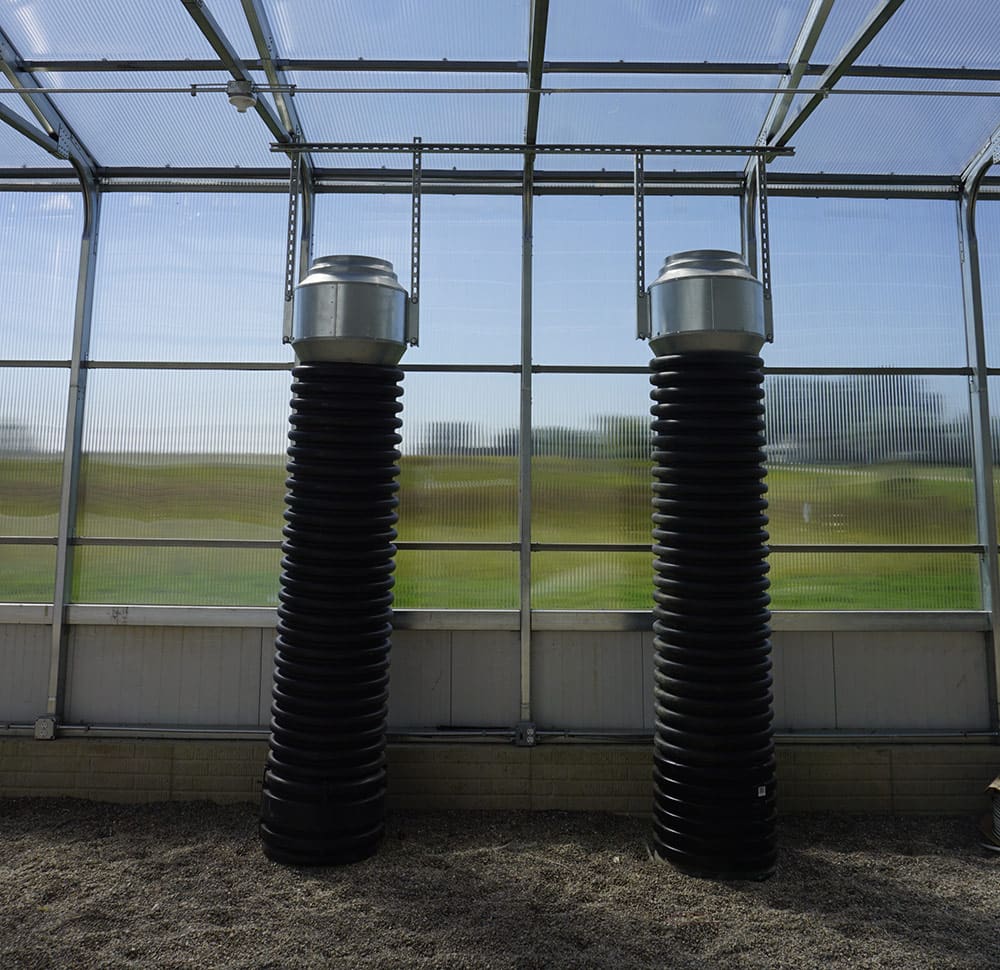
Passive Ventilation Architecture
Natural airflow patterns eliminate expensive ventilation systems while preventing humidity buildup that damages more greenhouse plants than cold temperatures. This design approach uses physics principles to create automatic air circulation that adjusts based on temperature and pressure differentials.
Stack effect principles create natural convection currents that increase in strength as temperature differentials rise. Your diy greenhouse can handle 360kg of snow per square meter when properly designed and stands up to 63 mph winds with the right structural approach. Proper vent sizing and placement prevents stagnant air pockets where fungal diseases develop and thrive.
Adjustable ventilation systems allow fine-tuning of airflow patterns based on seasonal conditions and plant requirements. Recent innovations in PVC hoop house construction show that “PVC plastic pipes arched over a wooden ground frame and then covered in polyethylene plastic” can create effective structures up to 18 feet wide, with galvanized steel pipe alternatives offering superior strength for extreme weather conditions.
When planning your diy greenhouse ventilation, remember that greenhouse kit manufacturers often undersize vents to reduce costs. I always recommend increasing vent area by at least 25% beyond kit specifications for optimal airflow.
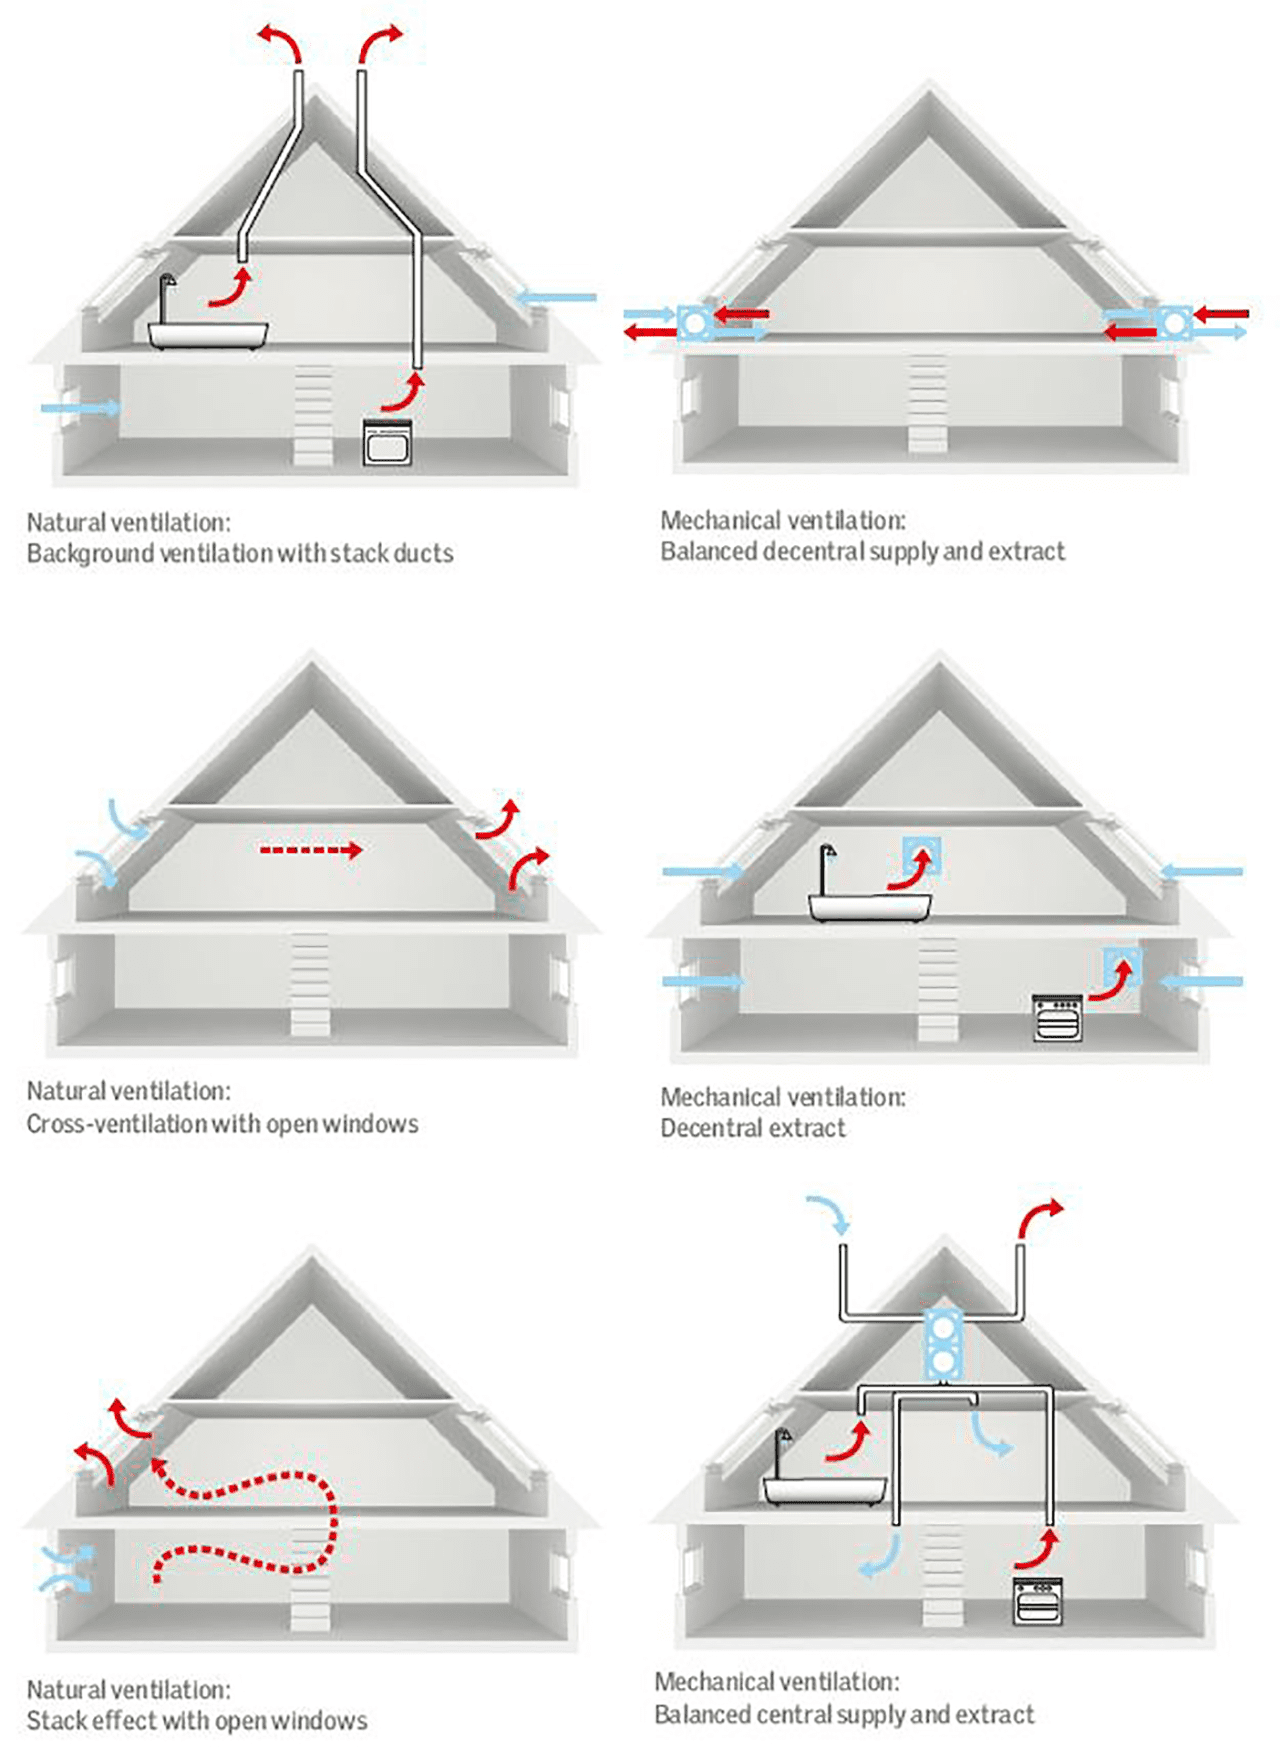
Stack Effect Optimization
Positioning intake vents at ground level and exhaust vents at the peak creates natural convection currents that automatically adjust based on temperature differentials. This system uses warm air’s tendency to rise, creating continuous air circulation without mechanical assistance.
Vertical distance between intake and exhaust vents directly affects convection strength and air circulation rates. Most diy greenhouse kit instructions don’t emphasize this critical measurement, but I’ve found that maximizing this vertical separation dramatically improves natural ventilation performance.
Vent sizing ratios determine airflow volume, with exhaust vents typically requiring 20% larger area than intake vents. This sizing difference accounts for the expansion of warm air as it rises, ensuring balanced airflow throughout your diy greenhouse kit structure.
Cross-Ventilation Channels
Installing adjustable louvers on opposite walls creates controllable air channels that prevent stagnant air pockets where fungal diseases thrive. This system provides lateral airflow that complements vertical stack effect ventilation, ensuring complete air circulation throughout the growing space.
Louver positioning at plant canopy level maximizes air movement around foliage where disease prevention is most critical. When selecting a greenhouse kit, look for models that include adjustable side vents, or plan to add them during construction. Adjustable controls allow seasonal modifications to airflow patterns based on changing weather conditions and plant growth stages.
Thermal Chimney Design
Building separate thermal chimney structures can increase natural ventilation by up to 300% compared to standard roof vents. These dedicated structures create enhanced convection effects that dramatically improve air circulation without requiring electrical ventilation equipment.
Chimney height and cross-sectional area determine convection strength, with taller structures creating stronger airflow effects. Solar heating of chimney walls increases convection power during daylight hours when ventilation needs are typically highest.
Humidity Gradient Management
Creating different humidity zones within a single greenhouse allows cultivation of plants with vastly different moisture requirements in the same structure. This approach uses strategic placement of water features and air circulation patterns to establish distinct microclimates without physical barriers.
Humidity differentials of 20-30% can be maintained between zones through strategic water feature placement and airflow management. I’ve successfully grown desert succulents alongside tropical plants in the same diy greenhouse by creating these distinct humidity zones.
Evaporation rates vary significantly based on air temperature, circulation patterns, and surface area of water features. Plant placement strategies maximize the benefits of humidity gradients while preventing moisture-related diseases. When you make a greenhouse with multiple humidity zones, you essentially create several growing environments within one structure.
Evaporation Zone Placement
Strategic positioning of water features and misting systems creates microclimates where humidity-loving plants thrive without affecting the entire space. This targeted approach allows precise humidity control in specific areas while maintaining different conditions elsewhere in the greenhouse.
Water feature surface area directly correlates with evaporation rates and local humidity levels in surrounding areas. Air circulation patterns distribute moisture from evaporation zones, requiring careful placement to prevent unwanted humidity in dry zones. Most greenhouse kits don’t include guidance for humidity zoning, but adding water features strategically can transform a basic kit into a multi-environment growing space.
Condensation Recovery Systems
Installing angled surfaces that channel condensation back into irrigation systems can provide up to 30% of watering needs while reducing excess moisture in the air. These systems capture naturally occurring condensation and redirect it for productive use rather than allowing it to drip onto plants or create humidity problems.
Surface angle and material selection affect condensation collection efficiency, with smooth materials and 15-20 degree slopes providing optimal results. Collection volume varies seasonally based on temperature differentials and humidity levels, requiring storage capacity planning.
|
Thermal Mass Material |
Heat Storage Capacity (BTU/lb/°F) |
Cost per Cubic Foot |
Installation Difficulty |
Lifespan |
|---|---|---|---|---|
|
Water Barrels |
1.0 |
$15-25 |
Easy |
10+ years |
|
Concrete Slab |
0.2 |
$35-50 |
Moderate |
50+ years |
|
Stone/Rock |
0.2 |
$20-40 |
Easy |
Permanent |
|
Phase Change Materials |
15-25 |
$200-400 |
Moderate |
20+ years |
Foundation and Structural Longevity Secrets
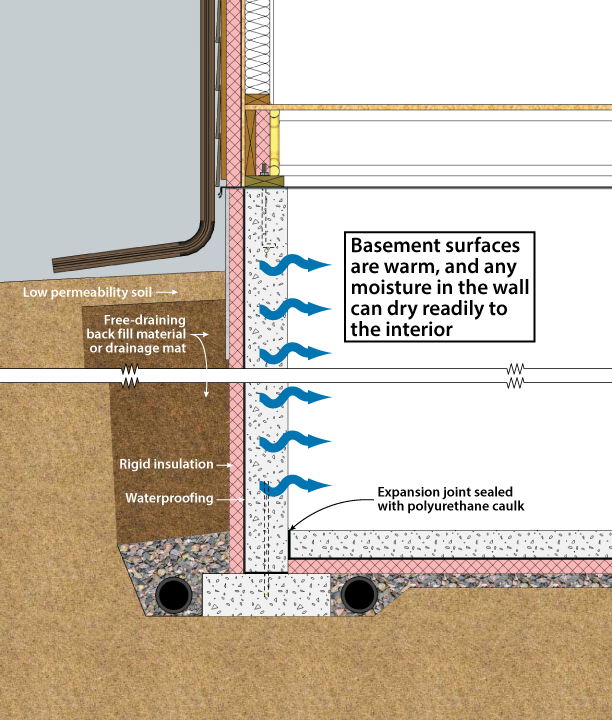
Foundation decisions made during initial construction determine whether your diy greenhouse survives 5 years or 25 years. Standard building practices fail to account for the unique thermal dynamics greenhouses experience, where interior heat creates frost penetration patterns and expansion forces that differ dramatically from typical structures.
Greenhouse foundations experience thermal cycling that’s 3-4 times more severe than residential buildings due to interior heat generation. I’ve seen too many diy greenhouse projects fail within the first few winters because builders followed standard construction depth recommendations without considering these unique thermal stresses.
Frost heaving destroys 60% of amateur greenhouse foundations because builders follow standard construction depth recommendations. When you build a greenhouse, the interior heating creates localized frost conditions that extend deeper than surrounding soil. Thermal bridging through improperly insulated foundations causes structural failure within three freeze-thaw cycles.
The key to building a greenhouse foundation that lasts decades lies in understanding that your structure creates its own microclimate that affects soil conditions around the foundation perimeter.
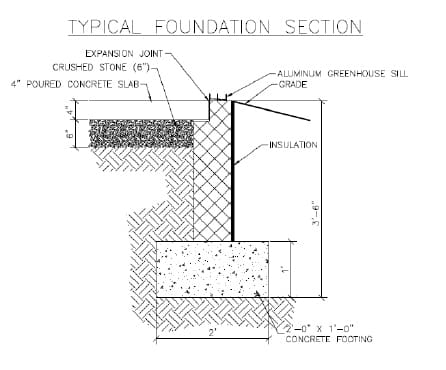
Frost-Proof Foundation Systems
Interior greenhouse heat creates frost penetration patterns completely different from typical buildings, requiring specialized foundation approaches that standard construction advice ignores. Understanding these thermal dynamics prevents the foundation failures that plague most DIY greenhouse projects.
Heat loss through foundations creates localized frost penetration that extends deeper than surrounding soil conditions. Your diy greenhouse generates heat that escapes through the foundation, creating ice formation patterns that can shift and crack improperly designed footings.
Foundation insulation requirements differ significantly from residential standards due to continuous interior heating during winter months. Most greenhouse kit instructions provide minimal foundation guidance, leaving builders to figure out these critical details on their own.
Thermal Break Integration
Installing rigid foam insulation between your foundation and greenhouse frame prevents thermal bridging that causes structural failure within three freeze-thaw cycles. This critical detail stops heat transfer that creates differential expansion and ice formation at connection points.
Rigid foam thickness of 2-4 inches provides adequate thermal separation while maintaining structural connection integrity. Thermal bridging creates temperature differentials that cause metal frame expansion at rates exceeding foundation movement capacity. When selecting a diy greenhouse kit, verify that thermal break details are included in the foundation specifications.
Insulation placement must extend below frost line depth to prevent thermal bypass through foundation walls. This detail is often overlooked in greenhouse kit installations, leading to foundation problems years later when thermal cycling takes its toll.
Deep Footing Strategy
Extending footings 12 inches below local frost line depth (rather than just meeting it) prevents frost heaving that destroys amateur greenhouse foundations. This extra depth accounts for the thermal dynamics created by interior heating that pushes frost penetration deeper than normal.
Additional depth compensates for heat loss effects that increase frost penetration beyond standard calculations. Footing width must increase proportionally with depth to maintain adequate bearing capacity on undisturbed soil. Most greenhouse kits specify minimum foundation requirements that don’t account for these thermal effects.
Frame Expansion Management
Temperature swings of 80°F or more create expansion and contraction forces that standard construction techniques can’t handle without modification. Managing these thermal movements prevents covering material failure and structural damage that occurs when frames expand beyond design limits.
Daily temperature cycling creates cumulative stress that leads to connection failure over multiple seasons. Your diy greenhouse experiences temperature extremes that residential structures never encounter, requiring specialized connection strategies.
Different frame materials expand at varying rates, requiring specific connection strategies for each material type. Expansion forces can exceed structural capacity of standard fasteners and connection hardware. When you select a greenhouse kit, understanding these expansion characteristics helps you choose appropriate materials and connection methods.
Sliding Connection Points
Installing expansion joints at critical frame connections allows thermal movement without structural stress that leads to covering material failure. These connections accommodate expansion while maintaining structural integrity throughout temperature cycles.
Connection design must allow movement in primary expansion direction while preventing lateral displacement. Fastener selection requires consideration of both structural loads and thermal movement requirements. Most how to build a greenhouse guides don’t address these critical connection details adequately.
Material-Specific Expansion Rates
Aluminum expands at twice the rate of steel, requiring different connection strategies that most kit instructions completely ignore. Understanding these expansion characteristics prevents connection failures and covering material damage caused by differential movement between frame components.
Aluminum expansion rates of 0.000013 inches per inch per degree Fahrenheit create significant movement over typical frame lengths. Mixed-material connections require specialized hardware that accommodates different expansion rates without binding or failure.
When evaluating diy greenhouse kit options, pay attention to frame material specifications and whether expansion details are addressed in the assembly instructions.

Foundation Planning Checklist:
-
☐ Determine local frost line depth
-
☐ Add 12 inches to frost line depth for footing placement
-
☐ Calculate thermal bridge locations
-
☐ Plan rigid foam insulation placement
-
☐ Design drainage around foundation perimeter
-
☐ Select appropriate fastener types for thermal movement
-
☐ Schedule foundation inspection before backfilling
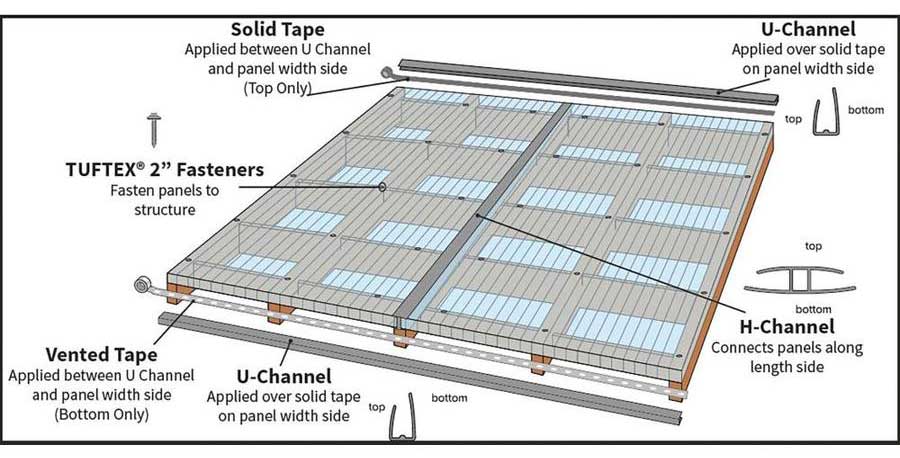
Advanced Covering Material Science
Covering material selection determines light transmission, thermal performance, structural loading, and long-term maintenance costs in ways that aren’t obvious during initial selection. Understanding these material properties helps you choose coverings that optimize plant growth while minimizing operational problems.
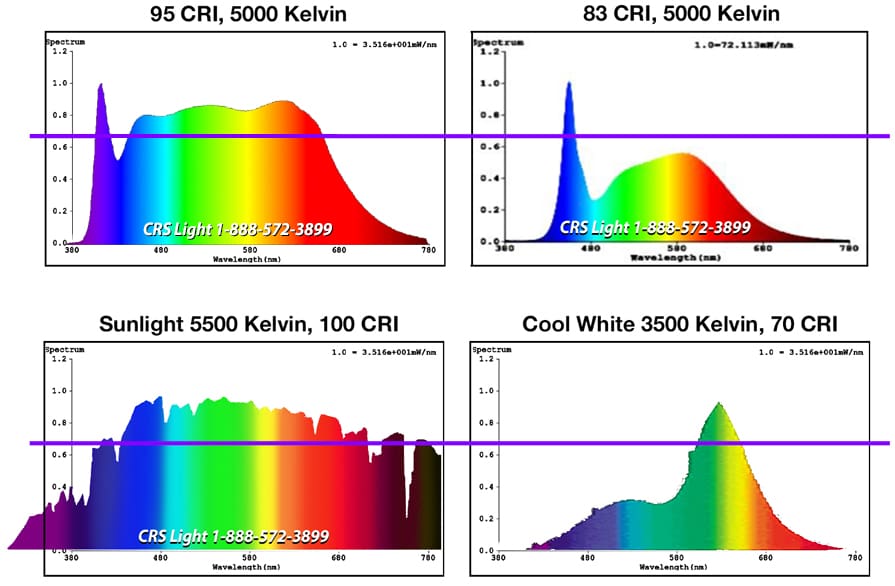
Light spectrum filtering affects plant morphology and essential oil production more than total light transmission percentages. I’ve discovered that some materials actually reduce yields despite appearing perfectly clear to the human eye. Your diy greenhouse covering choice impacts plant development in ways that go far beyond simple light quantity.
Condensation patterns vary dramatically between materials and directly impact plant health and structural maintenance. UV transmission control between 280-400nm wavelengths can double potency of herbs and medicinal plants. Most greenhouse kit manufacturers focus on cost and durability while ignoring these critical plant response factors.
When selecting materials for your diy greenhouse, consider how different coverings interact with your specific growing goals rather than just choosing the cheapest or most durable option.
Light Spectrum Optimization
Different covering materials filter light in ways that dramatically affect plant growth, with some materials actually reducing yields despite appearing perfectly clear. Understanding spectral transmission helps you select materials that enhance photosynthesis and plant development rather than simply maximizing light quantity.
Spectral filtering occurs even in materials that appear completely transparent to human vision. Plant photosynthesis responds differently to various wavelengths, making spectrum quality more important than total light intensity. Your diy greenhouse kit covering choice should align with your specific growing objectives.
Most greenhouse kits include basic polycarbonate or polyethylene coverings that prioritize cost over spectral performance. Understanding these differences helps you make informed upgrade decisions that can significantly impact your growing results.
UV Transmission Control
Controlling UV transmission between 280-400nm affects plant morphology and essential oil production in ways that can double the potency of herbs and medicinal plants. This wavelength range triggers specific plant responses that enhance flavor compounds and natural defense mechanisms.
UV-B radiation (280-315nm) stimulates production of secondary metabolites that create flavor and medicinal compounds. Excessive UV exposure can damage plant tissues, requiring balanced transmission that provides benefits without harm. Material aging affects UV transmission properties, with some plastics becoming more transparent over time.
Glass greenhouse kit options typically provide minimal UV filtering, while polycarbonate materials offer excellent UV protection. The choice depends on whether you want to encourage or limit UV-stimulated plant responses.
Diffused Light Benefits
Twin-wall polycarbonate creates diffused light that penetrates plant canopies 40% more effectively than clear glass, despite lower total light transmission. This light scattering reduces shadows and hot spots while providing more uniform illumination throughout the growing space.
Light diffusion eliminates sharp shadows that create uneven growing conditions within plant canopies. Scattered light reaches lower leaves that would otherwise be shaded, increasing overall photosynthetic capacity. Many greenhouse kit options now include structured polycarbonate specifically designed to optimize light diffusion.
Condensation Management Properties
Condensation patterns vary dramatically between covering materials and directly impact plant health, structural integrity, and maintenance requirements. Material surface properties determine whether moisture sheets off harmlessly or drips onto plants where it can cause disease problems.
Surface tension properties control whether condensation forms sheets or individual droplets that fall onto plants. Condensation volume can provide significant irrigation water when properly collected and managed. Your diy greenhouse covering choice affects both plant health and water management opportunities.
Most greenhouse kits don’t address condensation management in their material specifications, but this factor can make or break your growing success.
Anti-Drip Coatings
Special surface treatments cause condensation to sheet off rather than drip, preventing the constant moisture that encourages bacterial diseases. These coatings modify surface tension properties to control how water behaves when it condenses on covering materials.
Hydrophilic coatings create thin water films that flow down surfaces rather than forming droplets. Coating durability varies significantly between products, with some lasting only 2-3 years while others maintain effectiveness for decades. Glass greenhouse kit options sometimes include anti-drip treatments, but these add significantly to the overall cost.
|
Covering Material |
Light Transmission % |
R-Value |
Lifespan (Years) |
Cost per sq ft |
UV Protection |
|---|---|---|---|---|---|
|
Single Glass |
90 |
0.95 |
30+ |
$3-5 |
Minimal |
|
Double Glass |
82 |
1.9 |
30+ |
$6-8 |
Minimal |
|
6mm Twin-Wall PC |
82 |
1.6 |
15-20 |
$2-3 |
Excellent |
|
16mm Triple-Wall PC |
75 |
2.3 |
15-20 |
$4-6 |
Excellent |
|
6mil Greenhouse Poly |
87 |
0.8 |
4-5 |
$0.30-0.50 |
Good |
Site Integration and Permaculture Principles
The most successful DIY greenhouses function as integrated components of larger property systems rather than isolated structures, creating synergies that reduce operating costs while increasing productivity. This approach connects your greenhouse to existing energy flows and infrastructure for maximum efficiency.
Energy flow integration creates self-sustaining systems that require minimal external inputs while maximizing output. Companion structure positioning improves performance of both greenhouse and existing buildings through beneficial relationships. Your diy greenhouse becomes most valuable when it works with your property’s existing systems rather than competing with them.
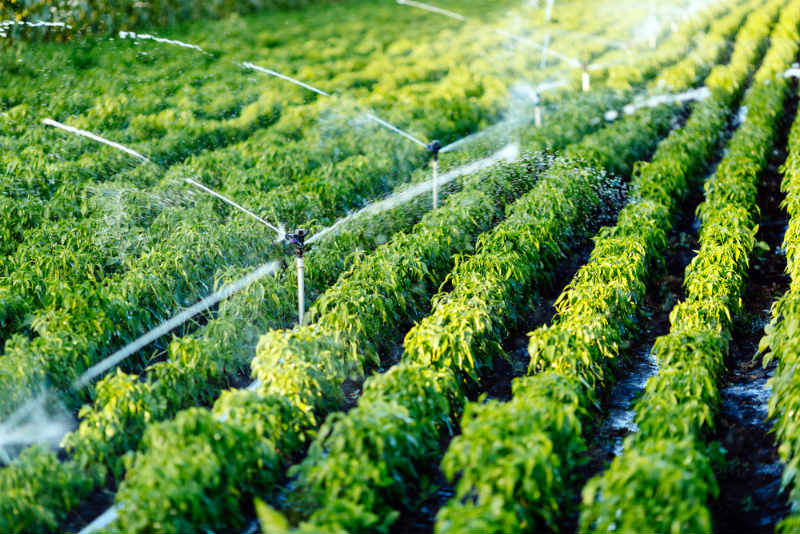
Rainwater integration systems can provide complete irrigation needs while reducing foundation water pressure. Greenhouse roof area typically provides 0.6 gallons per square foot per inch of rainfall for irrigation storage. When planning your diy backyard greenhouse, consider how it can contribute to your property’s overall water management strategy.
The key to successful integration lies in viewing your greenhouse as part of a larger ecosystem rather than a standalone structure. When you build a greenhouse with this perspective, you create opportunities for beneficial relationships that reduce costs and increase productivity.
Energy Flow Integration
Connecting your greenhouse to existing property energy flows creates self-sustaining systems that require minimal external inputs while maximizing output. This approach captures waste energy from other systems and redirects it for productive greenhouse heating and operation.
Waste heat sources throughout typical properties provide significant heating potential when properly captured and directed. Integration timing must account for when heat is available versus when greenhouse heating needs are greatest. Your diy greenhouse can tap into energy streams that would otherwise be wasted.
Most greenhouse plan designs ignore these integration opportunities, focusing instead on standalone heating and cooling systems that increase operating costs unnecessarily.
Waste Heat Recovery
Routing dryer vents, water heater exhaust, or compost pile heat into your greenhouse can provide significant heating without additional energy costs. These systems capture thermal energy that would otherwise be wasted and redirect it where it provides growing benefits.
Heat exchanger systems prevent direct exhaust contact with plants while capturing thermal energy from waste streams. Compost pile temperatures can reach 140-160°F, providing substantial heating potential when properly managed and directed. When planning your greenhouse integration, consider how garage cleanout services can help create space for utility connections and equipment storage that supports your greenhouse systems.
Your greenhouse plans should include provisions for connecting to these waste heat sources during the initial design phase rather than trying to retrofit connections later.
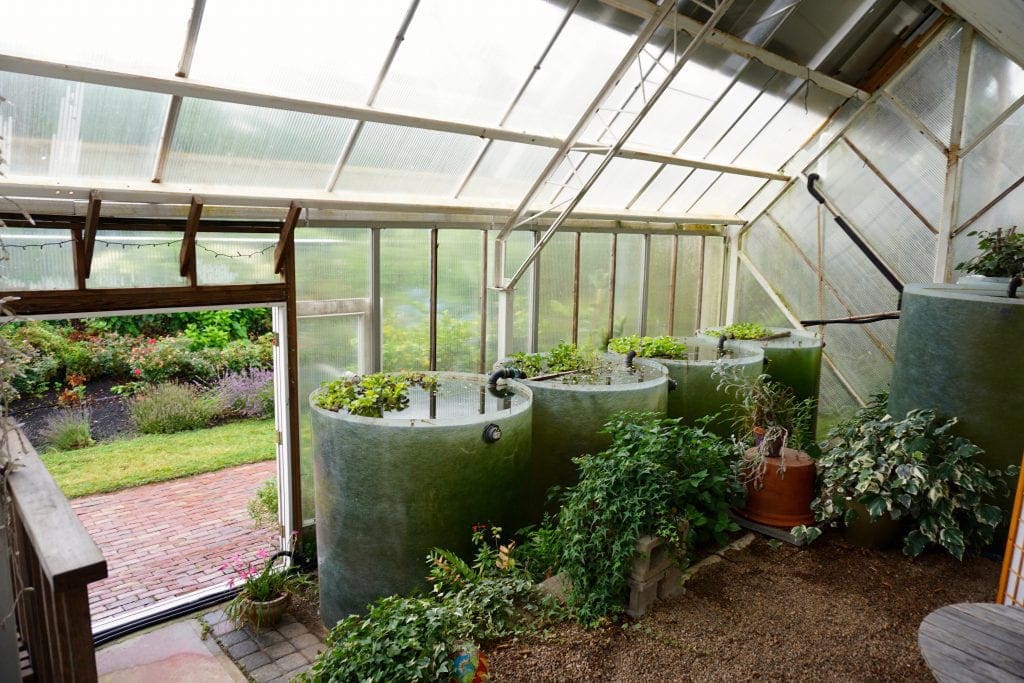
Rainwater Integration Systems
Designing your greenhouse roof as part of a property-wide rainwater collection system can provide all necessary irrigation while reducing foundation water pressure. This dual-purpose approach maximizes roof area utilization while solving multiple water management challenges.
Greenhouse roof area typically provides 0.6 gallons per square foot per inch of rainfall for irrigation storage. Integrated guttering systems must handle both collection and foundation drainage to prevent water accumulation problems. Your greenhouse plan should include rainwater collection as a primary water source rather than treating it as a secondary benefit.
Companion Structure Synergies
Positioning your greenhouse relative to other structures creates beneficial relationships that improve performance of both. Strategic placement uses existing buildings and landscape features to provide wind protection, thermal benefits, and operational conveniences.
Wind protection can reduce heating costs by up to 25% while creating beneficial microclimates for outdoor growing areas. Structural relationships affect snow loading, drainage patterns, and access convenience for daily operations. When evaluating building a greenhouse locations, consider how existing structures can provide mutual benefits.
Most greenhouse kits include basic siting recommendations that don’t address these integration opportunities, missing chances to improve performance through strategic positioning.
Windbreak Optimization
Using existing structures or plantings as windbreaks can reduce heating costs by up to 25% while creating beneficial microclimates for outdoor growing areas. Proper windbreak positioning channels air currents to reduce heat loss without blocking beneficial solar exposure.
Windbreak effectiveness depends on height, density, and distance from the protected structure. Optimal placement creates wind shadow zones that extend 10-15 times the windbreak height on the protected side. Your diy greenhouse kit performance improves significantly when positioned to take advantage of existing windbreaks.
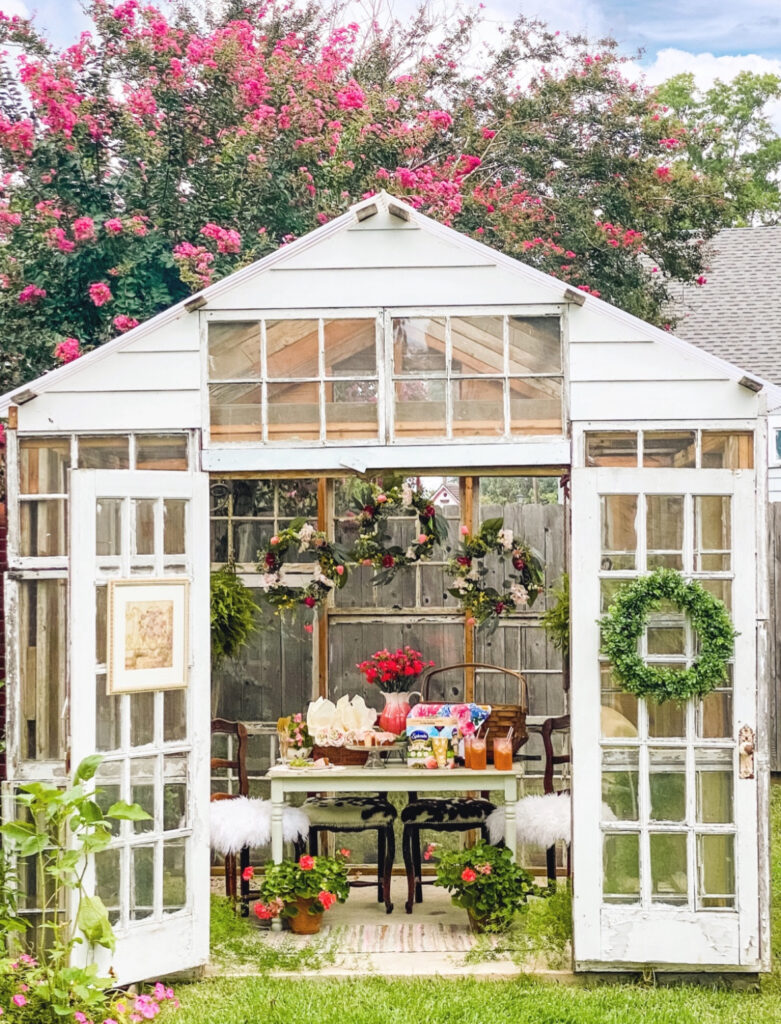
A lean-to greenhouse design attached to an existing garage in North Dakota demonstrates effective companion structure integration. Built against the south-facing wall using salvaged double-pane windows, the structure benefits from the garage’s thermal mass while sharing foundation and utility connections, reducing construction costs by approximately 30% compared to freestanding alternatives.
Site Integration Planning Checklist:
-
☐ Map existing heat sources on property
-
☐ Calculate rainwater collection potential from roof area
-
☐ Identify optimal windbreak positioning
-
☐ Plan utility connections to existing systems
-
☐ Design drainage integration with landscape
-
☐ Evaluate companion planting opportunities
-
☐ Schedule seasonal sun path analysis
Automation and Smart Systems Integration
Modern DIY greenhouses benefit from intelligent monitoring systems that respond to environmental changes faster than human observation, preventing crop losses while reducing daily maintenance demands. These systems provide data-driven growing conditions that eliminate guesswork from plant care decisions.
Environmental monitoring networks reveal temperature stratification and humidity patterns invisible to casual observation. Predictive climate control systems prepare plants for weather changes before they occur, reducing stress and crop losses. Your diy greenhouse becomes more productive and less demanding when equipped with smart monitoring capabilities.
Automation reduces daily maintenance time while improving growing consistency and plant health outcomes. Most greenhouse kit options don’t include automation components, but adding these systems during construction is much easier than retrofitting later.

Environmental Monitoring Networks
Installing interconnected sensor arrays throughout your greenhouse creates data-driven growing conditions that eliminate guesswork from plant care decisions. These networks reveal environmental patterns and variations that human observation typically misses.
Multi-point monitoring reveals microclimates and environmental gradients within the greenhouse space. Data logging capabilities track environmental trends over time, revealing patterns that inform management decisions. Your diy greenhouse kit performance improves dramatically when you understand the environmental variations within the growing space.
Sensor placement strategies must account for plant growth changes and seasonal variations in environmental conditions. Most diy greenhouse kit installations benefit from at least three monitoring points to capture environmental diversity.
Multi-Point Temperature Mapping
Placing sensors at different heights and locations reveals temperature stratification patterns that help optimize plant placement for maximum growth rates. This mapping approach identifies hot and cool zones that can be matched to specific plant requirements.
Temperature variations of 10-15°F commonly occur between floor level and peak areas in passive solar greenhouses. Stratification patterns change seasonally as sun angles and ventilation patterns shift throughout the year. Your greenhouse kit performance improves when you understand and utilize these temperature variations.
Soil Moisture Automation
Ground-level moisture sensors connected to irrigation valves prevent both drought stress and root rot by maintaining optimal soil conditions automatically. These systems respond to actual soil conditions rather than predetermined watering schedules.
Sensor placement depth affects readings, with root zone monitoring providing more accurate plant needs assessment. Different soil types require different moisture thresholds, necessitating calibration for specific growing media. Your diy greenhouse irrigation becomes more efficient and effective with automated moisture management.
CO2 Level Optimization
Monitoring carbon dioxide concentrations allows for strategic ventilation timing that maximizes photosynthesis during peak growing hours. Understanding CO2 patterns helps balance ventilation needs with temperature control requirements.
CO2 levels drop significantly during peak photosynthesis periods, potentially limiting plant growth rates. Ventilation timing must balance CO2 replenishment with temperature and humidity control needs.
Predictive Climate Control
Weather-responsive systems adjust greenhouse conditions based on forecast data, preparing plants for incoming weather changes before they occur. This proactive approach reduces plant stress and prevents damage from sudden environmental shifts.
Weather integration APIs provide advance warning of temperature drops, storms, and other conditions requiring preparation. Automated responses can secure ventilation, adjust heating, and modify irrigation based on predicted conditions. Your greenhouse kits benefit significantly from predictive control systems that respond to weather forecasts.
Most homemade greenhouse systems can integrate weather data through simple internet-connected controllers that cost less than $200.
Storm Preparation Protocols
Automated systems can secure ventilation, adjust heating, and protect sensitive plants when weather services predict severe conditions. These protocols execute protective measures without requiring constant monitoring or manual intervention.
Wind sensors trigger automatic vent closure before damaging gusts reach dangerous levels. Heating systems can pre-warm thermal mass before predicted temperature drops to extend heat release duration. After severe weather events, many greenhouse owners need garden debris removal services to clear damaged plants and materials while preparing for system repairs and replacements.
The growing trend of DIY indoor greenhouses reflects increasing interest in automated growing systems. As one expert notes, “It’s like having your own personal jungle, giving you a mini-escape right in your living room. Plus, watching your plants grow day by day is strangely satisfying—a little victory with every sprout and bloom!”
Material Sourcing and Cost Optimization
Strategic procurement approaches can reduce greenhouse construction costs by 40-60% while often resulting in superior materials compared to standard retail options. Understanding where to find quality materials and how to evaluate their condition opens access to professional-grade components at residential prices.
Reclaimed materials from commercial operations often exceed residential-grade specifications while costing significantly less. Bulk purchasing cooperatives create wholesale pricing access for individual builders through group buying power. Your diy greenhouse project budget can stretch much further with strategic sourcing approaches.
Seasonal timing strategies can yield 20-30% savings on identical products through strategic purchase timing. Most greenhouse kit manufacturers offer their best pricing during off-season periods when demand is lowest.
Reclaimed Material Strategies
Sourcing high-quality used materials requires knowledge of where to find them and how to evaluate their remaining useful life. This approach provides access to commercial-grade components that would otherwise be prohibitively expensive for DIY projects.
Commercial greenhouse dismantling creates opportunities to acquire professional-grade materials at residential prices. Material evaluation requires understanding of degradation patterns and remaining service life assessment techniques. Your diy greenhouse can benefit from materials that originally cost thousands of dollars but are available for hundreds.
Most greenhouse kits use materials that are adequate but not exceptional. Reclaimed commercial materials often provide superior performance and longevity.
Commercial Greenhouse Dismantling
Professional growing operations frequently upgrade facilities, creating opportunities to acquire commercial-grade materials at residential prices. These materials often exceed residential specifications while being available at fraction of new costs.
Commercial operations typically replace functional materials during facility upgrades, making high-quality components available. Professional-grade materials are designed for continuous use and harsh conditions, providing superior durability for residential applications. When you build a greenhouse using commercial reclaimed materials, you’re getting components designed for much more demanding applications than residential use.
Construction Site Partnerships
Building relationships with contractors provides access to surplus materials that would otherwise become waste. These partnerships create win-win situations where contractors reduce disposal costs while builders access quality materials.
Construction waste streams often include materials suitable for greenhouse construction that contractors must otherwise pay to dispose. Timing coordination with construction schedules allows access to materials when they become available. Your greenhouse kit costs can be reduced significantly by supplementing kit components with construction surplus materials.
A North Dakota greenhouse builder spent 10 years collecting framed windows to achieve their vision, ultimately completing a $5,000 project using primarily reclaimed materials. As they noted, “What I love about the greenhouse the most is that it’s random but symmetrical, everything fits together so perfectly,” demonstrating how patience and strategic material sourcing can create unique, cost-effective structures.
Bulk Purchase Cooperatives
Organizing with other local greenhouse builders creates purchasing power that unlocks wholesale pricing on specialty materials. This collaborative approach makes professional-grade materials accessible to individual builders through group orders.
Group purchasing power provides access to wholesale pricing tiers typically reserved for commercial buyers. Coordination requirements include timing, transportation, and payment logistics for successful group purchases. Your diy greenhouse kit costs can be reduced significantly through cooperative purchasing arrangements.
Most greenhouse plans don’t address material sourcing strategies, but these approaches can reduce total project costs by 40-60%.
Regional Growing Networks
Connecting with local gardening groups facilitates group orders for seeds, amendments, and infrastructure materials. These networks provide ongoing purchasing opportunities while building relationships with other growers.
Local networks provide access to bulk pricing on consumable materials such as seeds, fertilizers, and growing media. Regional coordination allows sharing of specialized tools and equipment that individual builders use infrequently. Your greenhouse plans should include connections to local growing communities for ongoing support and resource sharing.
Seasonal Timing Advantages
Purchasing materials during specific seasons can yield savings of 20-30% on identical products. Understanding seasonal pricing patterns helps time purchases for maximum cost savings without compromising project schedules.
End-of-season clearances provide significant savings on materials that don’t degrade during storage. Pre-season purchasing often includes early-bird discounts that reward advance planning and payment. Your diy greenhouse construction timeline should account for these seasonal pricing opportunities.
Material Sourcing Budget Planning Template:
-
Foundation Materials: $_____
-
Frame Components: $_____
-
Covering Materials: $_____
-
Ventilation Systems: $_____
-
Thermal Mass Materials: $_____
-
Automation/Controls: $_____
-
Utilities/Electrical: $_____
-
Contingency (15%): $_____
-
Total Project Cost: $_____
How Jiffy Junk Supports Your DIY Greenhouse Journey
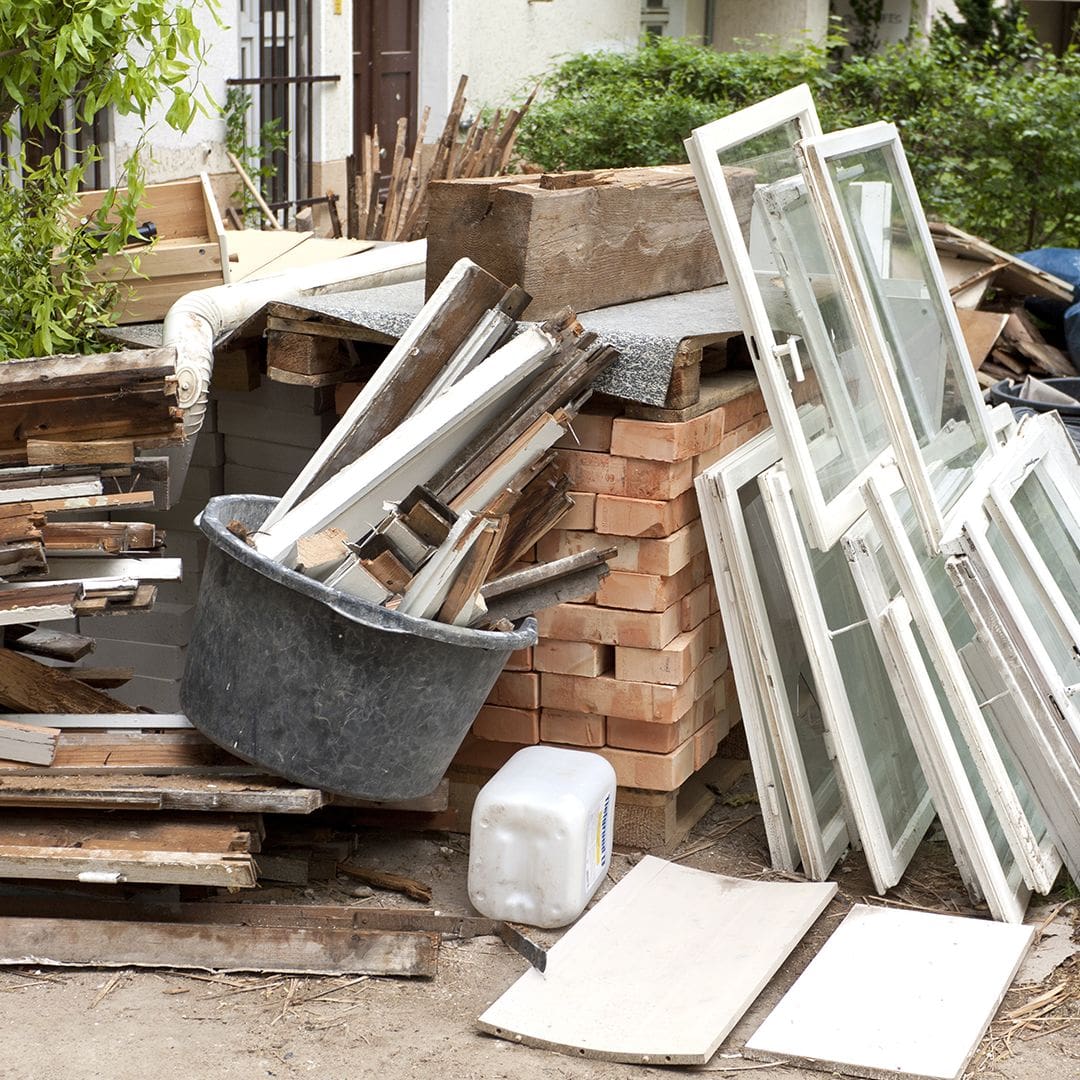
Building your dream greenhouse generates more waste than most people expect – from excavated soil and demolished structures to packaging materials and construction debris. When you’re ready to clear out that old shed to make room for your new growing space, or need to remove failed first attempts and upgrade materials, Jiffy Junk’s eco-friendly approach aligns perfectly with sustainable growing practices.
Whether you’re dealing with storage shed cleanouts to make space for your greenhouse or need yard waste removal after site preparation, our team understands the unique needs of DIY greenhouse builders.
Our team understands that greenhouse builders often have reusable materials mixed in with actual waste. We’ll carefully separate metal framing, good-condition polycarbonate panels, and thermal mass materials for recycling or donation to other gardening enthusiasts. This means your construction debris finds new life rather than ending up in landfills.
Ready to clear the space for your greenhouse project? Contact Jiffy Junk today for efficient, eco-conscious removal that keeps your property clean while supporting the growing community through material recovery and donation.
Final Thoughts
Building a successful diy greenhouse requires understanding the hidden science behind environmental control, structural longevity, and system integration. The difference between a greenhouse that struggles for a few seasons and one that produces abundantly for decades lies in applying these engineering principles from the start.
Your greenhouse becomes most valuable when it functions as an integrated component of your property’s larger systems. Connecting waste heat sources, rainwater collection, and existing structures creates synergies that reduce operating costs while maximizing productivity. Smart monitoring systems and automation take this integration further by responding to environmental changes faster than human observation allows.
The investment in proper foundation work, thermal mass systems, and quality materials pays dividends through decades of reliable operation. Strategic material sourcing and bulk purchasing cooperatives make professional-grade components accessible at residential budgets, while reclaimed materials often provide superior quality at significant savings.
Engineering principles applied during initial construction determine long-term success more than any single component or material choice. System integration creates compounding benefits that exceed the sum of individual improvements, making holistic design approaches most cost-effective. When you how to build a greenhouse with these principles in mind, you create a structure that improves with age rather than deteriorating.
Quality materials and proper installation techniques provide decades of reliable operation, making upfront investments in superior components financially advantageous over time. Your diy greenhouse designs should prioritize these long-term performance factors over initial cost savings that lead to expensive repairs and replacements.
Greenhouse Construction Planning Checklist:
-
☐ Site evaluation and sun exposure analysis
-
☐ Local permit and zoning requirement research
-
☐ Foundation depth calculation based on frost line
-
☐ Material selection and sourcing strategy
-
☐ Utility planning (water, electrical, drainage)
-
☐ Ventilation system design
-
☐ Thermal mass placement strategy
-
☐ Automation system integration planning
-
☐ Weather protection and anchoring systems
-
☐ Interior layout and workflow optimization