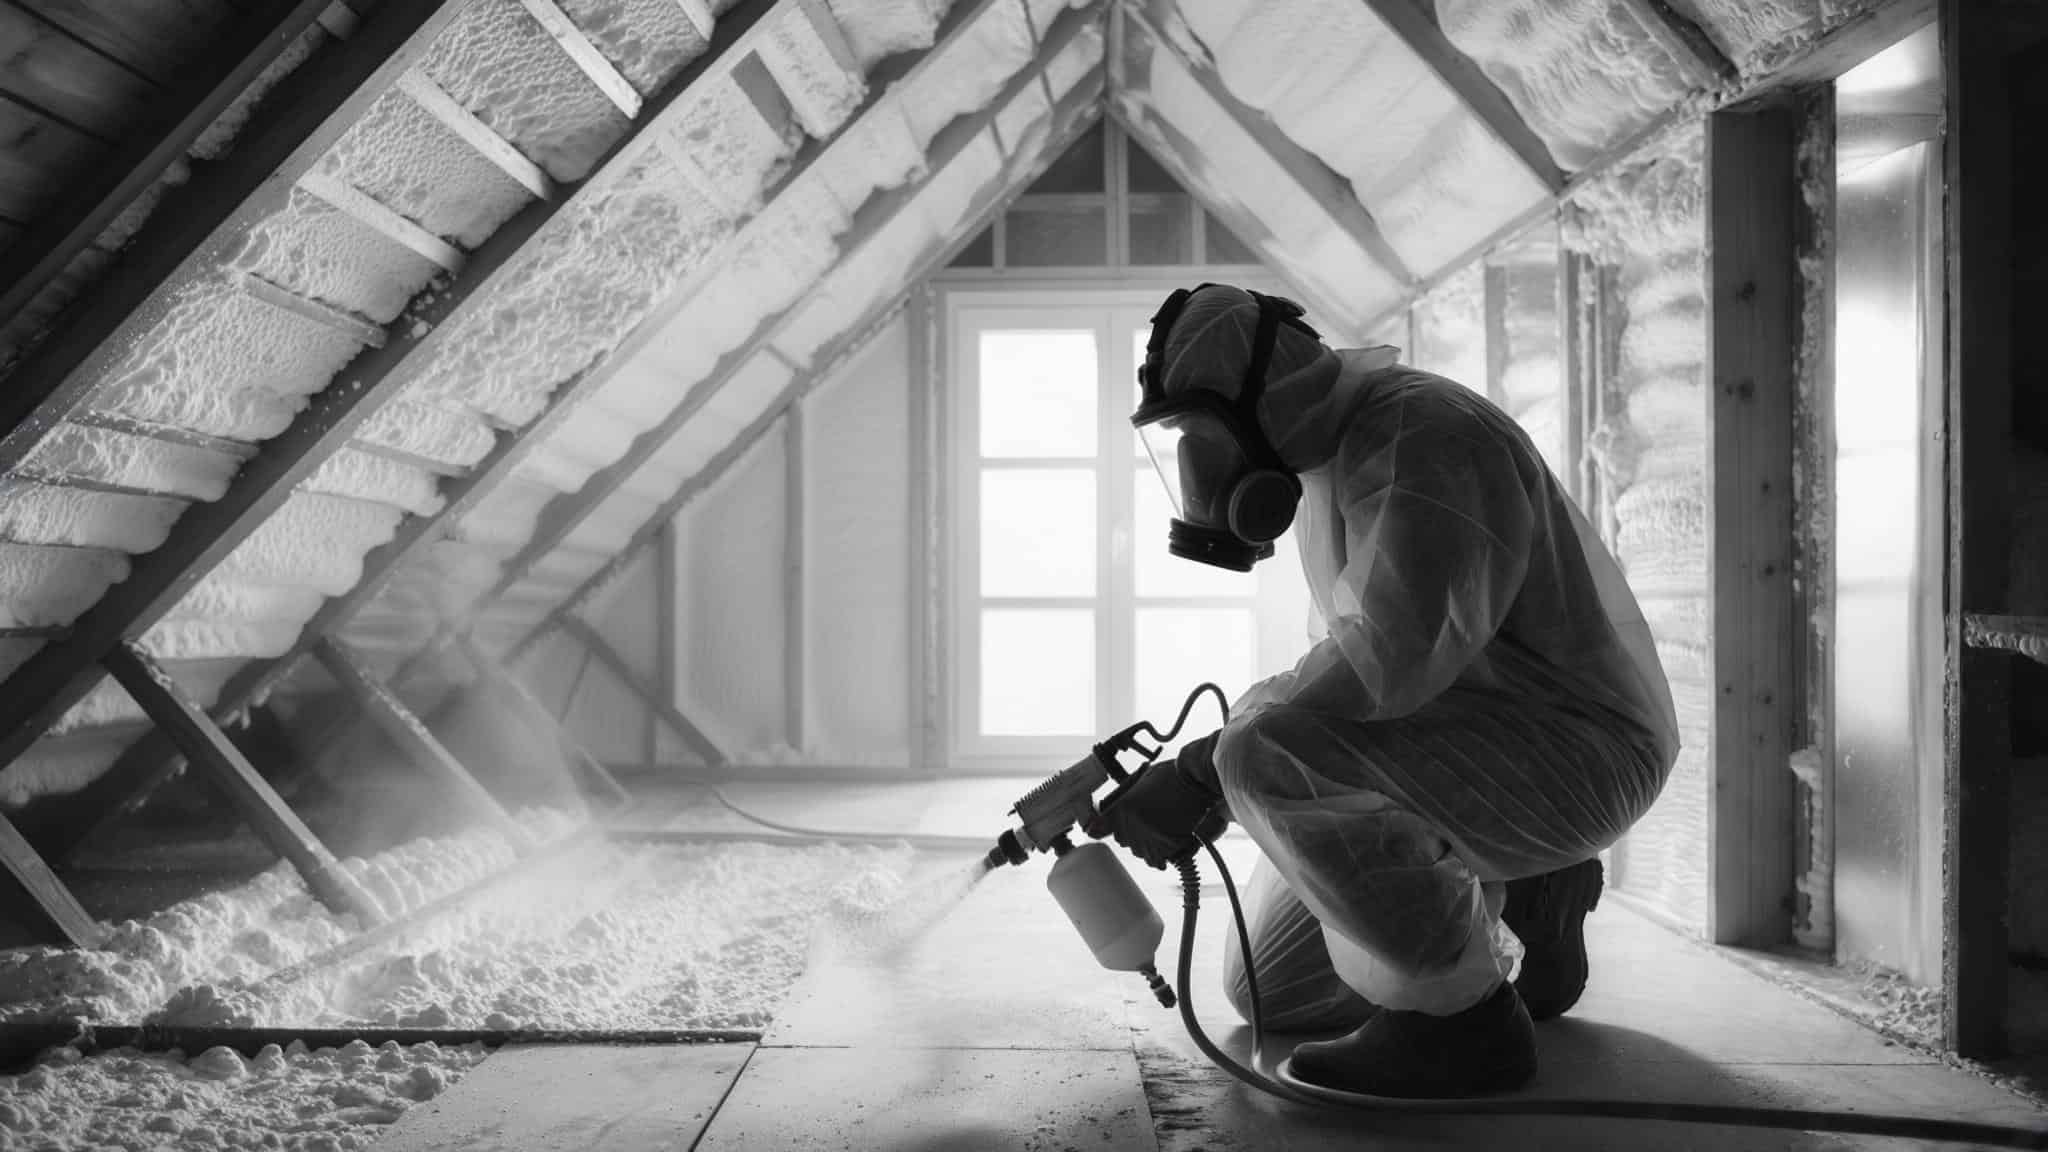
DIY Spray Foam Insulation: The Hidden Science That Makes or Breaks Your Project
Understanding the complexities of spray foam insulation can mean the difference between energy savings of up to 30% per year and costly application failures that require complete removal and reinstallation. According to industry data, spray foam can help lower energy bills by 5% to 30% annually when properly installed, making the investment in proper technique and safety protocols essential for long-term success.
Table of Contents
-
The Hidden Chemistry and Physics Behind Foam Performance
-
Kit Selection and Modification Strategies
-
Long-Term Performance and Failure Prevention
-
Environmental Impact and Waste Management
-
Safety Protocols and Health Considerations
TL;DR
-
Humidity levels between 40-60% during application determine whether you get uniform closed cells or problematic open-cell pockets that compromise insulation performance
-
Temperature differences between your substrate and foam mixture create expansion rates that lead to future delamination – keep surfaces within 15°F of ambient air temperature
-
Commercial foam kits need 20-30% more material than manufacturer estimates suggest, especially for first-time users dealing with learning curves and waste
-
Thermal imaging cameras reveal voids and thin spots in foam coverage that aren’t visible during application, preventing expensive failures
-
Isocyanate exposure creates cumulative health effects requiring VOC monitoring and specialized protective equipment beyond basic masks
-
Building codes often require permits and thermal barriers over exposed foam surfaces – violations can void insurance coverage
The Hidden Chemistry and Physics Behind Foam Performance
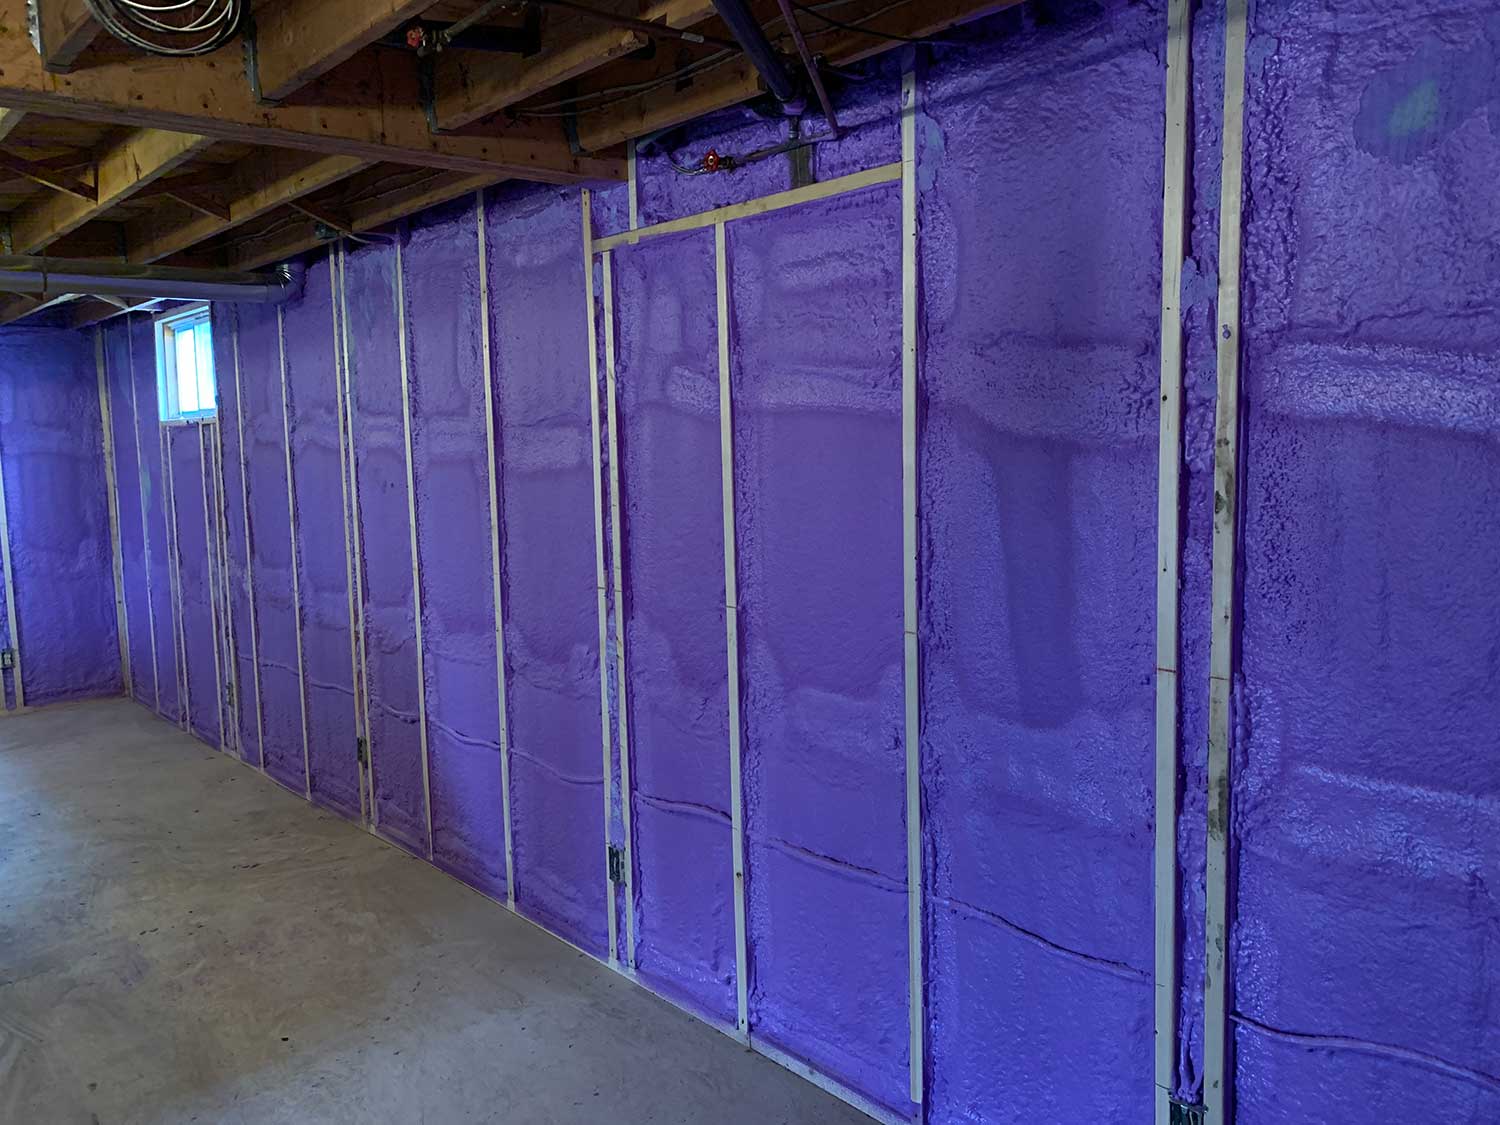
Understanding the molecular behavior and thermal dynamics of spray foam insulation reveals why certain applications fail while others perform reliably for decades. The chemical bonding process continues long after initial curing, with environmental factors influencing foam integrity throughout its lifespan. Temperature gradients, humidity levels, and substrate compatibility all play critical roles in determining whether your foam insulation installation will succeed or create expensive problems down the road.
Polyurethane chain reactions don’t stop after the foam appears “cured” – environmental conditions continue affecting molecular structure for weeks after application. Real-world conditions during installation create variables that manufacturer testing doesn’t account for, leading to performance gaps between lab results and actual installations.
I’ve seen too many DIY foam insulation projects fail because people assume the chemistry stops working once the foam looks solid. The truth is, your foam insulation continues reacting with moisture, temperature changes, and even air quality for much longer than you’d expect.
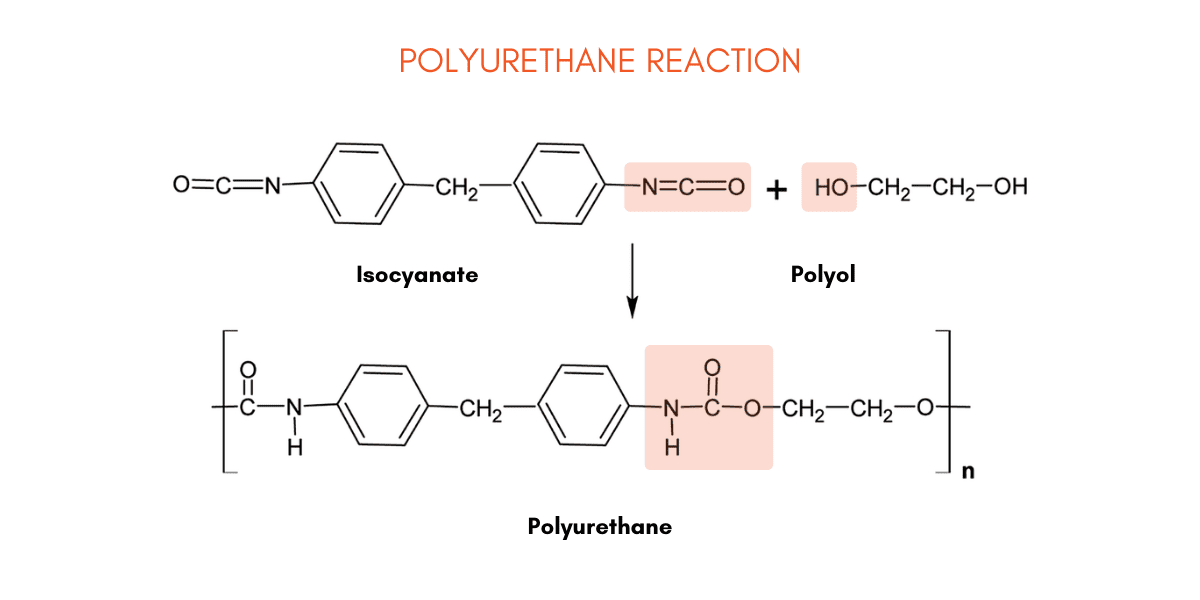
Polyurethane Chain Reactions Under Real-World Conditions
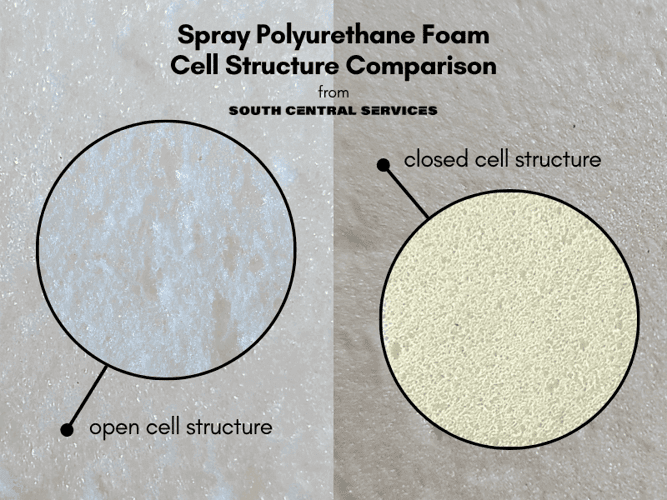
The chemical bonding process in spray foam insulation doesn’t stop after initial curing. Environmental factors continue influencing foam integrity long after installation, affecting everything from cell structure to adhesion strength. Moisture content and temperature variations during application determine whether you achieve uniform closed cells or develop problematic open-cell pockets that compromise R-value performance.
Uncured isocyanates remain reactive for 24-48 hours after application, meaning environmental changes during this window permanently affect final foam properties. Chemical cross-linking density varies based on cure conditions, with incomplete reactions creating weak points that fail under thermal cycling stress. Ambient conditions during the first 6 hours of cure determine final cell structure more than the chemical formulation itself.
Here’s what most people don’t realize: the foam insulation you spray today won’t have the same properties tomorrow if conditions change during curing. I’ve watched perfectly good applications turn into disasters because someone opened a window during the critical first few hours.
Humidity’s Role in Foam Cell Structure Formation
Moisture content during application determines whether you get uniform closed cells or problematic open-cell pockets that compromise R-value. Excess humidity creates irregular cell formation that reduces insulation performance and creates pathways for air infiltration. Using a digital hygrometer to measure ambient humidity before mixing ensures optimal conditions for proper foam development.
Water molecules react with isocyanates to produce CO2 gas, and excess moisture creates oversized cells that don’t close properly during the curing process. Humidity above 70% causes rapid foam rise that traps water vapor in cell walls, creating permanent weak points susceptible to moisture infiltration.
The ideal 40-60% humidity range allows controlled gas generation that creates uniform cell size distribution and maximum R-value per inch of thickness. When I work with foam insulation in my own projects, I always check humidity first – it’s saved me from countless headaches.
|
Humidity Level |
Foam Cell Structure |
R-Value Impact |
Application Quality |
|---|---|---|---|
|
Below 30% |
Dense, small cells |
Optimal R-value |
Difficult mixing |
|
30-40% |
Uniform closed cells |
High R-value |
Excellent |
|
40-60% |
Ideal cell formation |
Maximum R-value |
Professional quality |
|
60-70% |
Irregular cell size |
Reduced R-value |
Poor adhesion |
|
Above 70% |
Open cell pockets |
Significant loss |
Application failure |
Temperature Gradient Effects on Adhesion Strength
The temperature difference between your substrate and the foam mixture creates expansion rates that can lead to future delamination. Cold surfaces cause rapid foam cooling that prevents proper chemical bonding, while hot surfaces accelerate curing before adequate penetration occurs. Measuring surface temperature with an infrared thermometer and maintaining substrate temperatures within 15°F of ambient air prevents adhesion failures.
Thermal shock from temperature differentials greater than 20°F creates internal stress patterns that manifest as delamination months or years after installation. Cold substrates below 50°F prevent isocyanate penetration into surface pores, creating mechanical bonds instead of chemical adhesion. Rapid temperature changes during cure create differential expansion rates between foam and substrate that exceed the foam’s tensile strength.
A homeowner applying foam to basement rim joists in January found that concrete surfaces at 35°F caused immediate foam shrinkage and poor adhesion. After warming the surfaces to 55°F using a space heater and maintaining 65°F ambient temperature during application, the foam achieved proper penetration and created lasting chemical bonds that remained intact through multiple freeze-thaw cycles.
Substrate Compatibility Beyond Standard Materials
Most guides cover wood and drywall applications, but modern homes contain materials that can chemically react with foam components in unexpected ways. Metal surfaces require specific preparation to prevent corrosion-induced foam failure, while plastic and vinyl materials can experience chemical softening when exposed to uncured foam isocyanates.
Galvanized coatings react with isocyanates to form zinc carbamate compounds that prevent proper adhesion and accelerate coating degradation. PVC and vinyl materials contain plasticizers that migrate into uncured foam, creating soft spots and reducing foam structural integrity. Copper surfaces develop oxide layers that interfere with chemical bonding unless properly prepared with compatible primer systems.
Understanding these interactions prevents costly application failures and material damage. I learned this the hard way when foam insulation I applied to galvanized ductwork started peeling off within six months.
Metal Surface Preparation for Long-Term Bonding
Galvanized steel, aluminum flashing, and copper pipes require specific surface treatments to prevent corrosion-induced foam failure. Metal surfaces need mechanical preparation and chemical priming to achieve reliable long-term adhesion. Sanding with 120-grit paper removes oxidation and surface contaminants, while appropriate primers create chemical compatibility between metal substrates and foam components.
Galvanized surfaces require zinc-compatible primers that prevent galvanic corrosion while providing chemical bonding sites for isocyanate attachment. Aluminum oxidation creates a barrier layer that prevents foam penetration – mechanical abrasion exposes fresh metal for proper primer adhesion.
Copper requires specialized primers containing corrosion inhibitors that prevent verdigris formation under the foam layer. Trust me, you don’t want to discover green copper corrosion eating through your foam insulation years later.
Plastic and Vinyl Interaction Protocols
PVC pipes, vinyl siding, and plastic vapor barriers can experience chemical softening when exposed to uncured foam isocyanates. Testing foam compatibility on hidden sections prevents visible damage to finished surfaces. Low-expansion foam formulations designed for plastic compatibility reduce chemical interaction risks while maintaining insulation performance.
Isocyanates act as solvents for many thermoplastics, causing surface crazing, discoloration, or complete material failure depending on exposure time and concentration. Vinyl chloride polymers are particularly susceptible to isocyanate attack, with damage occurring within minutes of contact with uncured foam.
Masking tape barriers and specialized low-reactivity formulations provide protection while allowing foam application near sensitive plastic components. Recent industry discussions highlight the importance of proper application techniques. “DIY spray foam insulation kits can be appealing for homeowners looking to improve insulation in their homes, particularly in areas that are difficult to reach or have unique structural features,” according to House Digest’s expert analysis, though they emphasize the need for careful handling and precise application to achieve effective and safe results.
Advanced Application Techniques for Problem Areas
Professional installers use specialized methods for challenging spaces that standard DIY guides rarely address. Vertical applications require understanding foam viscosity and strategic layering to prevent sagging, while corner and edge details need specific techniques to avoid voids and ensure complete air sealing.
Foam viscosity changes during the working time window, requiring application timing that matches material flow characteristics to surface orientation. Corner applications create three-dimensional curing challenges where foam must bond to multiple surfaces simultaneously while maintaining structural integrity. Professional spray patterns distribute material evenly while accounting for foam expansion rates and surface adhesion requirements.
These advanced methods make the difference between amateur and professional-quality results. When I started doing my own diy foam insulation projects, I thought spraying foam was straightforward – boy, was I wrong.
Vertical Application Without Sagging
Achieving proper coverage on walls and vertical surfaces requires understanding foam viscosity and working in strategic layers. Applying foam in 2-inch lifts with 10-15 minute intervals between layers prevents sagging while ensuring complete coverage. Starting from the bottom and working upward with overlapping “S” patterns creates better adhesion than straight-line application methods.
Foam viscosity decreases during the 30-45 second working window, making timing critical for vertical applications where gravity works against adhesion. Layer thickness affects cure rate and heat generation – thicker applications generate more heat that can cause foam to lose viscosity and sag before curing.
Overlapping spray patterns ensure complete coverage while creating mechanical interlocking between foam layers that increases overall bond strength. The foam insulation technique took me several practice runs to master, but once you get the timing down, it becomes second nature.
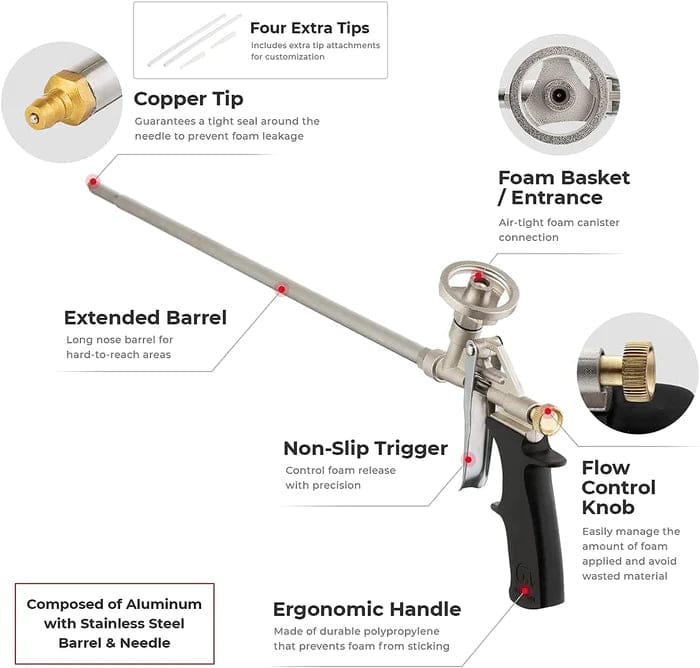
Corner and Edge Detail Work
Inside corners, pipe penetrations, and irregular surfaces need specific techniques to avoid voids and ensure complete air sealing. Using foam guns with adjustable tips provides precise control for detail work. Filling corners by applying foam to one surface first, then immediately spraying the adjacent surface while foam is still tacky, creates better adhesion than attempting to fill corner gaps directly.
Corner geometry creates air pockets that prevent complete foam penetration unless application sequence accounts for foam flow patterns and expansion characteristics. Pipe penetrations require foam application that accommodates thermal expansion of both the pipe and foam without creating stress cracks or air gaps.
Irregular surfaces need foam application techniques that ensure complete contact while avoiding overfill that wastes material and creates trimming difficulties. Getting these details right separates successful foam insulation projects from ones that fail over time.
Kit Selection and Modification Strategies
Commercial spray foam insulation kits can be enhanced and customized for specific applications, but understanding their limitations prevents costly mistakes. Not all spray foam insulation kit formulations use identical chemical compositions, and matching the right chemistry to your specific application dramatically improves results.
Equipment modifications and proper maintenance extend kit life while improving application quality, though yield calculations often fall short of manufacturer promises under real-world conditions. Kit chemistry variations affect cure times, expansion ratios, and final foam properties in ways that aren’t obvious from packaging specifications.
Standard equipment configurations work for ideal conditions but may need modification for challenging installations or climate conditions. When dealing with failed foam applications or excessive waste, construction debris removal services can help manage the substantial cleanup involved in spray foam projects.
I’ve used dozens of different spray foam insulation kit brands over the years, and the differences between them can make or break your project. The cheapest foam insulation kit isn’t always the worst choice, but you need to understand what you’re getting.
Decoding Kit Chemistry for Performance Optimization
Different spray foam insulation kits use varying chemical formulations that affect more than just R-value performance. The choice between open-cell and closed-cell foam impacts moisture management, structural support, and long-term durability in ways that extend beyond basic insulation properties.
Isocyanate index ratios vary between manufacturers, affecting cure speed, final hardness, and chemical resistance of the finished foam. Catalyst systems differ significantly between formulations, creating variations in working time, temperature sensitivity, and final foam properties. Blowing agent chemistry determines cell structure, R-value retention over time, and environmental impact of the finished installation.
Understanding these differences helps you select the right chemistry for your specific application rather than defaulting to whatever’s available at your local store. Each foam insulation kit has its own personality, and matching that personality to your project requirements makes all the difference.
Open-Cell vs Closed-Cell Performance in Real Applications
The choice between foam types affects moisture management, structural support, and long-term durability beyond simple R-value differences. Basement applications always require closed-cell foam below grade for moisture resistance, while attic spaces benefit from open-cell foam’s superior sound dampening properties.
Open-cell foam allows moisture vapor transmission that can be beneficial or problematic depending on wall assembly design and climate conditions. Closed-cell foam provides structural reinforcement that can increase wall strength by 200-300%, but this benefit comes with higher material costs. Vapor permeability ratings determine code compliance in different climate zones, with some regions requiring specific foam types for moisture management.
Local building codes may dictate foam type based on vapor barrier requirements that vary by climate zone. Professional contractors report that closed cell spray foam costs $1.15 to $1.75 per board foot while open cell spray foam ranges from $0.25 to $0.75 per board foot, making material selection a critical factor in project budgeting and performance expectations.
Yield Calculations and Coverage Reality
Manufacturer coverage estimates assume perfect conditions and experienced application techniques that most DIYers don’t achieve. First-time users should reduce manufacturer coverage estimates by 20-30% to account for learning curves and material waste. Calculating actual square footage including irregular surfaces and ordering 1.5 times the theoretical amount needed prevents mid-project material shortages.
Laboratory yield testing uses controlled spray patterns and optimal environmental conditions that don’t reflect typical DIY installation scenarios. Material waste increases exponentially with surface complexity – simple wall applications may waste 15% while complex areas can waste 40% or more.
Kit shelf life and storage conditions affect yield performance, with older kits or improperly stored materials producing lower coverage rates. Real-world testing shows that DIY spray foam kits like Froth-Pak cost $2.00 per board foot for their 200 board foot kit, significantly higher than professional rates and often exceeding manufacturer coverage estimates under actual application conditions.
When I first started using diy spray foam insulation, I consistently ran out of material before finishing projects. Now I automatically order 25% extra for any spray foam insulation kit purchase.
|
Kit Brand |
Advertised Coverage |
Actual DIY Coverage |
Cost Per Board Foot |
Waste Factor |
|---|---|---|---|---|
|
Froth-Pak 200 |
200 board feet |
140-160 board feet |
$2.00 |
20-30% |
|
Froth-Pak 210 |
210 board feet |
147-168 board feet |
$2.17 |
20-30% |
|
Tiger Foam 200 |
200 board feet |
140-170 board feet |
$1.83 |
15-30% |
|
Tiger Foam 600 |
600 board feet |
450-510 board feet |
$1.30 |
15-25% |
|
Professional Grade |
Variable |
85-95% of estimate |
$0.75-1.50 |
5-15% |
Equipment Modification and Maintenance
Standard kit equipment can be enhanced for better performance through strategic modifications, though changes must account for pressure dynamics and chemical compatibility. Extending hoses or adding supplemental heating improves foam quality in cold conditions but requires maintaining proper ratios between chemical lines.
Pressure drop calculations become critical when extending hoses beyond manufacturer specifications, as unequal pressure affects mixing ratios. Heat tape applications must use chemical-compatible materials that won’t react with isocyanates or polyol components during operation. Nozzle geometry affects droplet size, spray angle, and mixing efficiency in ways that directly impact final foam quality.
Different nozzle configurations dramatically affect spray patterns, foam texture, and application speed. I’ve modified every foam insulation kit I’ve used in some way, and these modifications often determine whether a project succeeds or fails.
Hose Length and Heating Modifications
Extending hoses beyond kit specifications can improve foam quality in cold conditions but requires understanding pressure dynamics to maintain proper chemical mixing ratios. Extended hoses need heat tape rated for chemical compatibility, and the 3:1 length ratio between chemical lines must be maintained to prevent mixing problems.
Pressure differential between A and B components increases with hose length, potentially creating off-ratio mixing that produces weak or improperly cured foam. Chemical compatibility of heat tape adhesives and insulation materials becomes critical when temperatures exceed 150°F during operation.
Flow rate calculations must account for increased system volume when extending hoses, affecting material delivery timing and mixing chamber performance. Testing spray patterns before beginning actual application ensures modifications work properly.
Nozzle Selection and Custom Modifications
Different tip configurations dramatically affect spray patterns, foam texture, and application speed in ways that can make or break your project results. Starting with wide tips for large areas then switching to narrow tips for detail work maximizes efficiency while maintaining quality.
Tip orifice size affects shear rate during mixing, with smaller openings creating more turbulent mixing but requiring higher operating pressures. Spray angle geometry determines material distribution patterns, with wider angles covering more area but potentially creating thinner application layers. Clogged tips create pressure imbalances that affect mixing ratios even when material still flows, producing foam with compromised properties.
Immediate cleaning with manufacturer-recommended solvents prevents permanent clogging that renders tips unusable. Here’s my pre-application equipment checklist that I use for every spray foam kit:
Pre-Application Equipment Checklist:
-
☐ Verify hose length ratios (maintain 3:1 between chemical lines)
-
☐ Test spray pattern on cardboard before application
-
☐ Check nozzle compatibility with foam chemistry
-
☐ Confirm heat tape chemical rating for temperatures up to 200°F
-
☐ Calibrate pressure gauges for both A and B components
-
☐ Prepare cleaning solvents and replacement nozzles
-
☐ Document baseline spray patterns for quality comparison
Long-Term Performance and Failure Prevention
Understanding how spray foam ages and potentially fails helps you make application decisions that ensure decades of reliable performance. Buildings move with temperature changes, and foam insulation must accommodate this movement without losing adhesion or developing cracks.
Thermal cycling creates repetitive stress patterns that can exceed foam tensile strength over time, particularly at building joints and material transitions. Moisture drive through building assemblies changes when spray foam is added, potentially creating condensation problems in unexpected locations.
Proper moisture management prevents hidden problems, while professional inspection techniques help identify and correct issues before they become expensive failures. Failed installations often require complete removal, and demolition waste removal services become necessary when foam applications create structural or health hazards that demand professional remediation.
I’ve seen foam insulation that looked perfect during installation fail catastrophically within five years because the installer didn’t account for building movement. The key is thinking beyond the initial application to how your foam insulation will perform over decades.

Thermal Cycling and Structural Movement
Buildings move with temperature changes, and spray foam must accommodate this movement without losing adhesion or developing cracks. Rigid foam can crack at building joints unless you plan for natural structural movement during application.
Building movement occurs predictably at material transitions, foundation connections, and roof-to-wall joints where different materials have varying expansion coefficients. Foam tensile strength decreases with age and UV exposure, making initial application decisions critical for long-term performance. Expansion joint planning must account for both daily temperature swings and seasonal variations that create different movement patterns.
Understanding where buildings flex and expand helps you design foam applications that remain intact through decades of seasonal temperature variations. The foam insulation I installed in my own home five years ago is still performing perfectly because I planned for movement from day one.
Expansion Joint Planning
Rigid foam can crack at building joints unless you plan for natural structural movement during application. Identifying building expansion joints before application and leaving 1/4-inch gaps at these locations prevents cracking from structural movement.
Structural engineers design buildings with specific movement joints that must remain functional even after insulation installation. Foam brittleness increases over time as chemical cross-linking continues, making joints that survive initial installation vulnerable to later cracking. Flexible sealant selection requires compatibility with both foam chemistry and expected movement ranges to prevent adhesive failure.
Sealing these gaps with flexible caulk after foam cures maintains air sealing while accommodating building movement. During a garage insulation project, a DIYer noticed hairline cracks appearing in foam applied across the garage door header after six months. Investigation revealed the header moved 1/8-inch during temperature swings, causing foam failure. Retrofitting with a flexible sealant joint and reapplying foam in sections prevented future cracking while maintaining thermal performance.
Moisture Management and Vapor Drive
Spray foam changes how moisture moves through building assemblies, and improper application can create hidden moisture problems that don’t appear for years. Understanding where condensation will occur in your wall assembly helps you apply foam at correct thickness to prevent moisture problems.
Vapor drive direction changes seasonally in most climates, requiring foam applications that manage moisture movement in both directions. Condensation plane location shifts when foam is added to existing wall assemblies, potentially creating moisture problems in new locations. Climate zone requirements for vapor barrier placement may conflict with foam application plans, requiring code compliance verification.
Dew point calculations for your climate zone determine minimum foam thickness requirements. Modern basement insulation challenges highlight moisture management complexities. “Basements are prone to drafts because they often have older windows, gaps around pipes and ducts, and unfinished walls. These drafts can increase heating and cooling costs by up to 25%,” according to Homes and Gardens expert analysis, emphasizing the critical role of proper sealing and moisture control in below-grade applications.
Getting moisture management wrong with diy spray foam can create problems that don’t show up for years. I always do the math on dew point calculations before starting any foam insulation project.
Dew Point Calculations for Climate Zones
Understanding where condensation will occur in your wall assembly helps you apply foam at the correct thickness to prevent moisture problems. Online dew point calculators for your climate zone determine minimum foam thickness needed to keep condensation outside the wall cavity.
Dew point location within wall assemblies varies with outdoor temperature, indoor humidity levels, and insulation R-values in ways that require calculation rather than guesswork. Insufficient foam thickness allows condensation to form on interior surfaces of sheathing or framing, creating conditions for mold growth and structural damage.
Climate zone maps provide general guidance, but local microclimates and building orientation can create conditions requiring thicker foam applications. This typically requires 2-4 inches of closed-cell foam depending on your geographic location and local climate conditions.
Climate Zone Foam Thickness Requirements:
-
☐ Zone 1-2 (Hot climates): 1-2 inches closed-cell minimum
-
☐ Zone 3-4 (Mixed climates): 2-3 inches closed-cell minimum
-
☐ Zone 5-6 (Cold climates): 3-4 inches closed-cell minimum
-
☐ Zone 7-8 (Very cold): 4+ inches closed-cell minimum
-
☐ Marine climates: Add 0.5 inches to base requirements
-
☐ High humidity areas: Consider vapor barrier interactions
-
☐ Verify local building code requirements exceed minimums
Inspection and Quality Control Methods
Professional techniques for evaluating foam quality help you identify and correct problems before they become expensive failures. Thermal imaging cameras reveal voids and thin spots in foam coverage that aren’t visible to the naked eye.
Thermal imaging effectiveness depends on temperature differential between indoor and outdoor conditions, requiring specific weather conditions for accurate void detection. Foam density variations create thermal bridging that appears as temperature differences on thermal cameras, indicating areas needing additional material. Quality control timing is critical – too early and thermal patterns haven’t stabilized, too late and foam has hardened beyond easy repair.
Conducting thermal surveys 24-48 hours after application allows time for temperature equalization while foam properties remain adjustable for repairs. According to professional installation standards, as much as 40% of a building’s energy is lost due to air infiltration, making thorough quality control and void detection essential for achieving the promised energy savings that justify foam installation costs.
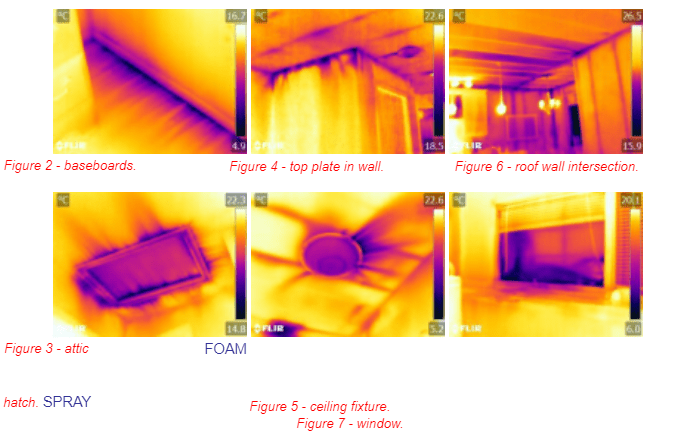
Thermal Imaging for Void Detection
Thermal cameras reveal voids and thin spots in foam coverage that aren’t visible during application or immediate inspection. Temperature variations indicate missing foam or thermal bridging that compromises insulation performance.
Void detection requires minimum 10°F temperature differential between conditioned and unconditioned spaces to create visible thermal signatures. Thermal bridging through thin foam sections appears as temperature gradients rather than distinct hot or cold spots, requiring experience to interpret correctly. Repair timing affects foam adhesion between old and new material, with best results achieved within 48-72 hours of initial application.
Marking problem areas with chalk for repair before final trimming ensures complete coverage and maximum R-value performance. A homeowner discovered significant thermal bridging in their attic foam insulation using a borrowed thermal camera three days post-installation. The imaging revealed several 2-foot sections where foam thickness varied from the intended 6 inches to less than 2 inches. Immediate repair with additional foam layers restored uniform thermal performance and prevented long-term energy losses that would have cost hundreds annually.
Environmental Impact and Waste Management
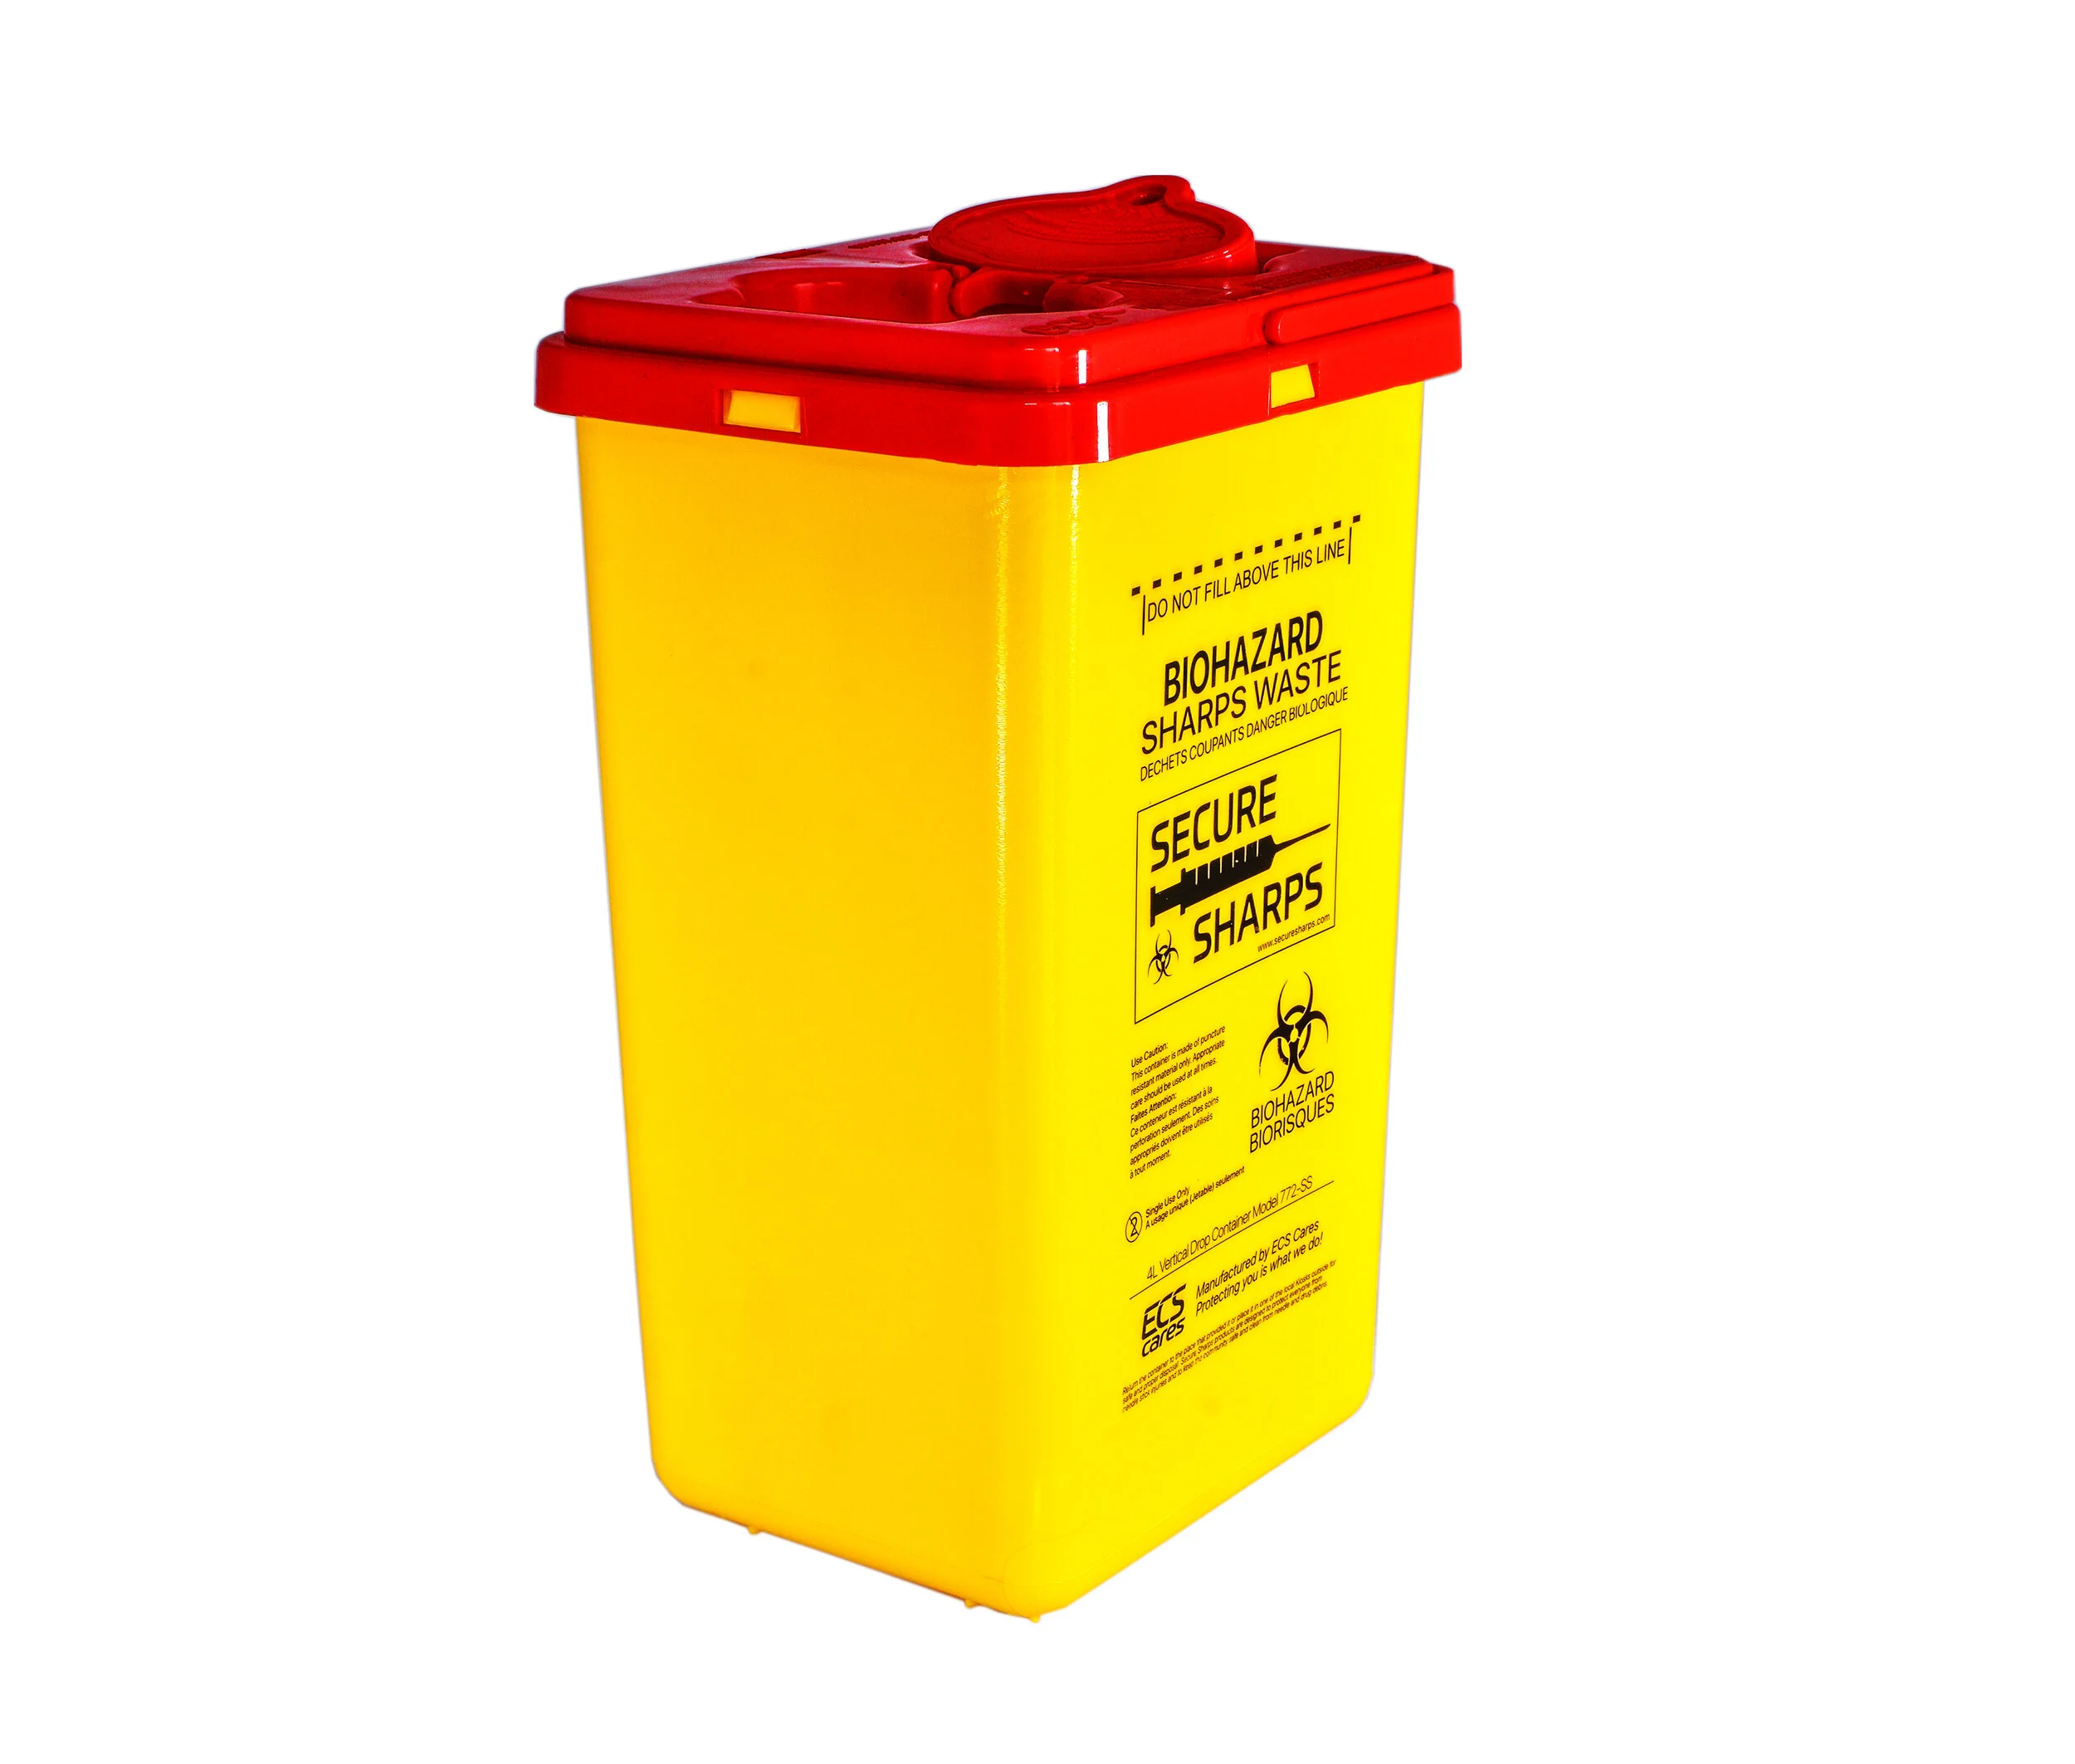
Proper disposal of foam waste and understanding environmental implications helps you make responsible choices while achieving insulation goals. Spray foam components are hazardous materials requiring specific disposal methods to protect both environment and personal safety.
Uncured foam components remain reactive and potentially hazardous for extended periods, requiring specialized disposal rather than standard construction waste handling. Environmental regulations for foam disposal vary by jurisdiction, with some areas requiring professional hazardous waste handling for any uncured materials.
Container decontamination and equipment cleaning prevent environmental contamination while extending equipment life through proper chemical compatibility practices. Large renovation projects with significant foam waste often benefit from construction waste disposal contractors who understand hazardous material handling requirements and proper disposal protocols.
I learned about proper foam waste disposal the hard way when my local dump refused to accept containers with foam residue. Now I plan disposal logistics before starting any diy spray foam insulation project.
Chemical Waste Handling Protocols
Spray foam components are hazardous materials that require specific disposal methods to protect both environment and personal safety. Proper cleaning prevents environmental contamination and extends equipment life, but requires understanding chemical compatibility between cleaning solvents and foam components.
Isocyanate components remain reactive in landfill conditions, potentially creating toxic gas emissions or groundwater contamination if improperly disposed. Cleaning solvent selection affects both cleaning effectiveness and environmental impact, with some solvents creating more hazardous waste than the original foam components. Local hazardous waste facilities may have specific requirements for foam waste acceptance, including curing requirements or container specifications.
Never disposing of uncured foam in regular trash prevents environmental contamination and potential regulatory violations. The foam insulation cleanup process requires as much planning as the application itself.
Container and Equipment Decontamination
Proper cleaning prevents environmental contamination and extends equipment life, but requires understanding chemical compatibility between cleaning agents and foam residues. Using only manufacturer-recommended solvents ensures effective cleaning without creating additional hazardous waste streams.
Solvent compatibility with both A and B components requires different cleaning agents for complete decontamination, as isocyanates and polyols respond to different chemical treatments. Equipment cleaning timing affects solvent effectiveness – immediate cleaning requires less solvent than cleaning after foam has begun to cure.
Container preparation for disposal must account for residual chemical reactions that can continue for weeks after apparent emptying. Curing any remaining foam in containers before disposal converts reactive chemicals into stable waste that’s safer for standard disposal methods.
Waste Disposal Checklist:
-
☐ Allow all foam residues to fully cure before disposal (minimum 48 hours)
-
☐ Use only manufacturer-approved cleaning solvents
-
☐ Separate A and B component waste streams
-
☐ Label all containers with contents and disposal date
-
☐ Contact local hazardous waste facility for acceptance requirements
-
☐ Document disposal with receipts for regulatory compliance
-
☐ Never mix different foam chemistries in waste containers

Safety Protocols and Health Considerations
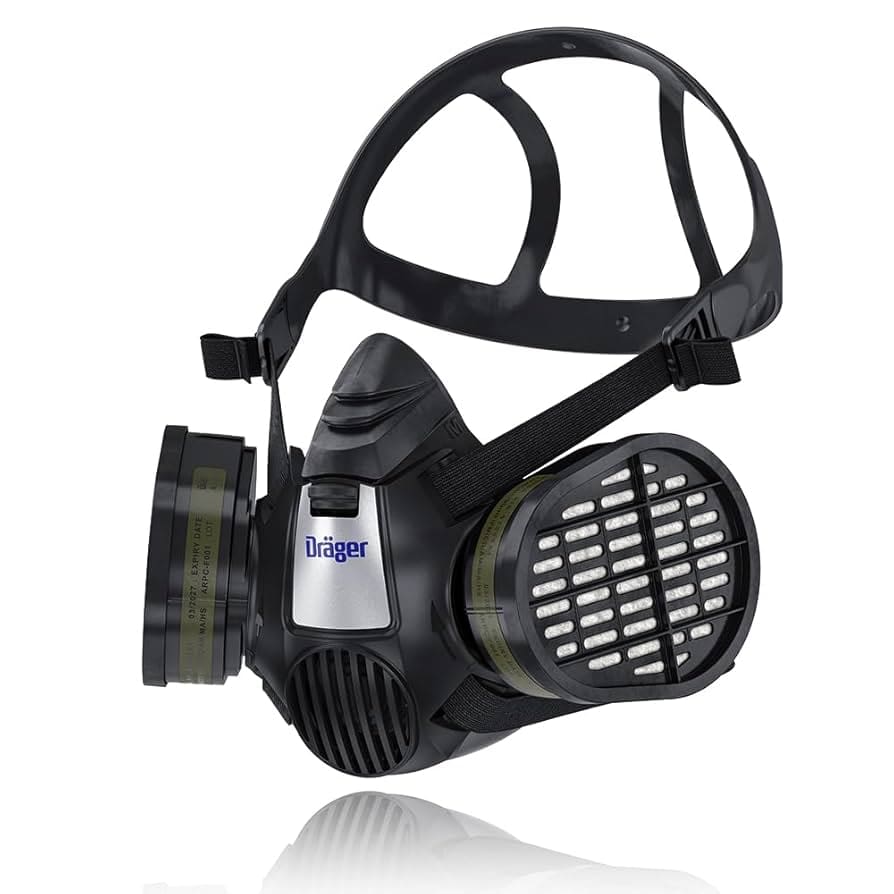
Professional-grade protective measures and health monitoring reveal risks that standard DIY guides minimize or ignore entirely. Isocyanate exposure creates cumulative health effects requiring understanding of long-term exposure limits and proper filtration systems.
Isocyanate sensitization is permanent and progressive, meaning each exposure increases sensitivity and reduces tolerance for future contact. Standard construction safety equipment provides inadequate protection against chemical vapors that require specialized respiratory protection and skin barriers.
Real-time air quality monitoring helps determine when ventilation becomes inadequate and exposure reaches dangerous levels that require work stoppage. When I first started doing diy spray foam insulation, I thought a basic dust mask was enough protection – I was dangerously wrong.
Respiratory Protection Beyond Basic Masks
Isocyanate exposure creates cumulative health effects that require understanding long-term exposure limits and proper filtration systems. Real-time air quality measurements help you understand when ventilation is inadequate and exposure becomes dangerous.
Isocyanate detection requires specialized sensors that respond to specific chemical signatures rather than general VOC measurements that miss dangerous exposure levels. Respiratory sensitization can occur at exposure levels below those that cause immediate symptoms, making objective monitoring essential for long-term health protection. Air quality monitoring must continue for 48 hours post-application as off-gassing continues well beyond visible curing completion.
VOC detectors capable of measuring isocyanate levels provide objective data for making safety decisions rather than relying on subjective symptoms that may indicate overexposure. The foam insulation safety equipment I use now costs more than my first few projects combined, but my health is worth it.
Air Quality Monitoring During Application
Real-time air quality measurements help you understand when ventilation is inadequate and exposure becomes dangerous. Establishing baseline readings before opening foam containers provides reference points for determining when chemical levels become hazardous.
Baseline air quality measurements establish normal background levels that help identify when foam application creates hazardous conditions. Exposure limit calculations must account for cumulative effects over the entire project duration, not just instantaneous peak readings. Ventilation effectiveness varies with building configuration and weather conditions, requiring continuous monitoring rather than assuming adequate air exchange.
If isocyanate levels exceed 0.02 ppm, increasing ventilation or halting work prevents dangerous exposure that can cause permanent health effects. The foam insulation monitoring equipment I use now alerts me before I can smell any chemical odors.
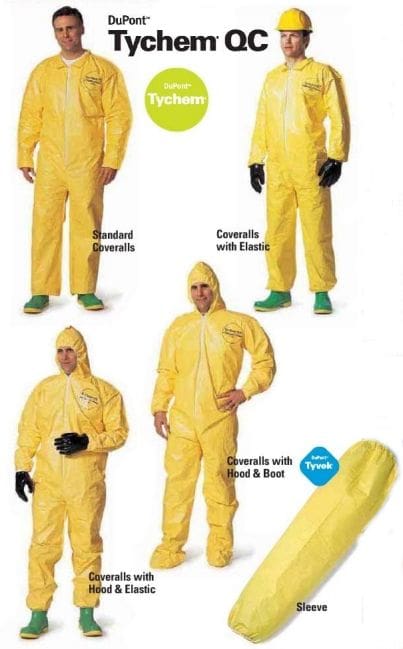
Skin Sensitization Prevention Strategies
Repeated skin contact creates permanent chemical sensitivity that makes future foam work impossible without severe reactions. Nitrile gloves rated for chemical resistance provide better protection than standard latex gloves that allow chemical penetration.
Chemical sensitization develops through repeated low-level exposure rather than single high-dose contact, making consistent protection more important than emergency response. Glove breakthrough time varies with temperature and chemical concentration, requiring more frequent changes during intensive application periods. Skin decontamination must occur immediately after contact, as delayed washing allows deeper chemical penetration and increases sensitization risk.
Changing gloves every 30 minutes during active application prevents breakthrough that occurs as chemicals saturate glove material over time. I’ve seen people develop permanent foam insulation allergies from inadequate skin protection – it’s not worth the risk.
Emergency Response Preparation
Chemical exposure incidents require immediate specific actions that differ from standard first aid protocols. Keeping polyethylene glycol solution on-site provides effective skin decontamination that neutralizes isocyanate contact better than water alone.
Isocyanate exposure requires specific decontamination procedures that differ from standard chemical burn treatment, with water potentially worsening some types of contact. Emergency response timing is critical – effective treatment within the first few minutes can prevent permanent sensitization or injury. Family member training ensures appropriate emergency response even when the primary applicator becomes incapacitated by chemical exposure.
Emergency contact numbers for poison control and evacuation routes ensure rapid response when exposure incidents occur despite preventive measures. Having proper emergency supplies for diy foam insulation projects isn’t paranoia – it’s common sense.
Building Code Compliance and Inspection Requirements
Municipal regulations for foam insulation vary significantly and often require permits or inspections that homeowners overlook. Most spray foams require thermal barriers in occupied spaces, and violations can void insurance coverage or prevent home sales.
Building code requirements for foam insulation often exceed manufacturer recommendations, particularly for fire safety and structural applications. Insurance policy compliance may require specific installation procedures or certifications that aren’t obvious from building code requirements alone. Permit requirements vary by project scope and location, with some jurisdictions requiring professional installation for certain applications.
Fire rating requirements and vapor barrier code interactions create compliance challenges that need resolution before foam application begins. I’ve seen homeowners forced to remove perfectly good foam insulation because they didn’t get required permits first.
Fire Rating and Ignition Barrier Requirements
Most spray foams require thermal barriers in occupied spaces, and violations can void insurance coverage or prevent home sales. Installing appropriate thermal barriers (typically 1/2-inch drywall) over all exposed foam surfaces ensures code compliance and fire safety.
Foam fire ratings apply only when proper thermal barriers are installed according to manufacturer specifications and local code requirements. Insurance coverage may be voided by code violations even if the installation performs adequately, creating financial liability for non-compliant work. Inspection timing requirements vary by jurisdiction, with some requiring multiple inspections at different stages of foam installation and covering.
Scheduling required inspections before covering foam with finish materials prevents costly corrections after work completion. The foam insulation I installed in my basement required three separate inspections before I could cover it with drywall.
Vapor Barrier Code Interactions
Adding spray foam to existing wall assemblies can create double vapor barriers that trap moisture and violate building codes. Evaluating existing vapor barriers before foam application prevents moisture problems and code violations.
Double vapor barrier conditions create moisture traps that can cause structural damage even when individual components meet code requirements. Existing vapor barrier modification must maintain overall wall assembly performance while accommodating new foam insulation properties. Documentation requirements for vapor barrier changes may require professional engineering review in some jurisdictions.
Removing or perforating existing plastic sheeting when installing closed-cell foam ensures proper moisture management and code compliance. Understanding these interactions before starting prevents expensive corrections later.
Advanced Troubleshooting and Repair Techniques
When foam applications fail, specific repair methods can salvage projects without complete removal and restart. Delamination repair using injection techniques and mechanical fasteners can reattach foam that pulls away from substrates.
Repair success depends on identifying failure causes rather than just addressing visible symptoms, as underlying problems will cause repeated failures. Injection repair techniques must account for foam expansion characteristics to avoid creating additional stress points or surface damage. Contamination cleanup effectiveness decreases rapidly with time, making immediate response critical for successful remediation.
Overspray and drift contamination require specific removal techniques to avoid permanent staining or damage to unintended surfaces. Complex cleanup situations may require professional assistance, particularly when construction garbage removal involves hazardous materials that exceed typical DIY disposal capabilities.
Delamination Repair Without Full Removal
Foam that pulls away from substrates can often be reattached using injection techniques and mechanical fasteners without complete removal and restart. Drilling small holes through delaminated sections into substrate allows foam injection that rebonds separated areas.
Injection hole placement must account for foam flow patterns and expansion characteristics to ensure complete void filling without creating additional separation. Mechanical fastener selection requires compatibility with both substrate material and foam chemistry to prevent corrosion or chemical reactions. Repair material adhesion to existing foam depends on surface preparation and chemical compatibility between old and new foam formulations.
Clamping or weighting sections until cure is complete ensures proper adhesion of repair material. I’ve successfully repaired foam insulation delamination that would have cost thousands to replace completely.
Overspray and Drift Contamination Cleanup
Foam that lands on unintended surfaces requires specific removal techniques to avoid permanent staining or damage. Removing wet foam immediately with plastic scrapers prevents chemical bonding that makes later removal difficult or impossible.
Removal technique selection depends on both the contaminated surface material and the foam cure state, with different approaches required for various combinations. Chemical solvents for foam removal may damage substrate materials more than the original foam contamination, requiring careful compatibility testing. Porous surface contamination often requires replacement rather than cleaning, as foam penetration makes complete removal impossible without surface damage.
For cured foam on glass or metal surfaces, dry ice freezing and shattering provides effective removal without surface damage. The key is acting fast – foam insulation overspray becomes exponentially harder to remove as it cures.
When DIY spray foam projects exceed your capabilities or create more waste than anticipated, professional cleanup services become essential. Jiffy Junk understands the complexities of foam waste disposal and contamination cleanup that often overwhelm homeowners. Their experience with hazardous material handling ensures proper disposal of chemical-contaminated equipment, failed foam applications, and overspray cleanup that meets environmental regulations.
Whether you’re dealing with a complete foam removal project due to application errors or simply need help managing the substantial waste generated by large insulation projects, Jiffy Junk’s specialized services handle construction debris that can’t go in regular trash. Their team knows which materials require special disposal methods and can clear contaminated work areas safely, allowing you to focus on perfecting your technique rather than managing increasingly complex waste disposal requirements.
Final Thoughts
DIY spray foam insulation success depends on understanding the science behind foam chemistry, proper equipment use, and long-term performance factors that standard guides often overlook. Environmental conditions during application, substrate preparation, and safety protocols all play critical roles in determining whether your project delivers decades of reliable performance or creates expensive problems.
Successful foam installation requires balancing chemical knowledge, environmental conditions, and application techniques in ways that go far beyond basic mixing and spraying. Long-term performance depends on decisions made during initial application, with many failure modes not appearing until years after installation when repairs become expensive and disruptive.
Professional-level knowledge of troubleshooting techniques and waste management ensures you can handle challenges that arise during complex installations. Professional-grade safety protocols and waste management practices protect both your health and the environment while ensuring compliance with regulations that vary by location and application type.
The difference between a successful diy spray foam insulation project and a disaster often comes down to understanding these hidden complexities. Every foam insulation kit project I’ve completed has taught me something new about the science behind the foam. When you respect the chemistry and plan for the unexpected, spray foam becomes a powerful tool for creating comfortable, energy-efficient spaces that perform reliably for decades.