25 Innovative Basement Bathroom Ideas for 2025: Transform Your Space
Basement bathrooms present unique challenges but offer tremendous potential to add value and functionality to your home. This comprehensive guide explores 25 innovative ideas across five categories to help you create the perfect basement bathroom, addressing common issues like plumbing, moisture, lighting, space constraints, and design cohesion.
Table of Contents
-
Planning Your Basement Bathroom
-
Maximizing Small Spaces
-
Lighting & Brightness Solutions
-
Moisture & Ventilation Solutions
-
Stylish & Functional Design
-
Practical Plumbing Solutions
-
How Jiffy Junk Can Help
-
Final Thoughts
Planning Your Basement Bathroom
Before diving into specific design ideas, understanding the unique challenges of basement bathrooms is crucial. I’ve found that proper planning makes all the difference between a successful project and a costly headache.
Basement bathrooms typically cost 10-30% more than main floor bathrooms due to plumbing challenges. You’re looking at average costs ranging from $10,000-$15,000 for a full bathroom installation. Why so expensive? The plumbing complications alone can add thousands to your budget.
Building codes require specific permits for basement bathrooms, including requirements for minimum ceiling height (usually 6’8″), proper ventilation (50 CFM minimum), and potentially egress windows if creating a full bathroom suite. Ignoring these requirements can lead to failed inspections and expensive corrections down the road.
|
Basement Bathroom Cost Comparison |
Basic |
Mid-Range |
Luxury |
|---|---|---|---|
|
Half Bath (toilet & sink) |
$5,000-7,000 |
$7,000-10,000 |
$10,000-15,000 |
|
3/4 Bath (toilet, sink, shower) |
$8,000-12,000 |
$12,000-18,000 |
$18,000-25,000 |
|
Full Bath (toilet, sink, shower/tub) |
$10,000-15,000 |
$15,000-25,000 |
$25,000-40,000 |
|
Additional Plumbing Costs |
Up-flush system: $600-1,200 |
Ejector pump: $800-1,500 |
Below-floor drainage: $1,500-3,000 |
|
Moisture Control Additions |
Basic vent fan: $150-300 |
Humidity-sensing fan: $250-500 |
Integrated HVAC dehumidification: $1,000-2,500 |
1. Key Considerations for Basement Bathroom Planning
Seven critical factors influence basement bathroom success: plumbing challenges, moisture control, lighting solutions, space constraints, building codes, budget planning, and design cohesion. I’ve seen too many DIYers jump straight to picking out tile without addressing these fundamentals first.
Most residential sewer lines sit 12-18 inches below grade level, requiring specialized plumbing solutions when fixtures are positioned below this point. This single factor can completely change your approach to the project.
Basement relative humidity typically runs 15-20% higher than main floors, necessitating ventilation systems rated at minimum 8 air changes per hour to prevent mold growth. Standard bathroom fans often can’t keep up with basement moisture levels.
When planning your basement bathroom renovation, consider how you’ll handle construction debris. As noted in our guide on efficient and ethical garage junk removal in Austin, proper waste management is crucial for keeping your project on schedule.
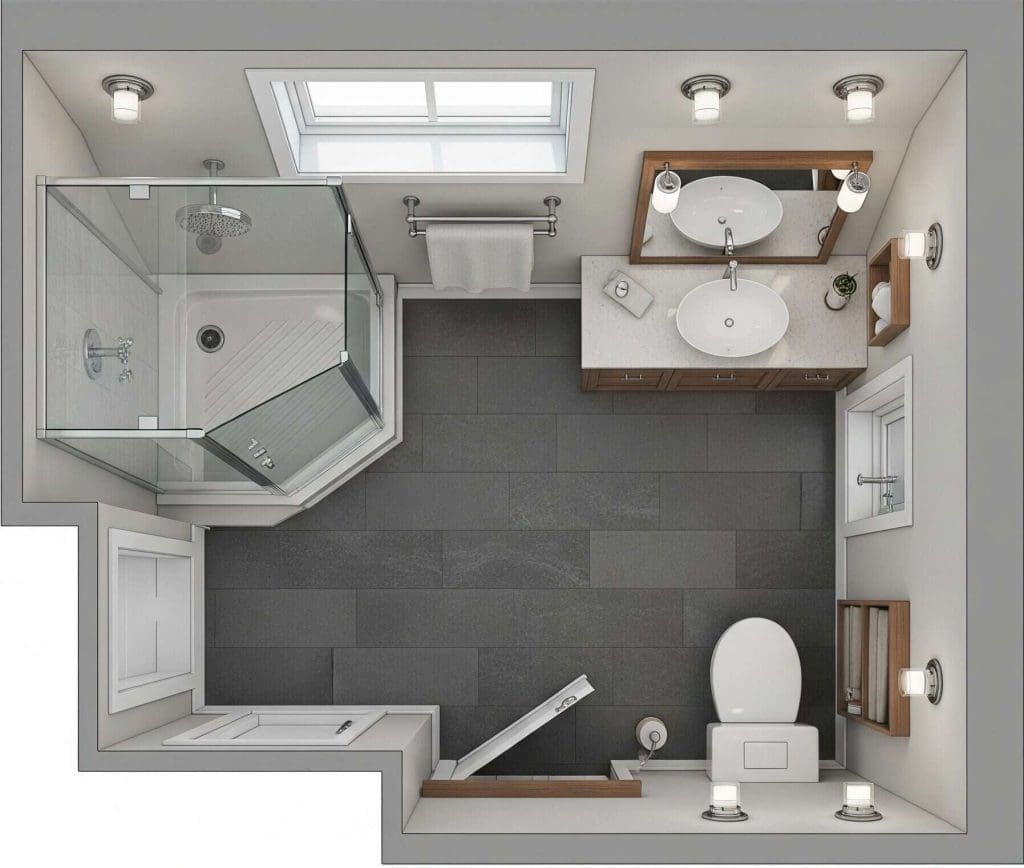
A homeowner in Minneapolis planned to add a full basement bathroom but discovered their main sewer line was only 8 inches below their basement floor. Rather than expensive excavation, they opted for an upflush toilet system combined with a shower pan raised 4 inches above the floor level. This solution saved over $3,000 in plumbing costs while maintaining adequate ceiling height. They also incorporated wall-mounted fixtures and a corner shower to maximize the 6×8 foot space, resulting in a functional bathroom that added $15,000 to their home’s appraised value.
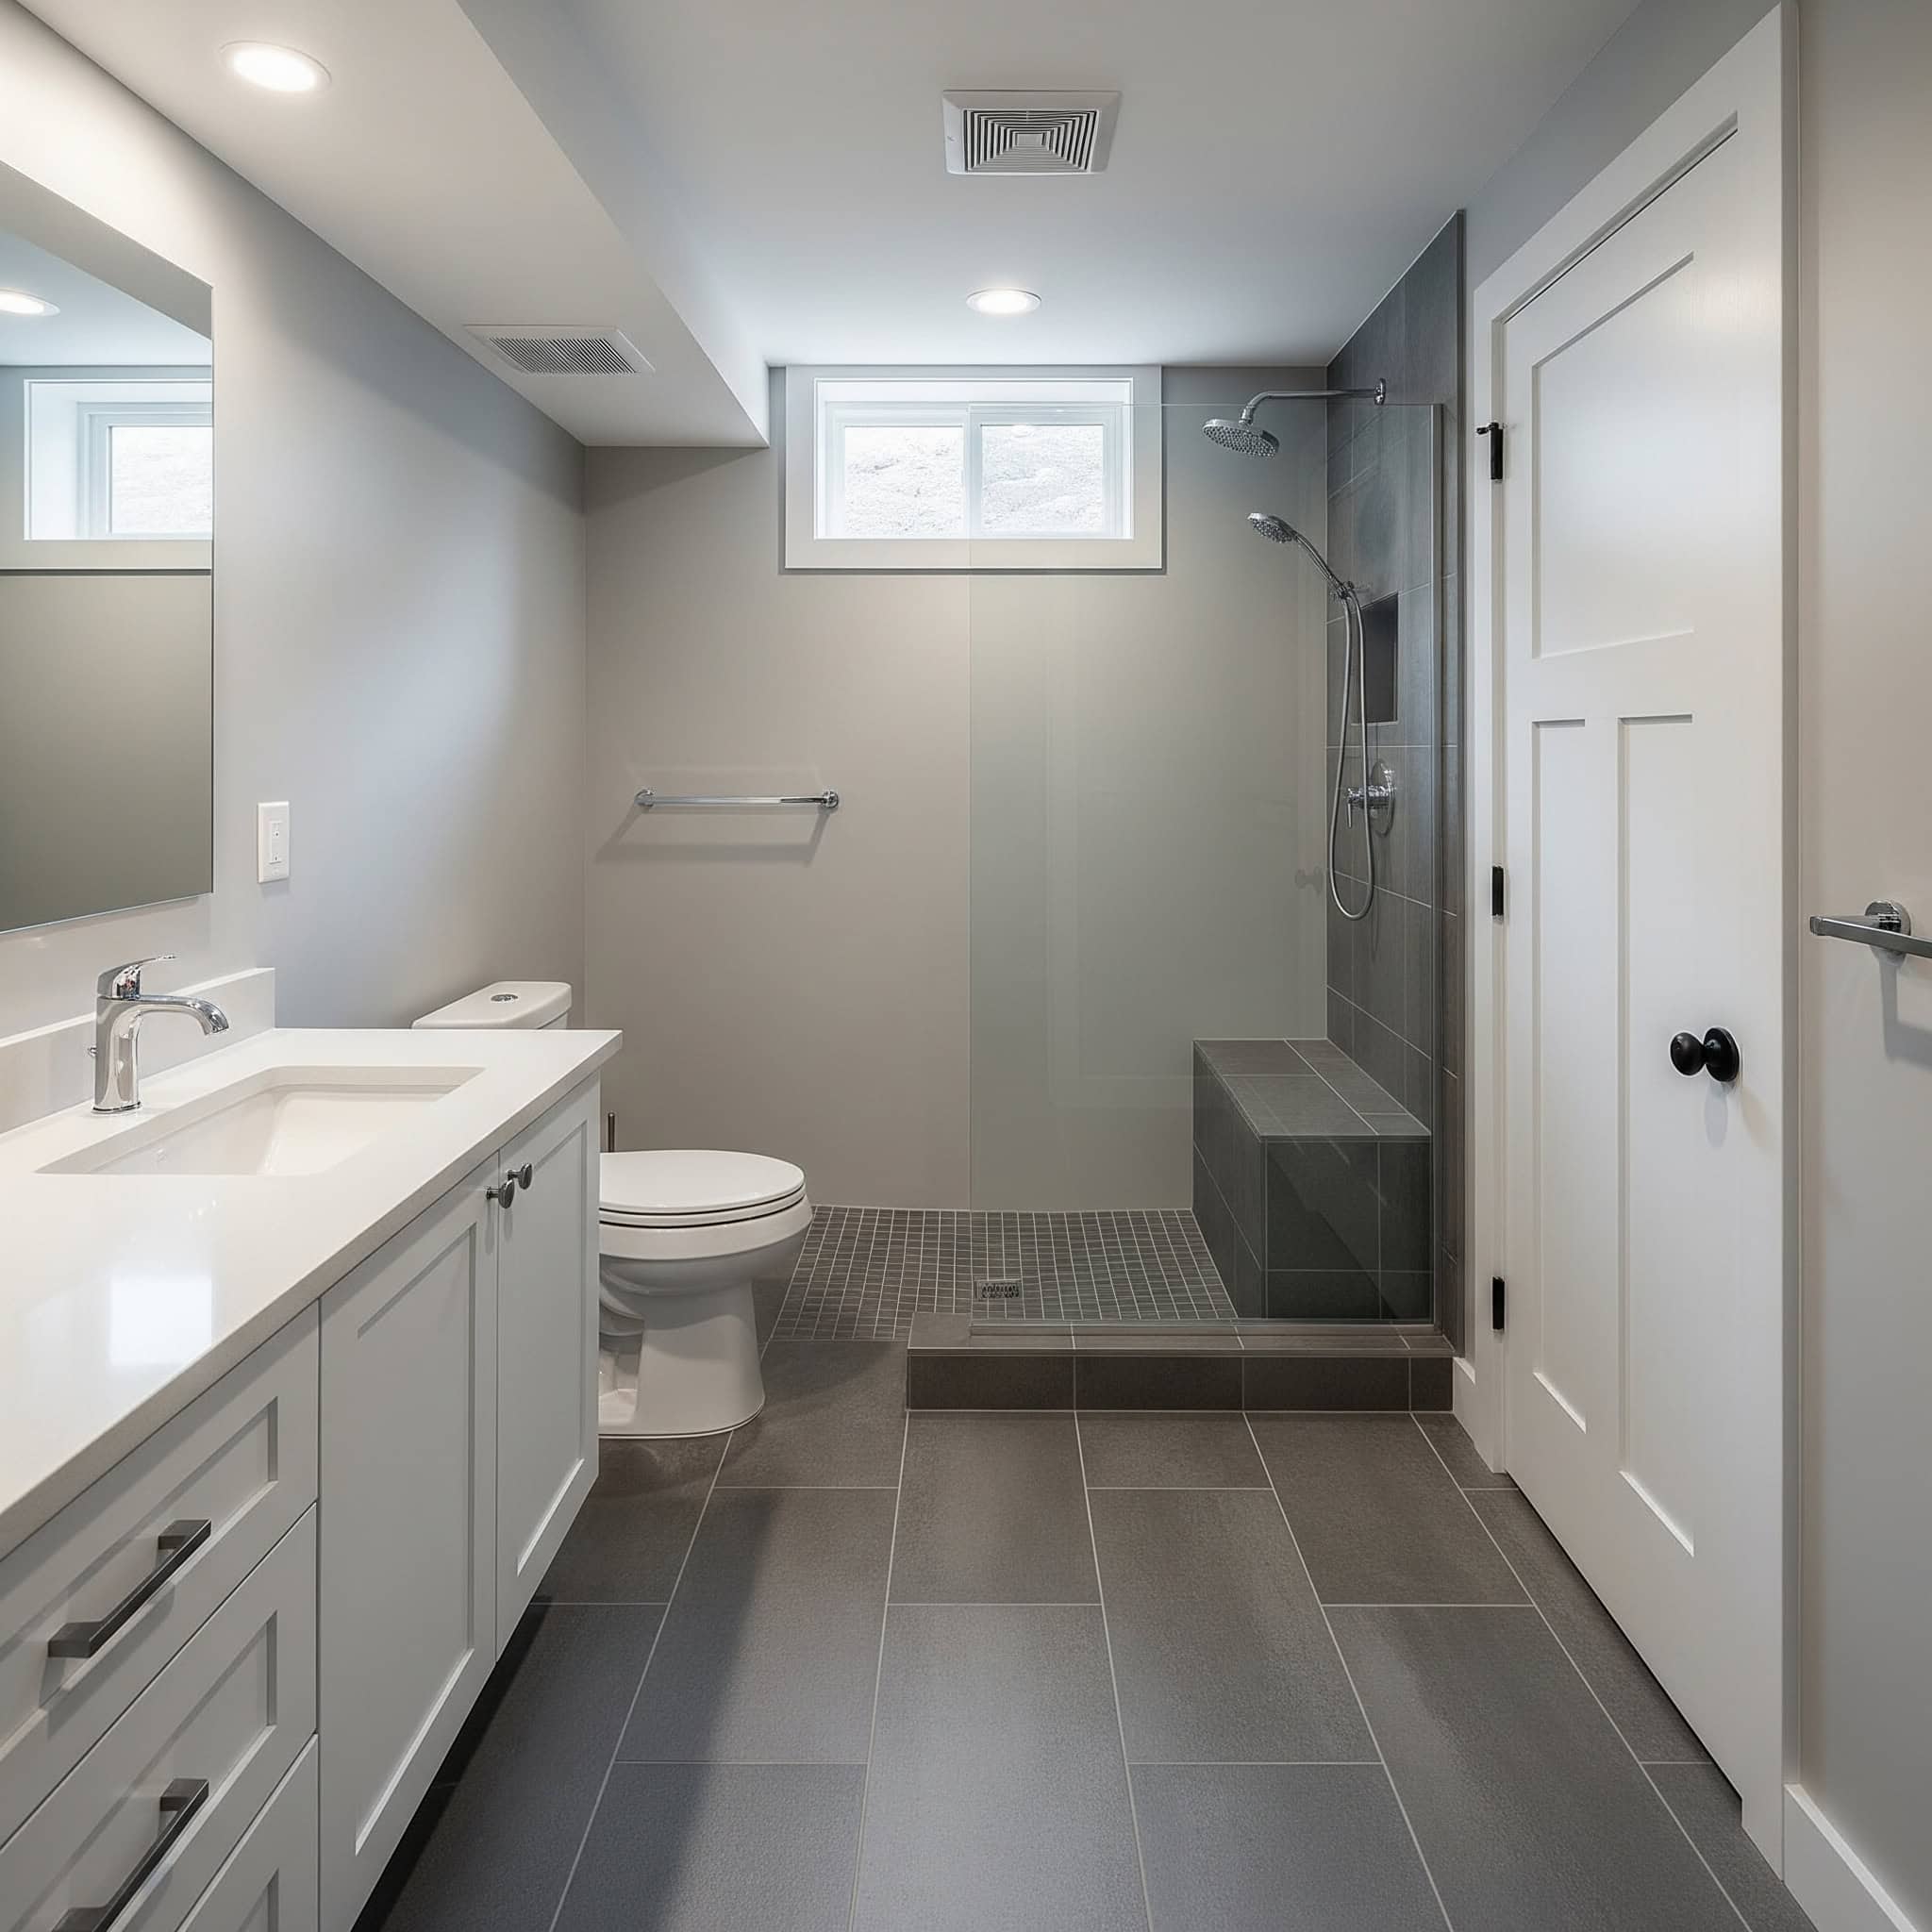
Maximizing Small Spaces
2. Corner Shower Installation
Corner showers utilize often-wasted space while providing full functionality. I’ve installed dozens of these in basement bathrooms where every inch counts. Modern units with space-saving doors maximize usable bathroom area while maintaining a comfortable shower experience.
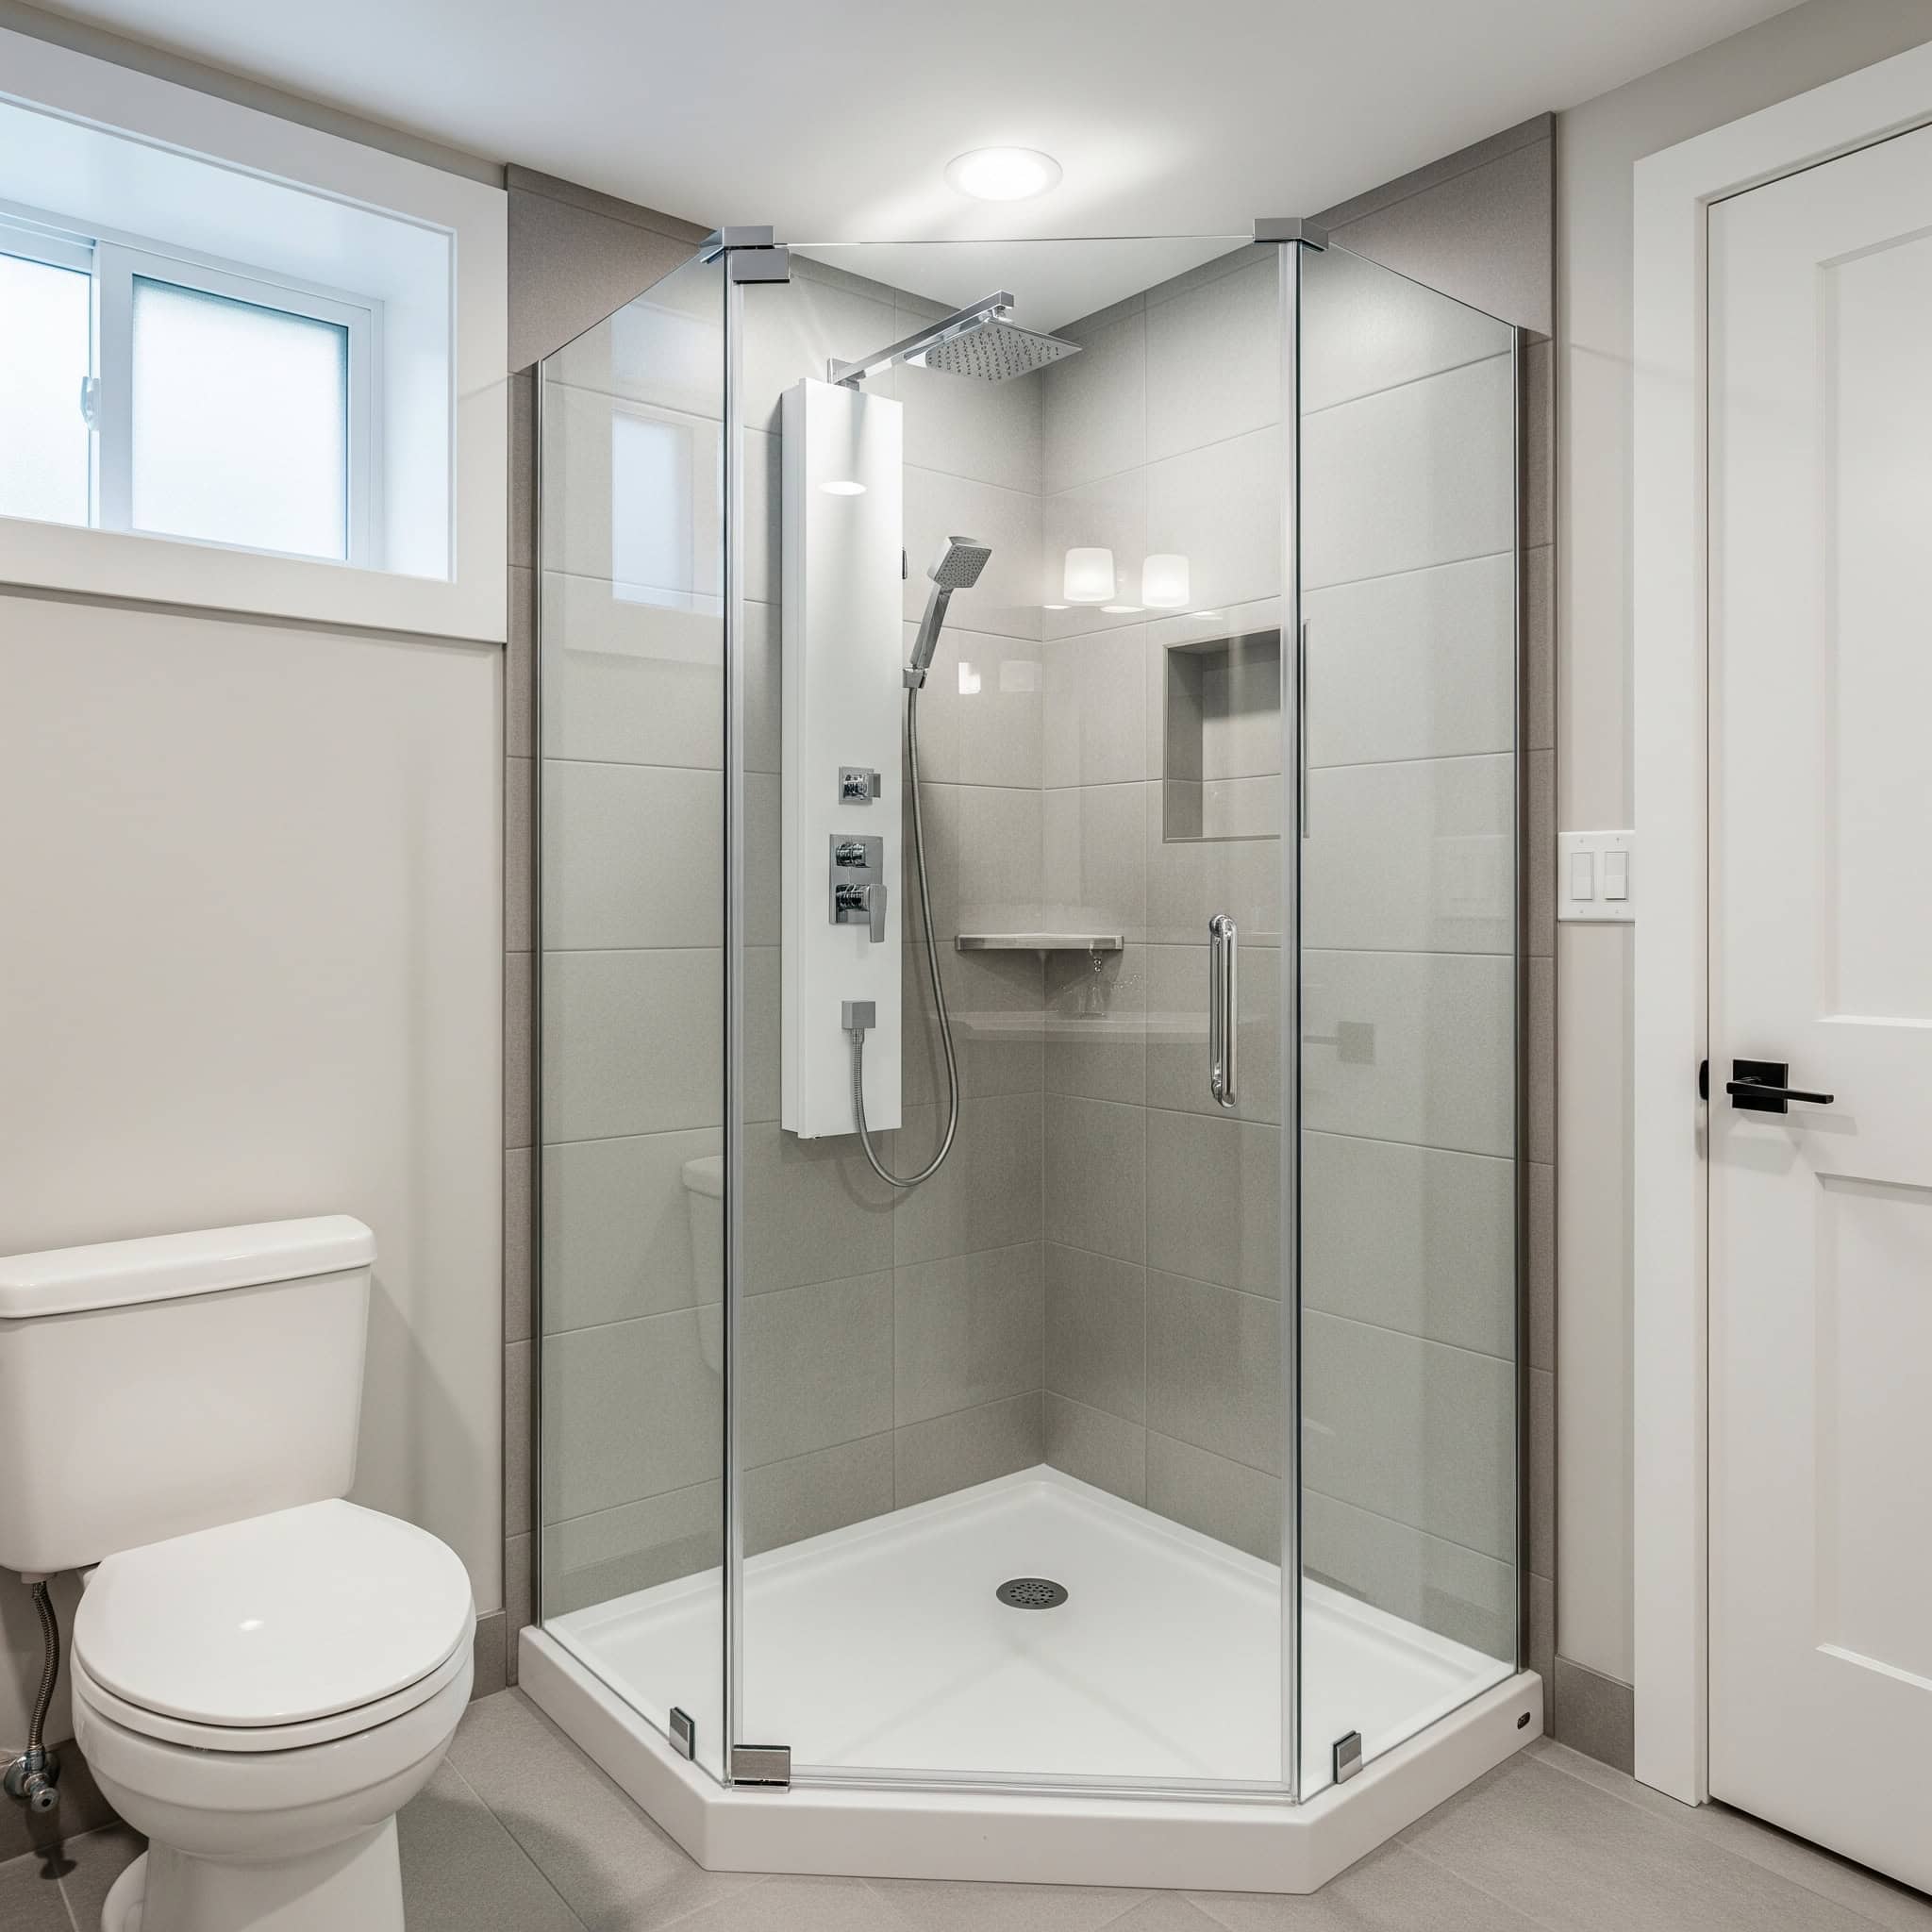
Neo-angle corner showers typically require 36″×36″ floor space while providing up to 30% more interior standing room compared to square corner units. This extra interior space makes a huge difference in comfort without expanding the bathroom’s footprint.
Frameless glass enclosures for corner showers increase installation costs by $800-1,200 but create visual spaciousness that makes the entire bathroom feel larger. The investment pays off in both aesthetics and perceived space.
3. Wall-Mounted Toilets
Wall-hung toilets conceal the tank inside the wall, saving 8-10 inches of floor space while creating a sleek, modern look. I’m seeing these become increasingly popular in basement bathrooms where every inch matters.
In-wall carrier systems for wall-mounted toilets require minimum 6″ wall depth and must be anchored to studs capable of supporting 500+ pounds of dynamic weight. This isn’t a DIY installation for most homeowners.
Maintenance access panels for wall-mounted toilets must be at least 12″×12″ to allow servicing of flush mechanisms and typically include sound insulation to minimize noise. Don’t skip this detail – you’ll regret it the first time maintenance is needed.
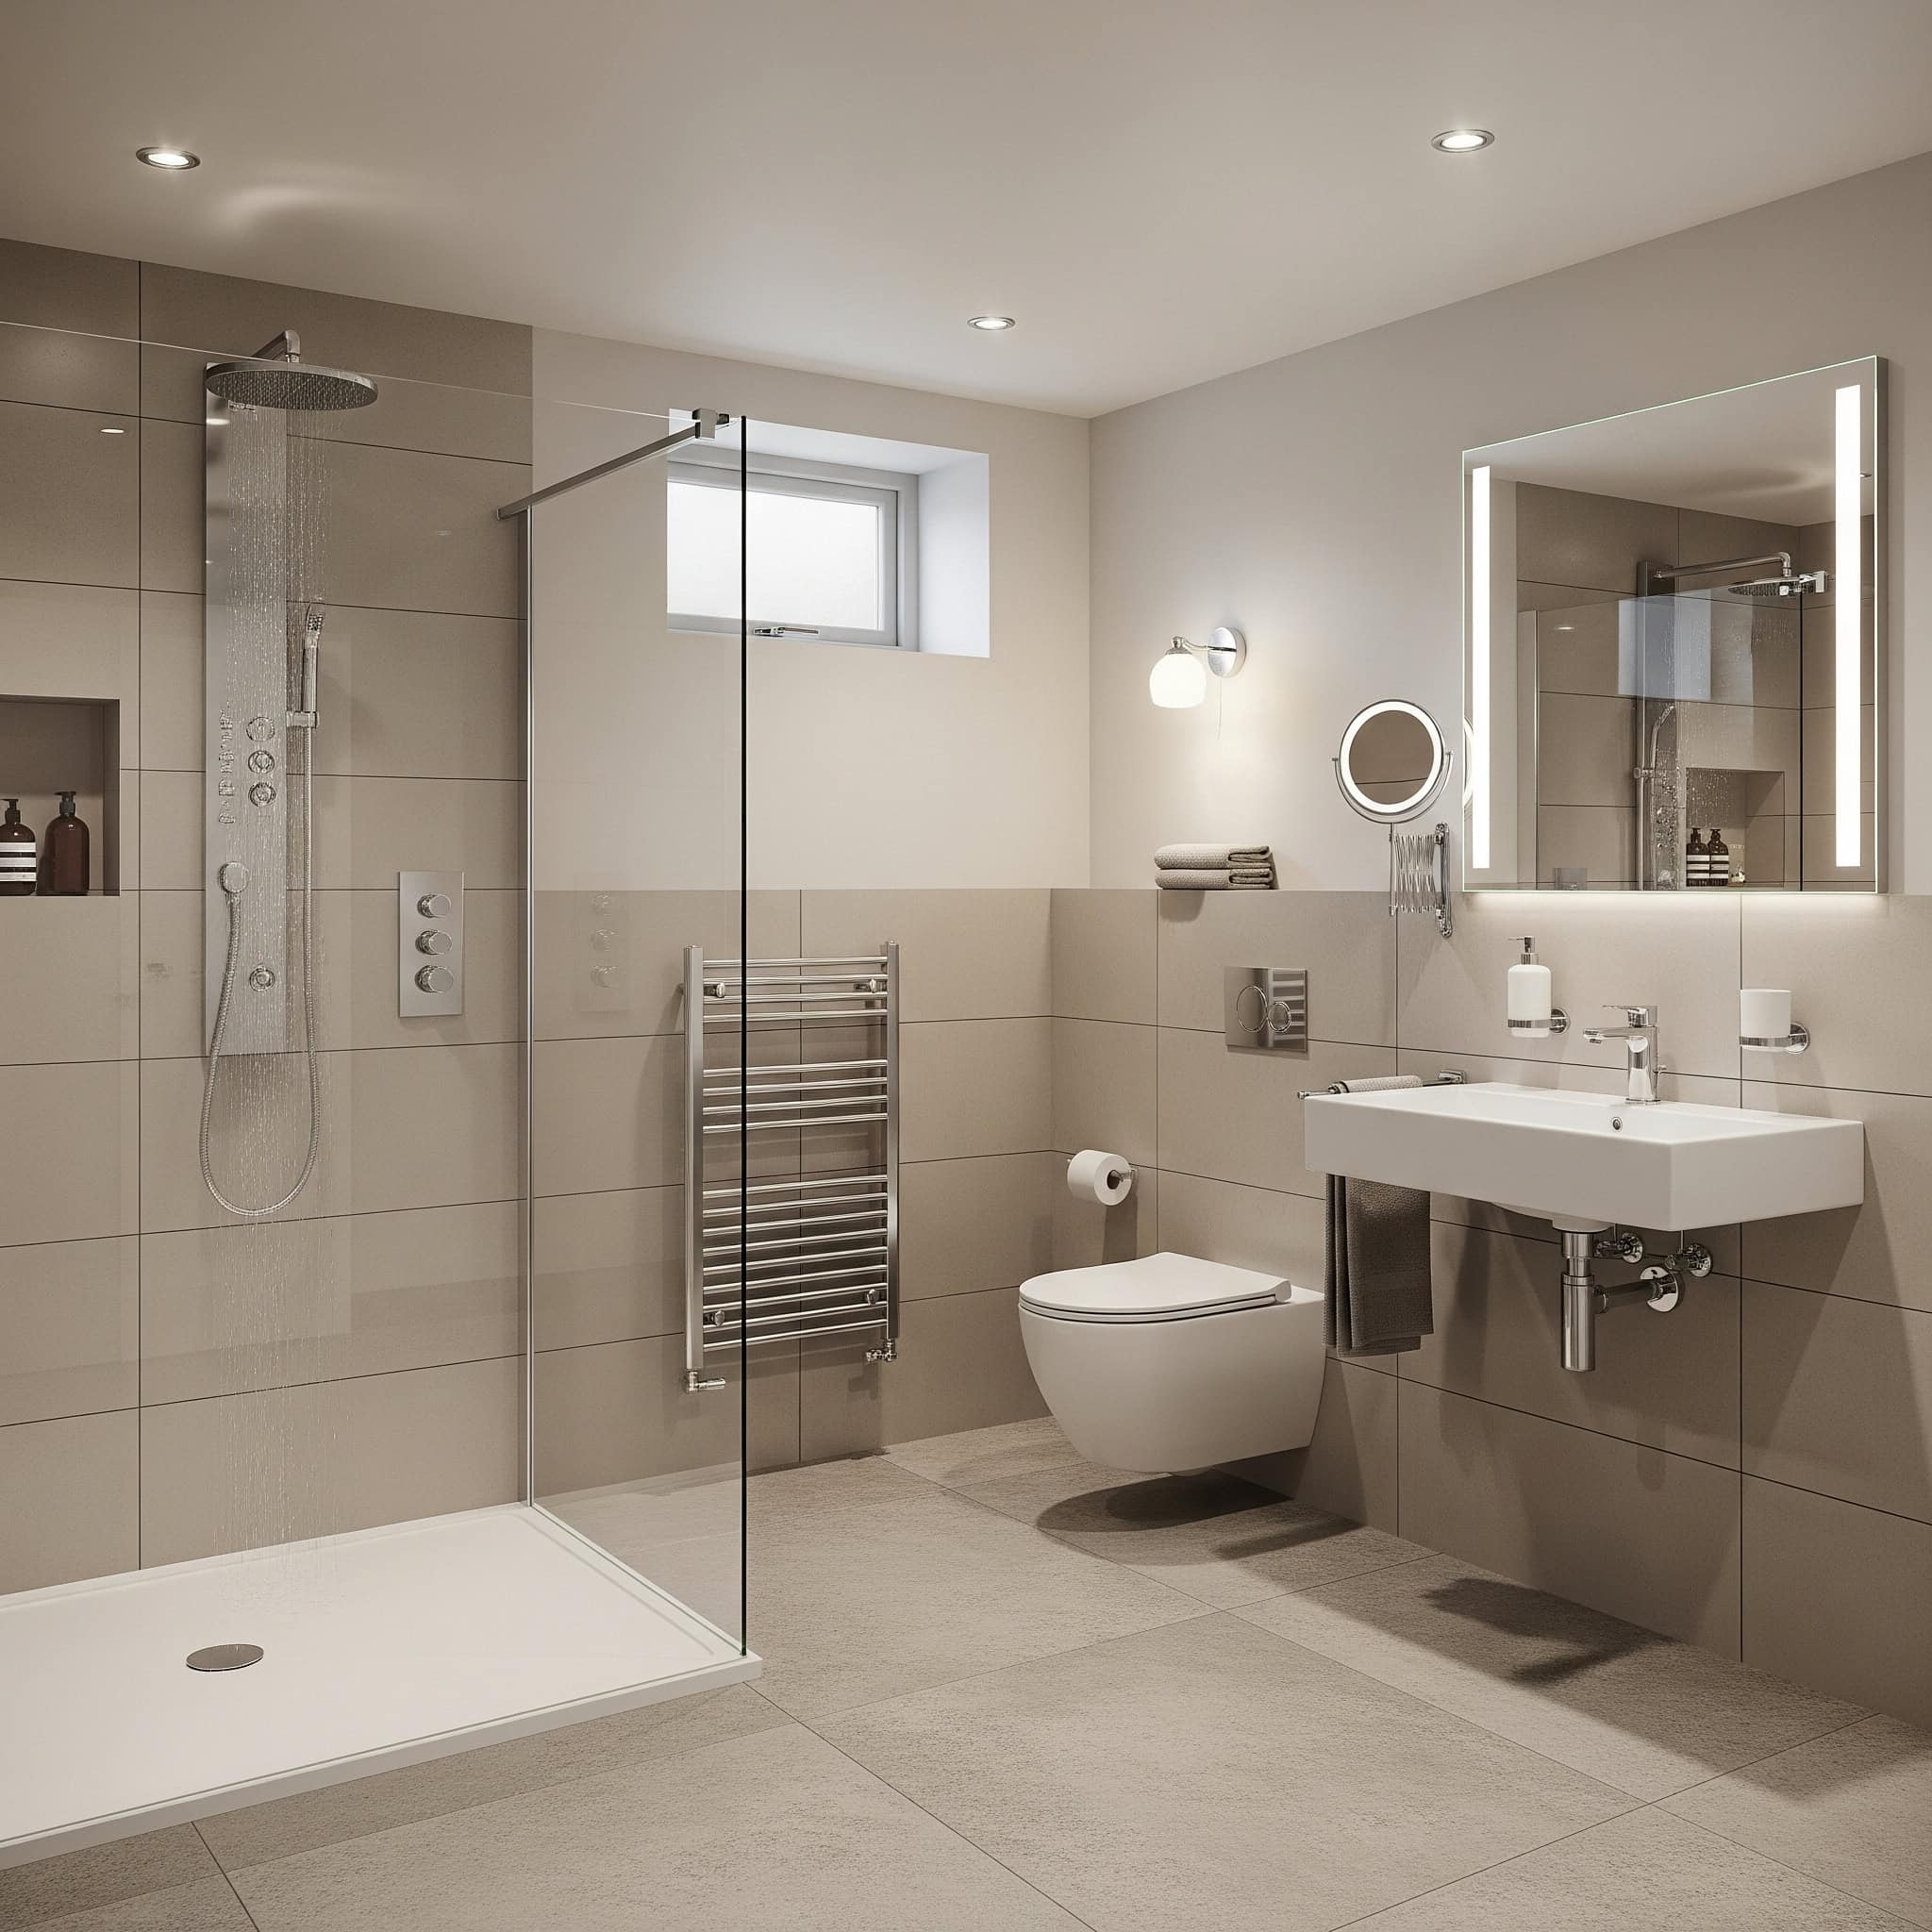
4. Floating Vanities
Wall-mounted vanities create floor space beneath the cabinet, making small bathrooms feel larger while providing necessary storage. I’ve found that this simple change dramatically transforms how spacious a basement bathroom feels.
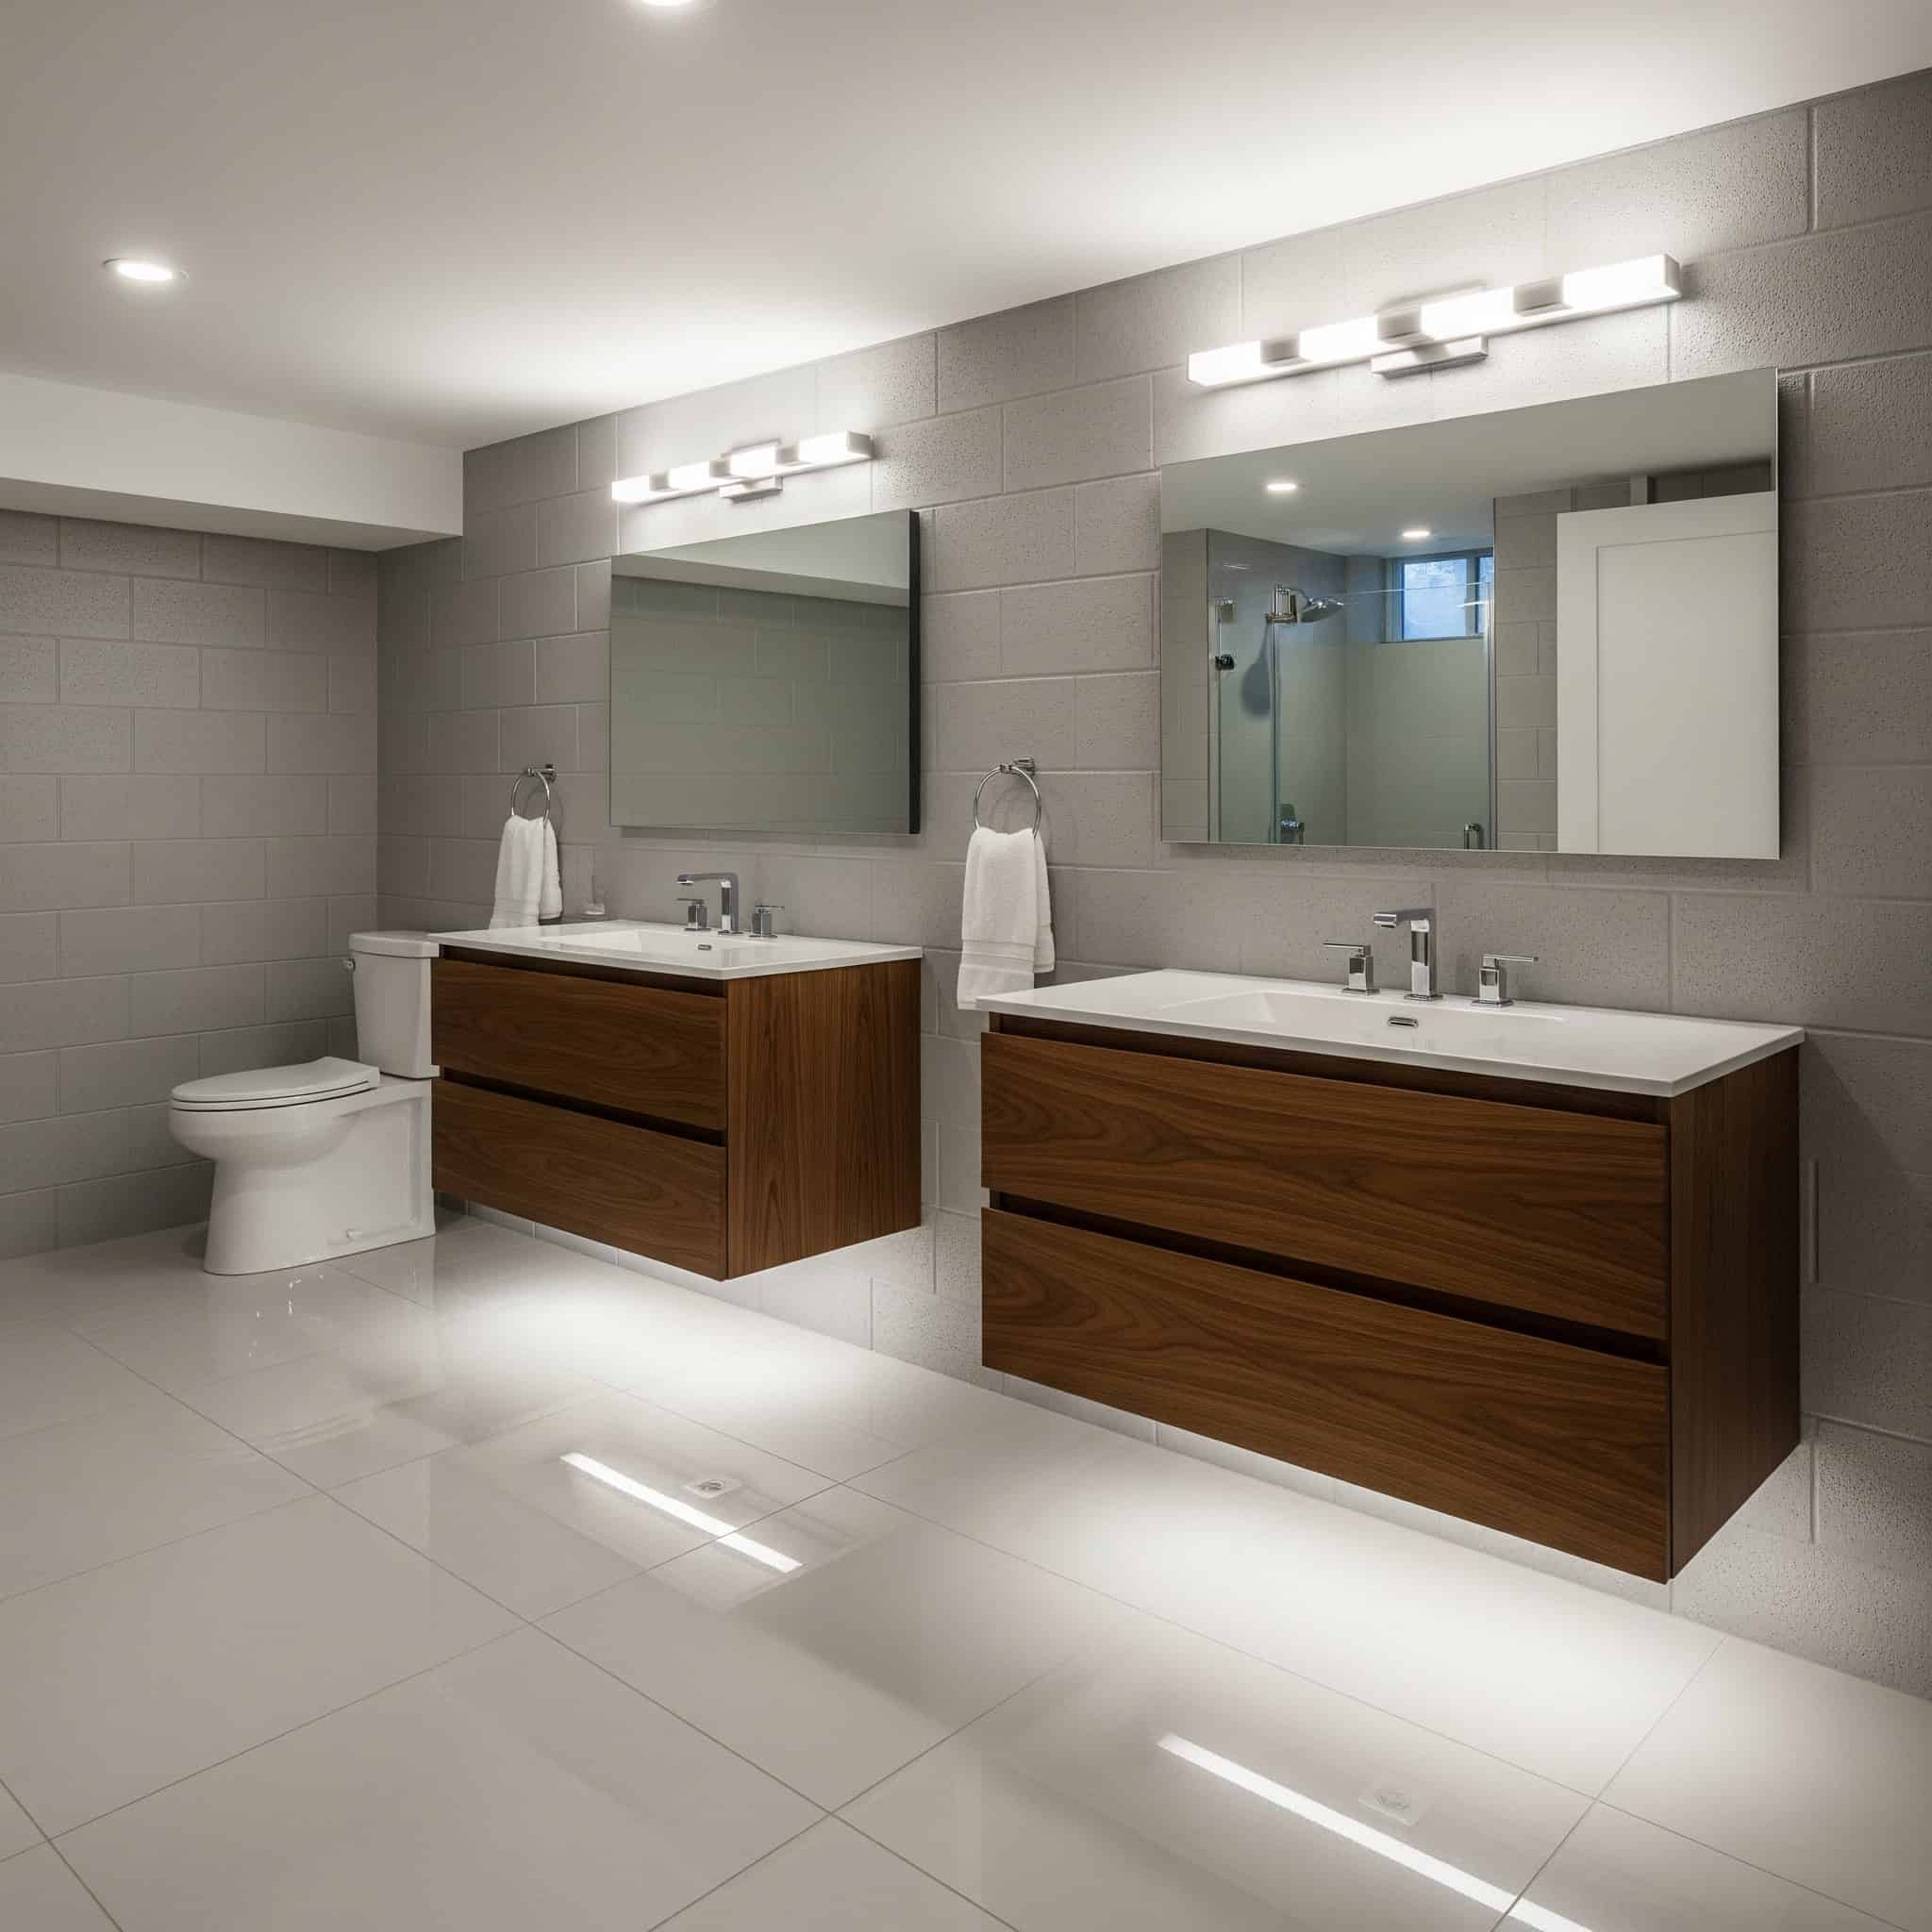
Modern designs include LED underlighting for both practical illumination and visual appeal. This feature adds a high-end touch while serving a practical purpose in typically dark basement spaces.
Floating vanities require wall blocking capable of supporting 300+ pounds, typically using 2×6 or 2×8 lumber secured to multiple studs with structural screws. The standard installation height for floating vanities is 32-36 inches from floor to countertop, with ADA-compliant installations requiring 34″ maximum height and 27″ minimum knee clearance.
5. Pocket Doors
Traditional swing doors require 8-10 square feet of clear space to operate. Pocket doors slide into the wall, reclaiming this space for other bathroom elements or simply creating more maneuvering room in tight quarters.
Pocket door frames require a minimum wall cavity width of 4-5 inches, with total wall thickness typically 6-7 inches including drywall on both sides. This means you’ll need to plan for thicker walls during the framing stage.
High-quality pocket door hardware systems include soft-close mechanisms and anti-jump features that prevent doors from derailing, with premium systems costing $150-300 more than basic hardware. I always recommend spending extra here – cheap pocket door hardware is a constant source of frustration.
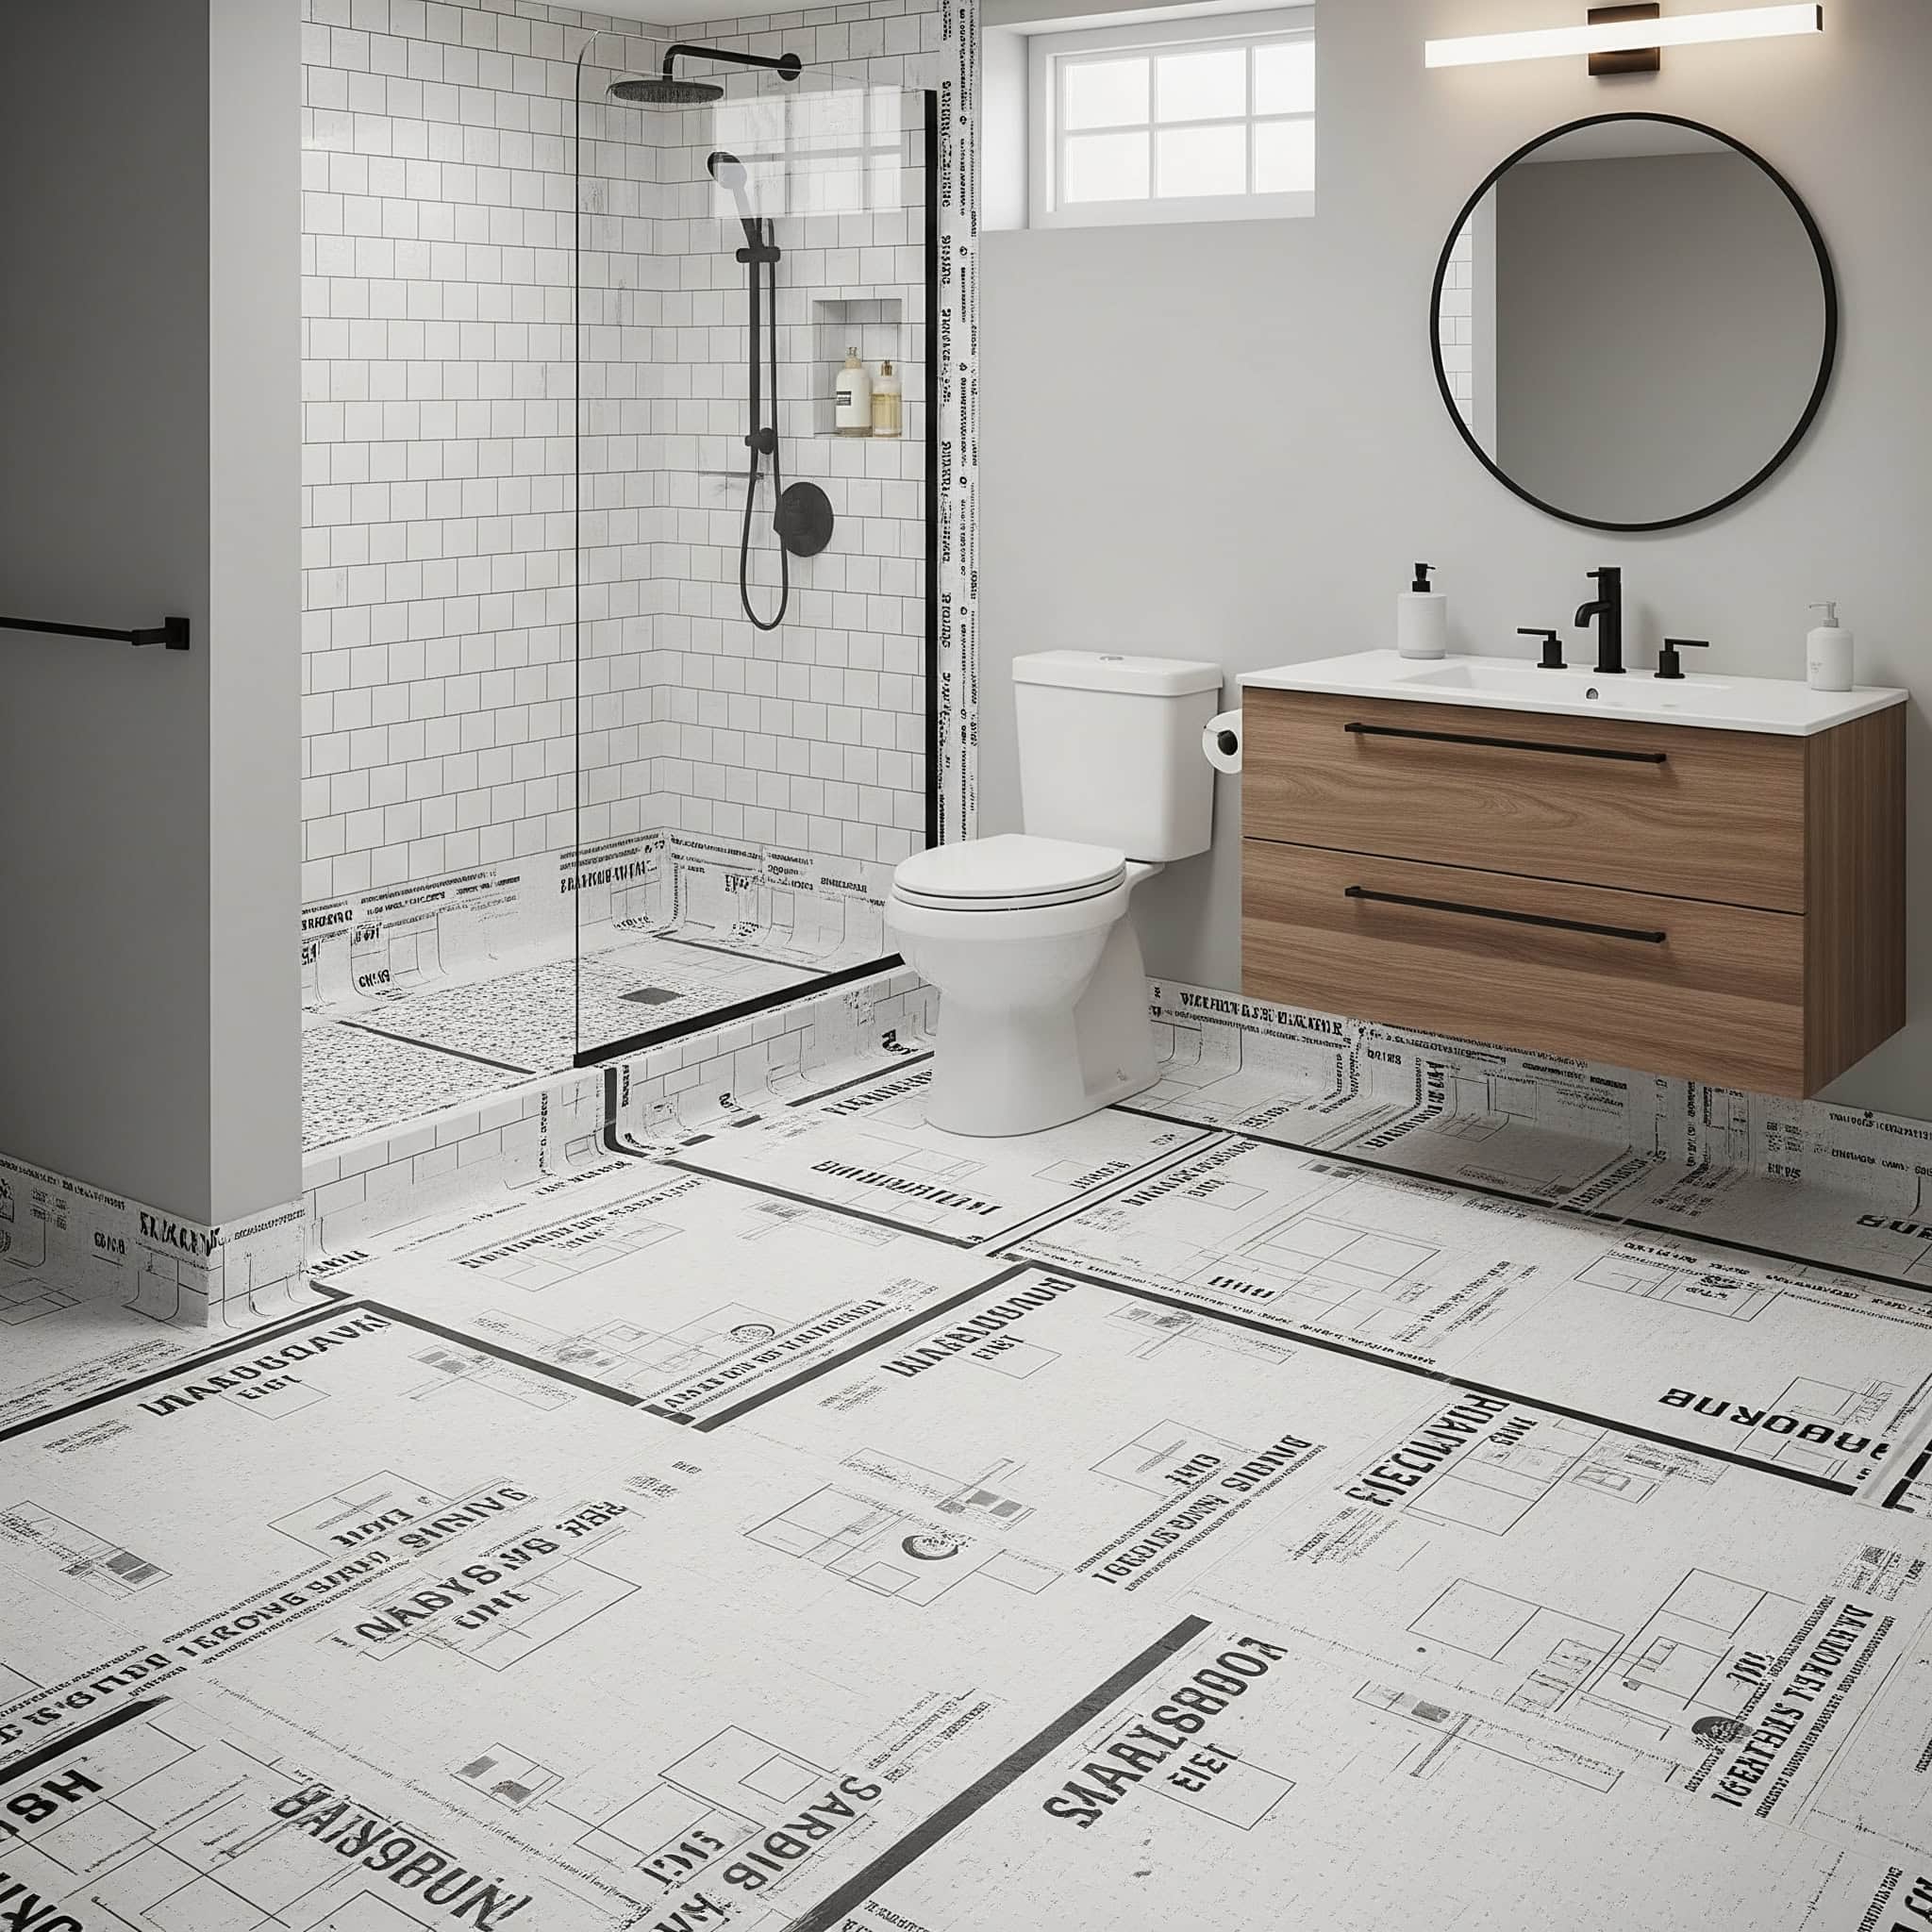
6. Wet Room Design
By waterproofing the entire bathroom and using a central floor drain, wet rooms eliminate the need for a separate shower enclosure. The entire room becomes the shower space, with gradient flooring directing water to the drain.
Proper wet room installation requires a minimum floor slope of 1/4″ per foot (2% grade) toward the drain, with specialized pre-sloped shower pans available for areas up to 6’×6′. Getting this slope right is critical – I’ve seen too many DIY wet rooms with standing water issues.
Waterproofing membranes for wet rooms must extend at least 6″ up all walls, with full-height waterproofing required on walls adjacent to shower fixtures to prevent moisture intrusion. This is one area where cutting corners will lead to disaster.
If you’re considering a wet room design for your basement bathroom, proper waterproofing is essential. Before installation, you might need to remove old fixtures and materials. Our guide on bathroom demolition explains why this isn’t as simple as it sounds and how to prepare properly.
|
Space-Saving Solution |
Space Saved |
Cost Range |
Installation Complexity |
Maintenance Considerations |
|---|---|---|---|---|
|
Corner Shower |
5-10 sq ft compared to standard tub |
$800-2,500 |
Moderate |
Requires regular glass cleaning |
|
Wall-Mounted Toilet |
8-10 inches depth |
$500-1,200 + installation |
High |
Access panel needed for repairs |
|
Floating Vanity |
4-6 sq ft floor space |
$600-2,000 |
Moderate-High |
Requires solid wall attachment |
|
Pocket Door |
8-10 sq ft swing space |
$300-800 + installation |
High |
Limited hardware options |
|
Wet Room Design |
6-12 sq ft (no enclosure needed) |
$3,000-7,000 |
Very High |
Requires excellent waterproofing |
Lighting & Brightness Solutions
7. Recessed LED Lighting
Basements typically lack natural light, making artificial lighting crucial. I’ve found that recessed LED fixtures provide even, shadow-free illumination without consuming precious headroom, with modern slim-profile LEDs requiring minimal ceiling depth.
Ultra-thin LED recessed lights require only 1/2″ to 2″ of ceiling clearance compared to traditional can lights needing 6-7″ of space, making them ideal for basement applications with limited ceiling height. This feature alone can make a basement bathroom feel significantly more open.
For proper illumination, install one 4-6″ LED recessed light for every 16-25 square feet of bathroom space, with higher density (one per 12-16 square feet) in task areas like vanities. Don’t skimp on lighting – it’s one of the most important elements in a basement bathroom.
8. Backlit Mirrors
Backlit mirrors combine functionality with ambient lighting, creating the impression of natural light while providing ideal illumination for grooming tasks without harsh shadows. Many models include anti-fog technology for humid environments.
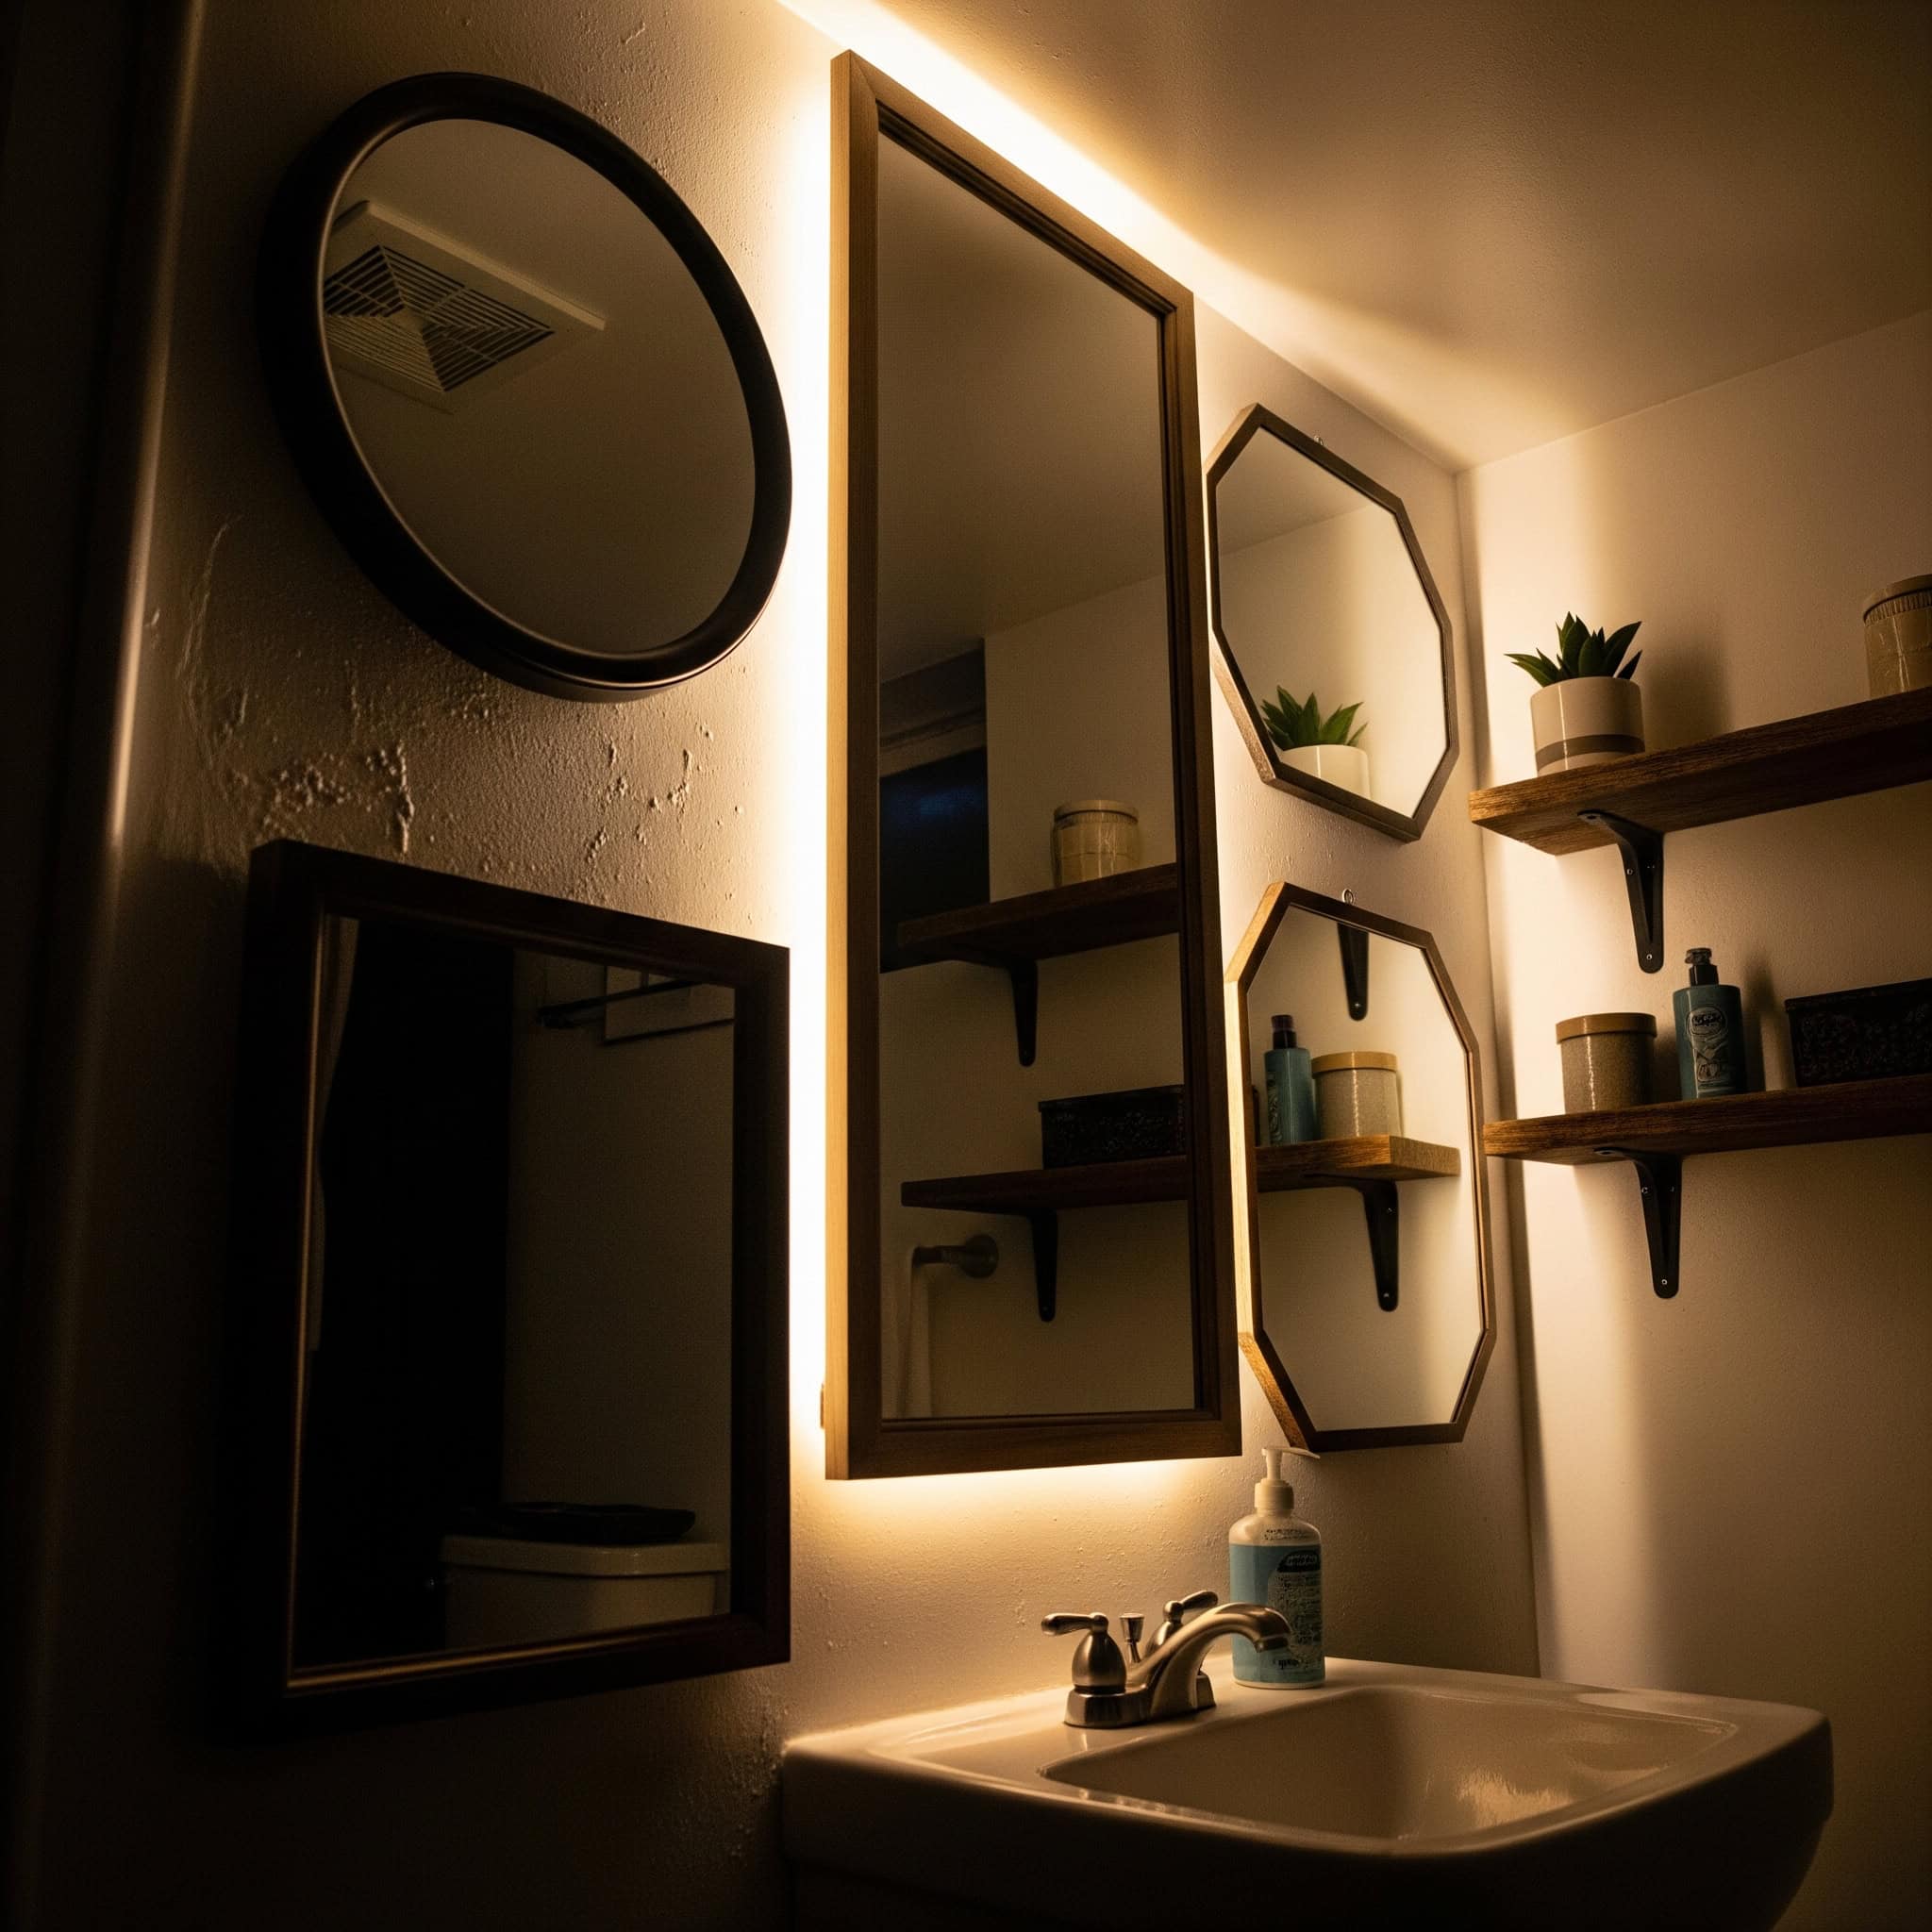
LED backlit mirrors typically operate at color temperatures between 3000K (warm white) and 6000K (cool white), with 4000K providing the most accurate color rendering for makeup application. I recommend 4000K for most basement bathroom applications.
Modern backlit mirrors consume 80% less energy than traditional vanity lighting while providing more even illumination, with typical power consumption between 20-40 watts depending on size. They’re a win-win for both aesthetics and energy efficiency.
9. Light Wells or Egress Windows
Where possible, adding a window well or egress window brings natural light into the basement bathroom. Modern window wells with reflective sides maximize light transfer while clear covers prevent debris collection.
Egress windows must provide minimum clear opening of 5.7 square feet with minimum width of 20″ and height of 24″ to meet International Residential Code requirements. These dimensions ensure the window can serve as an emergency exit if needed.
Window wells must extend at least 36″ from the foundation wall and project at least 4″ above grade level, with drainage systems capable of handling 25 gallons per minute to prevent flooding. Proper drainage is absolutely critical – a flooded window well can quickly lead to water damage.
10. Glass Block Walls
Glass blocks allow light to pass between spaces while maintaining privacy. They can be used to borrow light from adjacent rooms or to separate shower areas without blocking light flow, creating brightness without sacrificing privacy.
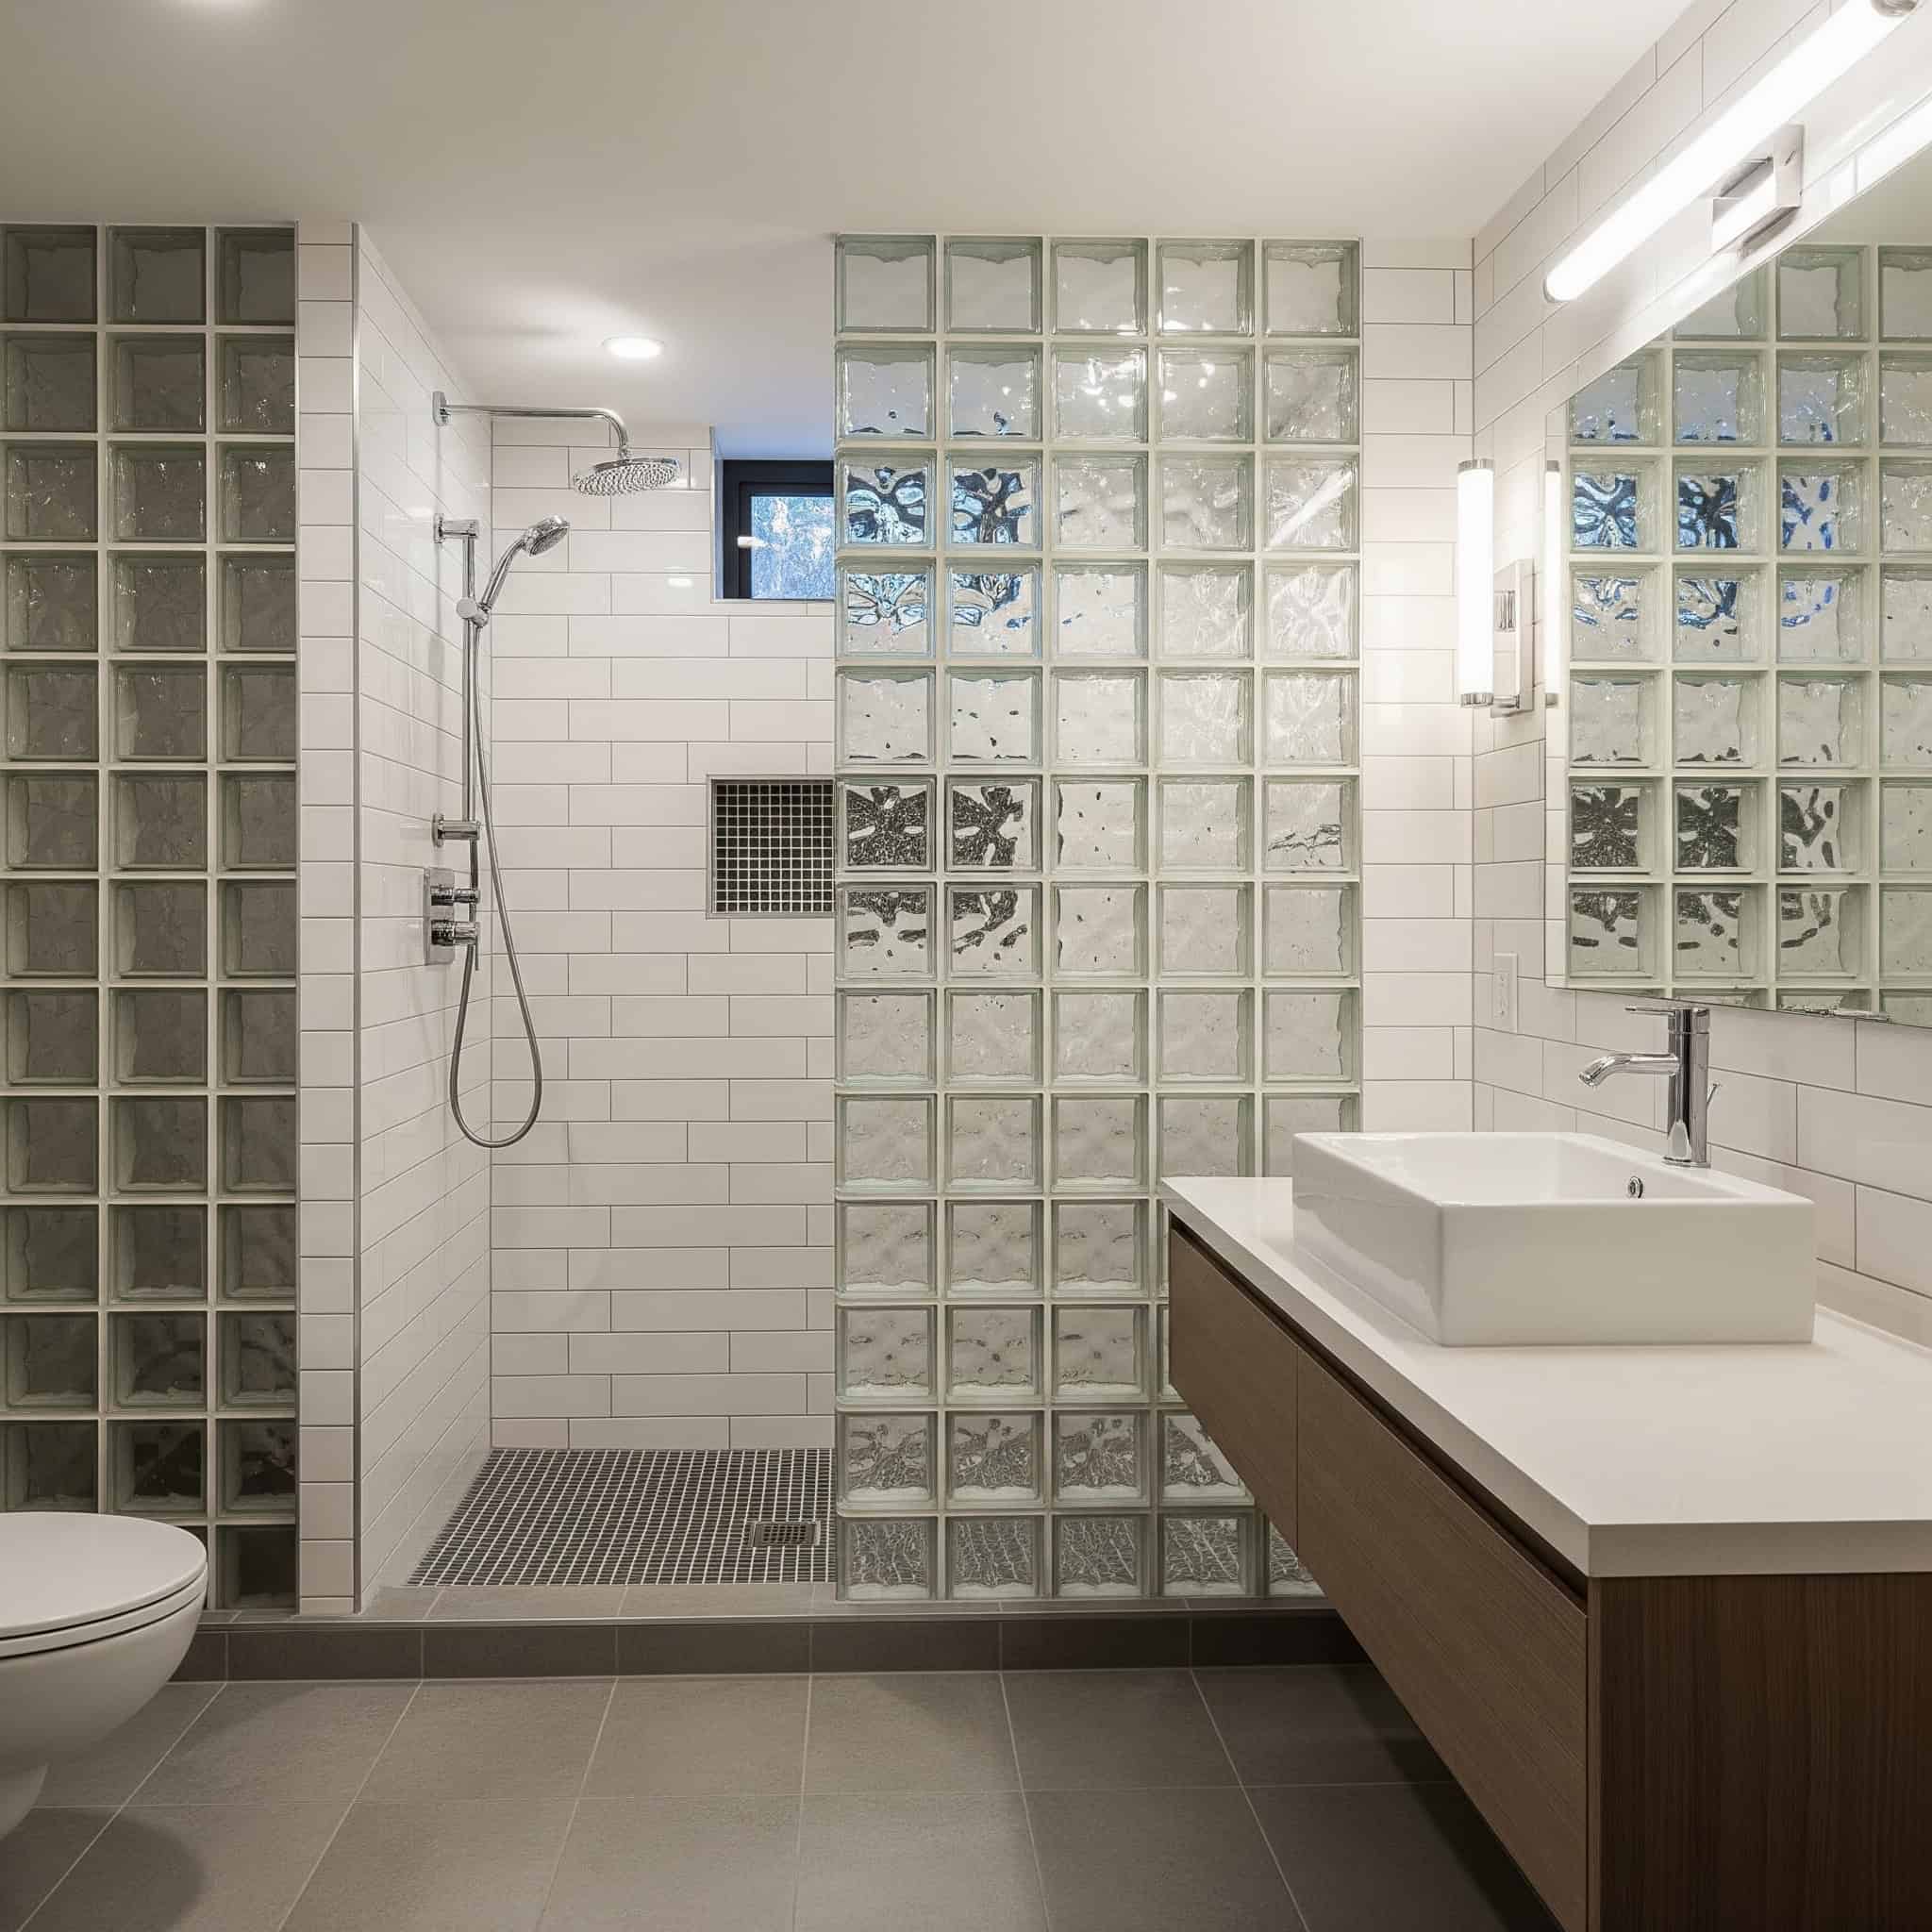
Standard glass blocks provide light transmission of 75-80% while obscuring visibility, with specialized high-performance blocks offering up to 90% light transmission. The difference in brightness is noticeable and worth the upgrade in basement settings.
Glass block walls require structural support every 20 square feet minimum, with specialized mortar containing latex additives to accommodate thermal expansion without cracking. This detail is often overlooked but essential for long-term durability.
11. Light-Reflecting Finishes
Light colors and glossy finishes maximize light reflection, making the space feel brighter. I’ve transformed dark basement bathrooms into bright, welcoming spaces simply by choosing the right finishes.
Large-format tiles with minimal grout lines create a more spacious feel while reflecting more light throughout the bathroom. The fewer grout lines, the more continuous the reflective surface.
High-gloss ceramic tiles have a light reflectance value (LRV) of 75-85% compared to 30-50% for matte finishes, significantly increasing perceived brightness in basement spaces. This dramatic difference makes glossy finishes worth considering despite their tendency to show water spots more readily.
When choosing finishes for your basement bathroom, consider materials that are easy to maintain. If you’re removing old flooring, our article on carpet removal requirements offers helpful insights on preparing your space for new, light-reflecting materials.
Large-format tiles (24″×24″ or larger) reduce grout lines by up to 60% compared to standard 12″×12″ tiles, creating more reflective surface area and easier cleaning in moisture-prone environments. The cleaning advantage alone makes them worth considering for basement bathrooms.
A Seattle homeowner transformed their dark basement bathroom by combining multiple lighting strategies. They installed six ultra-thin LED recessed lights in the ceiling, a 36″ backlit mirror over the vanity, and a glass block partition that borrowed light from an adjacent laundry room with an egress window. They completed the design with large-format glossy white wall tiles and a light gray floor. The result was a bathroom that appeared twice as bright as before without any natural light sources directly in the bathroom itself. The multi-layered lighting approach meant the space felt welcoming at any time of day, with different lighting options for various activities.
Moisture & Ventilation Solutions
12. Premium Ventilation Systems
Standard bathroom fans often fail to remove enough moisture in basement settings. I’ve seen countless cases of mold growth in basement bathrooms with inadequate ventilation. Premium systems with humidity sensors automatically adjust operation based on conditions, preventing mold growth and condensation without requiring manual operation.
High-performance bathroom ventilation should provide 1 CFM per square foot of bathroom space, with a minimum of 50 CFM for half baths and 80-110 CFM for full bathrooms with showers. Most builder-grade fans don’t meet these requirements.
Humidity-sensing fans typically activate when relative humidity exceeds 60% and continue running until levels drop below 50%, with premium models offering adjustable thresholds and programmable run times. This “set it and forget it” functionality ensures proper ventilation even when users forget to turn on the fan.
13. Heated Flooring
Electric radiant floor heating provides comfort and helps dry moisture more quickly after showering. I’ve installed these systems in dozens of basement bathrooms, and they’re always among the homeowners’ favorite features.
Programmable thermostats can schedule operation to prevent cold floors during typical use times while conserving energy when the bathroom is unoccupied. This smart approach maximizes comfort while minimizing operating costs.
Electric radiant floor heating systems typically operate at 12-15 watts per square foot, requiring dedicated 20-amp circuits for bathrooms larger than 30 square feet. Thermal mass affects heating response time, with electric mats under ceramic tile reaching target temperature in 30-60 minutes compared to 2-3 hours for systems installed under concrete subfloors.
14. Mold-Resistant Materials
Specialized materials like cement board, DensShield, or mold-resistant drywall provide better protection against basement humidity. I always recommend these materials for basement bathrooms, even when they add slightly to the project cost.
Pairing these with mold-resistant paint containing antimicrobial additives creates comprehensive protection against moisture damage. This two-pronged approach addresses both the substrate and the surface.
Mold-resistant drywall (ASTM D3273 rated) contains fungicides and moisture-resistant cores that prevent mold growth for up to 30 days of continuous moisture exposure compared to 24-48 hours for standard drywall. This dramatic difference in performance makes the additional cost worthwhile.
Cement backer boards provide complete immunity to water damage and mold growth but conduct heat more readily than other wall materials, potentially creating cold spots unless properly insulated. This thermal bridging effect should be addressed during the planning phase.
15. Dehumidification Systems
Dedicated dehumidifiers or HVAC systems with dehumidification functions maintain optimal humidity levels throughout the basement. Units with direct drain connections eliminate the need for manual emptying while continuously protecting against excess moisture.
Basement bathrooms require dehumidification capacity of 10-15 pints per day for spaces under 50 square feet, with larger bathrooms or those with jetted tubs needing 20-30 pints capacity. Undersized units will run constantly without adequately controlling humidity.
Integrated HVAC dehumidification systems maintain relative humidity between 40-50% while consuming 30-40% less energy than standalone dehumidifiers by leveraging existing air handling equipment. This approach provides whole-basement humidity control rather than just addressing the bathroom.
Managing moisture is critical in basement bathrooms. If you’re replacing an old dehumidifier, our guide on dehumidifier disposal explains how to responsibly get rid of your old unit while upgrading to a more efficient system for your new space.
16. Waterproof Membrane Systems
Complete waterproofing systems provide continuous moisture protection throughout the bathroom. These systems include specialized components for corners, drains, and transitions to ensure water stays contained and prevents damage to surrounding spaces.
Sheet membrane waterproofing systems like Schluter-KERDI have water vapor permeance ratings below 0.5 perms, preventing both liquid water penetration and vapor transmission that can cause hidden mold growth. This dual protection is crucial in basement environments.
Liquid-applied waterproofing membranes require minimum 2 coats with 15-20 mil total thickness and 24-hour curing time between application and tile installation to ensure complete protection. Rushing this process compromises the entire waterproofing system.
|
Moisture Control Solution |
Initial Cost |
Effectiveness |
Energy Usage |
Maintenance Requirements |
|---|---|---|---|---|
|
Standard Bath Fan (50 CFM) |
$100-200 |
★★☆☆☆ |
30-50W |
Replace every 5-8 years |
|
Humidity-Sensing Fan (80-110 CFM) |
$200-400 |
★★★★☆ |
30-80W |
Replace every 8-10 years |
|
Standalone Dehumidifier |
$200-500 |
★★★★☆ |
300-700W |
Clean filter monthly, replace every 5-7 years |
|
HVAC Integrated Dehumidification |
$1,000-2,500 |
★★★★★ |
100-300W additional |
Service with regular HVAC maintenance |
|
Electric Radiant Floor Heating |
$5-20 per sq ft |
★★★☆☆ |
12-15W per sq ft |
Virtually maintenance-free |
|
Waterproof Membrane System |
$4-8 per sq ft |
★★★★★ |
N/A |
None if properly installed |
|
Mold-Resistant Building Materials |
20-40% premium |
★★★★☆ |
N/A |
Repaint with antimicrobial paint every 3-5 years |
Stylish & Functional Design
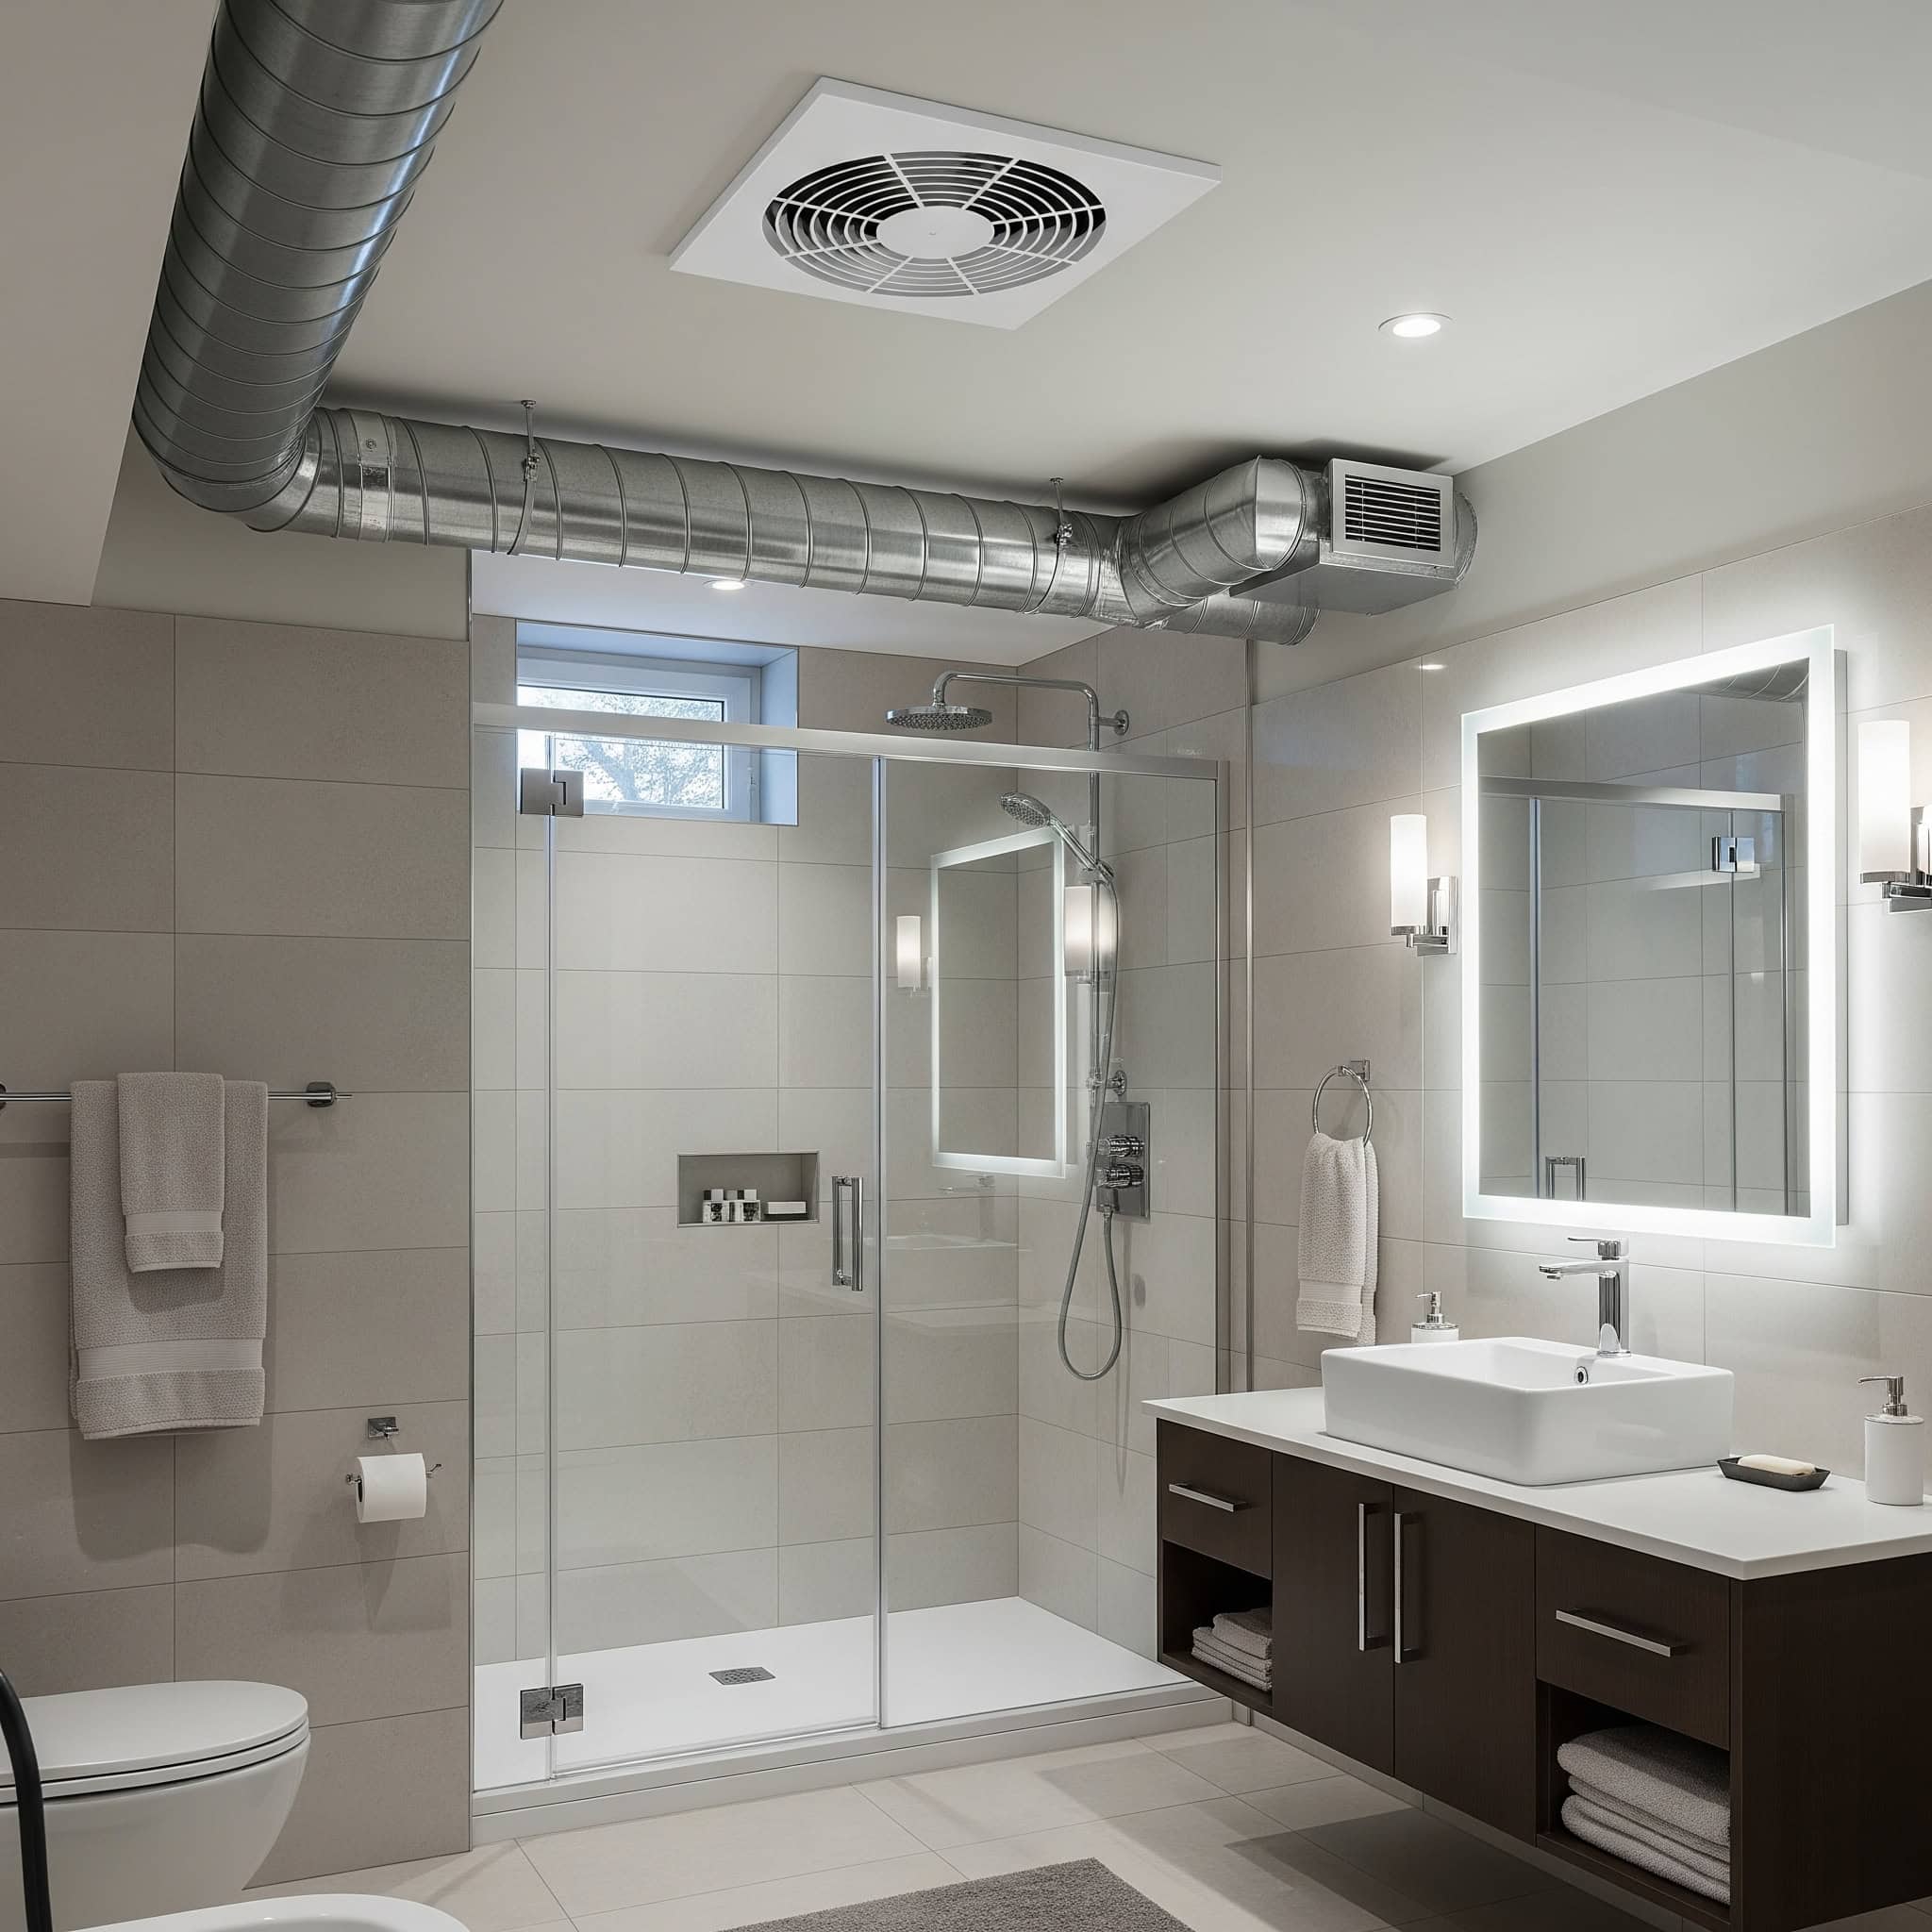
17. Industrial Chic Elements
This style embraces basement structural elements rather than concealing them. I’ve helped many homeowners transform exposed pipes, concrete surfaces, and metal accents into design features rather than eyesores.
Creating a cohesive industrial look that’s both practical and stylish while potentially reducing construction costs requires attention to detail. The key is intentionality – elements should look deliberately exposed rather than unfinished.
Exposed structural elements must be properly sealed and finished – concrete requires densifiers and sealers with minimum 25% solids content to prevent dusting and moisture absorption. Metal finishes in industrial designs should be selected based on corrosion resistance, with 304-grade stainless steel or powder-coated aluminum providing optimal performance in humid bathroom environments.
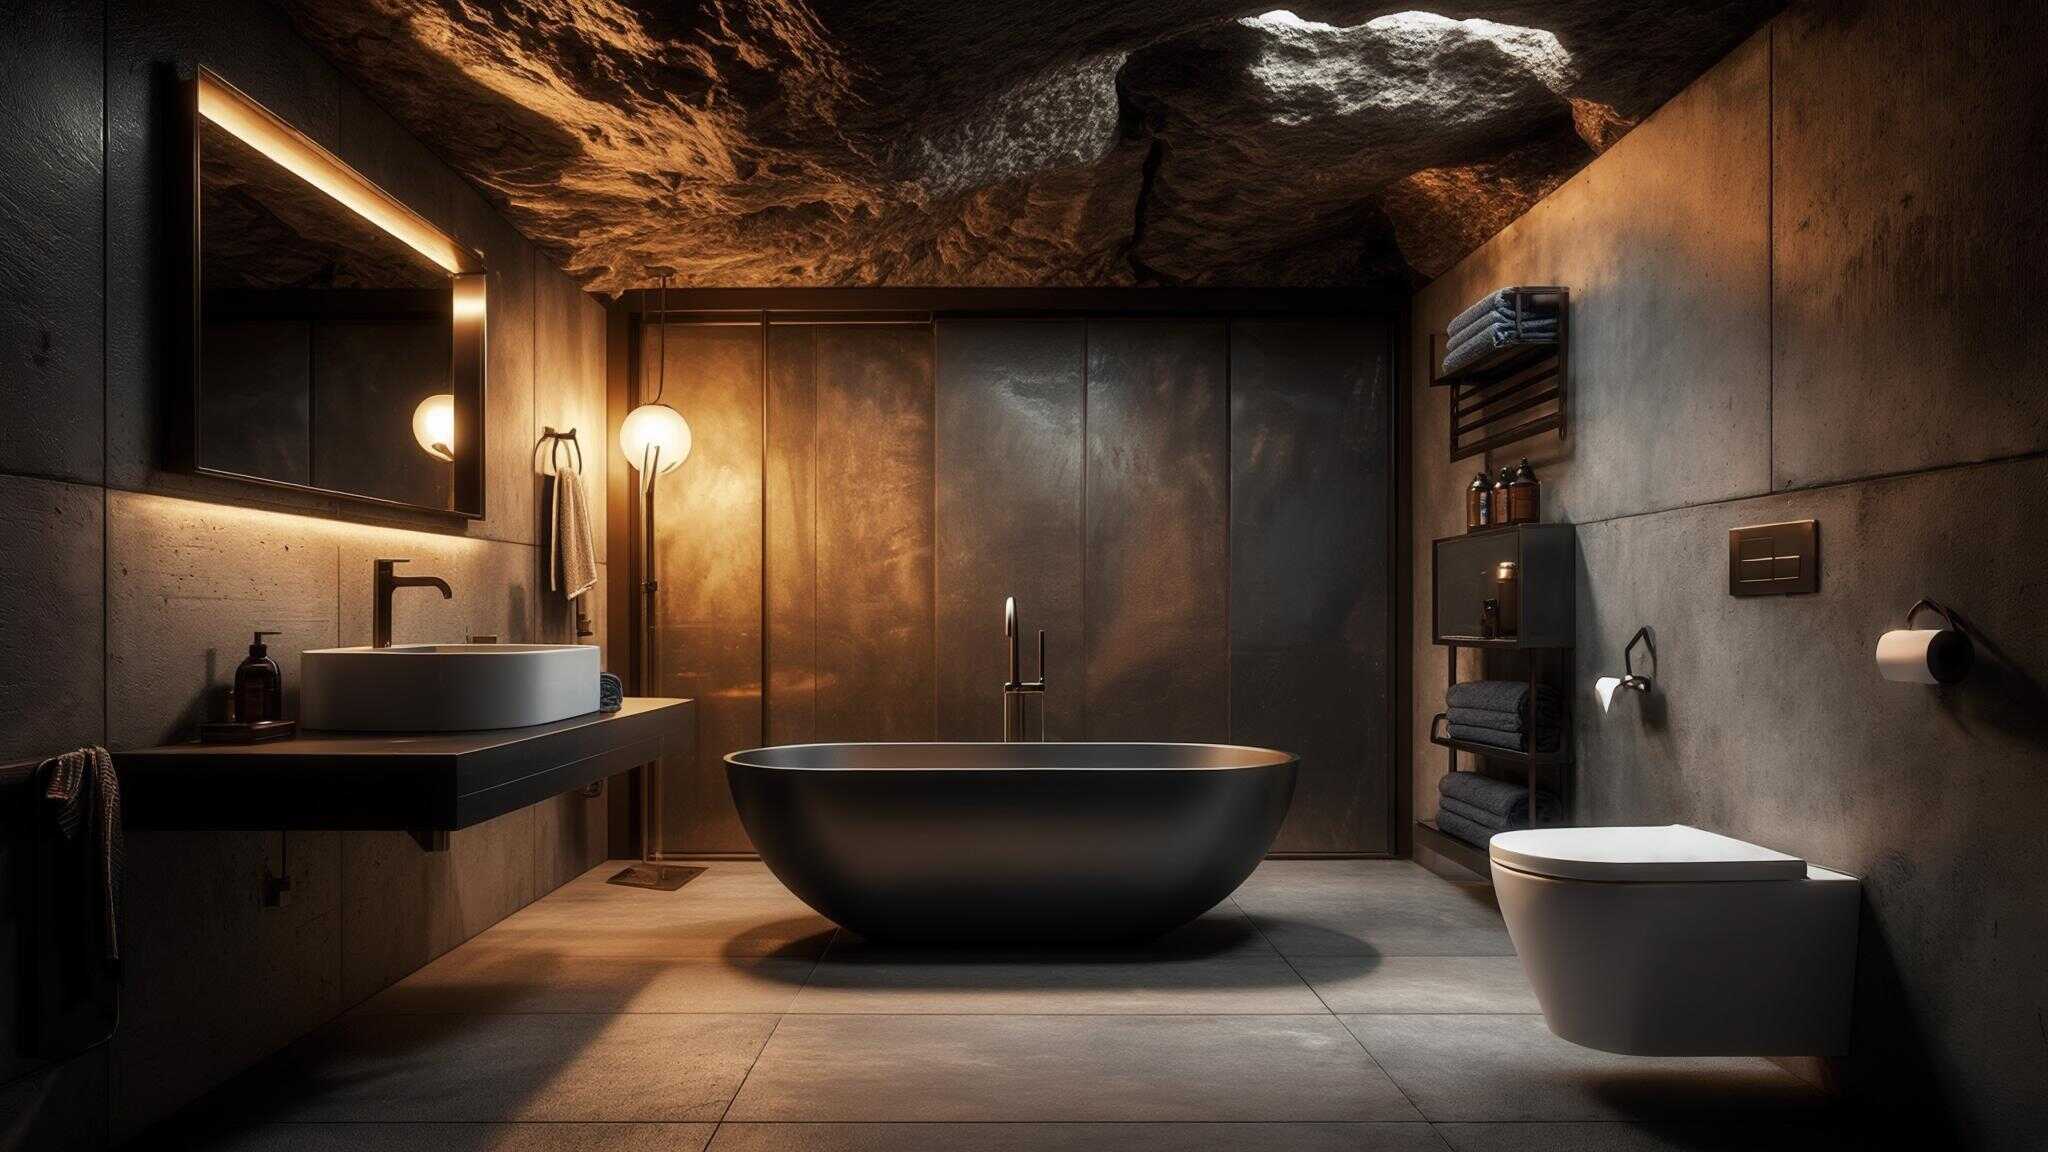
18. Spa-Inspired Retreat
Transform your basement bathroom into a luxury escape with elements like a soaking tub, rainfall shower, and natural materials. I’ve created spa-like basement bathrooms that become homeowners’ favorite retreats in the house.
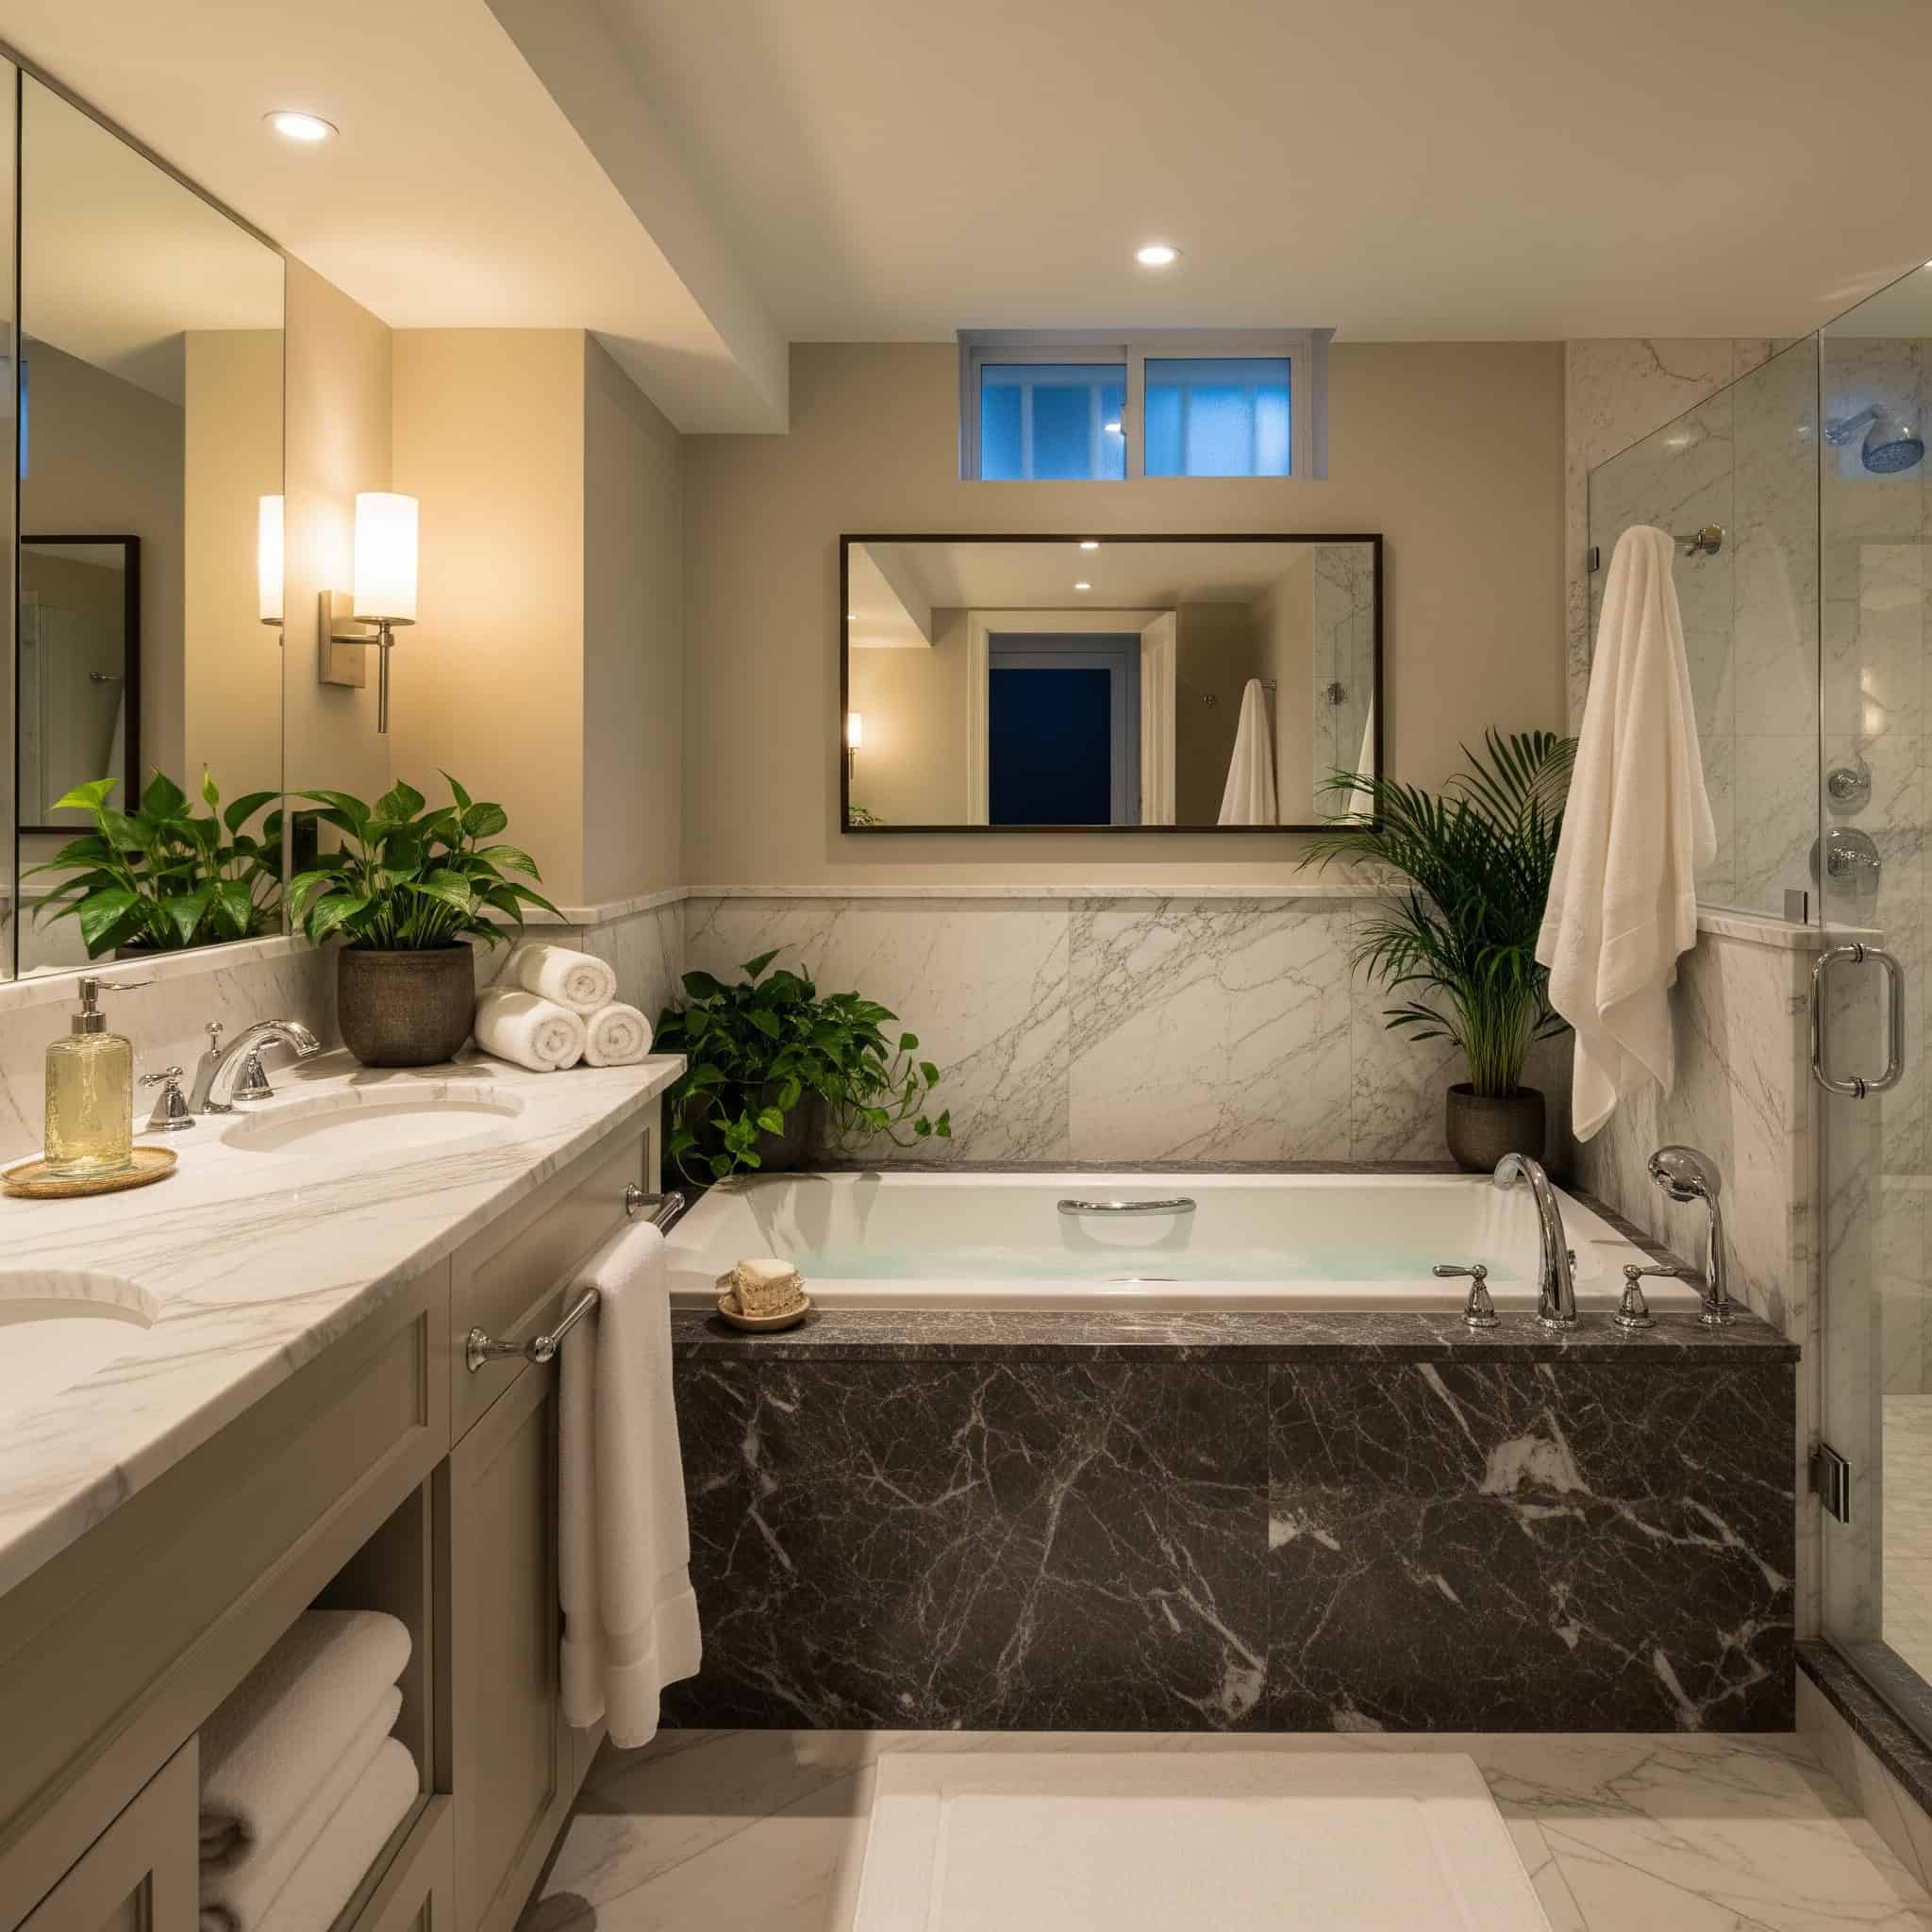
Incorporating plants that thrive in bathroom environments enhances the spa feeling while improving air quality. Species like pothos, snake plants, and peace lilies thrive in humid, low-light conditions while filtering air pollutants.
Soaking tubs require floor support capable of handling 40-50 pounds per square foot when filled, often necessitating additional structural reinforcement in basement installations. High-performance rainfall shower systems require water pressure of at least 45-50 PSI and 3/4″ supply lines to maintain proper flow rates of 2.0-2.5 gallons per minute across the entire shower head surface.
19. Bold Statement Walls
A single wall with bold tile, wallpaper, or color creates visual interest without overwhelming the space. This approach allows for personality while maintaining an overall clean design in a small space, focusing design budget on high-impact areas.
Moisture-resistant wallpaper for bathroom statement walls should have minimum Type II durability rating with microvented backing that allows vapor transmission while preventing liquid water penetration. This specification is crucial for basement applications where moisture is a constant concern.
Accent tile walls typically increase material costs by $10-25 per square foot compared to painted surfaces but create focal points that reduce the need for additional decorative elements in small spaces. The investment in one dramatic wall often eliminates the need for artwork and accessories.
When renovating your basement bathroom, you’ll need to deal with construction debris properly. Our article on debris removal options can help you plan for efficient waste management during your renovation project.
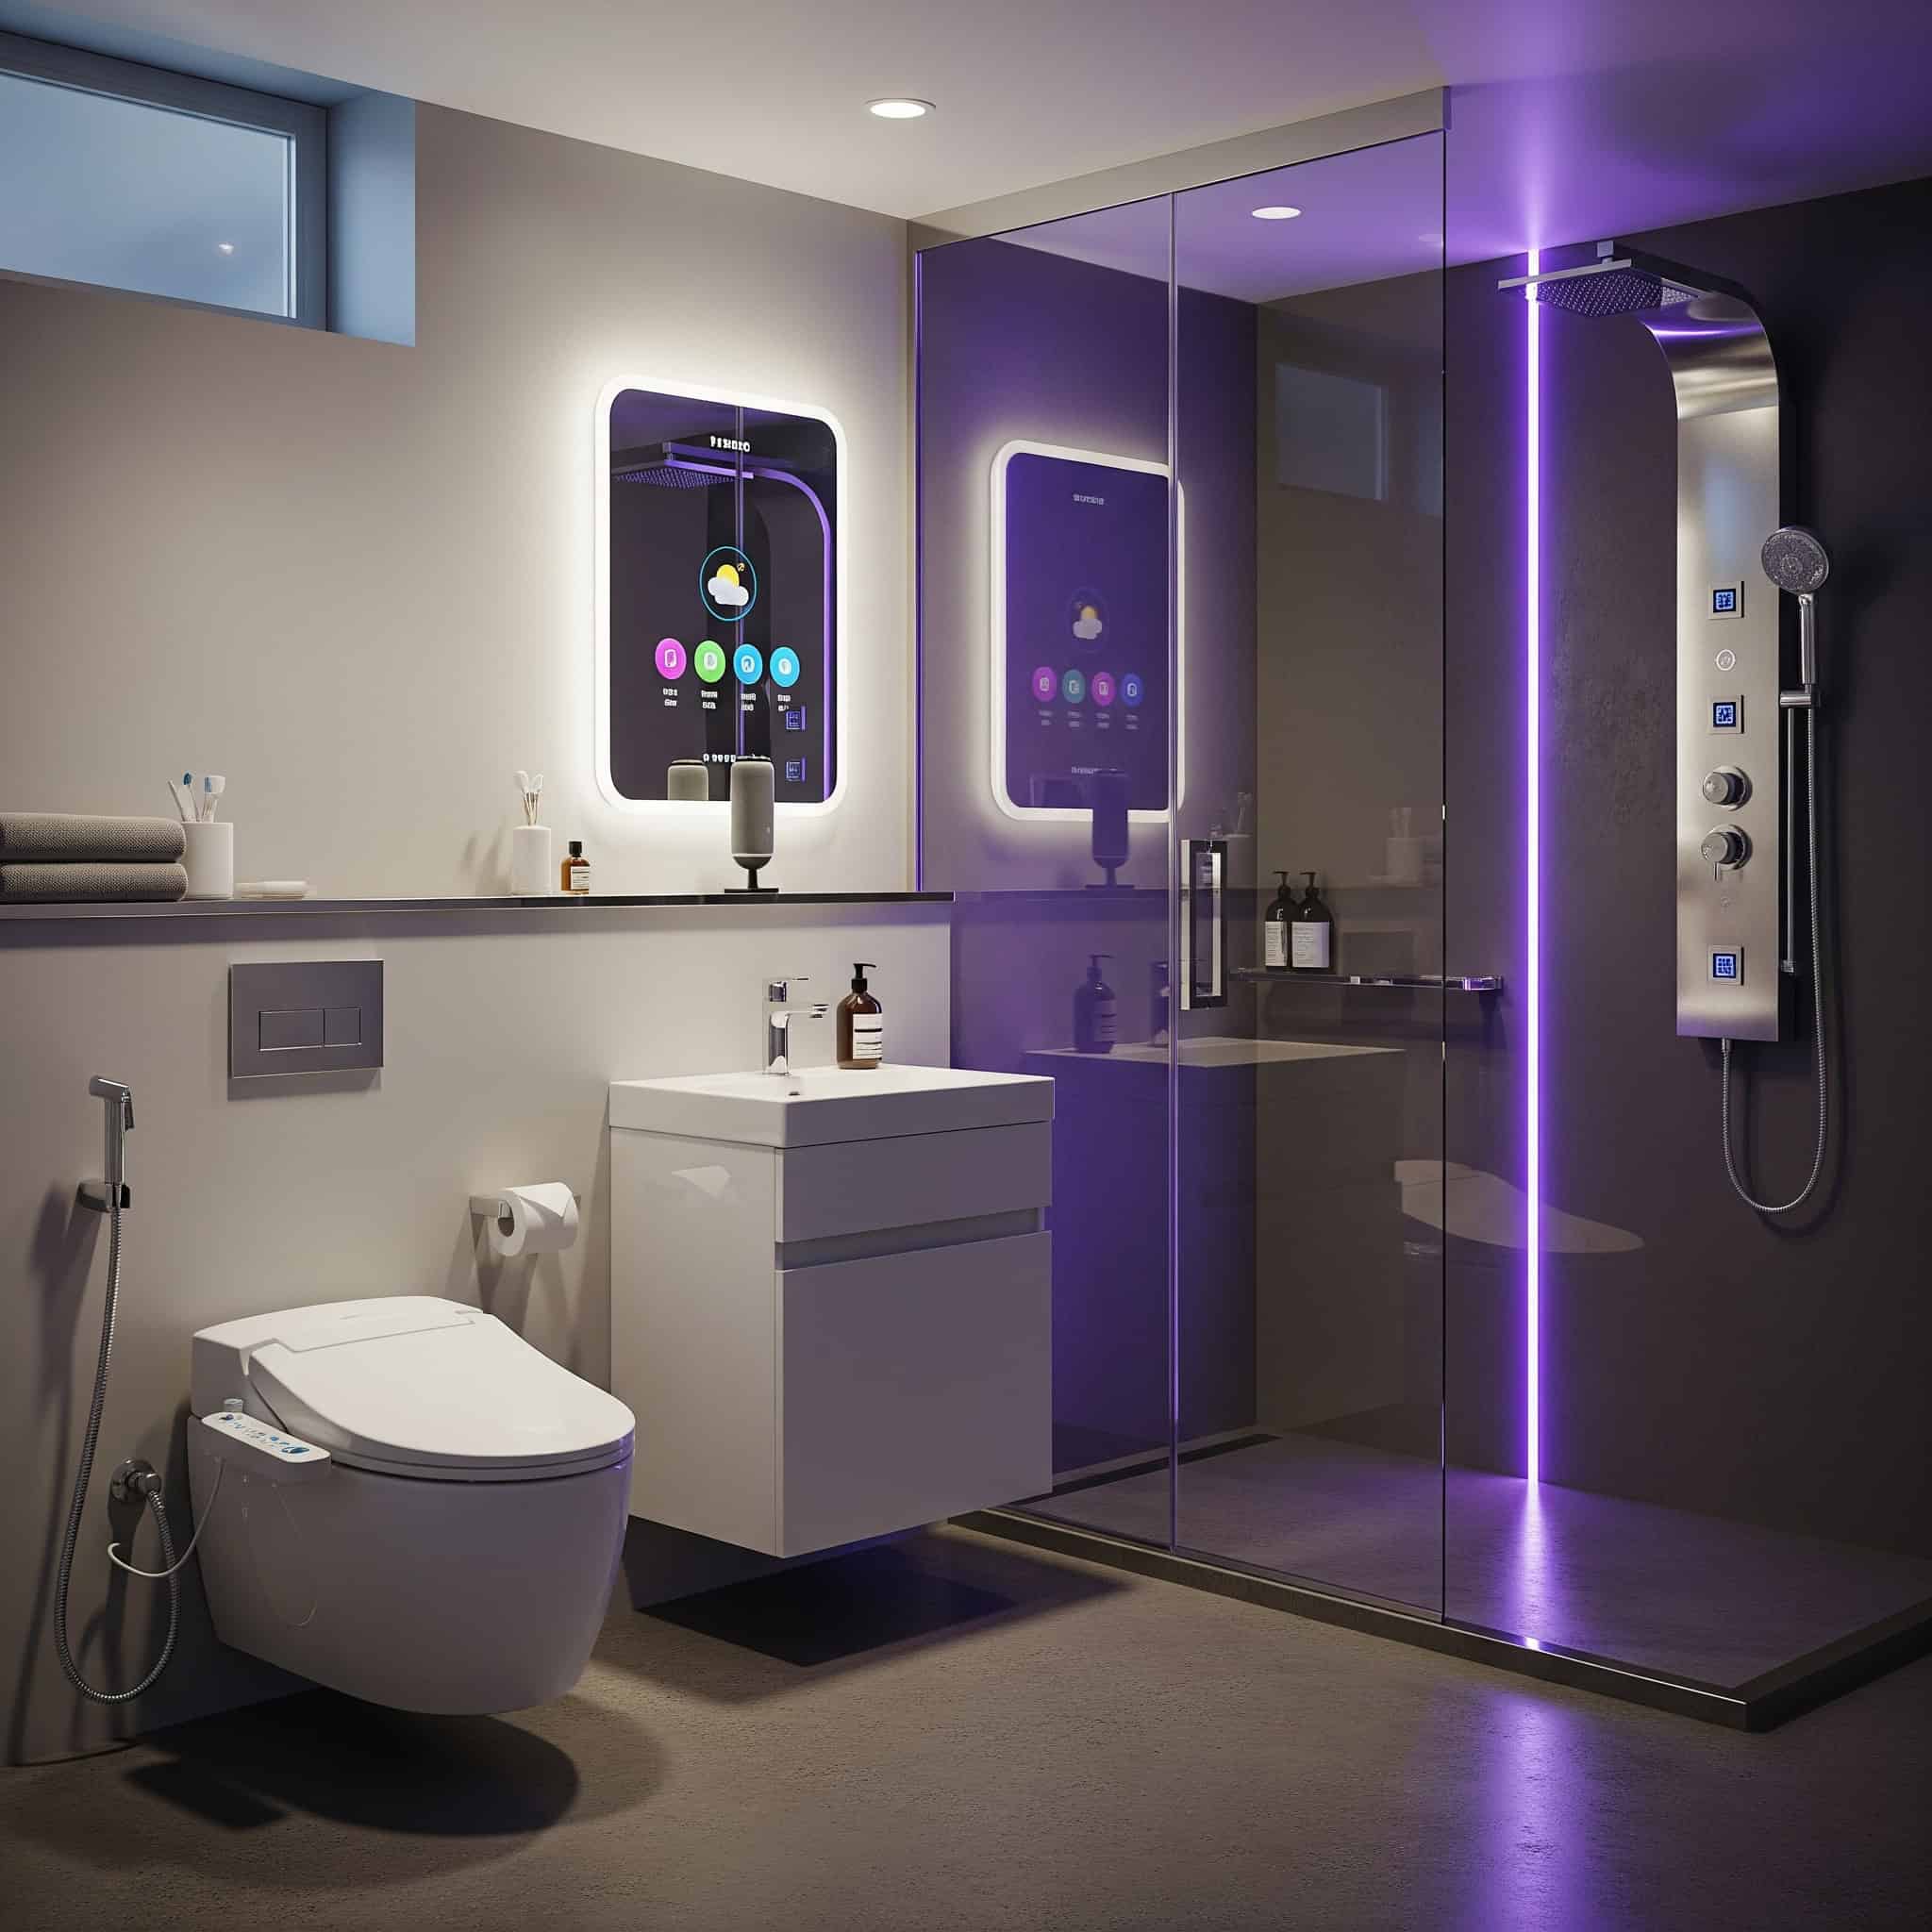
20. Smart Bathroom Technology
Integrated technology adds convenience and luxury to basement bathrooms. Digital shower controls, motion-activated faucets, and voice-controlled lighting enhance functionality while creating a modern, high-end aesthetic.
Smart bathroom systems typically require dedicated neutral wiring and stable WiFi signals of at least -60dBm, with mesh network extenders often necessary to ensure reliable connectivity in basement locations. Planning for these infrastructure requirements during the rough-in phase saves headaches later.
Digital shower systems with thermostatic mixing valves maintain water temperature within ±1°F regardless of pressure fluctuations, providing consistent comfort and preventing scalding risks. This precision control is particularly valuable in basements where water pressure and temperature can be less stable than on main floors.
21. Space-Defining Niches
Built-in recessed storage eliminates the need for shelving that protrudes into the room. I’ve incorporated these in countless basement bathroom remodels to maximize functional space without sacrificing style.
Illuminated niches serve both functional and aesthetic purposes, creating depth and interest while providing practical storage without consuming floor space. The lighting element transforms a simple storage solution into a design feature.
Shower niches should be constructed with minimum 1/4″ per foot slope on the bottom shelf and waterproofed with the same membrane system used for shower walls to prevent water accumulation. LED-illuminated niches require waterproof lighting rated minimum IP65 for splash resistance, with IP67 or higher recommended for wet locations, and low-voltage transformers located in accessible dry areas.
A Chicago family renovated their basement bathroom with a cohesive design approach that solved multiple challenges. They chose an industrial-chic aesthetic that intentionally exposed ceiling joists (which they painted matte black) to gain 8 inches of ceiling height. The exposed pipes were replaced with copper ones that complemented matte black fixtures and hardware. For moisture control, they installed a humidity-sensing ventilation fan and heated floors with a programmable thermostat. To maximize their limited 5×8 foot space, they used a corner shower with frameless glass, a wall-mounted toilet, and a floating vanity with built-in LED lighting underneath. The result was a bathroom that felt significantly larger than its actual dimensions while addressing the typical basement challenges of moisture, height limitations, and darkness.
Practical Plumbing Solutions
22. Upflush Toilet Systems
These specialized toilets contain a macerating pump that grinds waste and pumps it upward to the main sewer line, eliminating the need for below-floor drainage. I’ve installed dozens of these in basement bathroom renovations where conventional drainage wasn’t possible.
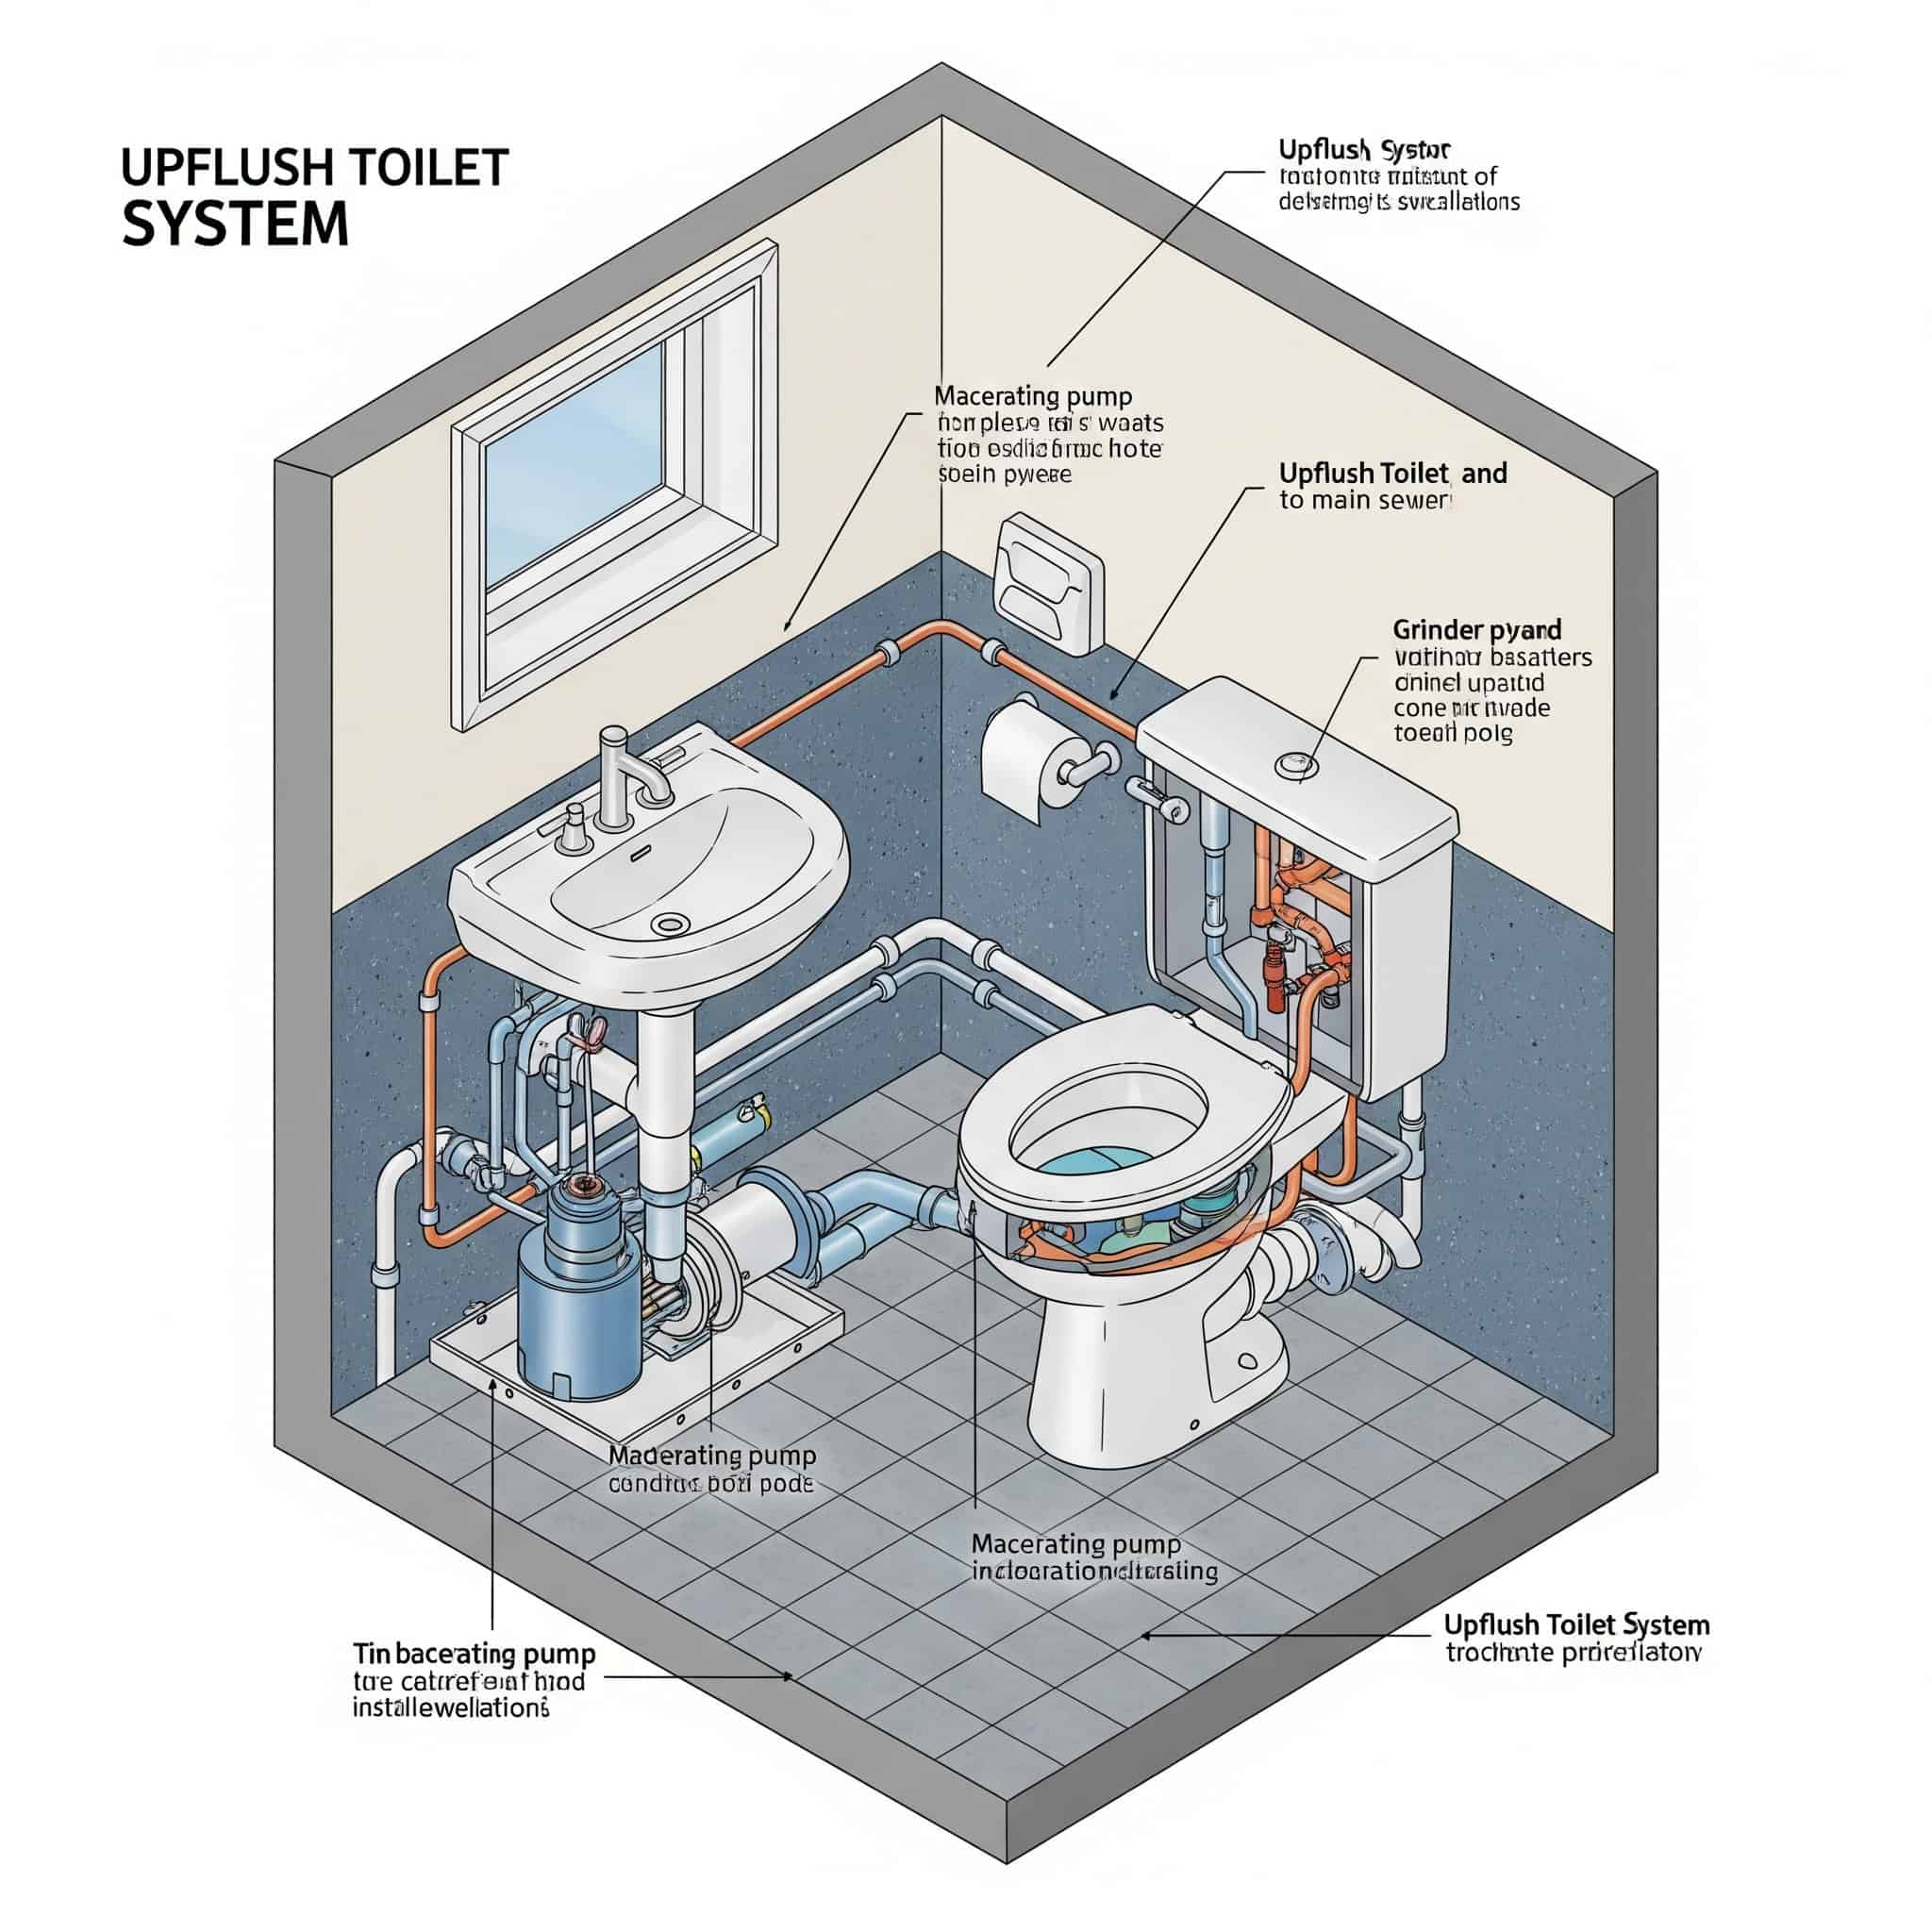
Modern systems operate quietly and reliably while solving major basement plumbing challenges. The technology has improved dramatically in recent years, with units that are virtually indistinguishable from conventional toilets in appearance and operation.
Macerating toilet systems can pump waste vertically up to 15 feet and horizontally up to 150 feet, operating on standard 120V electrical supply with power consumption of 400-800 watts during brief (10-15 second) pumping cycles. Upflush systems require minimum 3/4″ water supply lines to ensure proper flushing performance and typically include backflow prevention valves to protect against sewer backups during power outages.
23. Sewage Ejector Pump Basin
For full bathrooms with multiple fixtures, a sewage ejector pump basin collects waste from all sources and pumps it to the main sewer line. This approach provides more flexibility in fixture placement compared to upflush systems.
These systems require a basin typically 24″ in diameter and 30″ deep, with proper venting and alarm systems. The alarm component is crucial – it alerts homeowners to pump failures before sewage backups occur.
Sewage ejector pumps must be sized based on total fixture units, with 1/2 HP pumps handling up to 50 fixture units and providing lift capacity of 15-25 vertical feet at flow rates of 35-45 gallons per minute. Basin installations require two separate vent pipes: a 2″ minimum vent for the basin itself and standard DWV venting for fixtures, with both connecting to the home’s main vent stack above the flood rim level.
24. PEX Manifold Plumbing System
This system uses a central manifold with individual flexible PEX lines running to each fixture, allowing for future modifications without opening walls. I’ve found this approach particularly valuable in basement bathrooms where access for future repairs can be challenging.
It also provides better water pressure to basement fixtures while simplifying installation around obstacles. The flexibility of PEX allows it to navigate through joists and around corners without the multiple fittings required by rigid piping.
PEX manifold systems reduce water hammer by up to 90% compared to traditional branch-and-tee plumbing due to the elimination of directional fittings that create pressure spikes. Home-run PEX systems typically use 3/8″ or 1/2″ lines to individual fixtures, providing flow rates of 2-4 GPM per line while maintaining pressure better than shared branch lines over equivalent distances.
25. Gray Water Systems
Simple systems that reuse sink or shower water for toilet flushing reduce water consumption and utility costs. I’ve installed these in eco-conscious homes with excellent results.

These systems can be as simple as sink-to-toilet tank diversion or more complex filtered systems that provide significant water savings. The simplest versions require minimal additional plumbing while still providing meaningful conservation benefits.
Basic gray water diversion systems can reduce toilet water consumption by 25-30%, saving approximately 10-15 gallons per day for a typical household bathroom. Gray water must not be stored for more than 24 hours without treatment to prevent bacterial growth, requiring either immediate use systems or those with filtration and disinfection capabilities for longer storage.
When installing a gray water system in your basement bathroom, you’ll need to consider proper disposal of your old plumbing fixtures. Our guide on how to remove garbage disposal provides useful information on handling plumbing fixture removal properly.
26. Pressure-Assisted Fixtures
Basement bathrooms sometimes suffer from reduced water pressure. Pressure-assisted toilets and amplified showerheads compensate for this issue, providing better performance with existing water supply while maintaining the same footprint as standard fixtures.
Pressure-assisted toilets use compressed air to generate flushing force of 35-40 PSI compared to 8-10 PSI in gravity toilets, requiring minimum supply pressure of 25 PSI to function properly. This additional force ensures complete waste removal even with the challenging drainage situations common in basements.
Amplified showerheads use air-induction technology to increase perceived water volume by 30-40% while maintaining flow rates of 1.5-2.0 GPM, compensating for lower pressure conditions common in basement installations. The result is a satisfying shower experience despite less-than-ideal water pressure.
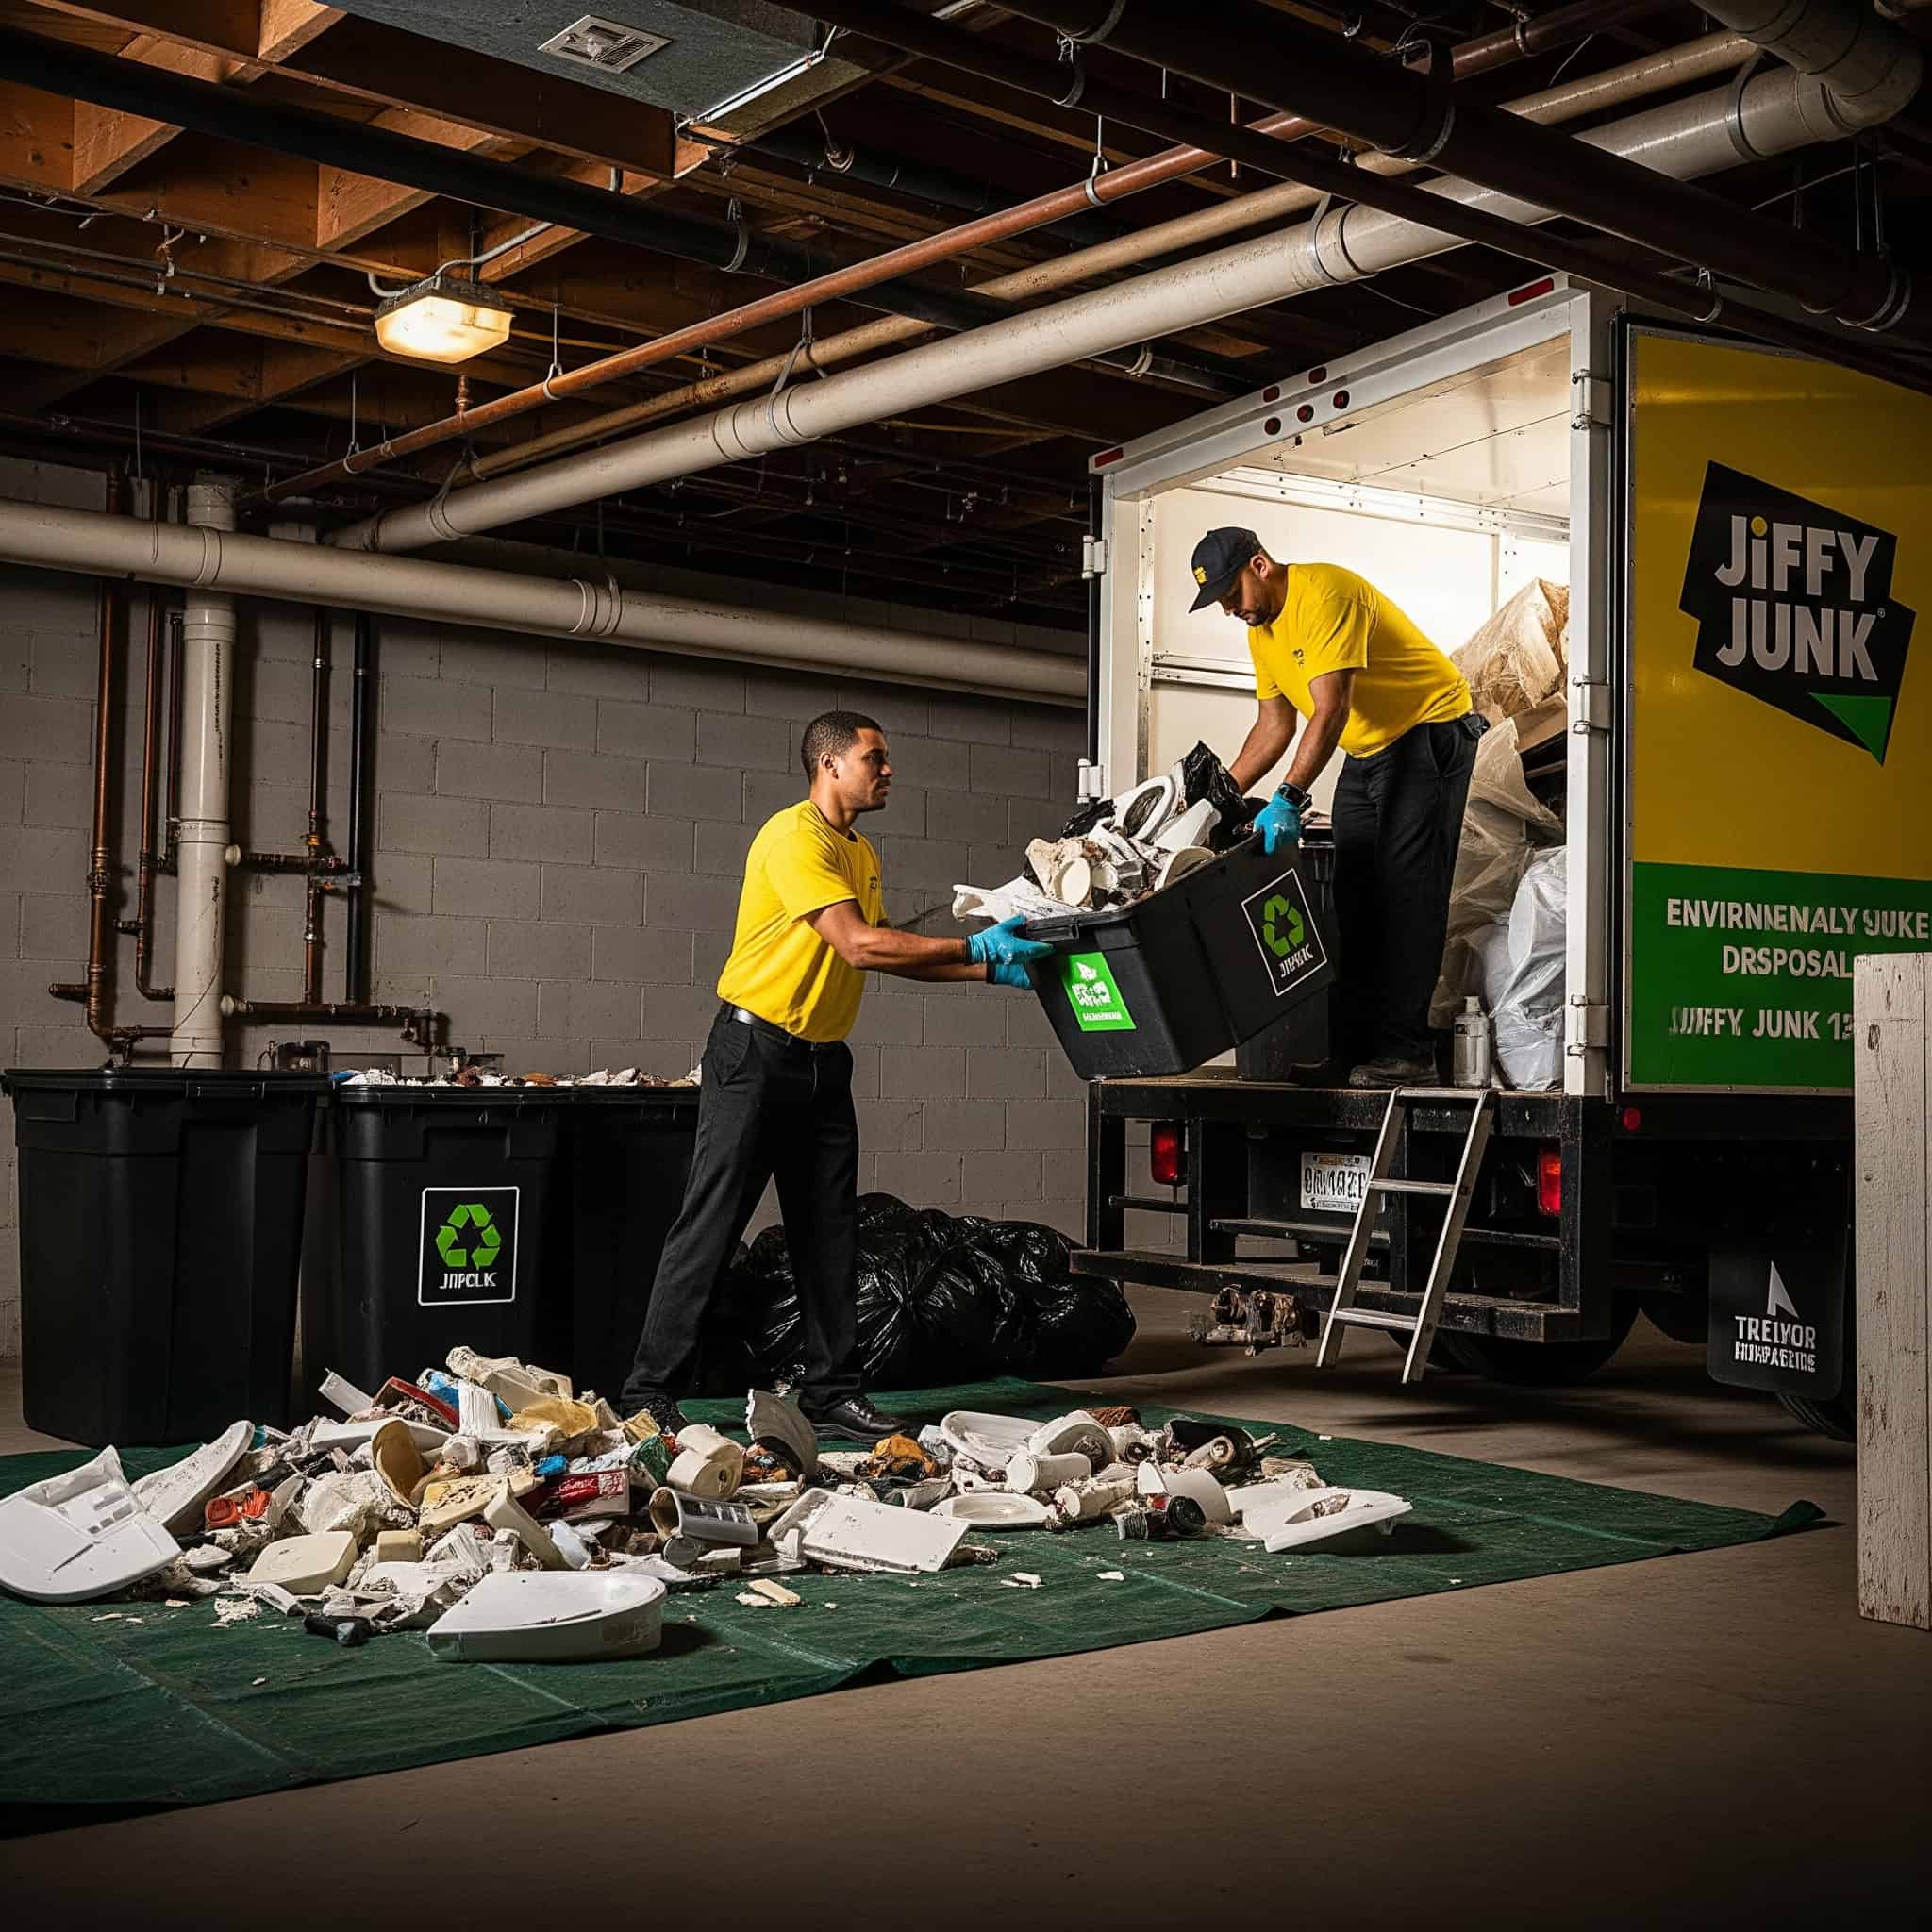
How Jiffy Junk Can Help With Your Basement Bathroom Project
Basement bathroom renovations generate significant waste and debris. I’ve seen too many DIY projects stall because homeowners underestimate the volume of demolition waste.
Jiffy Junk provides eco-friendly removal services that handle demolition waste, construction packaging, and final cleanup, allowing you to focus on your new bathroom rather than waste management. Their professional approach keeps your project moving forward without interruptions for debris handling.
Typical basement bathroom renovations generate 1-2 cubic yards of demolition waste weighing 500-1,000 pounds, requiring specialized removal equipment and proper disposal knowledge. Professional junk removal services can divert up to 70% of renovation waste from landfills through strategic sorting, recycling, and donation of usable materials, significantly reducing the environmental impact of your project.
Streamlining Your Renovation Process
Renovation projects often stall due to accumulating debris. I’ve witnessed countless projects fall behind schedule simply because waste removal wasn’t properly planned.
Jiffy Junk’s rapid response team removes waste at critical project milestones, preventing delays and keeping your contractor’s workflow uninterrupted. Their white-glove service handles all heavy lifting, sorting, and proper disposal.
Construction debris removal at strategic intervals improves worksite safety by reducing trip hazards and fire risks while increasing worker productivity by 15-20%. Professional junk haulers maintain relationships with specialized recycling facilities that accept materials standard municipal services reject, including treated wood, mixed construction debris, and certain fixtures.
Environmentally Responsible Disposal
Jiffy Junk prioritizes sustainable disposal methods for renovation waste. Their team carefully separates recyclable materials, donates usable fixtures and materials, and ensures hazardous components receive proper handling—all while providing documentation for green building certifications.
Bathroom fixtures often contain materials with recycling value, including copper piping ($2-3 per pound), brass fittings, and cast iron tubs (100-300 pounds of recyclable metal). Proper disposal of bathroom renovation waste prevents harmful materials like silicone caulk, adhesives, and certain grouts from contaminating groundwater through standard landfill leaching.
When completing your basement bathroom renovation, proper disposal of old materials is essential. As explained in our article on reclaim the basement junk removal for more austin living space, professional junk removal services can help transform your basement into valuable living space by efficiently removing construction debris.
Final Thoughts
Successful basement bathroom projects balance infrastructure requirements with aesthetic preferences. I’ve seen too many homeowners focus on finishes before addressing the fundamental challenges of basement bathrooms.
Begin by addressing waterproofing, ventilation, and code-compliant plumbing before focusing on design elements. Define the bathroom’s primary purpose to guide feature selection and budget allocation. Document all systems before closing walls to facilitate future maintenance.
Basement bathroom additions typically return 60-70% of project costs when selling, with full bathrooms yielding higher returns than powder rooms. Comprehensive documentation should include in-wall photos before drywall installation, precise measurements of pipe locations, and copies of all permits and inspection reports.
Future-Proofing Your Investment
Smart planning extends your bathroom’s functional lifespan. I’ve helped many homeowners incorporate features that will serve them for decades rather than years.
Incorporate universal design principles, choose timeless materials, and install infrastructure that accommodates future technology. These forward-thinking decisions maximize long-term value while minimizing the need for future renovations.
Universal design features add minimal cost during initial construction (typically 5-7% of project budget) but can save $15,000-25,000 in future modification costs. Rough-ins for future technology—including extra electrical capacity, data cabling, and plumbing access points—typically add $500-1,000 to initial costs but prevent disruptive wall demolition for later upgrades.
Balancing Budget and Quality
Basement bathrooms require strategic budget allocation. I always advise clients to invest in quality infrastructure components—waterproofing, ventilation, and plumbing—while finding creative ways to achieve desired aesthetics within budget constraints.
This approach ensures long-term functionality while delivering visual impact. A beautiful bathroom with failing infrastructure quickly becomes a costly nightmare.
Infrastructure components typically represent 60-65% of basement bathroom costs, with fixtures and finishes accounting for the remainder. Value engineering through material substitution (porcelain tiles that mimic natural stone, engineered quartz instead of marble) can reduce finish costs by 30-40% while maintaining visual appeal and performance.
Have you considered which of these basement bathroom ideas might work best for your space? With proper planning and attention to the unique challenges of basement environments, you can create a beautiful, functional bathroom that adds significant value to your home.